You push the power button. The vacuum gives a sad wheeze instead of a strong, steady roar. The suction drops to almost nothing, or the machine shuts off completely mid-clean. That sudden loss of power makes a normal chore feel impossible. Leaves you staring at a useless appliance on the floor.
In most cases, this frustrating failure comes from a few simple, fixable causes hiding inside the machine. Learning how to Fix a Vacuum Cleaner yourself saves time, money. The hassle of scheduling a repair visit. You do not need special tools or years of use to bring your cleaner back to life.
This guide walks you through a clear, safe diagnostic path that isolates the real problem fast. You will check the power supply, inspect the brush roll, clear blockages. Test key parts step by step. By following these practical steps, you can solve the issue in minutes. Get back to a clean home without calling a technician.
⚡ FAST DIAGNOSTIC OVERVIEW
- ✓Primary Symptom: Sudden loss of suction or complete power shutdown mid-use.
- ✓Most Common Cause: Clogged airflow path, full dust container, or tangled brush roll.
- ✓Quick Test: Unplug the unit, empty the bin, and check the hose for visible blockages.
- ✓Safety Precaution: Always disconnect power fully before opening any panel or inserting hands.
In this article
Immediate Safety and First Look Checks
Before you touch any internal part, you must protect yourself. The machine from electrical harm. A quick safety routine takes two minutes. Prevents shocks, burns, or further damage to the motor. Always treat the vacuum as a live appliance until you confirm it is fully disconnected.
Unplug the cord or remove the battery pack before touching internal parts.
Inspect intakes, hoses, filters, and moving joints for trapped debris.
Let the motor cool for 30 minutes so the safety cut-off resets cleanly.
Check belts, seals, and switches before replacing major assemblies.
Start by switching the unit off and pulling the plug straight from the wall outlet. Never yank the cord itself. That is because that damages the wiring and creates a hidden hazard for future use. If your model has a removable battery, take it out carefully. Set it on a cool, dry surface away from direct sunlight. For our complete category overview. Core buyer criteria, explore our cornerstone guide to Why Your Vacuum Cleaner Keeps Failing and Fixes.
- Power Disconnect: Switch off the machine and pull the plug from the wall outlet completely.
- Cool Down Wait: Let the motor rest for at least ten minutes if the unit was running hot.
- Visual Cord Check: Inspect the entire power cord for cuts, chew marks, or exposed copper strands.
- Dry Work Surface: Perform all checks on a dry floor away from water sources or wet spills.
- Protective Gloves: Wear rubber-soled shoes and light gloves when handling the plug or internal parts.
Diagnostic Matrix and Root Cause Breakdown
Understanding why a vacuum loses power helps you target the right fix instead of guessing randomly. Most failures fall into three clear categories: airflow blockage, electrical fault, or mechanical wear. Each category shows distinct signs that you can spot with a simple walkaround inspection.
A quick 60-second trick is to hold the vacuum hose up to your ear. Listen for a faint whooshing sound. If you hear air moving but the suction is weak, the blockage sits somewhere between the hose and the dust container. If you hear silence, the clog is likely deeper inside the wand or the brush roll housing.
Start by listening carefully to the motor sound. A healthy vacuum hums with a steady, even tone. A grinding, rattling, or high-pitched squeal points directly to a specific part problem. You can then trace that sound back to its source using the steps below.
- Airflow Blockage: A weak suction or hot motor smell usually means the air path is choked with dust or debris.
- Electrical Fault: Intermittent power cuts or a total failure to turn on often trace back to the plug, cord, or internal wiring.
- Mechanical Wear: Grinding noises or a spinning brush roll that stops turning signal worn belts or tangled hair wraps.
- Sensor Error: Modern smart vacuums may flash a red light or show a code that points to a specific internal fault.
- Filter Clog: A dusty smell or reduced airflow often comes from a filter soaked with fine dust and oils.
How to Fix a Vacuum Cleaner with No Power at All
When the vacuum refuses to turn on, the problem usually sits in the power delivery path before it ever reaches the motor. You can trace this path from the wall outlet all the way to the power switch. Most fixes in this area are simple and require no special tools at all.
Start by testing the wall outlet with another device like a lamp or phone charger. If the outlet works for that device, the problem is isolated inside the vacuum itself. Next, check the power cord for any visible damage or a loose connection at the base of the machine.
- Outlet Test: Plug a known working lamp into the same outlet to confirm it gives power.
- Cord Inspection: Run your fingers gently along the entire cord length to feel for kinks, breaks, or exposed wires.
- Switch Click: Press the power switch firmly. Listen for a soft click that confirms the switch activates.
- Battery Check: For cordless models, check the battery sits fully seated in its compartment and shows a charge light.
- Internal Fuse: Some models have a small thermal fuse that blows when the motor overheats and needs spare.
How to Fix a Vacuum Cleaner with Weak Suction
Weak suction drains cleaning power and leaves dirt behind on floors and carpets. The air path inside a vacuum is a sealed system. Any leak or blockage breaks the suction chain. Finding and clearing the restriction restores strong, steady pulling power quickly.
Begin by removing the dust container and checking the intake opening for large debris. Then inspect the hose and wand for small objects like coins, hair ties, or crumbs that restrict airflow. Even a thin layer of fine dust packed into the filter can choke the motor over time.
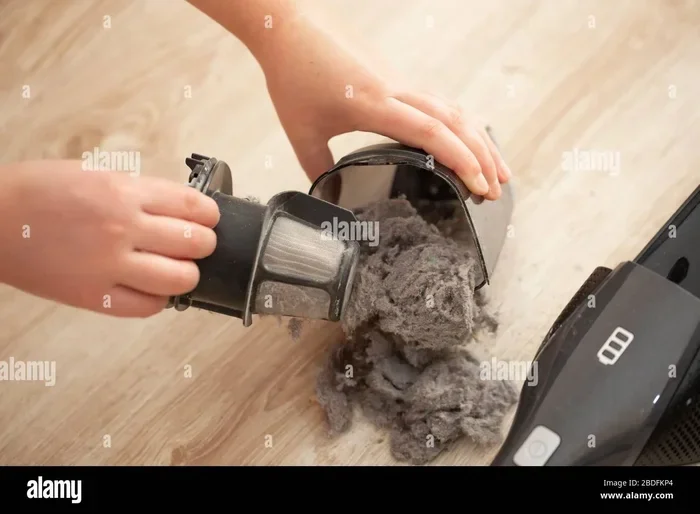
- Empty Dust Bin: Open the container. Dump all dust into a trash bag before reinserting it.
- Hose Clear Check: Drop a small coin through the hose to see if it passes through freely or gets stuck.
- Filter Removal: Take out the dust filter. Tap it gently over a trash can to release trapped fine particles.
- Seal Inspection: Check that all removable parts click fully into place with no gaps letting air escape.
- Breathe Test: Cover the nozzle end with your hand. Feel for strong, even airflow pulling against your palm.
How to Fix a Vacuum Cleaner with a Loud Grinding Noise
A loud grinding or screeching sound tells you that metal or dense debris is rubbing against the brush roll. The brush roll spins inside a closed housing. Any hard object caught there creates a harsh metal-on-metal noise. Stopping this quickly prevents permanent damage to the roll and the motor bearing.
Turn off the vacuum and flip it gently onto its side to expose the bottom plate. Remove the screws or quick-release clips that hold the bottom cover in place. Once you can see the brush roll, pull out any hair, string, or small objects wrapped around the central shaft.
- Brush Roll Access: Flip the vacuum. Remove the bottom plate to fully expose the spinning brush roll.
- Hair Cut: Use small scissors to snip long hair or thread wrapped tightly around the roll and shaft.
- Debris Pull: Pull out coins, buttons, or small toys that may have dropped down the nozzle opening.
- Bearing Spin: Spin the brush roll by hand. Feel for rough spots or grinding that indicate worn bearings.
- Belt Check: Inspect the drive belt for cracks, stretching, or missing chunks that cause a slipping squeal.
How to Fix a Vacuum Cleaner with a Flashing Error Light
Modern smart vacuums use LED lights or display codes to tell you exactly what is wrong inside the machine. A flashing red light or a blinking error code points to a specific fault that the user can often clear without tools. Understanding the code turns a scary warning into a simple fix.


Check your user manual for the exact meaning of the flash pattern or alphanumeric code shown. Most brands use a chart printed on the manual cover or inside the battery door. Common codes point to a full dustbin, a clogged filter, or a brush roll jam that needs clearing. For broader testing and full category picks, explore our in-depth guide to Why a Vacuum Cleaner Loses Suction Over Time and How to Fix It.
- Manual Lookup: Open the user guide. Find the error code chart near the troubleshooting section.
- Reset Button: Locate the small reset pinhole on the body. Press it gently with a paperclip.
- Full Bin Clear: Empty the dust container completely. Reinsert it until it clicks firmly into the sensor seat.
- Filter Reset: Remove and wash the filter if the code indicates a filter fault, then let it dry fully before reinstalling.
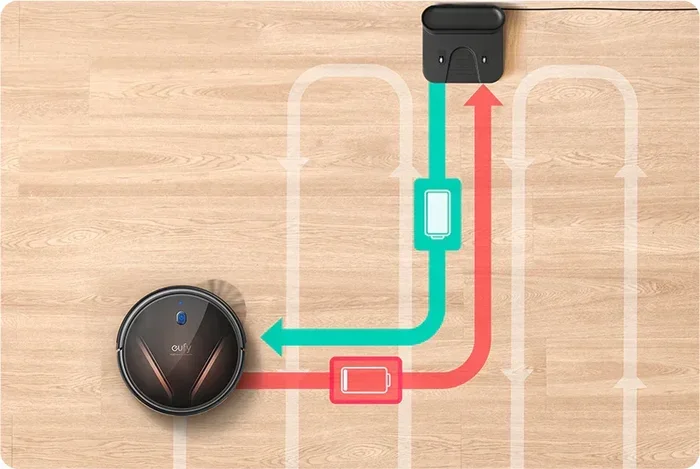
- Charging Dock: For robot vacuums, place the unit on the dock. Confirm the charging light turns solid green.
Step-By-Step Fix and Repair Procedures
Once you have identified the root cause, you can follow these clear repair steps to bring the vacuum back to full working order. Each procedure uses simple tools you already have at home. Takes only a few minutes to complete. Working in a logical order prevents you from missing hidden problems.
Start with the easiest fixes first, like emptying the bin or clearing a hose. Move to deeper checks like filter cleaning. Belt inspection only after the simple steps fail. This methodical approach saves you time and prevents unnecessary part spares.
- Clear Airway Path: Remove the hose. Use a long, thin stick to push any blockage out from both ends.
- Wash the Filter: Rinse the filter under cool running water until the water runs clear, then let it air dry fully.
- Replace the Belt: Slide the old belt off the brush roll, place a new one around the roll and motor shaft. Stretch it gently into place.
- Swap the Fuse: Open the motor housing, locate the blown thermal fuse. Replace it with an exact matching rating.
- Realign the Brush Roll: After removing debris, drop the brush roll back into its housing. Confirm it spins freely without rubbing the sides.
Component Testing, Cleaning, and Replacement Guide
Some vacuum parts wear out over time and need full spare instead of just cleaning. Testing each part with a simple continuity check or visual inspection helps you decide whether to clean or replace. Knowing when a part is truly dead saves you from wasting effort on a repair that will not last.
Keep a small set of spare parts on hand for your specific vacuum model. Common wear items like belts, filters. Brush rolls have a predictable lifespan and fail in the same way every time. Checking these parts regularly extends the overall life of the machine greatly.
- Filter Test: Hold the filter up to a bright light. If you cannot see light passing through the paper, the filter is fully clogged and needs spare.
- Belt Stretch Check: Press the belt with your thumb. If it stays stretched and does not snap back, the rubber has worn out and must be replaced.
- Motor Brush: Look inside the motor housing for worn carbon brushes that have worn down to a nub. Replace them in pairs for even wear.
- Hose Integrity: Hold the hose up to a window. Look for pinholes or cracks that leak suction air before it reaches the motor.
- Wheel Spin: Spin each wheel by hand. Feel for grit or hair wrapped around the axle that causes grinding resistance.
When to Replace vs. Call a Professional
Knowing the line between a simple fix. A serious repair saves you from wasted effort and unexpected costs. A DIY fix works best when the problem is visible, the part is inexpensive. The repair steps are straightforward. Some internal electrical faults demand a trained technician and specialized diagnostic tools.
If the motor itself fails, you will usually hear a loud hum followed by a burning smell or see smoke. A burned-out motor often costs more to replace than a new vacuum of the same type. In that case, replacing the whole unit becomes the smarter financial choice.
- DIY Fix: Clear blockages, replace filters, belts, or fuses. Clean the brush roll with simple hand tools.
- Pro Call: Seek a technician for internal wiring faults, motor failure, or electronic control board errors.
- Replace Unit: Choose a new vacuum when repair costs pass half the price of a comparable new model.
- Warranty Check: Review your warranty document before opening the machine, as unauthorized repairs void coverage.
- Safety Call: Contact a pro right away if you see sparking inside the housing or smell burning plastic.
Preventative Maintenance Schedule
A regular cleaning routine keeps your vacuum running strong. Prevents most common failures before they start. Spending just a few minutes after each cleaning session stops dirt from building up into bigger problems. A steady schedule also helps you spot small issues before they become expensive repairs. For broader testing and full category picks, explore our in-depth guide to What Causes a Vacuum Cleaner to Smell Bad and How to Fix It.
Set a simple weekly reminder on your phone to check the dustbin, filter, and brush roll. Monthly, give the hose and wand a deeper inspection. This habit keeps airflow clear and the motor cool. This extends the life of the entire machine by years.
- Post-Clean Dump: Empty the dustbin after every few uses to prevent fine dust from compacting into a solid plug.
- Weekly Filter Check: Inspect the filter each week. Tap out loose dust or wash it if the maker allows.
- Monthly Brush Roll: Cut away hair. String wrapped around the brush roll once a month during a deeper clean.
- Quarterly Hose Flush: Run a long, flexible wand through the hose to dislodge any stuck debris deep inside.
- Annual Belt Swap: Replace the drive belt once a year even if it looks fine. That is because rubber weakens over time.
Troubleshooting Matrix for Common Vacuum Failures
Never run the vacuum with a wet filter or a damp dust container. Moisture seeps into the motor windings and causes short circuits that ruin the appliance permanently. If the vacuum has sucked up water, disassemble the parts. Let them dry completely for at least twenty-four hours before reassembly.
| Symptom / Issue | Probable Root Cause | Recommended Fix | Difficulty Level |
|---|---|---|---|
| Vacuum will not turn on at all | Tripped thermal fuse or broken power cord | Test outlet, check cord for damage, replace thermal fuse | Easy |
| Suction drops to weak airflow | Full dustbin or clogged filter | Empty bin, wash or replace filter, clear hose blockage | Easy |
| Loud grinding or rattling noise | Hair or debris tangled around brush roll | Remove bottom plate, cut away hair, clear debris | Easy |
| Brush roll stops spinning | Broken or stretched drive belt | Remove old belt, install new matching belt | Medium |
| Intermittent power cuts | Loose cord connection or faulty switch | Reseat plug, inspect internal wiring, replace switch | Medium |
| Burning smell with smoke | Motor overheating or failed winding | Stop use immediately, let cool, call a professional | Hard |
| Flashing error light on display | Sensor detects full bin or filter fault | Empty bin, clean or replace filter, press reset button | Easy |
| Vacuum pulls to one side | Clogged nozzle or worn wheel | Clear nozzle of debris, spin wheels to check for resistance | Easy |
Frequently Asked Questions About Vacuum Repair
Why Does My Vacuum Lose Suction After Only a Few Minutes of Use?
The most common reason is a filter that is partially clogged or a dustbin that fills up faster than you notice. When airflow gets restricted, the motor strains and the suction drops. Empty the dustbin and check the filter to restore full pulling power.
Can I Wash My Vacuum Filter, or Do I Need to Buy a New One Every Time?
Many vacuum filters are washable. Can be reused several times if you let them dry completely. Check the user manual for your specific model to confirm whether washing is allowed. If the filter looks damaged or feels greasy after washing, replace it with a new one for best results.
How Often Should I Replace the Vacuum Belt to Keep the Brush Roll Working Properly?
A vacuum belt usually lasts between six and twelve months with regular home use. If you notice the brush roll not spinning or a slipping squeal, check the belt for cracks or stretching. Replacing the belt on a regular schedule prevents sudden brush roll failure during cleaning.
What Should I Do If the Vacuum Smells Like Burning Plastic While Running?
A burning plastic smell usually means a foreign object has melted onto the brush roll or motor winding. Turn off the vacuum right away and unplug it. Let the machine cool down completely, then inspect the brush roll housing. Remove any melted debris or stuck items.
Is It Worth Repairing an Older Vacuum, or Should I Buy a New One?
If the repair involves a common part like a belt, filter, or switch, fixing it is almost always worth the cost. However, if the motor has burned out or the main housing is cracked, a new vacuum often makes more sense. Compare the repair price to the cost of a new unit before deciding.
Final Thoughts and Next Steps
Fixing a vacuum cleaner at home is a practical skill that saves you money. Keeps your cleaning routine on track. Most common problems like weak suction, strange noises, or power failures trace back to simple causes you can clear in minutes.
Following the diagnostic steps in this guide helps you isolate the real problem fast. Apply the right fix with confidence.
Regular upkeep like emptying the dustbin, washing the filter. Clearing the brush roll stops most failures before they happen. A quick check after each cleaning session takes less than two minutes. Extends the life of your machine by years. This small habit pays off in stronger suction and fewer repair calls over time.
When a problem goes beyond simple fixes, do not hesitate to call a qualified technician or consider a spare unit. Your safety and the long-term power of the machine matter more than a single repair attempt. Stay proactive with your upkeep schedule. Your vacuum will keep working reliably for every cleaning session ahead.