How Robot Vacuums Create a Map of Your Home Explained
Featured image for how to robot vacuum mapping home
Image source: bestvacuumexpert.com
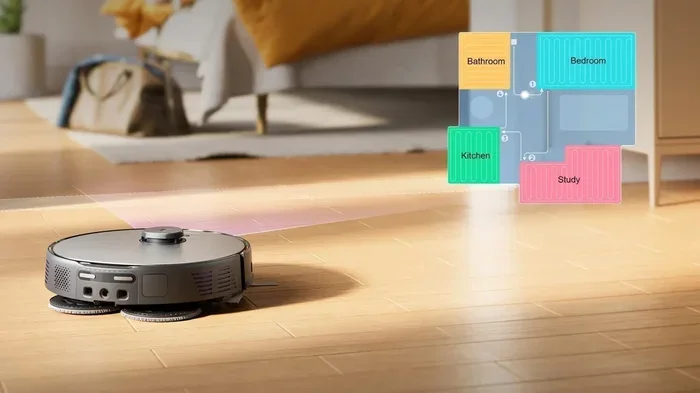
Robot vacuums use advanced sensors, cameras, and LiDAR technology to build detailed maps of your home for efficient cleaning. Understanding how this mapping process works helps you optimize placement, improve navigation, and get the most out of your smart cleaning device. This guide breaks down the entire process in simple terms.
You set your robot vacuum down, press start, and watch it glide across your floor with surprising precision. It avoids the couch legs, navigates around the dining table, and somehow knows exactly where it has already cleaned. But how does a small disc-shaped device actually learn the layout of your entire home?
The answer lies in a combination of advanced sensors, smart algorithms, and a bit of artificial intelligence. In this guide, we will break down exactly how robot vacuums create a map of your home, what technologies power the process, and what you can do to help your robot build the most accurate map possible.
📑 Table of Contents
- The Core Technologies Behind Robot Vacuum Mapping
- How the Mapping Process Actually Works Step by Step
- What Sensors Work Together to Build the Map
- How to Help Your Robot Vacuum Create a Better Map
- Understanding the Map in Your Robot Vacuum App
- Common Mapping Problems and How to Fix Them
- LiDAR vs Camera-Based Mapping: Which Is Better?
- The Future of Robot Vacuum Mapping
- Conclusion
The Core Technologies Behind Robot Vacuum Mapping
Robot vacuums do not just bump around randomly anymore. Modern smart models use dedicated mapping technologies to understand their surroundings. There are three primary methods that manufacturers rely on today.
LiDAR (Light Detection and Ranging)
LiDAR is the gold standard in robot vacuum mapping. If you have ever noticed a small spinning turret on top of a robot vacuum, that is the LiDAR sensor. It works by emitting laser beams in a 360-degree pattern and measuring how long it takes for each beam to bounce back after hitting a wall, piece of furniture, or other obstacle.
By calculating the distance to thousands of points around the room every second, the LiDAR sensor builds a precise geometric map of your floor plan. This method works in complete darkness because it relies on laser light rather than visible light, making it extremely reliable regardless of room lighting conditions.
Brands like Roborock, Dreame, and Ecovacs commonly use LiDAR in their premium models. The maps produced by LiDAR-equipped robots tend to be the most accurate and detailed you will find in consumer robot vacuums.
Camera-Based Visual Mapping (vSLAM)
Some robot vacuums use cameras instead of lasers. This approach is called visual simultaneous localization and mapping, or vSLAM. The camera captures images of the ceiling, walls, and furniture, and the robot’s processor compares these images over time to figure out where it is and how the space is arranged.
Camera-based systems can recognize specific objects and landmarks, which helps the robot orient itself. For example, it might identify a unique light fixture or a particular piece of furniture as a reference point. The Roomba j7 series from iRobot uses this technology along with AI-powered object recognition to avoid obstacles like pet waste and charging cables.
The downside is that camera-based mapping depends on adequate lighting. In a dark room, the camera cannot capture clear images, which can reduce mapping accuracy. Some models compensate by combining cameras with other sensor types.
Infrared and Time-of-Flight Sensors
More affordable robot vacuums often use infrared sensors or time-of-flight (ToF) sensors for basic mapping. These sensors emit infrared light pulses and measure the time it takes for the light to return after hitting a surface. While not as precise as LiDAR, they provide enough data for the robot to detect walls, furniture edges, and drop-offs like stairs.
These sensors are commonly found in budget-friendly models and are often combined with gyroscopes and accelerometers to help the robot track its position as it moves through your home.
How the Mapping Process Actually Works Step by Step
Now that you know the technologies involved, let us walk through what happens from the moment you turn on your robot vacuum for the first time.
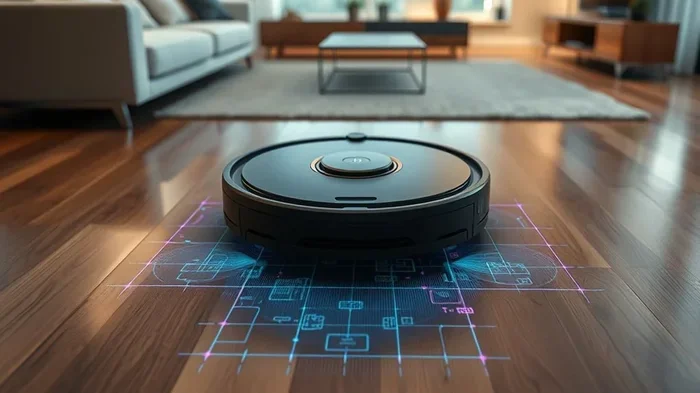
Visual guide about how to robot vacuum mapping home
Image source: thumbs.dreamstime.com
Step 1: The Initial Exploration Run
When you start a brand-new robot vacuum, it begins an exploration run. During this first cleaning cycle, the robot moves systematically through your home, scanning every surface its sensors can reach. It is not just cleaning during this run. It is actively collecting data about the size and shape of each room.
The robot follows walls, traces the edges of furniture, and records distances between objects. All of this raw sensor data is fed into the robot’s onboard processor, which begins constructing a preliminary floor plan.
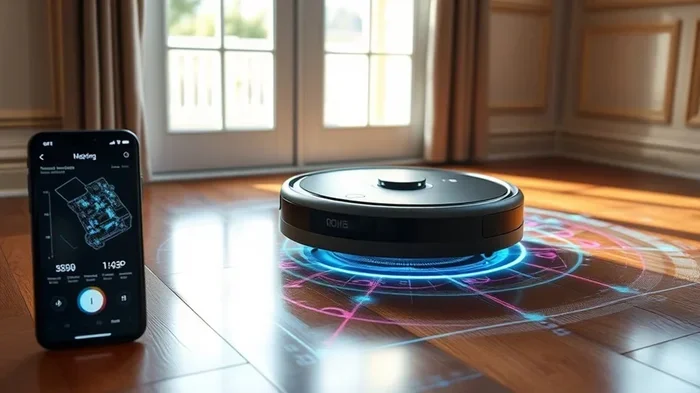
Step 2: Data Processing and Map Construction
As the robot collects sensor data, its internal software processes that information in real time. The processor uses a technique called SLAM (Simultaneous Localization and Mapping) to figure out two things at once: where the robot is located within the space and what the overall layout of the space looks like.
Think of it like drawing a map of a maze while you are still inside it. The robot constantly updates its position relative to the walls and objects it has already detected, gradually filling in the complete picture of your home.
Step 3: Refinement Over Multiple Runs
Most robot vacuums do not produce a perfect map on the very first run. It typically takes two to five cleaning cycles for the robot to build a complete and accurate map. Each subsequent run allows the robot to fill in gaps, correct errors, and add details it may have missed initially.
During these refinement runs, the robot compares new sensor data with its existing map. If it detects a new piece of furniture or notices that a door was previously closed but is now open, it updates the map accordingly. This is why your robot vacuum app might show a slightly different map after each of the first few cleaning sessions.
Step 4: Map Saving and Room Recognition
Once the robot has a stable and complete map, it saves that map to its internal memory and syncs it with the companion app on your phone. At this point, many robots can automatically detect room boundaries and identify separate rooms based on doorway thresholds and spatial layout.
You can then open the app and see a labeled floor plan of your home. Most apps allow you to rename rooms, merge or split rooms, and set specific cleaning preferences for each area. For example, you might tell the robot to vacuum the living room on a high-power setting while using a gentler mode in the bedroom.
What Sensors Work Together to Build the Map
Mapping is not the job of a single sensor. Robot vacuums use a combination of several sensor types working in harmony. Here is a breakdown of the key players.
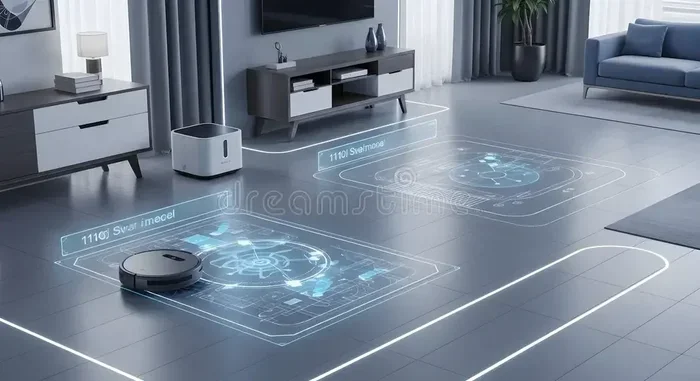
Visual guide about how to robot vacuum mapping home
Image source: us.3itech.com
- LiDAR or camera module: The primary mapping sensor that scans the environment and collects spatial data.
- Gyroscope: Tracks the robot’s rotational movement and helps it maintain a sense of direction.
- Accelerometer: Measures the robot’s speed and movement along straight lines, complementing the gyroscope.
- Bump sensors: Physical sensors on the robot’s bumper that detect direct contact with objects, providing a last-resort obstacle detection method.
- Cliff sensors: Infrared sensors on the underside that detect drop-offs like stairs to prevent falls.
- Wheel encoders: Track how far each wheel has turned, helping the robot estimate how far it has traveled (a technique called odometry).
All of these inputs are combined through sensor fusion algorithms, which merge data from multiple sources to produce a more accurate and reliable map than any single sensor could achieve alone.
How to Help Your Robot Vacuum Create a Better Map
Your robot vacuum does most of the work on its own, but there are several things you can do to improve the quality and speed of the mapping process.
Visual guide about how to robot vacuum mapping home
Image source: bestvacuumexpert.com
Clear the Floor Before the First Run
Pick up loose items like shoes, toys, cables, and small decorations before your robot’s first mapping run. Obstacles on the floor can confuse the sensors and result in an incomplete or inaccurate map. A clear floor gives the robot the best chance to trace the true boundaries of each room.
If you are wondering about the best way to get your space ready, check out our guide on how to prepare your home before vacuuming for practical tips that apply to robot vacuums as well.
Open All Doors
Make sure all interior doors are open during the initial mapping runs. If a door is closed, the robot will treat that area as a wall and will not include it in the map. Once the robot has mapped all accessible areas, you can close doors as needed for regular cleaning.
Ensure Good Lighting for Camera-Based Models
If your robot vacuum uses camera-based mapping, make sure your home is well lit during the first few runs. Turn on overhead lights and open curtains to give the camera the best possible view of the room. LiDAR-based models do not have this limitation, but it is still a good practice for overall cleaning efficiency.
Keep Sensors Clean
Dust and debris on the LiDAR window, camera lens, or infrared sensors can significantly reduce mapping accuracy. Wipe these components with a soft, dry cloth regularly. For a detailed walkthrough, our article on how to clean robot vacuum sensors covers everything you need to know.
Let the Robot Complete Full Runs
Resist the temptation to pick up the robot and move it to a different room during the mapping phase. Let it complete full cleaning cycles so it can naturally discover and map the entire accessible area. Interrupting the process can confuse the SLAM algorithm and result in a fragmented map.
Understanding the Map in Your Robot Vacuum App
Once your robot has built a map, the companion app becomes your control center. Here is what you can typically do with the saved map.
Room Labeling and Division
Most apps automatically detect room boundaries, but you can manually adjust them. You might want to split a large open-plan area into two virtual rooms or merge two small adjacent spaces into one. Labeling rooms lets you send the robot to clean specific areas with a single tap.
No-Go Zones and Virtual Walls
If there are areas you do not want the robot to enter, such as a pet feeding station, a pile of cords, or a delicate rug, you can draw no-go zones directly on the map. Virtual walls work similarly, creating invisible barriers that the robot will not cross.
Cleaning Schedules by Room
Advanced apps let you set different cleaning schedules for different rooms. You might schedule the kitchen to be cleaned every day after dinner while the guest room only needs attention once a week. This level of control is one of the biggest advantages of a mapping robot vacuum over a basic random-navigation model.
If you want to learn more about setting up schedules and routines, our guide on how to program a robot vacuum provides step-by-step instructions for the most popular brands.
Multi-Floor Mapping
Many modern robot vacuums can store multiple maps, which is incredibly useful if you live in a multi-story home. The robot recognizes which floor it is on based on the layout and automatically loads the correct map. Some models can store up to four or more floor plans.
Common Mapping Problems and How to Fix Them
Even the best robot vacuums can run into mapping issues. Here are the most common problems and what you can do about them.
The Map Looks Distorted or Incomplete
This usually happens during the first few runs and is completely normal. Give the robot three to five full cleaning cycles to refine the map. If the map is still distorted after that, try resetting the map in the app and starting fresh. You can find instructions in our guide on how to reset a robot vacuum.
The Robot Gets Lost or Strays from Its Path
If your robot frequently loses its position, check for sensor obstructions. Dirty LiDAR windows, smudged camera lenses, or blocked infrared sensors can all cause navigation errors. Also, highly reflective surfaces like mirrors or glass doors can confuse LiDAR sensors. Try covering or marking these surfaces temporarily during mapping runs.
The Map Disappears After a Firmware Update
Occasionally, a firmware update can reset the stored map. This is frustrating but fixable. Simply run the robot through a few cleaning cycles again to rebuild the map. To prevent this, check your app settings to see if there is an option to back up or lock the current map before updating.
The Robot Cannot Map Certain Areas
Very dark rooms, spaces with lots of reflective surfaces, or areas with extremely low furniture can be challenging for some sensors. If a specific room consistently causes problems, try adding a small lamp for camera-based models or placing a piece of non-reflective tape on problematic surfaces for LiDAR models.
LiDAR vs Camera-Based Mapping: Which Is Better?
This is one of the most common questions shoppers ask when choosing a robot vacuum. Here is a quick comparison to help you decide.
| Feature | LiDAR Mapping | Camera-Based Mapping |
|---|---|---|
| Accuracy | Very high, works in all lighting | High, but depends on lighting |
| Performance in Darkness | Excellent | Poor to moderate |
| Object Recognition | Limited to shape and distance | Can identify specific objects with AI |
| Cost | Generally higher | Moderate |
| Privacy | No camera, no privacy concerns | Camera may raise privacy concerns |
| Best For | Reliable mapping in any condition | Smart obstacle avoidance |
Many of the latest premium models actually combine both technologies to get the best of both worlds. They use LiDAR for precise spatial mapping and a camera for intelligent object recognition.
The Future of Robot Vacuum Mapping
Mapping technology is evolving rapidly. Here are a few trends worth watching.
- 3D mapping: Some next-generation robots are beginning to capture three-dimensional data, allowing them to recognize not just the floor plan but also the height and shape of objects.
- AI-powered room understanding: Future robots may automatically identify room types (kitchen, bedroom, bathroom) and adjust cleaning behavior accordingly without any manual input.
- Real-time map updates: As processors become faster, robots will be able to update their maps in real time as furniture is moved or doors are opened and closed.
- Integration with smart home systems: Robot vacuum maps may eventually integrate with broader smart home platforms, allowing your vacuum to coordinate with other devices based on room occupancy and usage patterns.
If you are considering investing in a robot vacuum and want to understand why they are worth it, our article on why a robot vacuum cleaner can be useful to own covers the benefits in detail.
Conclusion
Robot vacuum mapping is a fascinating blend of hardware and software working together to understand your home. Whether your robot uses LiDAR lasers, cameras, or infrared sensors, the goal is the same: to build an accurate map that enables efficient, targeted cleaning. By understanding how the process works, you can set up your robot for success from the very first run.
Keep your sensors clear, give the robot space to explore during initial mapping, and take advantage of the app features like room labeling and no-go zones. With a little patience during those first few cleaning cycles, you will have a smart cleaning companion that truly knows its way around your home.