Most people skip straight to vacuuming and never look back. They push the machine over crumbs and forget the hidden dust that clings to surfaces. This small mistake wastes time and can spread dust around your home. Learning How to Prepare Home Before Vacuuming changes your whole cleaning routine for the better.
A few minutes of prep work stops dirt from becoming mud. Saves your vacuum motor from extra strain. You clear the floor, lift the furniture. Trap dust before it ever hits the suction path.
Applying these proven insights on How to Prepare Home Before Vacuuming helps you avoid costly mistakes. This guide walks you through a simple, repeatable setup that makes every vacuum session faster and more strong. You will learn the exact steps to protect your floors and keep your air clean.
📌 AT A GLANCE
- ✓Clear Floor Zones: Remove small objects and toys to prevent clogs and damage.
- ✓Dust From High to Low: Wipe shelves and blinds first so falling dirt stays contained.
- ✓Check Vacuum Parts: A clean brush roll and full dustbin stop mid-clean failures.
- ✓Protect Delicate Surfaces: Use guards on bare wood and low-pile rugs to avoid scratches.
- ✓Set a Timer: A focused 15-minute prep routine keeps the whole job under control.
In this article
Why Preparing Your Home Makes Vacuuming Faster
Home cleaning works best when you follow a logical order from top to bottom. Dust settles on shelves, lampshades, and window ledges long before it reaches the floor. If you vacuum first, that loose dust falls back down. Dirties surfaces you just cleaned. A quick overhead sweep traps that debris so your vacuum only picks up what remains on the ground.
Gather required tools and clear your work area before starting.
Confirm baseline specs and maker guidelines first.
Complete each stage in order without skipping safety checks.
Run a quick test pass and wipe down key parts after use.
Preparing your space also protects your equipment from large debris. Small toys, coins, and hair ties can jam the brush roll or puncture bags. Taking two minutes to scan the floor prevents costly repairs and keeps suction strong. This simple habit extends the life of your machine and makes every cleaning session smoother. For our complete category overview. Core buyer criteria, explore our cornerstone guide to Why Your Vacuum Cleaner Keeps Failing and Fixes.
- Top-Down Logic: Gravity pulls dust downward, so cleaning high surfaces first keeps floors cleaner longer.
- Motor Protection: Removing hard objects stops the motor from overheating or the belt from shredding.
- Time Savings: A prepped room lets you vacuum in one smooth pass without stopping to move items.
- Allergen Control: Trapping dust before suction stops it from recirculating into the air you breathe.
- Floor Safety: Clearing clutter prevents scratches on wood. Tile from hidden debris or vacuum bumps.
Gathering the Right Tools Before You Start
Having your supplies ready stops you from interrupting the vacuuming flow halfway through. You need a few basic items that handle dust, corners, and edges. A standard home vacuum works best when paired with the correct tools and a clean dustbin. This setup turns a chore into a quick, satisfying task.
Set a five-minute kitchen timer before you begin prep work. This short deadline keeps you focused and prevents over-cleaning one area while neglecting another.
Check your vacuum manual or the Energy Star vacuum guidelines to confirm your model’s top upkeep steps. Different floors need different brushes.
So matching your tool to the surface makes a big difference. Keep all your supplies in one caddy or closet so you never waste time searching.
- Soft Dusting Brush: This tool gently lifts dust from blinds and delicate decor without scratching.
- Crevice Tool: A narrow nozzle reaches baseboards, window tracks, and tight corners with precision.
- Upholstery Tool: A soft brush head cleans couches, cushions, and pet beds without pulling fabric.
- Microfiber Cloths: Damp cloths trap falling dust on hard floors before you vacuum them up.
- Empty Dustbin: A full bin weakens suction. So swap it out or empty the bag before you start.
The Best Way to How to Prepare Home Before Vacuuming Step by Step
Start by walking through each room and picking up loose items from the floor. Clothes, shoes, and toys block the vacuum head and stop it from cleaning properly. Next, move light furniture like chairs and small tables to access hidden dust bunnies underneath. This single step reveals the dirt you normally miss during a quick pass.
After clearing the floor, dust high surfaces with a dry or slightly damp cloth. Work from shelves down to nightstands so falling particles stay in one zone. Finally, run a quick dry mop or broom over hard floors to gather large crumbs. This layered approach ensures your vacuum only handles fine dust and small debris.
- Pick Up Floor Items: Remove shoes, laundry baskets. Cords so the vacuum head moves freely.
- Shift Light Furniture: Slide chairs and stools to clean the full floor area beneath them.
- Wipe Horizontal Surfaces: Dust shelves and dressers top-down to catch falling particles in one pass.
- Spot Clean Stains: Treat visible spots on carpet or rugs before vacuuming so they do not spread.
- Open Doors Wide: Clear doorways allow easy movement between rooms without dragging the vacuum.
Protecting Floors and Furniture During Setup
Different floor types need different levels of care before you plug in the vacuum. Hardwood, tile, and laminate can scratch if large grit gets pushed under the machine. Area rugs and low-pile carpets also trap dirt differently than thick pile carpets. Matching your approach to each surface keeps your home looking its best.
Take a moment to check the floor for small hazards like pins, Legos, or pet food bowls. These items can damage the vacuum or leave marks on sensitive surfaces. For delicate furniture legs, you can place felt pads or use a vacuum with a soft roller head. This small effort prevents scuffs and keeps your floors pristine for years.
- Hard Floor Sweeping: A quick sweep removes grit that could or else scratch wood or tile under vacuum pressure.
- Rug Edge Check: Secure loose rug corners with double-sided tape so the vacuum does not catch them.
- Furniture Pad Inspection: Felt pads on chair legs prevent scratches when you push the vacuum across the room.
- Pet Bowl Removal: Moving food. Water bowls stops spills from turning into sticky messes during cleaning.
- Threshold Guard: Place a towel over door thresholds to catch debris. Prevent it from scattering between rooms.
Checking and Maintaining Your Vacuum Before Use
A vacuum performs best when you give it a quick inspection before every use. A tangled brush roll or full dustbin slows you down. Leaves streaks of dirt behind. Checking the hose for clogs and the filter for dust takes only a few minutes. This habit keeps suction strong and extends the life of your machine.
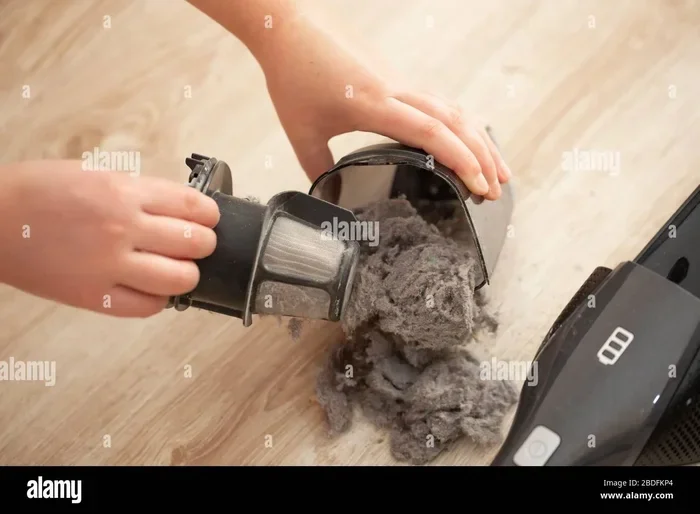
Start by unplugging the vacuum and inspecting the floor head for hair and string wraps. Cut away any tangled debris with scissors, being careful not to damage the bristles. Next, tap the dustbin over a trash can or replace the bag if it is more than two-thirds full. A clean filter also helps trap fine particles so they do not blow back into your room. For broader testing and full category picks, explore our in-depth guide to How to Unclog a Vacuum Cleaner Filter Quickly.


- Brush Roll Inspection: Remove hair and thread wraps from the roller to keep suction balanced.
- Dustbin Emptying: A full bin reduces airflow. So empty it completely before every new cleaning session.
- Hose Clog Check: Run your hand through the hose to feel for blockages from small toys or debris.
- Filter Cleaning: Tap or rinse the filter per maker instructions to maintain proper airflow.
- Attachment Test: Click all nozzles firmly into place so they do not fall off mid-cleaning.
Creating a Room-By-Room Cleaning Sequence
Cleaning one room at a time prevents you from tracking dirt from the garage or hallway into clean spaces. Start with the least used rooms and work toward the main living areas. This order keeps dust from settling on surfaces you already cleaned. A steady sequence also helps you finish faster because you never backtrack.
In each room, follow the same three-step pattern: clear, dust, and vacuum. Clear the floor of obstacles first, then wipe high surfaces. Finally vacuum the entire floor area.
Bedrooms often need the most prep because of clothes and shoes scattered on the floor. Living rooms and kitchens benefit from a quick pre-vacuum sweep to remove food crumbs and larger debris.
- Start With Bedrooms: These rooms collect more loose clothes. Personal items that block vacuum paths.
- Move to Living Areas: Open seating areas gather dust from daily use and need a full pass.
- Finish With Kitchens: Food debris can stick to floors. So a final sweep captures crumbs well.
- Close Doors Behind You: Shutting doors keeps dust from spreading into freshly cleaned rooms.
- Ventilate While Working: Opening a window helps carry away fine dust that the vacuum misses.
Handling Pet Hair and Allergy Triggers in Advance
Pet hair and dander cling to floors, furniture. Fabric in ways that make vacuuming harder. Preparing your home for a pet-friendly clean starts with a quick brushing session. Grooming your cat or dog on a hard floor catches loose fur before it spreads into carpets. This simple step reduces the amount of hair your vacuum must handle.
For allergy sufferers, damp wiping surfaces before vacuuming traps dust mites. Pollen more well than dry methods. You can also run an air purifier in the room. Meanwhile, you clean to capture floating particles.
Wearing a simple dust mask adds extra protection if you are sensitive to pet dander or mold spores. These extra steps make the home safer and more easy for everyone.
- Pet Grooming Session: Brushing your animal on tile or hardwood catches loose hair before it reaches carpets.
- Damp Wipe Surfaces: A moist cloth picks up pollen. Dander better than a dry dusting cloth alone.
- Air Purifier Run: A purifier filters airborne particles. Meanwhile, you vacuum and for an hour after.
- Wash Bedding First: Strip and wash pillowcases and sheets so vacuuming the mattress removes only deep dust.
- Vacuum Upholstery Early: Cleaning cushions before floors stops pet hair from falling onto clean carpets.
Quick Prep Comparison by Room Type
Summary Table: Cleaning Methods Compared
| Room Type | Prep Steps | Best Vacuum Head | Floor Protection |
|---|---|---|---|
| Hardwood Floors | Sweep debris, remove rugs, check for nails | Soft roller or microfiber mop attachment | Felt pads on furniture legs |
| Carpeted Rooms | Pick up toys, beat rugs outdoors, spot treat | Standard rotating brush roll | Check for hidden debris first |
| Tile and Laminate | Mop sticky spots, move pet bowls, dry sweep | Hard floor nozzle or gentle bristle brush | Secure loose rugs with tape |
| Upholstered Furniture | Remove cushions, pre-brush fabric, spot clean | Upholstery tool with soft brush | Protect wood frames with cloths |
Best Practices for a Smooth Vacuuming Routine
A great vacuuming routine depends on steady habits that keep your home ready at all times. Making your bed and folding laundry before you start prevents the vacuum from catching loose fabric. Keeping a small broom near entryways stops dirt from spreading into main rooms. These daily habits reduce the amount of prep work you need before each session. For broader testing and full category picks, explore our in-depth guide to Why a Vacuum Cleaner Loses Suction Over Time and How to Fix It.
Never vacuum large amounts of water or wet spills with a standard dry vacuum. This can ruin the motor and create a safety hazard. Use a wet-dry shop vac for liquid cleanup instead.
Store your vacuum in a central, easy to reach location so you can grab it quickly for spot cleaning. Label storage bins for tools so you always know where the crevice tool or dusting brush lives.
A little bit of daily attention to floors. Surfaces means your weekly vacuuming session becomes faster and more strong. Steadiness is the real secret to a truly clean home.
- Daily Surface Wipe: A quick dust of tables. Counters stops buildup before it reaches the floor.
- Entryway Mat Check: Shake or vacuum doormats regularly to trap outdoor dirt at the source.
- Attachment Labeling: Clear labels on bins save time when you switch between floor tools.
- Spot Clean Immediately: Treating spills right away prevents them from becoming stubborn stains.
- Weekly Schedule: A set cleaning day trains your home to keep floors clear in advance.
Frequently Asked Questions
How Long Should the Prep Phase Take Before Vacuuming?
A full prep routine takes about ten to fifteen minutes for an average room. You spend a few minutes picking up items, dusting high surfaces, and clearing the floor. The time drops greatly once you build a steady habit and keep supplies nearby.
Do I Need to Dust Before Vacuuming If I Only Clean the Floor?
Yes, dusting first prevents falling particles from re-soiling your floor right after you vacuum. A quick wipe of shelves. Tables traps dust that would or else land on clean carpets or hardwood. This one step makes a clear difference in how long your floors stay clean.
What Should I Do If My Vacuum Smells Bad During Use?
A bad smell often comes from a full dustbin, a clogged filter, or old debris stuck inside. Empty the bin, clean or replace the filter. Check the hose for trapped food or pet hair. Running a quick clean before use removes the source of the odor and restores fresh airflow.
Can I Vacuum Right After Mopping Hard Floors?
You should wait until floors are completely dry before vacuuming. Wet floors can clog vacuum filters and damage the motor in standard dry vacuums. Always mop first, allow time to air dry. Then vacuum any remaining dust or dried spots.
Is It Better to Vacuum Every Day or Once a Week with Proper Prep?
Proper prep makes a weekly vacuuming session highly strong for most homes. Daily vacuuming can wear down carpet fibers if you use the wrong settings or a heavy machine. A well-prepped weekly routine keeps floors clean without causing unnecessary wear on your flooring or equipment.
Final Thoughts and Next Steps
Taking a few minutes to prepare your home before vacuuming transforms a tiring chore into a quick and satisfying routine. You protect your floors, extend your vacuum’s life. Remove more dust and dust from the air.
The simple steps in this guide give you a clear path to a cleaner, healthier living space. Steadiness matters more than perfection, so start with one room and build your confidence. Keep your tools organized and your dustbin empty so you are always ready for the next session.
Your home will stay fresher, and you will spend less time cleaning overall. Put these habits into practice today. Notice the difference in how your home feels and looks. A well-prepared home makes every vacuum pass count. It leaves you with more free time and a truly clean space. Stick with the routine, and your floors will thank you for months to come.