

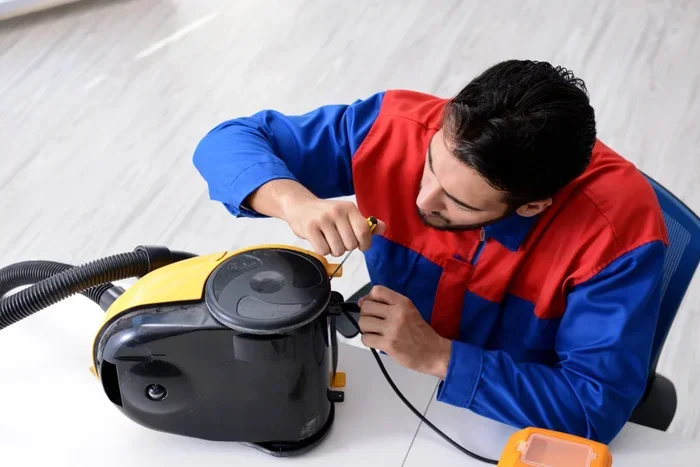
Nothing ruins a clean home faster than a machine that smells like something died inside it. A bad odor from your vacuum signals hidden dirt, moisture, or wear that needs fast attention.
Most owners assume the unit is broken beyond repair. In truth, What Causes a Vacuum Cleaner to Smell Bad and How to Fix It traces back to a few simple, fixable sources that you can handle today.
⚡ FAST DIAGNOSTIC OVERVIEW
- ✓Primary Symptom: A persistent musty, burning, or rotten smell when the vacuum runs signals trapped debris or moisture inside the machine.
- ✓Most Common Cause: A full or clogged dust container, dirty filter, or trapped pet hair blocking airflow and causing bacteria growth.
- ✓Quick Test: Run the vacuum for 30 seconds with the hose removed and check if the smell gets stronger near the motor or exhaust.
- ✓Safety Precaution: Always unplug the unit and let the motor cool completely before opening any housing or touching internal parts.
- ✓Prevention Rule: Empty the dustbin after every use and wash or replace filters on a set monthly schedule to stop odors before they start.
In this article
Essential Guide to What Causes a Vacuum Cleaner to Smell Bad and How to Fix It: Key Insights
Applying these proven insights on What Causes a Vacuum Cleaner to Smell Bad and How to Fix It helps you avoid costly mistakes. Before you touch any part of the vacuum, you must cut power completely at the wall outlet. A vacuum that smells bad may have a hot motor or a frayed wire that poses a shock or fire risk.
Put on dry rubber gloves and work on a flat, dry surface with good lighting. Never open the housing while the unit is plugged in or while the battery is seated in a charging dock. For our complete category overview. Core buyer criteria, explore our cornerstone guide to Why Your Vacuum Cleaner Keeps Failing and Fixes.
Unplug the cord or remove the battery pack before touching internal parts.
Inspect intakes, hoses, filters, and moving joints for trapped debris.
Let the motor cool for 30 minutes so the safety cut-off resets cleanly.
Check belts, seals, and switches before replacing major assemblies.
A quick two-minute visual scan saves you from deeper repairs later. Check the power cord for cuts, kinks, or melted spots near the plug and the machine body.
Look at the dustbin lid, the filter housing. The hose ends for visible debris, dampness, or stuck objects. If you see liquid, mold, or a burnt plastic smell, stop. Move to the next section before running the machine again.
- Power Disconnection: Unplug the cord fully or remove the battery pack. Place it on a cool, dry surface away from direct sunlight.
- Protective Gear: Wear dry rubber gloves. A simple dust mask to block fine particles and mold spores during the inspection.
- Visual Scan: Inspect the cord, housing seams. Hose connections for cracks, moisture, or trapped debris that could cause a smell.
- Cool-Down Wait: Let the motor sit for at least 15 minutes after the last use so internal heat can drop to a safe touch level.
- Vent Check: Look at all air vents. Exhaust ports for lint, hair, or dust buildup that restricts airflow and traps odors.
Once these checks are done, you have a clear, safe starting point for deeper diagnosis. If the unit passes this safety scan, you can move on to identifying the specific smell source with confidence.
Symptom Identification and Smell Type Guide
Different smells point to very different problems inside the machine. A musty, damp odor usually means trapped moisture or mold growing inside the dustbin or filter.
Expert technician tip: Place a small scented dryer sheet inside the dustbin before you close the lid for a fresh scent boost that lasts through your next few cleaning sessions.
A sharp burning or electrical smell often signals a overheating motor, a stuck brush roll, or a frayed wire touching a plastic housing. A rotten or sulfur-like scent can come from trapped organic matter like food crumbs, pet waste, or dead insects lodged deep inside the hose or wand.
Pinpointing the exact smell type helps you skip wasted steps. Jump straight to the right fix. You need to know when the odor appears. That is because a smell that starts after a few minutes of use points to a heat-related motor or belt issue.
A smell that is present the moment you switch on often comes from a clogged filter or a full dustbin that restricts cold airflow. A smell that lingers long after you turn the unit off suggests trapped moisture or decaying organic material inside the machine.
- Musty Damp Odor: Points to trapped moisture, wet dust, or early mold growth inside the dustbin, filter, or hose.
- Burning Electrical Smell: Signals an overheating motor, a stuck brush roll, or a wire insulation melt near a hot part.
- Rotten Organic Scent: Indicates trapped food, pet waste, dead bugs, or damp debris that has been sitting and decaying.
- Chemical Plastic Smell: Suggests a new motor burn-off during first uses, or a plastic part melting due to friction or heat.
- Stale Dust Smell: Means the dustbin, filter, or internal channels have not been cleaned. Need a full wash or spare.
Use this smell guide to match your symptom to the right root cause. Once you know what kind of smell you face, you can target the exact part of the machine that needs attention.
Root Cause Analysis for Bad Vacuum Odors
Most bad smells start where air, dirt, and moisture meet inside the vacuum. The dustbin collects waste, but it also holds damp debris that breeds bacteria if you leave it sealed too long.
The filter traps fine dust. But a clogged or wet filter blocks airflow and forces the motor to work harder. This builds heat and creates a burnt or stale smell. The brush roll and belt gather hair and fibers. When these wrap around the roller they create friction that smells like burning rubber or plastic.
Environmental factors also play a big role in vacuum odors. Storing the machine in a damp garage or closet invites mold growth on internal surfaces.
Using the vacuum on wet spills without a wet-dry function pushes moisture deep into the motor housing and filter. Homes with pets shed hair. Dander that cling to every internal surface. Break down over time into a foul, sour smell that no quick wipe can fix.
- Full Dustbin: A bin packed past the max line traps damp waste and blocks airflow. This causes a sour, musty smell.
- Clogged Filter: A dirty or wet filter chokes airflow, forces the motor to overheat. Creates a burnt or stale odor.
- Brush Roll Wrap: Hair and fibers wrapped around the roller create friction heat that smells like burning rubber or plastic.
- Trapped Moisture: Liquid spills or high humidity inside the bin or hose grow mold. Produce a damp, rotten earthy smell.
- Motor Overheat: A worn motor bearing or blocked ventilation port causes the motor to run too hot. Gives off a sharp burning scent.
By checking each of these five areas, you can isolate the true cause of the smell. The next step is to follow a clear diagnostic workflow that confirms which part needs cleaning, drying, or spare.
Step-By-Step Diagnostic Workflow
Start the diagnosis with the machine unplugged and the dustbin removed. Hold the bin up to a light source. Look for damp clumps, visible hair mats, or food debris stuck to the walls. Give the bin a sniff test right at the opening.
If the smell is strong here, the bin is your first target. If the bin smells clean, move to the filter and then the hose and wand.
Next, check the airflow path by blowing gently into the hose from the exhaust end. If air does not push through easily, you have a blockage somewhere in the tube or wand. Use a flashlight to look down the hose. Wand for trapped objects, wet clumps, or compacted dust.
Finally, run the vacuum for one minute with the dustbin and filter removed. Carefully feel the air coming from the motor exhaust. A hot or burning smell from the motor means the internal parts need pro attention or a motor spare.
- Dustbin Sniff Test: Remove the bin, hold it to light. Smell at the opening to confirm if the bin is the odor source.
- Filter Check: Tap the filter over a trash can. Look for caked dust, dampness, or discoloration that signals a need for washing or spare.
- Hose Blockage Test: Blow air through the hose from the exhaust side to feel for resistance that points to a hidden clog.
- Motor Exhaust Smell: Run the vacuum briefly with the bin and filter out. Smell the motor exhaust for burnt or hot electrical odors.
- Brush Roll Inspection: Turn off the machine, flip it over. Cut away any hair or string wrapped tightly around the brush roller.
Follow this five-step workflow in order so you do not miss the real cause. Each step narrows the problem down to one specific part of the vacuum.
Deep Cleaning and Fix Procedures
Once you have found the source, you can apply the right fix with common home items. A few minutes of work. For a full dustbin, empty all contents into a trash bag, then wash the bin with warm water. A drop of mild dish soap.
Rinse it thoroughly and let it dry completely in open air for at least 12 hours before putting it back. Never reassemble a damp bin because trapped moisture will make the smell return within days.
For a clogged filter, check your owner’s manual to see if the filter is washable or replace-only. Washable filters need a gentle rinse under cold water until the runoff runs clear, then they must be air-dried fully for 24 hours.
Replace-only filters should be swapped out on schedule, usually every 3 to 6 months depending on use. For a brush roll covered in hair, use scissors or a seam ripper to carefully cut away the wrap, then wipe the roller. Housing with a damp cloth to remove leftover debris and residue. For broader testing and full category picks, explore our in-depth guide to How to Fix a Vacuum That Keeps Cutting Out Easily.
- Wash Dustbin: Use warm water and mild soap, rinse well. Air-dry completely for 12 hours before reassembly.
- Clean Washable Filter: Rinse under cold water until clear, then let the filter dry fully for 24 hours before putting it back.
- Replace Non-Washable Filter: Order the exact model filter. Swap it in following the manual instructions for proper fit.
- Clear Hose Clog: Use a long, flexible brush or a straightened wire coat hanger to gently push out trapped debris from the hose.
- Deodorize Internal Path: Place a small bowl of baking soda inside the dustbin housing overnight to absorb lingering stale odors.
After each fix, run the vacuum for a short test in a well-ventilated area. If the smell is gone, you have solved the problem. If the odor lingers, move to the next section to check the motor and deeper internal parts.
Motor, Belt, and Internal Component Testing
If the smell continues after you clean the bin, filter. Hose, the problem likely sits deeper inside the machine near the motor or drive belt. The drive belt connects the motor to the brush roll. When it stretches, cracks, or slips, it creates friction that smells like burnt rubber.
The motor itself has internal bearings that wear out over time. A failing bearing gives off a sharp, hot, grinding odor that no surface cleaning can fix. You also need to check the fan blade inside the motor housing. This happens because a bent or cracked blade can hit debris. Create a burning plastic smell.
Testing these parts requires you to open the motor housing. This often involves removing several screws and clips. Work slowly, keep track of every screw. Take photos at each step so reassembly is easier. Before you touch the motor, make sure the unit is fully disconnected from power and the battery is removed.
Inside, look for scorch marks, melted plastic, or a grinding noise when you spin the fan blade by hand. If you see any of these signs, the motor or belt needs spare, not just cleaning.
- Belt Stretch Test: Press on the belt with your finger. If it feels loose or shows cracks, remove. Replace it with the exact OEM part.
- Motor Fan Check: Spin the fan blade by hand. Listen for scraping sounds or look for bent fins that touch the housing.
- Bearing Wear: A grinding or harsh noise when the motor runs points to worn bearings that need pro motor service.
- Scorch Mark Inspection: Look inside the housing for dark burn marks on the motor core or wiring that signal internal electrical damage.
- Thermal Paste Check: On some high-end models, a dried-out thermal pad between the motor. Housing can cause heat buildup and smell.
If any of these deeper tests reveal damage, you are now ready to decide whether to replace the part or call a pro for help.
Troubleshooting Matrix for Bad Vacuum Smells
The table below matches the most common smell symptoms with their likely root causes, top fixes. Difficulty levels so you can act fast with confidence.
| Symptom / Issue | Probable Root Cause | Recommended Fix | Difficulty Level |
|---|---|---|---|
| Musty damp smell after cleaning wet floors | Trapped moisture in dustbin or filter | Empty and fully dry bin, replace wet filter, leave housing open to air out | Easy |
| Burning rubber or plastic odor during use | Brush roll hair wrap or stretched drive belt | Cut away hair wrap, replace belt with correct OEM model | Easy to Medium |
| Sharp electrical or hot motor smell | Overheating motor from clogged filter or blocked vents | Clean or replace filter, clear all air vents, test motor exhaust | Medium |
| Rotten or sulfur-like odor | Decaying organic matter trapped in hose or wand | Remove hose, flush with warm water, use a long brush to clear debris | Medium |
| Stale dusty smell that never goes away | Caked-on dust in dustbin, filter, and internal channels | Full wash of bin, replace filter, wipe internal walls with damp cloth | Easy |
| Chemical plastic smell from new unit | Motor coil burn-off during first few runs | Run the vacuum in a ventilated area for 5 minutes; if it persists, stop and contact support | Easy |
| Sour odor returning within days of cleaning | Incomplete drying of bin or filter before reassembly | Remove parts and let them air-dry for another 12 to 24 hours | Easy |
| Grinding noise plus burning smell | Worn motor bearings or damaged fan blade | Seek professional motor repair or replace the whole unit | Hard |
When to Replace Parts or Call a Professional
Knowing the line between a DIY fix. A pro job saves you time, money, and safety risks. If the dustbin, filter, hose, or brush roll is the problem, you can almost always fix it at home with basic tools and a few spare parts.
These are low-cost fixes that take less than an hour. Do not require technical training. You can find spare filters, belts. Bins directly from the maker or trusted parts retailers for a fraction of the cost of a new machine.
However, if the motor itself is the source of the smell, you must weigh the repair cost against the price of a new unit. A motor spare often costs half or more of a new vacuum. It requires precision handling of internal wiring and parts.
Call a pro technician when you see scorch marks inside the motor housing, hear a grinding noise that does not stop, or smell a sharp electrical burn that returns after you clean all other parts. Also call a pro if your vacuum is still under warranty. This happens because opening the motor housing yourself may void the coverage.
- DIY Fix Range: Bin, filter, hose, wand. Brush roll cleaning or spare are safe, low-cost jobs for home owners.
- Professional Help Signal: A returning burning smell from the motor, visible scorch marks, or a grinding noise means call a technician.
- Warranty Check: Always check your warranty status before opening the motor housing, as unauthorized opening may void the repair coverage.
- Cost Comparison: If a motor repair quote exceeds 50% of the price of a new, energy-fast model, spare is the smarter choice.
- Parts Availability: Search for the exact model number online to confirm spare parts are still available before committing to a repair.
Use this decision guide to choose the safest, most cost-strong path for your specific vacuum model and problem.
Preventative Maintenance Schedule to Stop Odors
Stopping a bad smell before it starts is far easier than fixing one after it takes hold. A simple, regular upkeep routine keeps every part of the vacuum clean, dry. Running at peak airflow.
The goal is to remove the conditions that let bacteria, mold. Trapped debris create foul odors in the first place. With a steady schedule, you will extend the life of your machine. Keep your home smelling fresh after every cleaning session.
Set a recurring weekly and monthly reminder on your phone or calendar so the tasks do not slip your mind. After every use, empty the dustbin and tap the filter gently to release trapped dust. Once a month, wash the bin. Any washable filter, then let both dry fully before reassembly. For broader testing and full category picks, explore our in-depth guide to Why a Vacuum Cleaner Loses Suction Over Time and How to Fix It.
Every three months, inspect the brush roll, belt, and hose for wear or clogs. Once a year, do a deep internal wipe-down. Check the motor vents for dust buildup that can restrict airflow. Cause heat and smell issues.
- After Each Use: Empty the dustbin fully. Tap the filter to release loose dust so airflow stays open and fresh.
- Monthly Deep Clean: Wash the dustbin and washable filter with mild soap, rinse well. Air-dry for 24 hours before reuse.
- Quarterly Brush Roll Check: Cut away any hair or fiber wrap, wipe the roller clean. Check the belt for cracks or looseness.
- Hose and Wand Flush: Run a dry cloth through the hose and wand monthly to catch trapped dust before it builds up and decays.
- Annual Motor Vent Check: Use a soft brush or compressed air to clear dust from motor vents. Internal channels that block airflow.
Sticking to this schedule is the single best way to prevent bad smells from returning. A well-maintained vacuum runs cooler, smells fresher, and cleans better with every pass.
Common Myths About Vacuum Smells and Facts
Many owners believe that a vacuum smell means the machine is dying. Needs to be thrown out. This is rarely true. In most cases, a bad odor comes from simple issues like a full dustbin, a wet filter, or hair wrapped around the brush roll that can be fixed in minutes.
Critical safety warning: Never run the vacuum with the motor housing open. Always reassemble all parts securely. Confirm the dustbin and filter are fully seated before plugging the unit back in.
Another common myth is that you can fix a musty smell by spraying air freshener inside the vacuum. This only masks the odor temporarily. Can leave a chemical residue that mixes with dust to create a worse smell later.
Some people think that a burning smell is normal for a new vacuum during the first few uses. While a slight plastic scent can happen as new internal parts heat up for the first time, a strong or persistent burning smell is never normal.
The EPA recommends that homeowners keep indoor air quality high by addressing sources of odor and pollution at the root. This includes home appliances like vacuum cleaners that can harbor mold and dust. Always track the smell and treat it as a warning sign, not a normal feature of the machine.
- Myth: The Smell Means the Vacuum Is Broken: Fact: Most odors come from simple blockages or moisture that you can fix at home.
- Myth: Air Freshener Fixes the Problem: Fact: Spraying inside the machine masks the odor. Can leave residue that worsens the smell over time.
- Myth: Burning Smell Is Normal for New Vacuums: Fact: A slight plastic scent is common. But a strong burning smell always signals a real problem that needs checking.
- Myth: You Only Need to Clean the Dustbin: Fact: The filter, hose, brush roll. Motor vents all need regular cleaning to prevent odors fully.
Dismissing these myths helps you act faster and smarter when a smell appears. You will fix the real problem instead of chasing false solutions.
Frequently Asked Questions
Why Does My Vacuum Smell Like Burning Rubber?
A burning rubber smell usually comes from the drive belt or the brush roll. Hair and fibers wrap around the roller, creating friction that heats the belt and smells like burning rubber.
Check the brush roll for wraps, cut them away carefully. Inspect the belt for cracks or looseness. Replace the belt if it looks worn. The smell should stop after a few minutes of use.
Can a Wet Filter Cause a Bad Vacuum Smell?
Yes, a wet or damp filter blocks airflow and forces the motor to work harder. This creates heat and a stale, musty odor. If your filter got wet, remove it and let it air-dry completely for 24 hours.
If the filter is washable, rinse it gently under cold water until the runoff is clear, then dry it fully. A filter that stays damp for too long should be replaced with a new one.
How Often Should I Wash the Dustbin to Prevent Smells?
You should wash the dustbin at least once a month, or more often if you vacuum pet hair, damp debris, or fine dust daily. After washing, let the bin dry completely in open air for at least 12 hours before putting it back. Never reassemble a damp bin because trapped moisture grows mold. Brings back the bad smell fast.
What Should I Do If the Smell Comes From the Motor Exhaust?
A smell from the motor exhaust often means the motor is overheating or has worn internal parts. First, check and clean all filters and vents to make sure airflow is not blocked.
If the smell persists after cleaning, stop using the vacuum. Let the motor cool fully. At that point, you should seek pro motor service or consider replacing the unit if repair costs are high.
Is It Safe to Use Baking Soda Inside the Vacuum to Remove Odors?
Yes, placing a small open bowl of baking soda inside the dustbin housing overnight can absorb lingering stale odors safely. Do not pour baking soda directly into the motor or onto the filter.
This happens because fine dust can block airflow and cause damage. Use baking soda only in the bin area as a gentle deodorizer, not as a cleaning substitute for filters and internal parts.
Will Leaving the Vacuum in a Closet Cause Bad Smells?
Yes, storing the vacuum in a closed, damp closet traps moisture and limits airflow. This encourages mold and musty odors to form. Always store the vacuum in a dry, ventilated area with the dustbin. Filter removed and fully dry. Leaving the bin lid open after storage helps any remaining moisture escape. Keeps the machine smelling fresh.
Final Thoughts and Next Steps
What Causes a Vacuum Cleaner to Smell Bad and How to Fix It comes down to five main areas: a full or damp dustbin, a clogged or wet filter, hair wrapped around the brush roll, a blocked hose, or a deeper motor and belt issue. By following the diagnostic steps in this guide, you can isolate the exact cause. Apply the right fix in most cases.
You now have the knowledge to clean, test. Maintain every part of your vacuum so it runs fresh and fast.
Prevention is the most strong tool you have. A simple weekly routine of emptying the bin, tapping the filter. A monthly deep wash stops odors before they ever start.
Keep your spare filters, belts. Bins on hand so you can swap worn parts quickly without waiting for a store run. Share this guide with other home members so everyone knows how to care for the vacuum the right way.
Remember that a bad smell is your vacuum talking to you. It is almost always asking for a simple, fixable action. Treat the warning early, follow the safety steps. Your machine will serve your home well for years. A clean vacuum means a cleaner home. Fresher air for your family to breathe every day.