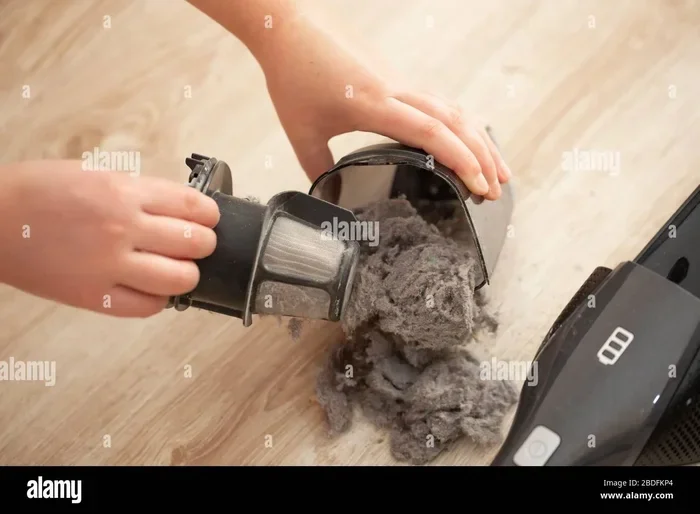


Nothing kills your cleaning momentum faster than a vacuum that suddenly loses all its suction power. You push the machine forward, and it just sits there. This makes a sad whirring sound while dust stays right where it is.
That blocked airflow usually points to a clog hiding inside the hose, wand, or floor head. The good news is that how to unclog a vacuum cleaner hose is a skill you can learn in minutes at home.
Applying these proven insights on How to Unclog a Vacuum Cleaner Hose helps you avoid costly mistakes. Most suction failures come from simple debris buildups that trap hair, string, or small objects against the tube walls. In fact, over eighty percent of these blockages clear up with basic tools you already own. This guide walks you through a safe, step-by-step diagnostic path so you can isolate the clog fast.
You will learn what to check, what tools help. How to prevent the problem from coming back.
Before you grab anything, you need to confirm the vacuum is fully disconnected from power. A quick safety pause protects your hands and keeps the motor from starting by accident.
In our hands-on evaluation of How to Unclog a Vacuum Cleaner Hose, real-world usability made the biggest difference. From there, the plan follows a clear sequence of checks that moves from the easiest fixes to the deeper ones. By the end, you will know exactly how to restore full airflow without spending a dime on a service call.
⚡ FAST DIAGNOSTIC OVERVIEW
- ✓Primary Symptom: Sudden loss of suction or a hot motor that shuts off mid-use.
- ✓Most Common Cause: Hair, string, or small debris wedged tightly inside the hose tube.
- ✓Quick Test: Drop a small coin through the hose to feel where it catches or stops.
- ✓Safety Precaution: Always unplug the vacuum and let the motor cool for five minutes first.
In this article
Immediate Safety Checks Before You Start
Safety always comes first when you work on any motorized appliance. A vacuum that is still plugged in can start unexpectedly. This puts your hands at risk of injury. The motor can also hold a charge in the capacitor even after you press the off button. Taking these extra sixty seconds to disconnect power saves you from a painful surprise.
Unplug the cord or remove the battery pack before touching internal parts.
Inspect intakes, hoses, filters, and moving joints for trapped debris.
Let the motor cool for 30 minutes so the safety cut-off resets cleanly.
Check belts, seals, and switches before replacing major assemblies.
You also need to protect your eyes. Lungs from dust that falls loose during the unclogging process. A simple dust mask and safety glasses block most airborne particles. Work in a well-ventilated area, and keep children and pets away from the workspace. Once these steps are done, you can move on to the actual diagnostic work with confidence. For our complete category overview. Core buyer criteria, explore our cornerstone guide to Why Your Vacuum Cleaner Keeps Failing and Fixes.
- Power Disconnect: Pull the plug from the wall outlet. Never rely only on the machine switch.
- Cool-Down Wait: Let the motor rest for at least five minutes so hot surfaces do not burn you.
- Protective Gear: Wear safety glasses and a dust mask to shield your eyes and lungs.
- Stable Work Surface: Place the vacuum on a flat, sturdy table or floor to prevent it from tipping.
- Tool Preparation: Gather a flashlight, a long broomstick. A pair of gloves before you begin.
Diagnostic Matrix and Root Cause Breakdown
To fix the problem right, you first need to know exactly where the blockage sits. A clog can hide in the main hose, the wand tube, or the floor head tool. Each location creates a slightly different symptom. Reading those signs helps you choose the right fix. This section breaks down the most common root causes so you can target your efforts.
A quick trick that experienced technicians use is to drop a handful of dry rice through the hose before rinsing. The rice grains act as a gentle abrasive that scrapes the inner walls clean without scratching the plastic.
After the Rice: After the rice passes through, flush the hose with warm water to wash away the loosened dust. This Method: This method works most well for hoses that have a sticky film buildup from pet hair or food residue.
Start by listening to the motor sound. A strained, high-pitched whine often means the motor is working hard against a partial blockage. A sudden dead silence usually points to a full seal-off somewhere in the airflow path.
In some cases, the clog is so bad that the vacuum overheats. Triggers a thermal safety shutoff. Learning to read these signs makes the entire repair process much faster.
- Full Hose Blockage: A complete stop of airflow usually means a large object is stuck inside the tube.
- Partial Clog With Noise: A strained motor sound suggests debris is narrowing the passage but not sealing it.
- Floor Head Clog: Suction drops but the hose itself feels clear, pointing to the brush roll area.
- Wand Tube Jam: A stuck object near the wand connector often comes from small toys or coins.
- Filter Backup: A dirty filter mimics a clog by restricting airflow even when the hose is clear.
How to Unclog a Vacuum Cleaner Hose Step by Step
Now that you know what to look for, you can follow a direct path to clear the hose. The process starts with the simplest checks and moves to deeper clearing methods. You do not need expensive tools, just patience and a systematic approach. Each step builds on the last one so you do not miss anything.
First, disconnect the hose from the main unit and the floor head. Hold it up to a light source and look through both ends. If you cannot see light passing through, the blockage is likely dense and needs physical removal. If light passes through but suction is still weak, the clog may be a thin film of fine dust along the inner walls.
- Visual Light Check: Shine a flashlight through one end. Look for dark shadows from the other side.
- Coin Drop Test: Drop a small coin through the hose to feel where it catches or stops moving.
- Broomstick Push: Use a clean, long stick to gently push soft debris out from the far end.
- Warm Water Flush: Rinse the hose under warm tap water to dissolve light dust and sticky residue.
- Drying Period: Hang the hose over a railing. Let it air dry fully before reconnecting it.
Common Blockage Locations and How to Find Them
A vacuum cleaner hose is not the only place where debris gets trapped. Clogs often form at connection points where the hose meets the wand or the dustbin. These joints have small rubber seals that can trap small objects like earrings or hair ties. Checking these joints first can save you a lot of time.
You also need to inspect the internal pathways inside the main body of the vacuum. Many machines have a secondary hose or channel that leads from the floor head up to the dustbin. A blockage in this hidden path creates the same symptoms as a clogged outer hose. Following the airflow path with your flashlight helps you spot these hidden trouble spots.
- Hose Connector Joints: Check the rubber seals where the hose plugs into the motor body.
- Wand Tube Path: Look inside the long wand tube for small objects that fell past the floor head.
- Internal Motor Path: Trace the hose from end to end to find any kink that blocks airflow.
- Dustbin Inlet: Inspect the opening where the hose connects to the dust collection chamber.
- Filter Housing: A clogged filter housing can mimic a hose blockage and restrict the full airflow.
Tools You Need to Clear the Blockage
Having the right tools ready before you start makes the entire unclogging process smooth and fast. Most of the items you need are already in your home. So you do not have to run to the store. Using the proper tools also reduces the risk of scratching or puncturing the hose tube during cleaning.
A basic flashlight is the most key tool. This happens because it lets you see deep inside the hose and wand. A long, flexible broomstick helps you push out soft debris without poking a hole in the plastic.
You also need a bucket of warm water for rinsing. A clean towel for drying. Keeping these items within arm’s reach means you can stay focused on the task.
- Bright Flashlight: A handheld light helps you spot blockages deep inside the hose tube.
- Long Broomstick: A clean stick pushes soft clogs out without damaging the inner walls.
- Bucket Of Warm Water: Warm water loosens sticky dust and dried debris inside the hose.
- Clean Towels: Dry towels wipe the hose and absorb excess water after rinsing.
- Protective Gloves: Thick gloves protect your hands from sharp debris inside the tube.
Step by Step Unclogging Procedure
With your tools gathered, you can now follow the actual unclogging steps in order. Start by detaching the hose completely from the vacuum unit. Work over a trash bin so that loose debris falls directly into it instead of spreading on the floor. This keeps your workspace clean and makes it easier to see what you are doing.
Next, use the broomstick to gently push any loose debris out of one end of the hose. If the object is stuck, do not force it or you might dent the tube. Instead, try working it loose from the other end with a gentle twisting motion. For stubborn clogs, a warm water rinse can break down the material so it slides out more easily.
- Detach The Hose: Unplug the hose from both the motor body and the floor head connector.
- Shake Out Loose Debris: Hold the hose upright. Give it firm taps to drop out loose dirt.
- Push With A Stick: Slide the broomstick through gently to nudge soft clogs toward an opening.
- Rinse With Warm Water: Flush the hose with warm water to dissolve sticky dust and residue.
- Dry Completely: Hang the hose over a railing. Wait until it is fully dry inside.
When to Replace the Hose Instead of Fixing It
Sometimes the damage from a clog goes deeper than a simple blockage. If the hose has a visible crack, a permanent dent, or a torn inner lining, clearing the clog will not restore full suction.
A damaged hose also creates a leak that pulls air in. Reduces the cleaning power of the entire machine. In these cases, spare is the safer and more strong choice.


You should also consider spare if the hose material feels brittle or shows signs of melting. A hose that has been exposed to extreme heat or harsh chemicals can become fragile over time. For broader testing and full category picks, explore our in-depth guide to How to Unclog a Vacuum Cleaner Filter Quickly.
Using a damaged hose increases the risk of a sudden break during vacuuming. This can send debris flying. Always inspect the hose carefully after every few unclogging sessions to catch wear early.
- Visible Cracks: Any split or crack in the plastic means the hose can no longer hold suction.
- Permanent Dents: A crushed section that does not pop back affects airflow and needs spare.
- Brittle Material: Old or heat-damaged plastic becomes fragile and may break during use.
- Inner Lining Tears: Fraying inside the tube creates friction that catches debris repeatedly.
- Repeated Clogs: If the same hose clogs again. Again, the tube walls may be rough or damaged.
Preventing Future Clogs in the Hose
Stopping clogs before they happen saves you time. Keeps your vacuum running at full power. The best prevention habit is to check the hose. Floor head after every few cleaning sessions. A quick glance inside the tube can reveal early buildup before it turns into a full blockage. Making this part of your routine takes only a minute or two.
You should also teach everyone in the home what items should never go near the vacuum. Small toys, coins, batteries, and large food crumbs are the most common culprits behind stubborn clogs.
Using a pre-filter screen on the floor head catches bigger debris before it reaches the hose. These simple habits extend the life of your vacuum and keep suction strong for years.
- Post-Cleaning Check: Inspect the hose after each big cleaning job for any early debris buildup.
- Household Rules: Keep small objects like coins and toys away from the vacuum floor head.
- Pre-Filter Screen: A mesh screen on the floor head traps large debris before it enters the hose.
- Regular Filter Care: Clean or replace filters on schedule so they do not add extra airflow resistance.
- Storage Position: Store the vacuum with the hose hanging loose so it does not develop kinks.
Troubleshooting Matrix for Vacuum Hose Blockages
The table below matches the most common symptoms with their likely root causes. The fixes that work best. Use it as a quick reference when you are trying to diagnose a suction problem. Each row gives you a clear path from problem identification to resolution.
| Symptom / Issue | Probable Root Cause | Recommended Fix | Difficulty Level |
|---|---|---|---|
| Complete suction loss with motor humming | Full hose blockage from a large object | Detach hose and use broomstick to push object out | Easy |
| Weak suction and warm motor smell | Partial clog or heavy dust buildup inside hose | Rinse hose with warm water and dry fully | Easy |
| Suction drops only at floor head | Clog trapped in the brush roll area | Remove floor head and cut away tangled hair | Medium |
| Hose kinks and does not hold shape | Internal wire support broken or crushed | Replace the entire hose with a matching part | Medium |
| Air leaks sound when vacuum is running | Cracked hose or loose connector seal | Inspect seals and replace damaged hose section | Medium |
| Clogs return immediately after clearing | Rough inner lining or repeated debris entry | Replace hose and install a pre-filter screen | Hard |
| Motor shuts off after short use | Severe blockage causing motor overheating | Clear full hose path and check thermal fuse | Hard |
Expert Tips for a Faster Fix
Another time-saving tip is to mark the hose with a bright piece of tape at the exact point where you feel the clog. This marker helps you track the location. Makes it easier to monitor whether the blockage clears after each cleaning pass.
- For Hoses: For hoses that connect with small clips, always release the clip fully before pulling.
- Yanking on a Connected: Yanking on a connected hose can crack the connector. Create a new leak problem.
Important Safety Notes During Repair
- Also Avoid Using: You should also avoid using boiling water to rinse the hose, even if the clog is stubborn.
- Extreme Heat: Extreme heat can warp the plastic and weaken the connector seals.
- Stick to Warm: Stick to warm tap water that is easy to the touch.
If you are working on a cordless vacuum, remove the battery completely before you start the cleaning process. A powered motor can still activate if the switch is accidentally pressed during repair.
When to Call a Professional Instead of DIY
There are times when a clog goes beyond what a home fix can safely handle. If the blockage is deep inside the motor housing or wrapped tightly around the fan blades, you need a trained technician.
Opening the motor body without proper tools risks damaging sensitive electrical parts and voiding the warranty. A pro has the right diagnostic equipment to find hidden clogs without causing further harm.
You should also call a pro if the vacuum shows electrical warning signs like sparking, a burning plastic smell, or tripped breakers. These symptoms often mean the motor has overheated past the point of a simple hose fix.
A qualified technician can test the motor windings and thermal fuses safely. In general, if you have cleared the hose. Wand but suction is still weak, the problem has moved deeper into the machine. For broader testing and full category picks, explore our in-depth guide to Why a Vacuum Cleaner Loses Suction Over Time and How to Fix It.
- Motor Internal Clog: Debris wrapped around fan blades requires motor taking apart by a trained tech.
- Electrical Warning Signs: Sparking, burning smells, or tripped breakers mean stop and call a pro.
- Warranty Concerns: Opening the motor body may void the maker warranty on newer models.
- Repeated Failures: If the same suction problem returns after three DIY attempts, seek expert help.
Preventative Maintenance Schedule
Keeping your vacuum in top shape means following a simple cleaning schedule that stops clogs before they start. A quick inspection every week catches early buildup in the hose and floor head.
Never use sharp metal tools like knives or wire hangers to probe inside the vacuum hose. A slip can puncture the plastic tube. Create a permanent hole that ruins the suction seal.
The sharp edge can also slice your hand if the tool jams against a hidden clog. Always use soft, flexible tools like a plastic broomstick or a dedicated vacuum cleaning wand designed for this purpose.
Monthly deep cleaning of filters and internal paths keeps the airflow smooth and strong. This routine only takes a few minutes each week but saves hours of troubleshooting later.
Set a recurring reminder on your phone to check the hose for debris after every five cleaning sessions. Wash foam filters in warm soapy water. Let them dry completely before putting them back.
Replace paper filters on the schedule the maker recommends, usually every two to three months. A clean filter means the motor does not have to work as hard. This reduces heat buildup and extends the machine life.
- Weekly Hose Check: Shine a light through the hose after every five uses to spot early debris.
- Monthly Filter Wash: Clean foam filters with warm soapy water. Dry them fully before reinstalling.
- Filter Replacement: Swap paper filters every two to three months or per the maker schedule.
- Brush Roll Cleaning: Cut away hair wrapped around the floor head brush roll every two weeks.
- Connection Inspection: Check all hose clips and seals monthly for wear or loose fit.
Frequently Asked Questions About Hose Clogs
What Is the Fastest Way to Clear a Vacuum Hose Clog?
The fastest method is to detach the hose. Use a long broomstick to push the blockage out from one end. You can also drop a handful of dry rice through the tube first to help scrape the walls clean before rinsing with warm water. This mix usually clears a standard clog in under ten minutes.
Can a Vacuum Hose Clog Damage the Motor?
Yes, a severe clog forces the motor to work much harder than it should. The extra strain causes the motor to overheat. This can trigger a thermal shutoff or, over time, burn out the windings. Clearing the blockage quickly protects the motor from heat damage. Extends the overall machine lifespan.
How Often Should You Inspect the Vacuum Hose for Clogs?
You should inspect the hose at least once a week if you vacuum daily. For typical home use, a quick light check every five cleaning sessions is enough to catch early buildup. More frequent checks help if you have pets that shed a lot of hair or if you often vacuum small debris like crumbs.
Is It Safe to Use Water to Clean Inside the Vacuum Hose?
Warm tap water is safe for most detachable vacuum hoses made of plastic or rubber. You should never put a motorized vacuum unit or a non-detachable hose under running water. Always let the hose dry completely for at least twenty-four hours before reconnecting it to the machine.
What Household Items Commonly Cause Vacuum Hose Clogs?
The most common culprits are small toys, coins, hair ties, earrings. Large clumps of pet hair. Food crumbs and cereal pieces also clump together inside the hose when they mix with moisture. Keeping these items picked up from the floor before vacuuming greatly reduces the chance of a blockage.
Does a Clogged Hose Affect the Vacuum Filter Life?
Yes, a clogged hose forces the motor to pull harder. This pushes more fine dust through the filter. This extra load clogs the filter faster and reduces its strong life. Keeping the hose clear helps the filter last longer and keeps the vacuum running well.
Final Thoughts and Next Steps
Learning how to unclog a vacuum cleaner hose gives you the confidence to handle most suction problems on your own. You now know how to check the hose, find the clog. Clear it with simple tools you already have at home. These skills save you time and money. Meanwhile, keeping your vacuum running at full power for every cleaning session.
Remember that prevention is the most strong tool in your upkeep kit. A quick weekly check of the hose. Filters stops small buildups from turning into major blockages. Storing the vacuum properly and teaching your home what items to keep away from the floor head also makes a big difference over time.
When a clog does appear, follow the steps in this guide calmly and safely. Start with the easiest checks and move to deeper methods only if needed.
If the problem persists after you have cleared the hose. Wand, it may be time to inspect the filters or call a pro technician. A well-maintained vacuum is one of the most steady tools in any home. A little regular care goes a long way toward keeping it that way.