
Nothing kills a cleaning session faster than a dead battery. You grab your vacuum, push the button, and hear nothing but silence. This frustration hits every owner of a cordless model at some point. Many people assume the problem is a broken machine when the real issue is simple charging behavior.
When you learn How to Charge a Cordless Vacuum Properly, you stop guessing and start trusting your tool. Small habits like where you place the dock. When you plug it in make a huge difference. These choices protect battery health and keep suction strong for years.
Applying these proven insights on How to Charge a Cordless Vacuum Properly helps you avoid costly mistakes. This guide gives you clear, practical steps you can follow right now. You will learn the right setup, the best timing. The upkeep habits that extend battery life. We also cover common mistakes that quietly damage your motor and charging circuit.
By the end, you will know exactly how to store, charge. Maintain your vacuum with confidence. You will save money on spares and never face a dead battery mid-clean again.
📌 AT A GLANCE
- ✓Correct Dock Placement: Always set the charging station on a flat, cool surface away from direct sunlight.
- ✓Charging Timing: Plug the vacuum in after every use or when the battery indicator drops below half.
- ✓Contact Cleaning: Wipe the metal terminals on the vacuum and dock every two weeks.
- ✓Storage Temperature: Keep the device and charger in a dry room between 50°F and 77°F.
- ✓Full Cycle Discipline: Let the battery run down to near empty once a month before a full recharge.
In this article
Why Proper Charging Protects Your Vacuum Investment
A cordless vacuum relies on a lithium-ion battery pack to give strong suction. Charging habits directly control how long that pack lasts. Heat, overcharging, and dirty contacts all wear down the cells faster than normal use. Understanding the core science helps you avoid simple mistakes that shorten battery life.
Gather required tools and clear your work area before starting.
Confirm baseline specs and maker guidelines first.
Complete each stage in order without skipping safety checks.
Run a quick test pass and wipe down key parts after use.
The charging process pushes lithium ions between two internal plates. When you leave the vacuum plugged in for days, the pack stays at peak voltage. This constant pressure stresses the chemistry and generates excess heat. Over time, the battery holds less charge and loses runtime. For our complete category overview. Core buyer criteria, explore our cornerstone guide to Why Your Vacuum Cleaner Keeps Failing and Fixes.
- Heat Buildup: Charging near a heater or in direct sunlight raises cell heat past safe limits.
- Voltage Stress: Keeping the battery at 100 percent for long periods strains the internal materials.
- Deep Discharge: Running the vacuum until it stops completely can push the cells below safe voltage.
- Dirty Contacts: Dust on the metal pins creates resistance, which slows charging and generates heat.
- Wrong Charger: Using a non-matching power adapter changes the current. Can damage the battery management board.
The best approach balances steady charging with gentle handling. A little attention to the dock location and plug timing pays off in longer runtime. You protect your investment every time you follow these simple steps.
The Best Way to How to Charge a Cordless Vacuum Properly Step by Step
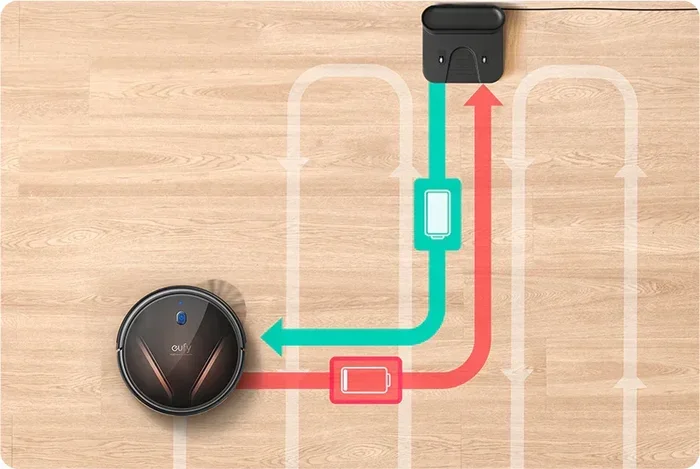
Follow this simple sequence every time you charge your vacuum. The process takes less than a minute and keeps the battery healthy. First, you prepare the device, then you connect the charger correctly. Finally you monitor the indicator light. Steadiness in these small actions prevents most charging problems.
Set a recurring weekly alarm on your phone labeled “Vacuum Dock Check.” This tiny habit reminds you to wipe the contacts. Confirm the indicator light behaves normally. Steady small checks prevent silent battery drain. Charging faults before they affect your cleaning routine.
Always place the dock on a hard, flat surface before you plug it in. Carpet, blankets, or soft mats trap heat around the charging port. A cool, open spot lets the battery vent warmth safely. Once the dock is set, you can attach the vacuum with confidence.
- Dock Surface Check: Place the charger on a hard floor or shelf, not on carpet or fabric.
- Pinion Alignment: Slide the vacuum onto the dock until the magnets click firmly into place.
- Light Observation: Watch the indicator turn solid red or amber, which means charging has started.
- Full Charge Wait: Leave the vacuum attached until the light turns green or solid white.
- Unplug After Use: Remove the vacuum from the dock once the charge is complete to stop trickle stress.
This routine works for most major brands and models. If your manual lists a different indicator behavior, follow those specific instructions. The core idea stays the same: connect, monitor, and remove when full.
Essential Equipment for Safe and Efficient Charging
You do not need many tools to charge your vacuum correctly. But the right gear helps. A clean, dry workspace prevents dust from entering the charging port. Having a few simple items ready makes the process faster and safer. Good equipment also reduces the risk of electrical issues.
The original charger that came with your vacuum is the safest option. Spare adapters must match the voltage and amperage listed on the label. A mismatched power brick can give too much current, which overheats the battery cells. Using the correct supply protects the internal circuit board.
- Original Charger: The factory adapter ensures the correct voltage and current for your specific model.
- Soft Cleaning Cloth: A dry microfiber cloth removes dust from the charging pins and dock contacts.
- Thermometer: A simple digital thermometer checks that the charging surface stays below 104°F.
- Electrical Outlet Tester: This small tool confirms your wall outlet provides stable power without surges.
- Storage Bin: A clean container keeps spare filters and tools away from the charging station.
Before you plug anything in, inspect the cable for fraying or damage. A cracked wire exposes the inner conductors and creates a shock risk. Replace any damaged charger right away and never use tape to fix a broken cord. Safe equipment choices protect you and your vacuum.
Common Mistakes That Damage Battery Health
Many owners unknowingly harm their vacuum batteries through daily habits. Leaving the device on the charger for weeks seems harmless at first. However, this habit puts constant stress on the lithium cells. Over time, the battery swells, holds less charge, and eventually fails.
Another common error is charging in a hot garage or near a window. Direct sunlight heats the battery past safe limits while it tries to absorb power. The same problem happens when you vacuum right away after a long charge. That is because the pack is already warm. Heat is the biggest enemy of lithium-ion chemistry.
- Overnight Charging: Leaving the vacuum on the dock for days keeps the cells at peak voltage stress.
- Hot Garage Storage: Charging in direct sun or near heat sources raises cell heat dangerously.
- Ignoring Warning Lights: A flashing red light often signals a fault, not just a low battery.
- Full Drain Habit: Running the vacuum until it stops completely deep-cycles the cells and shortens lifespan.
- Third-Party Adapters: Cheap spare chargers often give unstable current that damages internal boards.
Breaking these habits takes a few weeks of conscious effort. Set a reminder to unplug the vacuum once the light turns green. Move the dock to a cool, shaded spot if your current location gets direct sun. Small changes now save you from a dead battery later.

How to Charge a Cordless Vacuum Properly in Different Seasons
Seasonal changes affect how your battery accepts and holds a charge. Cold winter air slows the chemical reactions inside lithium cells. Hot summer heat speeds up degradation and can cause swelling. Adjusting your routine with the seasons keeps power stable year round. For broader testing and full category picks, explore our in-depth guide to Why a Vacuum Cleaner Loses Suction Over Time and How to Fix It.
In winter, bring the vacuum. Dock into a warm room before you plug them in. Charging a frozen battery forces current through resistant cells, which generates excess heat. In summer, avoid charging in a closed car or near a radiator. A stable indoor heat gives the battery the best conditions to refill safely.
- Winter Warmup: Let the vacuum sit at room heat for 30 minutes before connecting the charger.
- Summer Shade: Keep the dock away from windows where sunlight raises the ambient heat.
- Humidity Check: High moisture can corrode the metal contacts. So use a dry cloth before charging.
- Seasonal Full Cycle: Once per season, run the vacuum until it stops and then charge it fully.
- Storage Mode: If you store the vacuum for months, keep the battery at about 50 percent charge.
These seasonal adjustments protect the battery from the extremes that cause long-term damage. The goal is to keep the heat and charge level in a safe middle range. A little planning with the weather helps your vacuum last for many cleaning sessions.
Maintenance Routines That Extend Battery Life
Regular care keeps the charging system working at peak speed. A clean dock and vacuum connector give power without resistance. Simple weekly habits prevent buildup that slows charging and generates heat. Upkeep also lets you spot small problems before they become big failures.
Start by inspecting the charging contacts on both the vacuum and the dock. Use a dry microfiber cloth to wipe away dust and lint. If you see green or white corrosion, dampen the cloth slightly with rubbing alcohol. Gently clean the metal pins. Always let the contacts dry fully before you reconnect the vacuum.
- Weekly Contact Wipe: Clean the metal pins on the vacuum. Dock every two weeks with a dry cloth.
- Monthly Full Discharge: Run the vacuum until it stops once a month, then charge it to 100 percent.
- Dock Vent Check: Ensure the charging station vents are not blocked by clutter or dust buildup.
- Battery Indicator Test: Press the power button monthly to check the charge lights work correctly.
- Cable Management: Coil the charger cord loosely. Store it away from sharp edges or heavy objects.
These routines take only a few minutes each week but add months or years to battery life. A clean connection charges faster and safer. You also avoid the frustration of a vacuum that dies mid-clean. This happens because of a hidden contact problem.
Troubleshooting Guide When Charging Problems Arise
Even with perfect habits, charging issues can still appear over time. A blinking red light, a warm battery, or a vacuum that refuses to charge all signal a specific cause. Most problems have simple fixes you can do at home without tools. Understanding what each warning means helps you respond quickly and safely.
Start by checking the most obvious things first. Is the wall outlet working? Is the power cord fully seated in both the wall and the dock? Often, a loose connection or a tripped outlet is the real culprit. If those check out, move on to the vacuum and dock contacts. For broader testing and full category picks, explore our in-depth guide to How to Fix a Vacuum with Weak Suction Fast Easily.
- Flashing Red Light: This usually means the battery heat is too high or too low for safe charging.
- Solid Red Light That Never Changes: The dock may not detect the vacuum, often due to dirty contacts or misalignment.
- Warm Battery During Charge: Unplug right away. Let the pack cool for at least 30 minutes.
- No Light At All: Try a different wall outlet. Inspect the power cable for visible damage or fraying.
- Intermittent Charging: Gently wiggle the vacuum on the dock to ensure the magnets and pins make full contact.
If none of these steps fix the problem, consult your owner manual or contact the maker. Some faults require a spare battery or charging board. Acting early prevents a small issue from turning into a costly repair or a dead vacuum.
Comparing Charging Methods and Runtime Expectations
Different vacuum models use slightly different charging systems and battery sizes. Understanding these differences helps you set realistic runtime expectations. A larger battery takes longer to charge but gives more cleaning time. The charging method also affects how quickly you get back to work.
Never attempt to open the vacuum battery pack or the charging station yourself. The internal cells store high energy and can cause burns or fire if punctured. Always rely on authorized service centers for any internal repairs or battery spares.
- Most Modern Vacuums: Most modern vacuums use a smart charger that reduces power flow when the battery reaches full size.
- This Trickle Protection: This trickle protection prevents overcharging and heat buildup.
- Older or Budget Models: However, older or budget models may lack this feature and need closer monitoring.
- Knowing Which Type: Knowing which type you own shapes your daily charging routine.
Summary Table: Charging Methods Compared
| Charging Method | Typical Full Charge Time | Recommended Routine | Safety Level | Best For |
|---|---|---|---|---|
| Standard Dock Charging | 3 to 5 hours | Charge after each use | High | Daily home cleaning |
| Fast Charge Mode | 1 to 2 hours | Use only when urgent | Medium | Emergency touch-ups |
| removable Battery Charge | 4 to 6 hours | Charge spare battery separately | High | Multi-floor homes |
| USB-C Portable Charge | 6 to 8 hours | Use with a 5V/2A adapter | Medium | Travel and quick top-ups |
The table above shows the trade-offs between speed, safety, and ease. Standard dock charging offers the best balance for everyday use. Fast charge modes generate more heat, so limit them to occasional use. Always match the charger type to your specific model for the safest results.
Final Thoughts and Next Steps
Charging your cordless vacuum properly is one of the easiest ways to protect your investment. A few simple habits, like placing the dock on a cool surface. Unplugging the vacuum when full, add years of steady service. These routines take seconds but prevent costly battery spares and frustrating downtime.
You now have the practical steps, seasonal tips, and troubleshooting tools to charge with confidence. Start by checking your current dock location and cleaning the contacts this week. Small, steady actions build into long-term power that keeps your home clean without interruptions.
Share what you have learned with family members who also use cordless vacuums. Good charging habits protect every device in your home. You can now enjoy strong suction, longer runtime. The peace of mind that comes from knowing you care for your tools the right way.
Frequently Asked Questions
How Long Should I Charge My Cordless Vacuum for the First Time?
Charge the vacuum for the full time listed in the manual, usually 3 to 5 hours. A complete first charge helps the battery management system calibrate correctly. Avoid using the vacuum until the indicator shows a full charge.
Can I Leave My Cordless Vacuum on the Charger All the Time?
You should not leave it plugged in nonstop for more than a few hours after it reaches full charge. Modern smart chargers reduce power flow, but long-term trickle charging still stresses the battery. Unplug the vacuum once the light turns green.
What Should I Do If the Vacuum Gets Hot While Charging?
Unplug the vacuum right away and move it to a cool, shaded spot. Let the battery cool for at least 30 minutes before you check the contacts. If the heat returns during the next charge, stop using the device and contact the maker.
Is It Safe to Charge the Vacuum in a Garage or Outdoor Shed?
Charging in an unheated garage exposes the battery to cold or hot heat swings. These extremes reduce battery size over time. Always charge in a dry, heat-controlled indoor space for the safest results.
How Often Should I Replace the Battery Pack on My Cordless Vacuum?
Most battery packs last 2 to 3 years with proper charging habits. If you notice the runtime dropping greatly after a full charge, the pack may be degrading. Replace the battery with an OEM or certified fit model to maintain safe use.