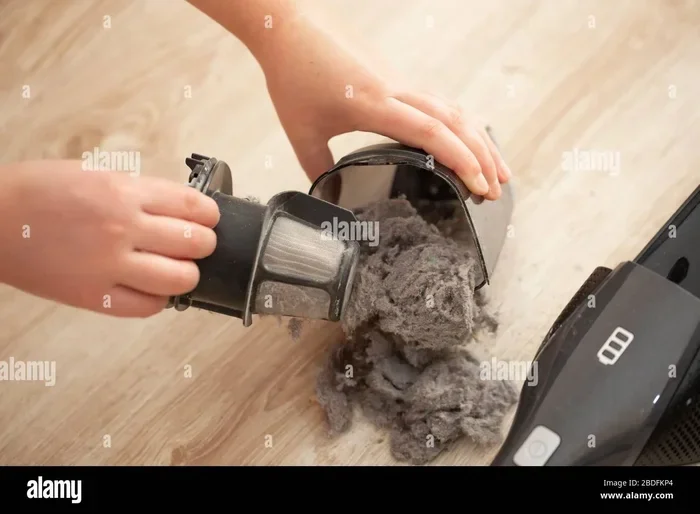
Nothing kills a good cleaning session faster than a vacuum that sounds like a dying jet engine. A worn-out motor turns your trusty tool into a loud, weak shadow of itself.
Many people toss the whole machine when the motor fails. But that is not always necessary. Learning How to Replace Vacuum Cleaner Motor can save you money. Keep your favorite cleaner running for years.
Replacing the motor is not as scary as it sounds once you break the job into clear steps. This guide walks you through the whole process from start to finish. You will learn what tools you need, how to remove the old motor safely. How to install the new one without guesswork. By the end, you will feel confident tackling this repair on your own.
📌 AT A GLANCE
- ✓Core Concept: understanding motor types helps you pick the right spare part.
- ✓Essential Step: disconnecting power before you touch any internal parts keeps you safe.
- ✓Safety Rule: waiting for capacitors to discharge prevents painful electrical shocks.
- ✓Efficiency Tip: photographing each step during taking apart makes reassembly much easier.
- ✓Long-Term Care: cleaning airflow paths after the swap extends the new motor’s life.
In this article
Why Replacing the Motor Matters for Vacuum Performance
A vacuum motor is the heart of the cleaning system. It creates the suction that pulls dirt, dust, and debris into the canister or bag. When the motor weakens, airflow drops, and your cleaner stops picking up particles well.
Replacing a failed motor restores full suction power and breathing room for your machine. Many users skip this repair because they fear electrical work. But the process is straightforward with the right guidance. For our complete category overview. Core buyer criteria, explore our cornerstone guide to Why Your Vacuum Cleaner Keeps Failing and Fixes.
Gather required tools and clear your work area before starting.
Confirm baseline specs and maker guidelines first.
Complete each stage in order without skipping safety checks.
Run a quick test pass and wipe down key parts after use.
Understanding How to Replace Vacuum Cleaner Motor starts with recognizing the signs of motor failure. Common clues include a burning smell, unusual grinding noises, or sudden loss of suction during use. Ignoring these signs can damage other parts like the belt or fan blades.
A fresh motor also improves energy speed because it draws power smoothly without straining. This guide covers every detail you need to feel safe and prepared.
- Motor Function Basics: The spinning rotor creates suction that pulls air. Debris through the hose and into the collection chamber.
- Failure Warning Signs: Burning smells, loud grinding, or sudden power drops often signal internal motor winding or bearing damage.
- Cost vs Replacement: A new motor usually costs less than half the price of a brand-new vacuum cleaner.
- Safety First Mindset: Always unplug the unit. Wait for stored energy to dissipate before touching any internal parts.
- Performance Recovery: A fresh motor restores original airflow. This improves cleaning speed and reduces strain on the belt system.
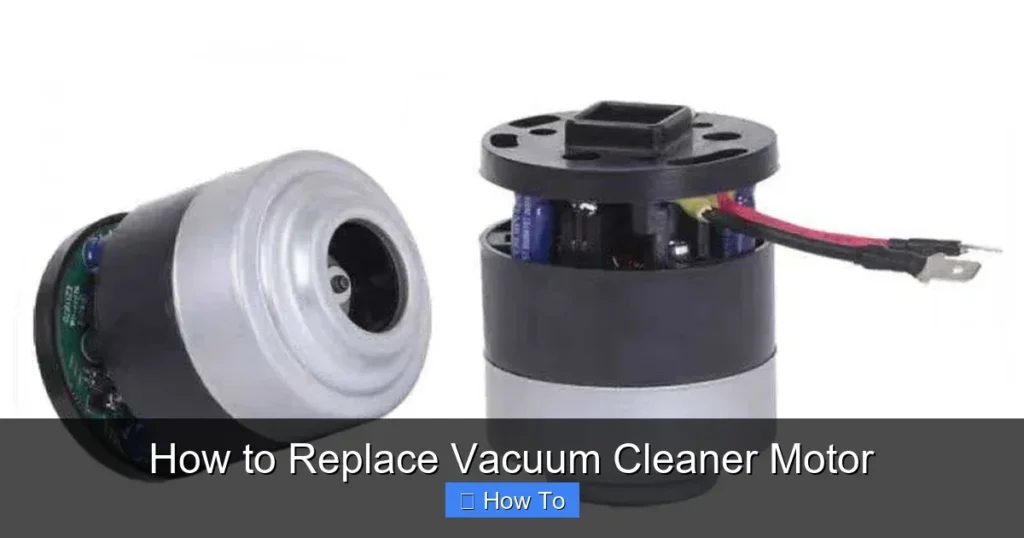
Knowing what happens inside the motor helps you handle the job with care. The stator holds stationary windings that create a magnetic field. The rotor spins inside that field, connected to the fan that moves air.
Dust and hair often clog the ventilation channels around these parts. When you replace the motor, you also get a chance to clear those blockages for better cooling.
Gathering the Right Tools and Replacement Parts
Before you open the vacuum, collect everything you will need for the job. Having the correct spare motor is the most key step. You can find the exact model number on the old motor’s label or in your vacuum’s manual.
Always take clear photos of the wiring layout before you disconnect anything. These reference pictures make reassembly much faster and help you remember which wire connects where.
Matching the voltage, wattage, and shaft size ensures the new motor fits and runs correctly. Using the wrong part can cause overheating or poor power. Next, gather basic hand tools like screwdrivers, pliers, and a multimeter to check electrical connections.
Organizing your workspace prevents frustration during the repair. Lay out a clean towel or mat to place small screws and parts on. A magnetic tray works wonders for keeping tiny hardware from rolling away.
Good lighting helps you see fine wires and connectors clearly. Working on a stable table with plenty of room lets you move parts safely without rushing. A clean, well-lit space also reduces the risk of accidentally damaging sensitive parts.
- Exact Replacement Motor: Match the part number from your old motor label or vacuum manual to ensure correct fit and electrical specs.
- Screwdriver Set: A variety of Phillips. Flathead drivers helps you remove the outer shell and internal mounting brackets safely.
- Multimeter Tool: This device checks for continuity. Confirms that electrical connections are intact before you reassemble the machine.
- Soft Cleaning Cloth: A lint-free cloth removes dust. Debris from the motor housing and internal airflow channels during the swap.
- Small Parts Tray: A magnetic or divided tray keeps screws, clips. Washers organized so you do not lose them.
- Insulated Gloves: Wearing rubber-coated gloves adds a layer of protection when handling any remaining electrical contacts.
Take a moment to check the new motor before you start the swap. Check the shaft length and diameter against the old part. Confirm the mounting hole pattern matches the housing. Some motors include a new fan blade, which saves you a separate buy. Having all parts ready means you can complete the job in one focused session without interruptions.
Step-By-Step Process for How to Replace Vacuum Cleaner Motor
Now it is time to move from preparation to action. The process follows a clear sequence of removing the old motor and installing the new one. You will work through the outer shell first, then disconnect the wiring. Finally swap the motor unit itself.
Each step builds on the last, so do not skip ahead. Taking your time ensures you do not damage nearby parts or forget a small but key connection.
Understanding How to Replace Vacuum Cleaner Motor becomes much easier when you treat each stage as a separate mini-task. Start by flipping the vacuum upside down and removing the bottom plate. This gives you access to the motor housing. The belt if your model uses one.
Next, locate the screws that hold the motor mount in place. Keep all screws in a safe spot because you will need them later. Patience during this phase pays off when the reassembly goes smoothly.
- Unplug and Wait: Disconnect the power cord fully and wait at least ten minutes for any stored electrical charge to dissipate safely.
- Remove Outer Shell: Flip the vacuum over, remove the bottom plate. Carefully take off the outer housing screws one by one.
- Disconnect Wiring: Use your photos as a guide to detach the motor wires from the switch and power cord connections gently.
- Release Mounting Brackets: Loosen the screws or clips that hold the motor in the housing. Slide the old motor unit out carefully.
- Install New Motor: Place the new motor into the housing, align the mounting holes. Secure it with the brackets you removed earlier.
- Reconnect Wires: Follow your reference photos to reconnect each wire to its correct terminal. This ensures a snug and secure fit.
After you reconnect the wires, give the assembly a gentle tug to confirm nothing is loose. The new motor should sit firmly in place without wobbling. Before you close the housing, take a moment to look around the workspace.
Check that no tools or small parts remain inside the vacuum body. This simple check prevents rattling noises and internal damage later on.
Testing the New Motor Safely After Installation
Once the new motor is in place, resist the urge to plug the vacuum in right away. First, inspect all wire connections to make sure they are secure and properly seated. Look for any stray strands of copper that could touch the metal housing.
Use your multimeter to check for continuity across the power cord and switch. This quick check confirms that electricity will flow correctly through the new motor without short circuits.
Testing should happen in a clear, open area away from flammable materials. Plug the vacuum in and switch it on at the lowest speed setting first. Listen carefully for any unusual grinding or humming sounds that were not present before.
Feel the motor housing gently with the back of your hand to detect any hot spots. A properly functioning motor should run smoothly. Feel warm but not hot to the touch. If anything feels wrong, turn the vacuum off right away and double-check your wiring.
- Visual Wire Check: Inspect every connection point for loose strands, frayed insulation, or wires touching the metal housing before powering on.
- Low Speed Test: Start the vacuum on the lowest setting to reduce stress on the new motor during the first few seconds of use.
- Sound and Vibration Check: Listen for smooth humming and feel for steady vibration. This indicates the rotor is balanced correctly inside the housing.
- Heat Sensing: Use the back of your hand to gently check the motor housing after two minutes of running to confirm it stays warm but not hot.
- Suction Power Test: Hold the hose nozzle over a small pile of debris. Check that the vacuum picks up particles with strong, steady airflow.
- Automatic Shutoff Check: If your model has a thermal cutoff, let the motor run for several minutes to ensure it does not trigger an early shutdown.
A successful test run means your How to Replace Vacuum Cleaner Motor job is complete and working as intended. If the motor fails to start, turn it off. Recheck the wiring diagram you photographed earlier. Sometimes a wire slips off the terminal during the final assembly steps.
Fixing this early saves you from more serious damage later. A well-tested motor gives you confidence that your vacuum will handle tough cleaning jobs without hesitation.
Common Mistakes to Avoid During Motor Replacement
Even with clear instructions, small mistakes can turn a simple repair into a bigger problem. One of the most common errors is forcing a wire connector that does not fit. This can bend the metal contacts inside the plug and create a loose connection.
Another frequent issue is forgetting to remove a small screw or clip before trying to slide the motor out. Forcing the housing closed with a part still trapped inside can crack the plastic shell. Taking a slow, methodical approach helps you avoid these preventable setbacks. For broader testing and full category picks, explore our in-depth guide to How to Replace a Broken Vacuum Belt in Minutes.
Electrical safety deserves extra attention during any motor swap. Skipping the discharge step for internal capacitors can lead to a painful shock even after the unit is unplugged. Mixing up wire connections during reassembly can send power to the wrong parts. This may damage the switch or control board.
Always refer to your reference photos and test each connection before you close the housing. A little extra care now protects both you and your new motor from early failure.


- Forced Connector Risk: Never push a wire plug that does not slide in easily. This happens because this bends internal metal contacts and creates a loose fit.
- Forgotten Screw or Clip: Always scan the motor area for hidden fasteners before you try to remove or install the motor unit itself.
- Capacitor Discharge Skip: Wait for stored energy to dissipate fully before touching any internal wiring or motor terminals to stay safe.
- Mixed Up Wires: Follow your photographed wiring diagram exactly so each wire goes back to its correct terminal without confusion.
- Rushing Reassembly: Closing the housing before checking all connections can trap tools or parts inside and cause damage during use.
- Ignoring Heat Signals: If the motor housing gets too hot during the test run, turn it off right away. Recheck the wiring for short circuits.
Learning from other people’s mistakes makes your repair use smoother and safer. Most errors come from rushing or skipping a simple verification step.
By working slowly and checking each connection twice, you protect your new investment and extend the life of your vacuum. This careful mindset also applies to future upkeep tasks you may tackle on your own.
Maintaining Your New Motor for Longer Life
A new motor deserves regular care to keep it running strong for years. The most key habit is cleaning the airflow paths after every few uses. Dust and fine particles build up around the motor housing and block ventilation slots.
When airflow gets restricted, the motor works harder and generates excess heat. Over time, this heat degrades the internal windings and shortens the motor’s lifespan. A quick cleaning routine prevents this buildup and keeps the motor cool during use.
Checking the belt and filters regularly also reduces strain on the new motor. A worn belt forces the motor to pull harder. This drains power and creates extra wear. Replace the belt at the first sign of cracking or stretching.
Clean or swap out filters when they look clogged. That is because a blocked filter limits airflow just like dust on the housing does. These small habits add up to a big difference in how long your motor lasts between repairs.
- Regular Dust Clearing: Use a soft brush or compressed air to remove dust from motor ventilation slots every one to two weeks.
- Belt Inspection Routine: Check the belt for cracks or stretching monthly. Replace it promptly when you notice any wear.
- Filter Cleaning Schedule: Wash or replace filters according to your vacuum’s manual to keep airflow unrestricted around the motor.
- Hose and Nozzle Check: Clear blockages from the hose and nozzle regularly. This happens because clogs force the motor to work against higher resistance.
- Storage Best Practices: Store the vacuum in a dry area away from moisture. This can corrode motor connections and internal parts over time.
- Annual Electrical Check: Once a year, inspect the power cord. Plug for fraying or damage that could affect motor power.
Simple upkeep habits turn a motor spare into a long-term investment. When you keep the airflow clear. The belt in good shape, the new motor does not have to work overtime.
This means lower energy bills and a quieter cleaning use. A well-maintained vacuum also picks up dirt more well. This keeps your home cleaner with less effort.
Comparing Motor Types and Compatibility Options
Vacuum motors come in different shapes and sizes depending on the brand and model. Some motors use a standard shaft size that fits many popular cleaner brands. Others are brand-specific designs. Universal motors are common in home vacuums. This happens because they run on alternating current and give strong suction.
Understanding the differences helps you choose the right spare motor for your specific machine. Matching the correct type ensures fit and prevents power issues after the swap.
When comparing motors, pay close attention to the voltage. Wattage ratings printed on the label. A motor with higher wattage usually produces stronger suction but may draw more power. The shaft diameter and length must also match the old part exactly.
Some motors include a built-in fan blade. Others require you to transfer the old blade over. Checking these details before you buy saves time. Prevents the frustration of a poor fit during installation.
- Universal Motor Design: These motors run on home AC power. Are found in most standard upright and canister vacuum cleaners.
- Brand-Specific Fit: Some makers use unique housing shapes or mounting patterns that only match their own motor models.
- Voltage and Wattage Match: Always confirm the new motor’s electrical ratings match the original to ensure safe and fast use.
- Shaft Size Check: Measure the diameter. Length of the old motor shaft to guarantee the spare part connects to the fan correctly.
- Fan Blade Inclusion: Some spare motors come with a new fan blade attached. This saves you the step of transferring the old one.
- Thermal Protection Features: Modern motors often include a built-in thermal cutoff that shuts the motor down if it overheats during use.
Using a reference table helps you compare the key specs side by side before you order a spare motor. The table below highlights the most key factors to consider during your selection. This quick visual guide saves you from guessing. Ensures you pick the right part for your vacuum cleaner.
Summary Table: Motor Replacement Options Compared
| Motor Type | Voltage Range | Shaft Fit | Fan Blade | Thermal Protection | Best For |
|---|---|---|---|---|---|
| Universal Standard | 110V – 120V | Standard size | Included | Yes | Most household uprights |
| Brand-Specific | 110V – 120V | Unique pattern | Separate | Yes | Proprietary canister models |
| High-Performance | 120V – 240V | Oversized | Included | Yes | Heavy-duty commercial use |
| Compact Replacement | 110V – 120V | Small size | Separate | No | Lightweight handheld vacuums |
| Energy-Efficient | 110V – 120V | Standard size | Included | Yes | Eco-friendly home models |
Consulting this table before you buy helps you avoid costly returns. Ensures the new motor works with your vacuum. When in doubt, share the old motor’s label details with the supplier to confirm fit. The right match leads to a smooth installation. Strong, steady suction for years to come. For broader testing and full category picks, explore our in-depth guide to Why a Vacuum Cleaner Loses Suction Over Time and How to Fix It.
Troubleshooting Common Issues After Motor Replacement
Even a careful motor spare can sometimes lead to unexpected issues during the first few uses. A common problem is the vacuum losing suction shortly after the swap. This often happens when the new motor’s airflow path is not fully clear.
Never force any wire connector during reassembly. If a plug does not slide back in easily, double-check that you are using the correct terminal. That the clip is fully released.
Dust or packaging debris from the new motor can block the ventilation grilles. Another possible cause is a wire that did not seat fully on its terminal, creating intermittent contact. Checking these simple areas first usually solves the problem quickly.
Unusual noises after a motor change can also signal a misalignment or loose part. A grinding sound might mean the fan blade is rubbing against the housing. A humming noise that stops after a few seconds often points to a thermal cutoff tripping because of restricted airflow.
In some cases, the new motor simply needs a few minutes of running to seat the internal bearings properly. If the noise persists, turn the vacuum off. Inspect the fan blade and housing for any obstructions or loose screws.
- Suction Loss Check: Clear any dust or debris from the new motor’s ventilation grilles. Confirm all wire connectors are fully seated.
- Noise Diagnosis: Listen for grinding or humming sounds. Inspect the fan blade for contact with the housing or loose mounting screws.
- Thermal Cutoff Reset: If the motor shuts off quickly, let it cool for fifteen minutes. Check that airflow paths are completely clear of blockages.
- Intermittent Power: A wire that is not fully clipped onto its terminal can cause the motor to cut in and out during use.
- Bearing Break-In: A slight change in sound during the first few uses is normal as the new motor bearings settle into smooth use.
- Electrical Test: Use your multimeter to check that the switch. Power cord give steady voltage to the new motor under load.
Most post-spare issues resolve quickly with a few simple checks. Starting with the easiest fixes saves you time and prevents unnecessary worry. Remember that a new motor sometimes sounds slightly different from the old one during the first few uses.
This is normal and usually settles down as the internal parts wear in together. If a problem continues after these checks, consult a qualified technician for further diagnosis.
Final Thoughts and Next Steps
Replacing a vacuum cleaner motor is a satisfying repair that extends the life of your machine and saves you money. By following the steps in this guide, you can handle the job with confidence and care. You now know how to gather the right parts, safely remove the old motor. Test the new one for steady power.
The key is to work slowly, double-check every connection, and never skip safety precautions. A successful motor swap leaves your vacuum running strong and your home cleaner than ever.
Regular upkeep after the spare keeps your new motor in top shape for years to come. Clean the airflow paths, inspect the belt, and replace filters on schedule. These small habits prevent the kind of strain that leads to early motor failure.
When you treat your vacuum with respect, it rewards you with steady suction and quieter use. A well-maintained machine also handles tough cleaning tasks with ease. This makes every session faster and more strong.
Now that you understand How to Replace Vacuum Cleaner Motor, you have the skills to tackle this repair without pro help. Share your use with friends or family who struggle with a weak vacuum.
Your knowledge empowers others to fix their own machines and avoid unnecessary waste. With the right tools, a careful approach. A little patience, you can keep your vacuum running like new for many cleaning seasons ahead.
Frequently Asked Questions
How Long Does It Take to Replace a Vacuum Cleaner Motor?
Most people complete the job in one to two hours. The time depends on how easily you can access the motor. How many screws your model requires. Having your photos and tools ready helps you move through each step without pauses.
Can I Replace the Motor Myself If I Have No Electrical Experience?
Yes, the process is designed for DIYers with basic tool skills. The most key steps are unplugging the unit and following your reference photos. If you stay patient and check each connection twice, you can do this safely.
Where Can I Find the Correct Replacement Motor for My Vacuum?
Check the label on the old motor for the part number and voltage rating. You can search online marketplaces or contact the vacuum maker directly. Matching the shaft size and mounting pattern ensures the new motor fits correctly.
Is it normal for the new motor to smell slightly warm during the first use?
A mild warm smell is normal during the first few runs as the internal parts settle. However, a strong burning smell or too much heat means you should turn the vacuum off. Check your wiring connections right away.
What Should I Do If the New Motor Does Not Start at All?
First, turn the vacuum off and unplug it. Recheck every wire connection against your reference photos. Use your multimeter to confirm the power cord. Switch give voltage to the motor terminals correctly.
Do I Need to Replace the Belt When I Swap Out the Motor?
Not always, but it is a good idea to inspect the belt closely during the motor swap. If the belt shows cracks, stretching, or wear, replacing it alongside the motor prevents future downtime and keeps suction strong.