Nothing breaks a cleaning session faster than a vacuum that barely picks up dust. You push the machine over a carpet and watch crumbs sit right there, mocking you. That weak pull makes a simple chore feel endless and frustrating. In fact, most owners face this exact problem at least once a year.
The good news is that you can solve this yourself in most cases. How to Fix Weak Vacuum Suction starts with a few simple checks you can do right at home. You do not need expensive tools or a repair technician for the majority of these fixes. This guide walks you through every step with clear instructions and safety tips.
We will start with quick safety checks and then move into deeper diagnosis. You will learn to spot the real cause fast and apply the right fix. Each section gives you actionable steps, common signs. Expert tips to save your time and money.
By the end, you will know exactly what to do when suction drops again. You will also learn how to stop the problem from coming back. Let us get your vacuum working at full power once more.
⚡ FAST DIAGNOSTIC OVERVIEW
- ✓Primary Symptom: The vacuum picks up debris very slowly or leaves dust behind on floors and carpets.
- ✓Most Common Cause: A clogged hose, full dust bag, or blocked air filter chokes the airflow completely.
- ✓Quick Test: Run your hand along the hose and feel for air leaks or kinks that block suction flow.
- ✓Safety Precaution: Always unplug the machine and let the motor cool for ten minutes before any inspection.
- ✓Prevention Rule: Clean or replace filters every one to three months and empty the dust container after each use.
In this article
Essential Guide to How to Fix Weak Vacuum Suction: Key Insights
Safety comes first every single time you open a vacuum for repair. A plugged-in machine can cause electric shock or sudden motor spin. You also risk burning your hands on hot motor parts if you touch them too soon. Taking five minutes to follow basic safety steps protects you and your machine.
Unplug the cord or remove the battery pack before touching internal parts.
Inspect intakes, hoses, filters, and moving joints for trapped debris.
Let the motor cool for 30 minutes so the safety cut-off resets cleanly.
Check belts, seals, and switches before replacing major assemblies.
Start by finding the power switch and unplugging the cord completely. Do not just turn the machine off. Pull the plug from the wall outlet so there is zero power to the motor. Next, let the vacuum sit for ten minutes so the motor cools down. Hot parts can burn you. Can also warp plastic housing if you press on them too soon. For our complete category overview. Core buyer criteria, explore our cornerstone guide to Why Your Vacuum Cleaner Keeps Failing and Fixes.
- Power Disconnection: Always pull the plug from the wall outlet before touching any internal parts or hoses.
- Cool-Down Wait: Let the motor rest for ten minutes to avoid burns and prevent accidental startup.
- Protective Gloves: Wear thick gloves to shield your hands from sharp edges on broken plastic or metal parts.
- Clear Work Area: Move all children. Pets away from your work space before you begin any inspection.
- Dry Hands Only: Never handle plugs or internal parts with wet hands to reduce the risk of electric shock.
Once you finish these safety steps, you can begin the actual diagnosis with full confidence. You have removed the two biggest risks from the process. Now you can focus on finding and fixing the suction problem safely.
Diagnostic Matrix and Root Causes Breakdown
Weak suction usually comes from one of three root problems. Either air cannot get into the machine, air cannot get out, or the motor itself is weak. Each path has a specific set of causes that you can check one by one. This section breaks down the main root causes so you can isolate the culprit fast.
Expert Technician Tip: Always clean your vacuum filters outside or over a trash bin. Shaking a dirty filter indoors spreads fine dust back into your breathing air and can trigger allergies.
The airflow in a vacuum works like a simple breathing cycle. The machine pulls air in through the nozzle, passes it through a filter. Pushes it out the exhaust. If any part of that loop gets blocked or leaks, the suction drops. In fact, even a tiny crack in a hose can cut your pulling power in half.
Symptom Identification and Error Signs
You can tell a lot about the cause just by watching and listening. A vacuum that makes a high-pitched whine but picks up nothing usually has a blocked intake path. A machine that vibrates heavily and smells like burning likely has a motor strain issue. Strange sounds often point to loose parts or debris stuck inside the fan.
- High-Pitched Whine: A tight, squealing sound often means the motor is straining against a severe airflow blockage.
- Burning Smell: This sign points to a motor overheating. This can happen when airflow is cut off for too long.
- Sudden Suction Loss: If suction drops mid-use, check the dust bag or canister. This happens because it may have filled up fast.
- Visible Debris Spitting: Dust blowing back out of the nozzle means the exhaust path is blocked or the seal is broken.
- Loud Rattling Noise: This usually signals a loose fan blade or a foreign object stuck inside the motor housing.
Once you match the symptom to a likely cause, you can move to the right fix section. Always start with the simplest and most common causes first. Most weak suction problems trace back to a clogged filter or a full dust container.
Step-By-Step Fix for a Clogged Hose or Wand
A blocked hose is the single most common reason for weak suction in any vacuum. Over time, dust, hair, and small debris build up inside the tube. This creates a thick wall that chokes the airflow. Stops your machine from pulling properly. The fix is usually simple and takes only a few minutes.
Start by detaching the hose from both the vacuum body and the floor nozzle. Hold it up to a window or bright light and look through it. If you cannot see light clearly through the tube, you have a clog. You can use a long, flexible wire or a straightened coat hanger to gently break up the blockage.
- Detach the Hose: Pull the hose off the main body. The nozzle to isolate the airway for cleaning.
- Use a Long Brush: A bottle brush or a long flexible broom handle works great to push debris out from both ends.
- Check for Kinks: Straighten any sharp bends in the hose. This happens because a kink can completely block airflow even without a clog.
- Run Water Through It: For washable hoses, flush warm water through the tube. Let it dry fully before reattaching.
- Test Suction Again: Plug the machine back in. Feel the air pull at the nozzle to confirm the fix worked.
After you clear the hose, always inspect the wand tube too. Debris often hides where the wand connects to the main body. A clean hose and wand restore full airflow and bring your suction power right back up.
How to Fix Weak Suction Caused by a Full Dust Bag or Canister
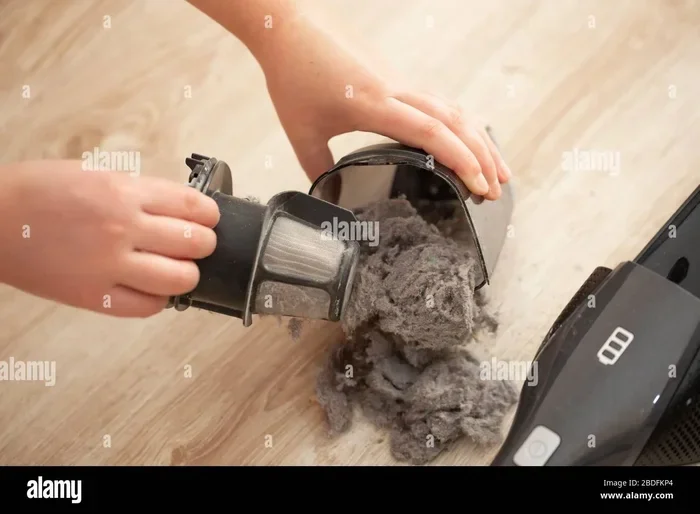
A vacuum bag or canister that is too full chokes the machine just like a clogged hose does. When the dirt container reaches about two-thirds full, airflow drops sharply. Many modern vacuums have a clear window so you can check the fill level at a glance. Emptying or replacing this part often solves the problem instantly.
For bagged models, you simply remove the old bag and drop in a new one. Make sure the new bag sits flat and seals properly in its housing. For bagless models, pull the canister out, empty the debris into a trash bin. Rinse it with water if the maker says it is safe to do so.
- Check the Fill Line: Most bags and canisters have a marked fill line. Never let the dirt go past that line.
- Use Correct Bags: Always buy bags that match your exact vacuum model to ensure a proper seal.
- Wash the Canister: Rinse the dust container with warm water. Let it dry completely before reinstalling it.
- Inspect the Seal: Look at the rubber gasket on the canister for cracks or gaps that let air leak out.
- Replace Old Bags: A torn or overly full bag loses suction. Can even let dust blow back into your room.
Emptying the dust container after every cleaning session keeps the vacuum running at peak power. This simple habit stops weak suction before it ever starts.
Clean or Replace the Air Filter to Restore Pulling Power
The air filter catches fine dust so it does not blow back into your room. Over time, that trapped dust builds up and blocks the filter. A dirty filter acts like a pillow pressed over the motor intake, cutting off the air supply and killing your suction. Cleaning or replacing this part is one of the easiest fixes you can do.
First, find the filter housing. This is usually near the motor or at the bottom of the machine. Slide the filter out and check it for visible dirt. If the filter is washable, rinse it under warm water until the water runs clear. If it is not washable, tap it gently to remove loose dust or replace it with a new one.
- Locate the Filter: Check your vacuum manual to find the exact position of the air filter inside the housing.
- Wash if Allowed: Only wash filters marked as washable by the maker to avoid damaging the filter material.
- Dry Completely: Let the filter air-dry for at least twenty-four hours before putting it back in the machine.
- Replace on Schedule: Swap out non-washable filters every three to six months for best suction power.
- Check the Seal: Make sure the filter sits snugly in its slot with no gaps that let air bypass the filter.
A clean filter makes a huge difference in how well your vacuum pulls dirt. This is one of the most overlooked fixes that instantly brings back lost suction.
Fix a Worn or Broken Drive Belt
The drive belt connects the motor to the brush roll that spins at the bottom of the vacuum. When this belt stretches, frays, or breaks, the brush roll stops turning. The machine may still run. But it loses the agitation that pulls dirt out of carpet fibers. Replacing the belt is a fast and inexpensive fix. For broader testing and full category picks, explore our in-depth guide to Why a Vacuum Cleaner Loses Suction Over Time and How to Fix It.


First, flip the vacuum over and remove the bottom plate where the brush roll sits. You will see the belt looped around the motor shaft and the brush roll axle. Pull the old belt off carefully and note how it sits. Then loop the new belt around the parts in the exact same way.
- Unplug the Vacuum: Always disconnect power before reaching inside the machine to remove the bottom plate.
- Remove the Bottom Plate: Use a screwdriver to take off the plate that covers the brush roll and belt area.
- Inspect the Brush Roll: Check the bristles for hair. String wrapped around the axle that can stop the roll from spinning.
- Install the New Belt: Place the new belt around the motor shaft. Brush roll following the original path exactly.
- Test the Spin: Plug the machine back in. Watch the brush roll spin freely without any grinding sound.
A new belt restores the spinning action that agitates carpet fibers and lifts trapped dirt. This simple swap often brings back the deep cleaning power you thought was lost forever.
Check the Suction Path for Leaks and Loose Connections
Air leaks in the suction path rob your vacuum of pulling power just like a hole in a tire lets air escape. The vacuum needs a sealed path to build strong suction. Even a small gap between two hose sections or a cracked fitting can drop the power dramatically. Finding these leaks is a key part of How to Fix Weak Vacuum Suction at home.
Start by reassembling the hose, wand, and nozzle. Turn the machine on and hold your hand near each connection point. If you feel air pushing out from a joint, you have found a leak. You can also run your hand along the full length of the hose to feel for cracks or holes.
- Inspect All Joints: Check every connection point where the hose meets the body or the nozzle for gaps or cracks.
- Tighten Clamps: Use a screwdriver to tighten any hose clamps that have loosened over time.
- Patch Small Cracks: A small crack in a rigid hose can sometimes be sealed temporarily with strong tape until you replace the hose.
- Replace Worn Seals: Check the rubber gaskets on the nozzle. Wand for wear and swap them if they look cracked.
- Test After Repair: Run the vacuum. Feel each joint again to confirm the leak is fully sealed.
Sealing the suction path ensures all the motor power goes into pulling dirt instead of escaping through gaps. This fix often makes a vacuum feel like brand new again.
When the Motor Itself Is the Problem
Sometimes the motor loses power because of internal wear or electrical failure. A motor that runs but produces weak suction may have damaged windings or worn carbon brushes. In other cases, the motor simply overheats and shuts down before reaching full speed. You can test for motor issues with a few simple checks.
First, listen to the sound of the motor when the vacuum is on. A healthy motor sounds steady and strong. A weak motor sounds strained, whiny, or rattling. You can also check the exhaust air to see if it feels as strong as it should. If the motor is the problem, you may need to replace it or call a pro.
- Listen for Strain: A motor that sounds rough or shaky often has internal electrical or mechanical wear.
- Check the Carbon Brushes: These small blocks inside the motor wear down over time. Need spare to keep the motor running strong.
- Test the Power Cord: A damaged cord can send inconsistent power to the motor and cause weak suction.
- Look for Burn Marks: Discoloration or a burnt smell near the motor means the parts may be damaged beyond repair.
- Call a Professional: Motor repairs require advanced skills. Should be left to trained technicians in most cases.
A failing motor often means the vacuum has reached the end of its practical repair life. In these cases, you must weigh the cost of a new motor against buying a new machine.
Troubleshooting Matrix for Weak Vacuum Suction
The table below matches common symptoms with their most likely root causes. The best fix for each. Use this quick reference to skip straight to the solution that matches your problem.
| Symptom / Issue | Probable Root Cause | Recommended Fix | Difficulty Level |
|---|---|---|---|
| Suction drops suddenly mid-use | Full dust bag or canister | Empty or replace the dirt container immediately | Easy |
| No air pull at the nozzle | Clogged hose or wand | Detach and clear the blockage with a long brush | Easy |
| Brush roll stops spinning | Worn or broken drive belt | Replace the drive belt with the correct model | Medium |
| Dust blows back out of nozzle | Clogged or missing air filter | Clean or replace the air filter | Easy |
| Air leaks from hose joints | Loose clamps or cracked hose | Tighten clamps or replace the damaged hose | Medium |
| Motor runs but feels weak | Damaged motor windings or brushes | Replace motor parts or seek professional help | Hard |
| Machine smells like burning | Overheated motor from blocked airflow | Clear all blockages and let the motor cool fully | Easy |
| Suction weakens on thick carpet | Brush roll not agitating carpet fibers | Check belt tension and clean the brush roll | Medium |
When to Replace vs Call a Professional
Knowing when to stop fixing and start replacing saves you time and money. If the motor is burned out or the main housing is cracked beyond repair, a new vacuum is usually the smarter choice. You should also consider spare when the repair cost exceeds half the price of a new machine. A pro technician can help you make that call.
Call a pro when the problem involves the motor, internal wiring, or electrical circuits. These parts require specialized tools and safety knowledge. For broader testing and full category picks, explore our in-depth guide to What Causes a Vacuum Cleaner to Smell Bad and How to Fix It.
A trained technician can test the electrical parts safely. Replace them without risking further damage. For simple clogs, belt swaps, and filter changes, you can handle everything yourself at home.
- Motor Failure: A burned-out motor often costs more to repair than a new vacuum unit.
- Cracked Housing: A broken main body cannot seal properly and will always lose suction.
- Electrical Issues: Any problem with the power cord, switch, or internal wiring needs a pro.
- Repeated Breakdowns: If the same part breaks multiple times, the machine may be at the end of its life.
- Simple Clogs and Belts: These are perfect DIY fixes that save you service call fees and downtime.
A good rule is to try the easy fixes first. Then seek help for anything involving the motor or electrical parts. This approach keeps you safe and your wallet happy.
Preventative Maintenance Schedule to Stop Suction Loss
Regular upkeep stops weak suction before it ever starts. A simple routine that you follow after each cleaning session keeps every part working at its best. Think of it like brushing your teeth. A few minutes of care each day prevents big problems later.
Critical Safety Warning: Never run the vacuum with the brush cover removed. Exposed moving parts can catch hair, break the brush roll, or cause serious injury to fingers and loose clothing.
Set a weekly reminder to empty the dust canister or replace the bag. Once a month, wash or shake out the filter and check the hose for clogs. Every three months, inspect the belt and brush roll for wear. This schedule covers the main parts that cause suction loss. Keeps your vacuum running strong all year long.
- After Every Use: Empty the dust canister or replace the bag to keep airflow wide open.
- Weekly: Check the filter and clean or replace it if it looks dirty or feels clogged.
- Monthly: Inspect the hose and wand for clogs, kinks, or cracks that block airflow.
- Every Three Months: Check the drive belt for wear. Replace it if it looks frayed or stretched.
- Every Six Months: Clean the brush roll thoroughly. Remove any hair or string wrapped around the axle.
Following this schedule makes How to Fix Weak Vacuum Suction a rare event instead of a regular frustration. You will spend less time troubleshooting and more time enjoying a clean home.
Frequently Asked Questions
Why Does My Vacuum Lose Suction After Only a Few Minutes of Use?
This usually happens because the dust bag or canister fills up too fast. A full container chokes the airflow and kills suction. Empty the container more often or replace the bag to fix this issue quickly.
Can a Dirty Filter Really Cause Weak Suction?
Yes, a dirty filter blocks the air supply to the motor. The motor needs clean air to run at full power. Cleaning or replacing the filter almost always restores strong suction.
How Often Should I Replace My Vacuum Belt?
You should replace the belt every three to six months depending on how often you use the vacuum. A worn belt makes the brush roll spin poorly and reduces cleaning power on carpets.
Is It Safe to Use Tape to Fix a Cracked Hose Temporarily?
Yes, strong tape works as a short-term fix for a cracked hose. However, you should replace the hose completely as soon as possible. This happens because tape can peel off and block the airway again.
What Should I Do If the Motor Smells Like It Is Burning?
Unplug the vacuum right away and let it cool for at least thirty minutes. Check for blockages in the filter and hose. This happens because a blocked airway causes the motor to overheat and smell burnt.
Does Vacuum Altitude Affect Suction Power?
Yes, high altitude reduces air density, which slightly lowers suction. This is normal and not a sign of a broken machine. For more details on airflow science, you can read the principles of air density on the EPA website here.
Final Thoughts and Next Steps
Fixing weak vacuum suction is easier than most people think. You can handle the majority of suction problems with a few simple checks and basic cleaning steps. Start with the easiest fixes like emptying the dust canister and cleaning the filter. Then move to the hose, belt, and connections if the problem persists.
Regular upkeep keeps your vacuum working at full power for years. A clean filter, empty canister, and clear hose prevent most suction problems from ever happening. You save money on repairs and you keep your home cleaner every day.
Remember that safety always comes first. Unplug the machine before you open it. Let the motor cool down before you touch any parts. If the motor is the problem, do not hesitate to call a pro. You now have the knowledge. Steps to tackle weak suction with confidence and bring your vacuum back to life.