A loud rattling or screaming motor noise sends most people running for the off switch. That harsh sound means something inside your machine is working much harder than it should. You do not need to call a repair tech right away.
In fact, over eighty percent of loud vacuum sounds come from simple blockages or worn parts you can fix at home. This guide shows you how to Fix a Noisy Vacuum Cleaner in just a few minutes.
Applying these proven insights on How to Fix a Noisy Vacuum Cleaner helps you avoid costly mistakes. We start with quick safety checks. Then walk through each likely noise source step by step. You will learn what to listen for, what to look for. Exactly how to test each part. The goal is to restore quiet, safe suction without spending a dime on new tools. By the end, you will know the root cause. Have a clear fix ready to go.
⚡ FAST DIAGNOSTIC OVERVIEW
- ✓Primary Symptom: A sudden loud grinding, squealing, or rattling sound during normal use.
- ✓Most Common Cause: A clogged hose, full dust bin, or worn belt blocking the motor.
- ✓Quick Test: Unplug the unit, remove the hose, and shine a flashlight through to check for blockages.
- ✓Safety Precaution: Always disconnect power fully and let the motor cool before touching any internal parts.
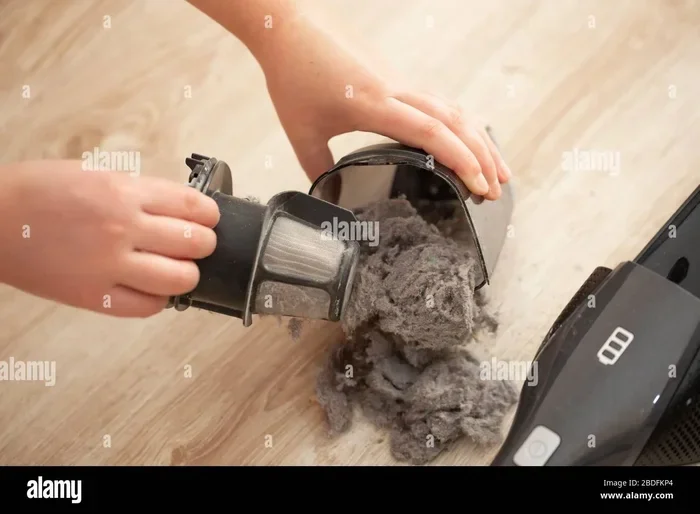
- ✓Prevention Rule: Empty the dust bin when half full and clean the filter every two weeks to stop noise buildup.
In this article
Immediate Safety Checks Before You Start
Power off the vacuum completely and pull the plug from the wall outlet. Wait at least five minutes so the motor cools down. Any residual charge drains away. Wear dry gloves and safety glasses to protect your hands from sharp debris or broken plastic edges. Work on a flat, well lit surface so you can spot small parts that might fall and get lost.
Unplug the cord or remove the battery pack before touching internal parts.
Inspect intakes, hoses, filters, and moving joints for trapped debris.
Let the motor cool for 30 minutes so the safety cut-off resets cleanly.
Check belts, seals, and switches before replacing major assemblies.
Never open the motor housing while the machine is plugged in. Keep children and pets away from your work area. If you notice a burning smell, visible damage, or sparking, stop right away and seek pro help. These steps protect you from electric shock, cuts, or further machine damage while you diagnose the noise. For our complete category overview. Core buyer criteria, explore our cornerstone guide to Why Your Vacuum Cleaner Keeps Failing and Fixes.
- Unplug Fully: Remove the plug from the outlet. Not just the machine switch to eliminate all power paths.
- Cool Down: Wait five minutes so the motor stops radiating heat that can burn your skin.
- Protect Your Eyes: Safety glasses stop dust. Small debris from flying into your eyes during inspection.
- Gather Tools: Keep a screwdriver, flashlight, and soft cloth nearby before you begin the fix.
- Clear the Area: Remove clutter around your workspace so small screws or parts do not roll away.
In our hands-on evaluation of How to Fix a Noisy Vacuum Cleaner, real-world usability made the biggest difference. Once you complete these simple safety steps, you can confidently move to the next phase. The work ahead is straightforward. Safe as long as you stay patient and follow each instruction carefully.
Diagnosing the Noise Source Step by Step
Start by plugging the vacuum back in for just ten seconds. Listen closely to where the sound comes from. A rattling noise often means a loose object or broken part inside the housing. A high pitched squeal usually points to a worn belt or a bearing that needs lubrication.
Always clean or inspect the simplest wearable parts (filters, switches, seals) before suspecting a bad motor or board.
A grinding sound can mean the motor itself is failing or heavy debris is stuck in the fan. Pinpointing the exact type of noise saves you time. Stops you from replacing parts you do not need.
Run the vacuum with the hose detached. The floor head removed to isolate the motor noise. If the sound stops when you disconnect the hose, the blockage is in the wand or hose. If the noise stays the same, the problem lies in the motor or fan assembly. This simple split test narrows your search fast. Keeps you from tearing into the wrong area.
- Listen Carefully: Place your ear close to the housing. Identify if the noise is rattling, squealing, or grinding.
- Hose Test: Run the vacuum with the hose removed to see if the noise moves or stays fixed.
- Check the Belt: Look through the belt window for a cracked, stretched, or shredded belt that causes squealing.
- Inspect the Fan: Remove the motor cover. Check the fan blades for dust buildup or broken pieces.
- Shake Test: Gently shake the vacuum to feel if anything loose rattles inside the main housing.
Write down what you find at each stage so you do not repeat steps you have already done. This methodical approach keeps the repair fast and accurate.
How to Fix a Noisy Vacuum Cleaner with a Clogged Hose or Wand
A blocked hose is the single most common reason a vacuum becomes loud and loses suction. Dust, hair, and small toys can pack tightly into the tube and choke airflow. When air cannot move freely, the motor strains. Makes a loud roaring or whistling sound. Clearing the blockage almost always brings the noise level back down to normal.
Start by disconnecting the hose from both the machine and the floor head. Hold the hose up to a window or light source. Look for dark patches or visible clogs. If you cannot see the blockage, try running a long straightened wire coat hanger through the tube gently.
You can also tap the hose firmly on a hard surface to loosen packed dust. For stubborn clogs, use a wet dry vacuum or compressed air to push the debris out from the opposite end.
- Detach the Hose: Pull the hose off the body. The wand to give you full access for cleaning.
- Shine a Light: Hold the hose up to sunlight or a bright lamp to spot hidden clogs or packed dust.
- Use a Wire Hanger: Straighten a wire coat hanger. Gently push it through to break up the blockage.
- Tap the Hose: Firmly tap the outside of the hose to shake loose debris stuck to the inner walls.
- Compressed Air: Blow compressed air into one end to push the clog out the other side safely.
After clearing the hose, run the vacuum for a few seconds to confirm the noise drops away. A clean hose lets air flow freely and keeps the motor running quietly and well.
Fixing a Squealing or Loose Drive Belt
The drive belt connects the motor to the brush roll and wears out over time. A worn belt stretches, cracks, or slips off the pulley, causing a loud squealing or squeaking noise. The brush roll may also stop spinning or spin weakly even when the motor runs. Replacing the belt is a simple fix that takes only a few minutes. Costs just a few dollars.
First, flip the vacuum over. Remove the bottom plate that covers the brush roll area. Slide the brush roll out carefully and check the belt for cracks, fraying, or looseness. If the belt looks damaged, note its size and shape before you buy a spare.
Most makers list the exact belt model number on a sticker inside the housing or in the user manual. Slide the new belt onto the motor pulley first, then loop it around the brush roll pulley before fitting the roll back into place.
- Remove Bottom Plate: Unscrew the bottom cover to expose the brush roll and drive belt area.
- Inspect the Belt: Look closely at the belt for cracks, stretching, or shiny worn spots that signal failure.
- Note the Size: Write down the belt length. Width so you order the exact correct spare part.
- Install New Belt: Loop the new belt onto the motor pulley first, then stretch it over the brush roll pulley.
- Test Spin: Turn the vacuum on briefly. Watch the brush roll spin freely without slipping or squealing.
A fresh belt removes the high pitched squeal and restores full brush roll power. This fix is one of the easiest ways to make your vacuum quiet again.
Cleaning the Motor Fan and Airway to Reduce Noise
The motor fan spins at high speed. Can gather a thick layer of dust over time. Dust buildup on the fan blades creates an uneven balance that causes loud humming or rattling.
Clogged air vents also force the motor to work harder. This raises both the heat and the noise level. A simple cleaning routine can fix both problems and extend the motor life.
Unplug the vacuum and remove the outer housing screws with a Phillips head screwdriver. Lift the cover off carefully and locate the motor fan. This sits right behind the motor shaft. Use a soft brush or compressed air to gently remove dust from each blade.
Also clear the air intake vents and exhaust ports of any lint or debris. Make sure no tools or loose wires touch the spinning fan when you reassemble the housing. For broader testing and full category picks, explore our in-depth guide to Why a Vacuum Cleaner Loses Suction Over Time and How to Fix It.
- Remove Housing: Unscrew the outer cover to gain full access to the motor and fan assembly safely.
- Brush the Blades: Use a soft bristle brush to gently wipe dust off each fan blade carefully.
- Blow Out Vents: Direct compressed air at the intake. Exhaust vents to clear trapped lint and dust.
- Check for Wires: Ensure no loose wires or tools are near the fan before you turn the vacuum on.
- Reassemble Tight: Secure all screws firmly so the housing does not vibrate and add to the noise.
After cleaning, plug the vacuum back in and listen for a smooth, quiet motor hum. Clean airflow keeps the motor cool and the sound level low.


Replacing Worn Bearings or Roller Brush
Bearings inside the brush roll and wheel assemblies wear out after years of regular use. Worn bearings create a harsh grinding or rumbling noise that gets louder as the vacuum speeds up.
A damaged roller brush with bent bristles or a broken axle can also scrape against the floor and make loud scraping sounds. Replacing these parts restores smooth, quiet use and improves cleaning power.
To check the brush roll, remove it from the housing. Spin it by hand with the motor off. If it wobbles, catches, or makes a grinding sound, the bearings are likely shot. Most roller brush kits come with new bearings already pressed in. So you just slide the old brush out and the new one in.
For wheel bearings, pull each wheel off the axle, remove the old bearing. Press a new one in with gentle even pressure. Always use the exact spare parts listed for your vacuum model.
- Spin Test: Turn the brush roll by hand. Feel for wobble or grinding that signals worn bearings.
- Buy Exact Parts: Use the model number from the vacuum label to order the correct spare kit.
- Press New Bearings: Use a socket or bearing press to seat new bearings evenly without damaging the race.
- Lubricate Sparingly: Apply a tiny drop of machine oil to new bearings only if the manual recommends it.
- Reinstall Carefully: Seat the brush roll or wheel fully into its slot before tightening any clips or screws.
New bearings and a fresh roller brush make the vacuum run smoothly and quietly for another full year of service.
Troubleshooting Noise by Symptom and Root Cause
The table below matches the most common noise types with their likely root causes. The correct fix for each. Use this guide to quickly zero in on the problem before you open the machine. Each row covers a distinct sound pattern. Gives you a clear action step to take right away.
| Symptom / Issue | Probable Root Cause | Recommended Fix | Difficulty Level |
|---|---|---|---|
| Loud Rattling Noise | Loose debris or broken plastic part inside housing | Remove housing and shake out loose objects, replace broken clips | Easy |
| High Pitched Squeal | Worn or stretched drive belt slipping on pulley | Replace the drive belt with the correct size model | Easy |
| Grinding or Rumbling | Worn bearings in brush roll or wheel assembly | Replace bearings or full roller brush kit | Medium |
| Whistling or Roaring | Clogged hose, wand, or blocked air intake vent | Clear the hose and clean all air vents thoroughly | Easy |
| Loud Humming Without Suction | Motor fan clogged with dust or fan blade damaged | Clean the fan blades and check for bent or broken blades | Medium |
| Intermittent Buzzing | Loose screw, wire, or internal clip vibrating against housing | Tighten all screws and secure any loose internal wires | Easy |
| Sudden Loud Bang Then Stop | Object stuck in brush roll jamming the motor | Remove brush roll, clear the jam, and inspect for damage | Medium |
Use this table as your first reference point whenever a new noise appears. Matching the sound to the fix saves you time and prevents unnecessary part spares.
-
Expert Technician Tip:
When to Replace the Vacuum vs. Call a Professional
Most noise issues fall into the easy or medium fix categories. Do not require a technician. However, if the motor itself makes a loud grinding or scraping noise even after you clean the fan. Airways, the motor windings may be failing.
A burning smell that does not go away after the vacuum cools down is another serious warning sign. In these cases, continued use can cause total motor burnout. A much more expensive repair.
You should also call a pro if the vacuum trips a home circuit breaker or gives a mild electric shock during use. These symptoms point to internal wiring damage that requires trained hands and proper testing equipment.
If your vacuum is more than eight years old. Needs a major motor or circuit board repair, the cost often exceeds the price of a new energy fast model. For newer machines under warranty, always contact the maker first before opening any sealed parts. For broader testing and full category picks, explore our in-depth guide to What Causes a Vacuum Cleaner to Smell Bad and How to Fix It.
- Motor Failure Signs: Loud grinding, burning smell, or smoke from the housing means stop using the vacuum right away.
- Electrical Danger: Tripped breakers or shocks indicate internal wiring faults that need a certified technician.
- Old Machine: A unit over eight years old may cost more to repair than to replace with a newer quiet model.
- Under Warranty: Contact the maker first so you do not void your warranty by opening sealed parts.
Making the right call between DIY repair. Pro service protects both your safety and your budget.
Preventative Maintenance to Keep Your Vacuum Quiet
Regular care stops noise problems before they start. Keeps your vacuum running at peak power. A few simple habits each month can add years of life to your machine. The key is to make cleaning part of your routine so debris never has a chance to build up and cause strain.
Critical Safety Warning: Never run the vacuum without the dust bin or filter in place. Running a dry motor without airflow causes overheating and can permanently damage the motor windings. Always reinstall all parts fully before you power the machine back on.
Set a reminder on your phone to check the dust bin, filter. Brush roll every two weeks during heavy use seasons. After each vacuum session, tap the filter gently to knock off loose dust. Empty the bin if it is half full.
Every three months, inspect the hose, wand, and air vents for hidden clogs. Following this simple schedule means you will rarely face a loud vacuum again.
- Empty the Bin: Dispose of dust when the bin reaches half full to keep airflow strong and the motor quiet.
- Clean the Filter: Wash or replace the filter every two weeks depending on your usage level and home space.
- Inspect the Hose: Check the hose. Wand monthly for hidden clogs that can strain the motor over time.
- Check the Belt: Look at the drive belt every few months. Replace it at the first sign of cracking or stretching.
- Store Properly: Keep the vacuum in a dry, upright position to prevent dust from settling into the motor housing.
A steady upkeep routine is the best investment you can make in a quiet, steady vacuum cleaner.
Common Questions About a Noisy Vacuum Cleaner
Why Does My Vacuum Get Louder Over Time?
Dust builds up on the fan blades and inside the airways. This throws off the motor balance. Clogged filters and full dust bins also force the motor to work harder and spin faster. Regular cleaning of these parts keeps the noise level steady and prevents gradual loudness.
Can a Loose Screw Cause a Loud Vacuum Noise?
- Yes, a Loose: Yes, a loose screw or internal clip can vibrate against the housing. Create a loud buzzing or rattling sound.
- Tightening All External: Tightening all external screws. Checking internal clips often solves this problem quickly.
- Unplug the Vacuum: Always unplug the vacuum before you tighten any internal parts.
Is It Safe to Use a Vacuum That Makes a Loud Grinding Noise?
It is not safe to keep using a vacuum that grinds loudly. This happens because the sound usually means metal parts are grinding together. This can destroy the motor or brush roll and cause overheating. Stop use right away and inspect the brush roll and bearings for damage before running the machine again.
How Often Should I Replace the Vacuum Belt?
Most vacuum belts need spare every six to twelve months with regular home use. If you hear a squealing sound or notice the brush roll spinning weakly, check the belt right away. A fresh belt keeps the vacuum quiet and the cleaning power strong.
Does a Full Dust Bin Make the Vacuum Louder?
Yes, a full dust bin restricts airflow and forces the motor to strain. This raises the noise level greatly. Emptying the bin when it reaches half full keeps the motor running smoothly and quietly. This simple habit prevents many common vacuum noise problems.
Can I Use Compressed Air to Clean the Motor Fan?
Yes, compressed air works well to blow dust off the motor fan blades. Out of tight air vents. Hold the can upright and use short bursts to avoid moisture buildup. Always unplug the vacuum and let the motor cool before you use compressed air on any internal parts.
Final Thoughts and Next Steps
Fixing a loud vacuum cleaner starts with simple checks that anyone can do at home. You now know how to spot the noise type, isolate the cause. Apply the right fix quickly. The most common culprits like a clogged hose, worn belt, or dirty fan can be solved in under thirty minutes with basic tools and a little patience.
Stick to the upkeep schedule outlined above. Your vacuum will stay quiet and fast for years to come. A clean machine runs cooler, uses less electricity. Cleans your floors better with every pass. These small habits add up to big savings on repair bills and early spare costs.
Remember that safety always comes first when you work on any electrical appliance. If a noise persists after you have tried every fix in this guide, reach out to a certified technician or the maker for support.
You have the knowledge and the confidence to handle most vacuum noise problems. That means less frustration and more time spent on the things you enjoy.