How to Clean a Rainbow Vacuum Cleaner
Keeping your Rainbow vacuum cleaner spotless is key to its performance and your home’s air quality. This comprehensive guide walks you through every step of cleaning your unit, from the water basin to the attachments. You’ll learn simple techniques to maintain its efficiency, prevent odors, and ensure your Rainbow continues to deliver a remarkably clean environment for years to come.

Image source: Bing
📋 Table of Contents
- 🔹 Keeping Your Rainbow Vacuum Sparkling Clean
- 🔹 What Does “Cleaning a Rainbow Vacuum Cleaner” Really Mean?
- 🔹 Why is Cleaning Your Rainbow Vacuum So Important?
- 🔹 When Should You Clean Your Rainbow Vacuum?
- 🔹 How to Clean a Rainbow Vacuum Cleaner: A Detailed Step-by-Step Guide
- 🔹 Benefits of Regular Rainbow Vacuum Cleaning
- 🔹 Common Mistakes to Avoid When Cleaning Your Rainbow
- 🔹 Practical Tips for Maintaining Your Rainbow’s Cleanliness
- 🔹 Frequently Asked Questions About Cleaning Your Rainbow Vacuum
- 🔹 Conclusion: A Clean Rainbow, a Clean Home
Cleaning your Rainbow vacuum cleaner involves emptying and sanitizing the water basin after each use, regularly cleaning the separator, and wiping down the exterior. Periodically, you’ll also deep clean the hose, attachments, and power nozzle to maintain optimal suction, hygiene, and extend its lifespan.
Keeping Your Rainbow Vacuum Sparkling Clean
There’s a special kind of clean that only a Rainbow vacuum can deliver, thanks to its unique water-filtration system. But to keep that system working its magic and to prevent any unpleasant odors, you’ve got to give your Rainbow a little TLC. Think of it like maintaining a car; a little routine care goes a long way in ensuring it runs smoothly and efficiently.
This guide is here to walk you through everything you need to know about how to clean a Rainbow vacuum cleaner. We’ll cover why it’s so important, how often you should do it, and a simple, step-by-step process for cleaning every key component. By the end, you’ll feel confident in keeping your Rainbow in tip-top shape, ready to tackle any mess and leave your home feeling fresher than ever.
What Does “Cleaning a Rainbow Vacuum Cleaner” Really Mean?
When we talk about cleaning a Rainbow vacuum, we’re really talking about a couple of different things. First and foremost, it means properly emptying and rinsing the water basin after every single use. This is crucial because the dirty water holds all the dust, dirt, and allergens that the vacuum has picked up.
Beyond that, it involves cleaning the internal components, especially the separator, which is responsible for trapping airborne particles in the water. It also means keeping the hose, wands, and various attachments free of debris, hair, and grime. Essentially, cleaning your Rainbow vacuum is about maintaining all its parts to ensure hygienic operation, peak performance, and to prevent any buildup that could lead to odors or reduced efficiency.
Why is Cleaning Your Rainbow Vacuum So Important?
You might be wondering why taking the time to clean your vacuum is such a big deal. For a Rainbow, it’s especially critical, and here’s why:
- Prevents Odors: The water in the basin traps all sorts of things, from pet dander to food crumbs. If you leave this dirty water, or even just residual grime, it can quickly develop a stale, musty, or even foul odor that will then be circulated into your home’s air the next time you use the vacuum. Yuck!
- Maintains Suction Power: A clean separator and clear hose pathways ensure optimal airflow. If these get clogged with dirt, hair, or debris, the vacuum’s suction power will decrease significantly, making it less effective at cleaning.
- Enhances Air Quality: The Rainbow is known for improving indoor air quality. However, if its components are dirty, especially the separator, it can’t trap particles as effectively, potentially re-releasing them into your air. A clean vacuum means cleaner air for your family.
- Extends Lifespan: Regular cleaning prevents corrosive buildup and reduces strain on the motor. Keeping parts free from gunk means less wear and tear, helping your Rainbow last for many years.
- Ensures Hygiene: Dirt, dust, and microscopic particles can harbor bacteria and mold. Regularly cleaning and sanitizing your vacuum’s components helps keep it hygienic and prevents the spread of these unwanted guests.
When Should You Clean Your Rainbow Vacuum?
Knowing when to clean your Rainbow is just as important as knowing how. Here’s a quick guide:
- After Every Use: The water basin should always be emptied, rinsed, and dried after each use. This is the absolute minimum to prevent odors and bacterial growth.
- Monthly (or Bi-Weekly for Heavy Use): The separator should be thoroughly cleaned once a month. If you have pets, high foot traffic, or use your Rainbow frequently, consider cleaning it every two weeks.
- Every Few Months (or as Needed): The hose, wands, and attachments should be inspected and cleaned every few months. If you notice reduced suction, visible blockages, or an odor coming from these parts, clean them sooner.
- Annually: A full, deep clean of all components, including careful inspection of the power nozzle brush roll, is a good idea once a year.
By following these guidelines, you’ll ensure your Rainbow is always ready to perform at its best.
How to Clean a Rainbow Vacuum Cleaner: A Detailed Step-by-Step Guide
Ready to give your Rainbow a spa day? Here’s how to deep clean it, step by step, to ensure it’s spotless and performing perfectly.
Step 1: Preparation is Key
Before you start, make sure your Rainbow is unplugged from the wall socket. Safety first! Gather a few simple supplies:
- A sink or bathtub for rinsing
- Soft cloths or sponges
- Mild dish soap (optional, for stubborn grime)
- A soft-bristle brush (like an old toothbrush) for tight spots
- Plenty of fresh, clean water
- An area for parts to air dry
Step 2: Tackle the Water Basin
This is the most frequent cleaning task you’ll perform.
- Remove and Empty: Detach the water basin from the motor unit. Carefully carry it to a toilet or utility sink and pour out the dirty water.
- Rinse Thoroughly: Rinse the basin with clean, warm water. Swish it around to dislodge any remaining dirt or debris. Dump out the rinse water.
- Clean if Needed: If there’s a film or residue, add a drop of mild dish soap and scrub with a soft brush or sponge. Make sure to get into all the nooks and crannies.
- Final Rinse: Rinse the basin several times until all soap residue is gone and the water runs clear.
- Dry Completely: This is crucial. Use a clean cloth to wipe the basin dry. Then, allow it to air dry completely, upside down, before reattaching it to the motor unit. Moisture left behind can lead to mildew and odors.
Step 3: Clean the Separator (The Heart of the System)
The separator is the spinning part under the motor that mixes air and water. Keeping it clean is vital for performance.
- Locate the Separator: After removing the water basin, you’ll see the separator attached to the underside of the motor unit.
- Remove if Possible (Check Your Model): Some Rainbow models have a removable separator. If yours does, twist it counter-clockwise to detach. If it’s not designed to be easily removable, you’ll clean it in place.
- Rinse and Clean:
- Removable Separator: Hold it under running water, letting the water flush through the fins. Use a soft brush (like a toothbrush) to gently scrub away any accumulated hair, dust, or grime from the fins and central shaft.
- Non-Removable Separator: DO NOT get the motor wet! Use a damp (not dripping wet) cloth to carefully wipe down the fins of the separator. You can use the soft-bristle brush to dislodge stubborn debris while being extremely careful not to let water drip into the motor housing.
- Dry Thoroughly: Let the separator air dry completely. For removable ones, you can shake off excess water and place it on a towel. For non-removable ones, allow ample time for any residual moisture to evaporate before using the vacuum again. You can also use a dry cloth to speed up the process.
Step 4: Don’t Forget the Hose and Wands
These can accumulate dust, hair, and even small blockages over time.
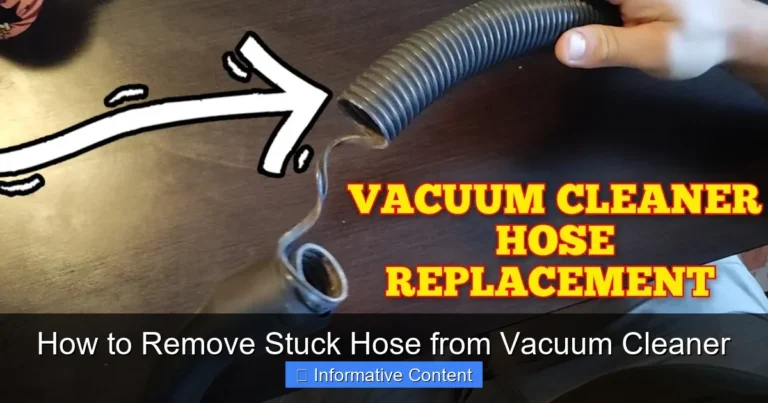
- Detach: Remove the hose and any attached wands from the vacuum and attachments.
- Inspect for Blockages: Hold the hose up to a light and look through it. If you see a blockage, try to carefully dislodge it with a broom handle or a long, blunt object. Never use sharp objects that could puncture the hose.
- Rinse (if possible): For the main cleaning hose, you can run water through it, especially if it’s exceptionally dirty or smelly. Use a mild soap solution if needed. Rinse thoroughly until water runs clear.
- Dry Completely: Hang the hose to air dry, allowing any water to drain out. This can take several hours, or even overnight. Ensure it’s completely dry before storing or reconnecting. Wipe down the wands with a damp cloth.
Step 5: Refresh Your Attachments and Power Nozzle
Your tools work hard; let’s clean them up.
- Detach All Attachments: Remove all brushes, nozzles, and the power nozzle from the wands.
- Hand Wash: Most attachments can be washed in a sink with warm, soapy water. Use a brush to clean bristles and crevices. Rinse them thoroughly.
- Power Nozzle (Power Head):
- Unplug it first!
- Inspect the Brush Roll: Use scissors or a seam ripper to carefully cut away tangled hair or threads from the brush roll.
- Wipe Down: Use a damp cloth to wipe down the exterior of the power nozzle.
- Clean Brush Roll Housing: Use a dry brush or even a toothpick to clean out any dirt or debris from around the brush roll bearings and housing. Do not submerge the power nozzle in water, as it contains electrical components.
- Dry Completely: Lay all attachments out to air dry. Ensure they are bone dry before storing them away.
Step 6: Wipe Down the Motor Unit Exterior
While you can’t get the motor itself wet, you can clean the outside.
- Damp Cloth Wipe: Use a slightly damp cloth to wipe down the exterior surfaces of the motor unit.
- Dry Cloth Follow-up: Immediately follow with a dry cloth to remove any moisture.
- Air Vents: Use a dry brush or a small vacuum attachment to gently clean any dust from the motor unit’s air vents. This helps ensure proper airflow for cooling.
Step 7: Reassemble and Store Properly
Once everything is completely dry, reassemble your Rainbow. Ensure the water basin clicks securely into place and the separator is properly seated. Store your vacuum and attachments in a clean, dry area. A dry vacuum is a happy, odor-free vacuum!
Benefits of Regular Rainbow Vacuum Cleaning
The effort you put into cleaning your Rainbow isn’t just about avoiding bad smells; it yields significant advantages for your home and your cleaning routine.
A regularly cleaned Rainbow means you’re benefiting from:
- Maximum Cleaning Power: With no blockages or dirty components, your vacuum operates at peak efficiency, picking up more dirt and allergens with less effort.
- Extended Appliance Life: Proper maintenance minimizes wear and tear on crucial parts, preventing costly repairs and extending the years you’ll get from your investment.
- Improved Indoor Air Quality: By preventing mold and mildew growth and ensuring the water filtration system works optimally, your Rainbow is truly delivering on its promise of cleaner, fresher air.
- Pleasant Cleaning Experience: No more musty odors, just the satisfaction of a fresh-smelling, powerful clean every time you use it.
- Cost Savings: Keeping your vacuum clean reduces the likelihood of needing replacement parts or professional servicing due to neglect.
Common Mistakes to Avoid When Cleaning Your Rainbow
While cleaning your Rainbow is straightforward, a few common missteps can hinder your efforts or even damage the unit. Here’s what to watch out for:
- Not Drying Components Fully: This is perhaps the biggest mistake. Leaving any part of the water basin, separator, or hose damp is an open invitation for mildew, mold, and terrible odors. Always ensure everything is bone dry before reassembling or storing.
- Getting the Motor Unit Wet: The motor unit contains electrical components that are not designed to get wet. Never submerge it, rinse it, or allow water to drip into its housing. Only wipe the exterior with a damp cloth, followed immediately by a dry one.
- Using Harsh Chemicals: Abrasive cleaners, bleach, or strong detergents can damage plastic components, seals, or leave residues that are harmful when aerosolized. Stick to mild dish soap or plain water.
- Forgetting About the Separator: The separator is vital for the Rainbow’s filtration. Neglecting to clean it allows dirt and hair to build up, reducing efficiency and potentially causing odors.
- Ignoring the Hose and Attachments: These parts can harbor surprising amounts of dust, hair, and debris, leading to clogs and reduced suction if not cleaned periodically.
- Rough Handling: While durable, the plastic components can crack if dropped or handled too roughly. Be gentle when disassembling and reassembling.
Practical Tips for Maintaining Your Rainbow’s Cleanliness
Beyond the deep cleaning, incorporating a few habits can keep your Rainbow humming happily:
- Empty Immediately: Make it a habit to empty the dirty water and rinse the basin as soon as you finish vacuuming. Don’t let it sit.
- Air It Out: After rinsing the basin, leave it to air dry, ideally upside down, for a few hours before putting it back on the motor unit.
- Keep Fresh Water: Always start with clean, fresh water for each cleaning session. Dirty water from a previous use won’t filter effectively.
- Use a Deodorizer (Sparingly): If you like a fresh scent, you can add a few drops of an approved Rainbow deodorizer to the clean water basin before you vacuum. However, this isn’t a substitute for actual cleaning.
- Store Properly: Keep your Rainbow in a clean, dry place. Avoid dusty basements or damp garages where components could become compromised.
- Quick Wipes: After using an attachment, give it a quick wipe-down to prevent dirt buildup from the start.
Frequently Asked Questions About Cleaning Your Rainbow Vacuum
How often should I clean my Rainbow vacuum’s water basin?
You should absolutely empty and rinse your Rainbow vacuum’s water basin after every single use. This prevents odors, mildew growth, and keeps your unit hygienic for its next cleaning job.
Can I use soap to clean my Rainbow vacuum?
For the water basin, hose, and attachments, a small amount of mild dish soap is perfectly fine for cutting through grime, as long as you rinse thoroughly afterwards. However, never use soap or any cleaning solution on the motor unit or separator without specific guidance from the manufacturer, as it could damage electrical components or leave harmful residues.
What tools do I need to clean my Rainbow vacuum?
You’ll need basic cleaning supplies like a sink or tub, clean cloths or sponges, fresh water, and possibly a mild dish soap. A soft-bristle brush, like an old toothbrush, can be very helpful for cleaning the separator fins and tight crevices on attachments.
Is it okay to get the motor wet when cleaning?
No, absolutely not. The motor unit contains electrical components that must never get wet. Only wipe the exterior of the motor unit with a slightly damp cloth, immediately followed by a dry one. Ensure no water drips into any openings.
How do I know if my Rainbow vacuum needs cleaning?
Beyond the regular schedule, signs your Rainbow needs cleaning include a musty or unpleasant odor during or after use, noticeably reduced suction power, visible dirt or gunk on the separator or inside the hose, or a general feeling that it’s not performing as well as it should.
Conclusion: A Clean Rainbow, a Clean Home
Your Rainbow vacuum cleaner is a powerful tool for maintaining a clean and healthy home environment. Its unique water filtration system does an incredible job of trapping dirt and allergens, but its effectiveness relies heavily on consistent cleaning and maintenance.
By following the simple, step-by-step guide we’ve outlined, from diligently emptying and rinsing the water basin after every use to giving the separator and attachments a proper clean, you’re not just preserving the life of your appliance. You’re ensuring it continues to deliver the superior cleaning performance and fresh air you expect. A little effort goes a long way, and your fresh-smelling, spotlessly clean home will be the rewarding proof.