Few things ruin a cleaning session faster than a vacuum that suddenly cuts out, blows hot air, or smells like burning dust. That frustrating shutdown often points to a heat problem that many owners ignore until it is too late.
Learning How to Prevent Vacuum Overheating early saves you from costly repairs or a dead machine. In most cases, you can spot the warning signs. Fix the root cause at home in under an hour.
This guide walks you through a clear diagnostic path so you can isolate the real reason your vacuum heats up too fast. You will learn how to check airflow, motor health, and filter condition with simple tools.
We also cover safe repair steps. A upkeep plan that keeps your unit running cool for years. Follow each step in order. You will build a solid understanding of How to Prevent Vacuum Overheating from the ground up.
⚡ FAST DIAGNOSTIC OVERVIEW
- ✓Primary Symptom: sudden power loss, hot airflow, or a burning smell during use
- ✓Most Common Cause: clogged filters, blocked airways, or worn motor parts
- ✓Quick Test: a 60-second airflow check at the nozzle and dust bin
- ✓Safety Precaution: always disconnect power and let the motor cool before inspecting
- ✓Prevention Rule: clean or replace filters weekly and clear brush rolls monthly
In this article
Essential Guide to How to Prevent Vacuum Overheating: Key Insights
Before you touch any internal part, you need to make sure the workspace. The machine are completely safe. Hot motors, sharp blades, and electrical connections all pose real risks if you rush in. Taking five minutes for basic safety prep protects you from injury. Prevents further damage to the vacuum.
Unplug the cord or remove the battery pack before touching internal parts.
Inspect intakes, hoses, filters, and moving joints for trapped debris.
Let the motor cool for 30 minutes so the safety cut-off resets cleanly.
Check belts, seals, and switches before replacing major assemblies.
- Power Disconnection: Unplug the unit fully from the wall outlet before any inspection. For cordless models, remove the battery pack and store it on a cool, flat surface. Confirm the power indicator light is off before you proceed.
- Cooling Wait Time: Let the motor cool for at least 20 to 30 minutes after heavy use. A hot motor housing can burn your fingers instantly. Patience here prevents a painful injury and a ruined skin surface.
- Protective Gear: Wear dry, rubber-soled shoes. Keep your hands clear of the brush roll area. Use a soft brush tool to poke into tight spaces instead of metal screwdrivers. Safety glasses help if you are shaking out heavy debris.
- Workspace Check: Clear your floor of cords, small objects, and water spills before you begin. A clean, dry workspace keeps you stable and prevents accidental re-contact with debris. Good lighting helps you spot cracks or wear marks on hoses.
Once you complete these four safety steps, you are ready to start the actual diagnostic process. Never skip the cooling wait. That is because a hot motor can hide real faults behind temporary heat. Safe handling also keeps your warranty valid if you need pro service later. For our complete category overview. Core buyer criteria, explore our cornerstone guide to How Much is a Shark Vacuum Cleaner: Understanding the Factors of Design and Technology.
Spotting Early Warning Signs of Heat Damage
Your vacuum gives clear signals long before a full motor failure shuts it down completely. Recognizing these signs early is the fastest way to practice How to Prevent Vacuum Overheating before a minor issue becomes a burned-out motor. Most owners miss the subtle smell or power drop that warns them something is trapping heat inside the machine.
Your expert technician tip: After cleaning the brush roll. Filter, run the vacuum empty for two minutes on a hard floor. This burn-in test lets you confirm the motor heat stays stable before you resume normal floor cleaning.
- Burning Dust Smell: A faint hot smell usually means dust is baking onto the motor fan or filter frame. This odor often appears first during strong suction tasks like carpet deep cleans. Ignoring this smell lets heat build up around sensitive winding wires.
- Sudden Power Loss: If the vacuum cuts out mid-clean. Restarts after resting, the thermal cut-off switch activated. This safety feature stops the motor before permanent damage occurs. Repeated trips mean the heat buildup is happening too often and needs a real fix.
- Weak Suction Drop: A gradual loss of pull strength signals that airflow is restricted somewhere in the path. The motor works harder to pull air through a blocked passage, which generates extra heat. You often notice this weakness on thick carpet or hard floor transitions.
- Excessive Vibration: Heavy shaking that feels different from normal cleaning noise often points to a damaged fan blade or unbalanced brush roll. A wobbling part creates friction that turns into waste heat quickly. You may also hear a rhythmic clicking sound with each rotation.
When you notice any two of these signs together, stop using the machine right away and begin your deeper inspection. For more detail on recognizing these patterns across brands, you can check this Energy Star vacuum efficiency guidelines. Catching heat stress early saves the motor and keeps your cleaning schedule on track.
Main Root Causes of Vacuum Overheating
Understanding why a vacuum heats up too much is the core of How to Prevent Vacuum Overheating in practical daily use. The problem almost always traces back to one of three areas: airflow restriction, mechanical wear, or environmental misuse.
Each root cause demands a different fix. So accurate identification is critical before you grab any tools.
Airflow Restriction Issues
- Blocked Air Paths: Blocked air paths force the motor to run longer and harder than designed. This spikes internal heat fast.
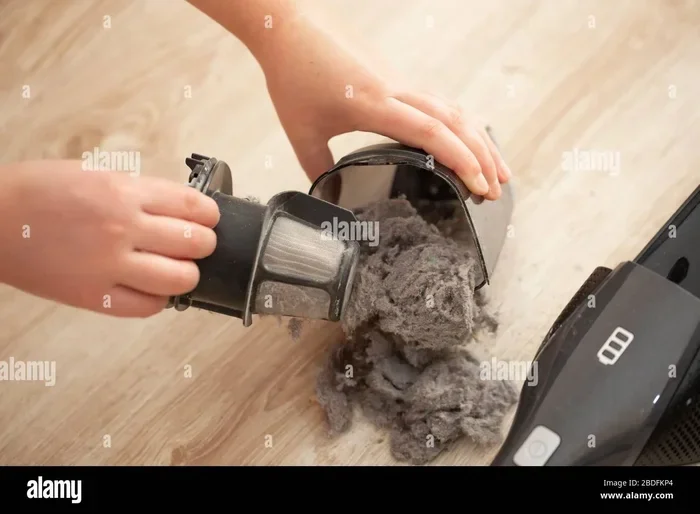
- Dust, Hair: Dust, hair, and small debris build up silently inside canisters, hoses, and filters over weeks of use.
- Even a Partially: Even a partially clogged filter can raise motor heat by a large margin without visible symptoms outside the machine.
Mechanical Wear and Tear
Moving parts like the fan blade, belt. Brush roll naturally degrade over hundreds of running hours. A worn belt slips and creates friction heat. A cracked fan blade pushes air unevenly. These problems often start after heavy use periods or when you vacuum large debris like gravel or sawdust.
Operational and Environmental Mistakes
Vacuuming wet surfaces, running the machine non-stop for hours, or using it in hot garages all push heat past safe limits. Direct sunlight on a parked vacuum also heats the plastic housing. Warps internal seals over time. These user-driven causes are the easiest to fix once you recognize the pattern.
Step-By-Step Diagnostic Workflow
Now that you know the warning signs. Root causes, you need a steady sequence to find the exact fault. This structured workflow removes guesswork. Helps you confirm the true cause of heat buildup in under 15 minutes. Follow each stage in order. Write down what you find so you can track patterns over time.
- Visual Exterior Scan: Walk around the vacuum. Look for cracks, loose panels, or dust buildup on vents. Check the power cord for any melting spots or exposed wiring. A damaged exterior often traps heat inside the housing and signals a past overheating event.
- Airflow Path Inspection: Remove the dust bin. Hose, then hold them up to a light source. If light does not pass through easily, you have a blockage restricting the motor draw. A clogged hose is one of the most common reasons How to Prevent Vacuum Overheating fails for many owners.
- Filter Condition Test: Tap the filter gently. Check for heavy dust coating or a musty smell. Hold a dry cloth against the filter surface after tapping. If dust lands on the cloth, the filter needs cleaning or spare. A saturated filter blocks airflow completely and causes rapid heat spikes.
- Brush Roll Check: Remove the brush roll. Spin it slowly with your finger to feel for snagging or rough spots. Cut away any tangled hair or fibers wrapped around the axle with scissors. A stuck brush roll drags the motor down and creates localized friction heat.
- Motor Amperage Test: Use a clamp meter on the power cord to check the amp draw against the label rating. A reading above 10 to 15 percent of the rated amp suggests internal wear or severe restriction. This test requires basic electrical safety knowledge, so review your owner manual first.
After finishing these five stages, compare your findings with the troubleshooting table below to match symptoms with fixes. If multiple items failed your test, address the most restrictive blockage first.
This happens because that single fix often resolves the heat issue entirely. Document your results so you can repeat this workflow during every seasonal upkeep check.
Complete Repair and Fix Procedures
Once your diagnostic workflow identifies the culprit, you can move into targeted repair steps that directly lower heat and restore suction. Most fixes require only basic home tools and about 20 minutes of focused work. Always match the repair to the specific fault you found. That is because using the wrong fix wastes time and leaves the motor at risk.
- Clear Blocked Hose: Detach the hose fully and shine a flashlight through both ends. Use a long broom handle or a dedicated hose cleaning tool to push soft debris out from each end. For stubborn clogs, a mixture of baking soda. Warm water flushed through the tube breaks down grease buildup. Never use sharp metal objects inside the hose. This happens because they scratch the interior and worsen future dust buildup.
- Clean or Replace Filter: Wash washable filters with cold water. A tiny drop of dish soap, then let them dry completely for 24 hours. Dry filters snap back into place easily and restore full airflow to the motor housing. For disposable filters, match the exact model number. Order a fresh pack from your retailer. A properly seated filter gasket prevents air leaks that cause heat to escape into the motor.
- Fix Worn Belt: Open the bottom plate. Slide off the old belt by pulling it gently away from the motor shaft. Thread the new belt through the roller bracket. Loop it onto the motor pulley with steady pressure. A belt that stretches or shows glazing on the surface must be replaced right away to prevent motor strain. This simple swap often restores full suction and reduces heat output by a large margin.
Component Testing and Replacement Guidelines
Some heat problems come from single parts that fail internally. Cannot be cleaned back to health. In these cases, you need to test the part electrically or mechanically. Then swap it for a fresh spare. Knowing which parts to test saves you from unnecessary motor teardown. Keeps your repair time short. For broader testing and full category picks, explore our in-depth guide to The Difference Between Hepa and Standard Vacuum Filters.
- Thermal Cut-Off Switch: Use a multimeter set to continuity mode. Touch the probes to the switch terminals. A reading of zero ohms means the switch is fine. An open reading means it tripped and needs spare. This small part protects the motor from burning out. So a faulty switch removes that safety entirely. Always let the motor cool fully before testing this part.
- Motor Fan Blade: Remove the fan housing cover and spin the blade slowly. Meanwhile, watching for wobble or rubbing marks. A bent blade scrapes the inner housing and creates drag heat that builds fast. Compare the blade shape against a new part photo in your service manual for a clear match. Replacing a warped blade restores balanced airflow. Stops the whining noise that often accompanies overheating.
- Carbon Brush Wear: Slide the brush cap on the motor housing. Pull the carbon brush out gently to check its length. A brush shorter than a quarter inch has worn down. Produces poor contact with the commutator. Worn brushes cause arcing, sparking, and heat buildup inside the motor windings. Replace both brushes at the same time to keep motor power balanced and avoid uneven wear patterns.
After replacing any internal part, run a short test cycle. Monitor the vacuum heat with your hand near the exhaust vent. Warm air is normal, but hot air that you cannot hold your hand near means another restriction still exists. Repeat the full diagnostic workflow if heat persists after a part spare so you do not miss a secondary fault.
Troubleshooting Matrix Table
This table matches common symptoms you will see during everyday use with their most likely causes and top fixes. Use it alongside the diagnostic workflow above to quickly narrow down the problem. Pick the right repair path.


| Symptom / Issue | Probable Root Cause | Recommended Fix | Difficulty Level |
|---|---|---|---|
| Sudden shutdown after 5 minutes | Clogged motor intake or thermal switch trip | Clear air vents, test and reset or replace switch | Easy |
| Weak suction on all surfaces | Saturated filter or full dust bin | Clean or replace filter, empty bin completely | Easy |
| Burning smell with no visible dust | Worn carbon brushes or damaged fan blade | Replace brushes, inspect and replace fan blade | Moderate |
| Excessive vibration during use | Tangled brush roll or unbalanced motor fan | Detangle brush roll, true the fan blade | Easy |
| Overheating on hard floors only | Belt slipping or brush roll not spinning | Replace belt, check brush roll bearing spin | Moderate |
| Motor runs but no suction | Blocked hose or cracked duct seal | Flush hose, inspect all duct joints, reseal | Easy |
| Unit hot after short carpet use | Restricted airflow through carpet tool | Clean carpet tool nozzle, check for stuck debris | Easy |
| High amp draw on electrical test | Internal motor wear or severe restriction | Replace motor or clear all air path blockages | Advanced |
When to Replace vs. Call a Professional
Knowing when a repair is worth your time. When you need expert help saves money and prevents dangerous mistakes. Many heat-related failures are simple enough for a confident homeowner to handle with basic tools. Other situations demand a trained technician with proper electrical safety training and specialized parts access.
- DIY-Friendly Fixes: Filter changes, hose clearing, brush roll detangling. Belt swaps all fit a home repair scope. These tasks require no electrical taking apart and carry very low risk of injury. You can complete them during a regular weekend cleaning routine with no special parts ordering needed in most cases.
- Professional Service Needed: Internal motor rewinding, electrical control board faults. Sealed bearing spares require factory tools and training. If the vacuum is under warranty, a pro repair protects your coverage and prevents voided claims. A technician also has access to original OEM parts that match motor specs exactly.
- Age-Based Replacement Rule: If your vacuum is over eight years old. The motor has failed, a spare unit often costs less than a motor rebuild. Newer models also include better filtering and energy-fast motors that run cooler overall. Weigh repair cost against new unit price carefully before committing to a service call.
Always ask a pro for a written estimate before they begin internal work on your vacuum. A clear quote lets you compare the repair against a new buy and make a confident decision. For guidance on safe motor testing standards, you can reference NIST electrical safety and testing standards that apply to home appliance diagnostics.
Preventative Maintenance Schedule
A regular upkeep routine stops heat problems before they ever start. This schedule works for all vacuum types.
Steady upkeep keeps airflow clean, motor parts healthy, and suction strong across every cleaning session. Following this simple weekly and monthly plan is one of the most strong forms of How to Prevent Vacuum Overheating over the full lifespan of your machine.
- Weekly Filter Check: Tap out the dust bin. Inspect the filter for visible coating after every three to four uses. A quick knock over a trash can dislodges loose dust and keeps airflow unrestricted. If the filter looks slightly gray, a brief rinse. Full dry keeps it performing at peak level.
- Monthly Brush Roll Cleaning: Remove the brush roll once a month. Cut away any hair or fiber tangles with scissors. Spin the roll freely to confirm the bearings move without grit or grinding noise. A clean roll spins smoothly. Takes the load off the motor during heavy vacuuming sessions.
- Quarterly Hose Flush: Detach the hose. Flush it with warm water to clear sticky residue and fine dust buildup. Let the hose hang dry completely before reinstalling it to prevent mold growth inside. This simple step removes hidden restrictions that raise motor heat during long cleaning runs.
- Annual Deep Inspection: Once a year, open the housing and check the fan blade, belt. Thermal switch for wear. Replace any part that shows cracking, glazing, or thinning before it fails under load. This annual deep check extends your vacuum life by years and keeps warranty coverage active.
Sticking to this schedule means you spend less time troubleshooting heat problems. More time actually cleaning your home. Mark your calendar or set a phone reminder so you never miss a upkeep window. A well-maintained vacuum also uses less energy. This helps your utility bills stay low over time.
Best Practices for Long-Term Heat Prevention
Beyond scheduled upkeep, daily habits make a big difference in how cool. Reliably your vacuum runs over the years. Small changes in how you store, charge. Operate the machine prevent heat stress from building up silently. These best practices complement your upkeep schedule. Form the final layer of protection against overheating. For broader testing and full category picks, explore our in-depth guide to How Do I Make Baked Potatoes in Oven Perfect Every Time.
Critical safety warning: Never operate the vacuum with the dust bin empty for extended periods, as this increases dust recirculation and can overheat the motor. Always refill or reinstall the bin before heavy cleaning sessions.
- Proper Storage Location: Keep the vacuum in a cool, dry closet away from direct sunlight and heating vents. Sunlight heats the plastic housing and slowly warps internal seals that manage airflow. A shaded storage spot keeps all materials stable and prevents early aging of rubber gaskets.
- Smart Operation Timing: Avoid vacuuming during the hottest part of the day if your machine runs for long stretches. Early morning or evening sessions give the motor a cooler starting heat. A longer safe run window. Taking short breaks between rooms also lets the housing dissipate built-up heat naturally.
- Wet Debris Avoidance: Never vacuum spilled water or damp leaves unless your model is explicitly rated for wet pickup. Moisture inside the motor housing creates steam and short-circuits internal insulation over time. For liquid spills, use a dedicated wet-dry shop vac that separates liquid from the motor path entirely.
Best Practices for Preventing Vacuum Overheating
Integrating these habits into your routine means you rarely face surprise shutdowns or burning smells again. A clean filter, a clear hose. A cool storage spot cover the three main heat triggers that affect all vacuum designs.
These practices also pair perfectly with your upkeep schedule so every task reinforces the next one. When you combine daily care with periodic deep checks, How to Prevent Vacuum Overheating becomes second nature rather than a emergency reaction.
Frequently Asked Questions
How Do I Know If My Vacuum Motor Is Already Damaged From Overheating?
A damaged motor often shows a strong burning smell, visible smoke from the exhaust, or complete silence when you turn it on. You may also notice a distinct clicking sound that comes from inside the housing during power-up. If the thermal switch trips repeatedly after a short run, internal windings are likely already compromised.
A multimeter continuity test on the motor terminals can confirm an open circuit that signals burned coils. In this case, pro repair or spare is usually the safest path forward.
Can Using the Wrong Replacement Filter Cause Overheating?
Yes, a filter that does not match your model often sits crookedly. Blocks more airflow than the original part. A poor-fitting gasket also allows hot air to leak into the motor compartment instead of exiting through the proper duct.
Always order filters by the exact model number printed on the old filter label. Generic or oversized filters may look similar but fail to seal properly. Trap heat inside the machine.
Is It Safe to Run a Vacuum That Smells Slightly Hot but Works Fine?
A slight warm smell during the first use of the day is often normal, most in cold rooms. However, a persistent hot smell after the motor has warmed up signals dust baking onto internal parts or a filter that needs cleaning.
You should stop right away. Run the full diagnostic workflow if the smell returns after a full cool-down. Continuing to run a hot-smelling vacuum risks melting internal wiring insulation and permanent motor damage.
Does Room Temperature Really Affect Vacuum Overheating?
Room heat has a direct impact. This happens because the motor relies on ambient air to carry away heat from the housing. A vacuum running in a 95-degree garage without ventilation heats up far faster than one in a 70-degree living room.
High humidity also thickens the air. Reduces how well heat escapes through the exhaust vent. For best results, keep room heat between 60. 80 degrees and humidity below 70 percent during extended cleaning sessions.
How Long Should I Let the Vacuum Cool Down Before Using It Again?
Most motors need at least 20 to 30 minutes of rest after a heavy cleaning session to drop below the thermal cut-off threshold. Light tasks like quick floor touch-ups may only need 10 minutes of cool-down time.
If the vacuum shuts off again after only five minutes, a hidden airflow restriction is still forcing heat buildup faster than the cooling period can resolve it. Always let the machine cool fully before restarting to protect the motor windings.
Final Thoughts and Next Steps
Learning How to Prevent Vacuum Overheating gives you the power to keep your machine running strong for many years beyond the typical lifespan. The diagnostic workflow and repair steps in this guide cover the most common faults that cause heat buildup, from simple blockages to worn motor parts. You now have a clear path to follow the next time your vacuum shows warning signs like weak suction, burning smells, or sudden shutdowns.
Stick to your weekly and monthly upkeep schedule so these heat problems never get a chance to start in the first place. A clean filter, a clear hose.
A cool storage location handle the bulk of heat prevention with very little effort on your part. Document your repairs and test results so you build a useful history that helps you spot recurring issues faster over time.
When a repair goes beyond your comfort level, do not hesitate to call a qualified technician who can test internal parts safely. A pro diagnosis protects your investment and keeps your home safe from electrical hazards. Take action today, and your vacuum will reward you with steady, cool-running power every cleaning session.