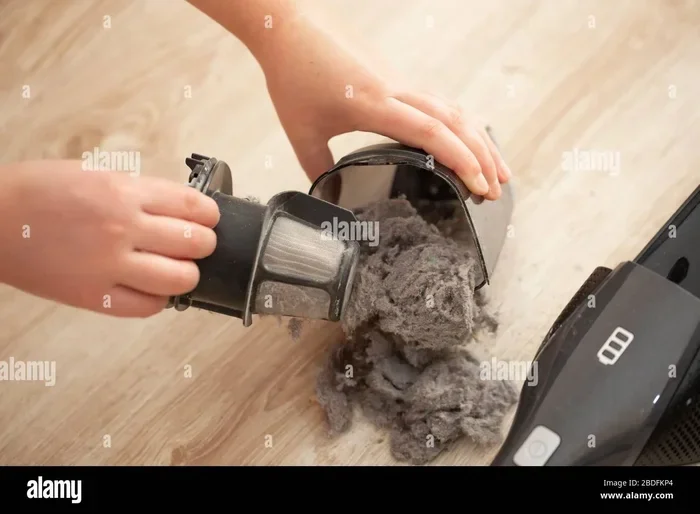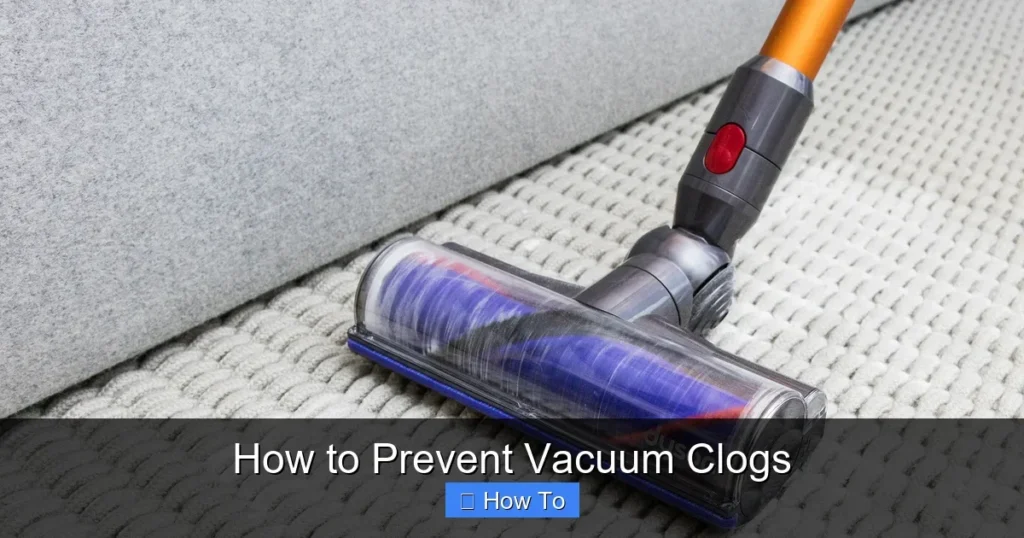
Nothing kills a cleaning session faster than a vacuum that chokes on dust halfway across the room. You push the machine forward. It just sits there, wheezing and losing all its pull. That loss of suction means you are pushing the same dirt around instead of actually lifting it away from your floors.
A simple blockage deep inside the hose or brush roll can turn a strong cleaner into a heavy paperweight. Learning How to Prevent Vacuum Clogs saves you from that frustrating stop-and-start cycle every single week. It also protects the motor.
That is because a starved machine works harder and burns out faster than it should. A few smart habits now keep your floors clean. Your wallet safe from early spare costs.
You do not need special tools or a technical degree to keep airflow wide open. This guide walks you through the exact checks, habits. Fixes that stop clogs before they start. You will learn how to spot trouble early, clear minor blockages in minutes. Set up a routine that makes every vacuum run like new.
📌 AT A GLANCE
- ✓Core Concept: A vacuum loses suction when dust, hair, or debris build up past the filter or inside the hose.
- ✓Essential Step: Check the hose, wand, and brush roll for trapped hair and large debris before every use.
- ✓Safety Rule: Always unplug the vacuum before you open any part or reach inside the brush roll.
- ✓Efficiency Tip: Empty the dustbin or replace the bag when it is half full to keep airflow strong.
- ✓Long-Term Habit: Wash or replace filters on a set schedule so fine dust never clogs the inner airflow path.
In this article
Why Preventing Clogs Matters for Your Vacuum
A vacuum cleaner works by moving air fast enough to carry dirt into the bin or bag. When something blocks that path, air slows down and the motor strains to push through. Over time, that extra strain wears out the brushes, overheats the winding. Shortens the machine life. Preventing clogs keeps the original suction power you paid for.
Gather required tools and clear your work area before starting.
Confirm baseline specs and maker guidelines first.
Complete each stage in order without skipping safety checks.
Run a quick test pass and wipe down key parts after use.
Small debris like cereal crumbs or pet hair clumps might seem harmless at first. They build up inside the hose or around the brush roll until the airflow narrows to a trickle. Regular care stops this slow decline. Stops dust from blowing back out of the exhaust. You get a cleaner floor and cleaner air in the room with far less effort. For our complete category overview. Core buyer criteria, explore our cornerstone guide to How Much is a Shark Vacuum Cleaner: Understanding the Factors of Design and Technology.
- Airflow Path: A clear hose lets air move at full speed so dirt stays suspended and reaches the bin.
- Motor Strain: Blocked intake forces the motor to draw more current. This raises heat inside the housing.
- Filter Load: Clogged pre-filters let fine dust pass deeper. This then gums up the main filter faster.
- Brush Roll Health: Hair wrapped tightly around the roller stops the bristles from agitating carpet fibers properly.
- Longevity Boost: Machines that breathe well last years longer than ones that choke on every cleaning session.
Checking the airflow path takes less than a minute, yet it prevents most suction loss. Make this quick glance part of your start-up habit so the vacuum pulls strong from the first pass. A little attention now stops expensive repairs and early machine failure later.
The Best Way to How to Prevent Vacuum Clogs Step by Step
Preventing clogs starts with a simple routine you follow before and after each job. The goal is to remove the big stuff that gets stuck. Keep fine dust from piling up inside. Once you know where blockages hide, you can clear them fast. Keep the machine running smoothly.
Keep a small hook made from a wire coat hanger near your vacuum. You can fish out hair. Debris from the brush roll area without reaching deep into the machine.
Most clogs form in three main spots: the dustbin or bag, the hose and wand. The brush roll area. Each spot needs a slightly different check, but the sequence stays the same. Empty the bin first, then look at the hose. Finally clear any hair from the roller. Doing this in order stops you from missing a spot. Lets air flow freely again.
- Empty Dustbin: Toss the contents when the bin is one-third full so loose debris never packs down and blocks airflow.
- Check Hose Path: Look through the hose from both ends to spot any large clumps or stuck objects before they cause a full clog.
- Clear Brush Roll: Cut away hair. String wrapped around the roller so the bristles can spin freely and lift dirt.
- Inspect Filters: Tap or wash filters when they look dusty so fine particles do not choke the inner air channel.
- Listen for Changes: A sudden rise in motor noise or drop in suction tells you a blockage has formed and needs fast action.
Building this step-by-step habit means you rarely deal with a fully blocked machine. You catch small issues during the quick check and fix them in seconds. That simple routine turns a dreaded clog into a minor, easy-to-fix moment.
Essential Supplies for How to Prevent Vacuum Clogs
You do not need a full workshop to keep your vacuum clear. A few simple home items make the job fast and easy. They help you reach the spots where dust hides. Having these tools ready means you fix small blockages before they grow into big problems.
Most clogs involve hair, string, or fine dust that clumps together. The right tools let you pull or push that material out without damaging the hose or filter. With a few basics on hand, you can handle every common clog type in under five minutes.
- Scissors or Shears: Sharp tips let you snip long hair. String wrapped tightly around the brush roll.
- Long Wooden Dowel: A thin, rigid stick pushes soft clogs out of the hose without scratching the inside walls.
- Soft Cleaning Cloth: A dry microfiber cloth wipes dust off the filter. The inside of the dustbin rim.
- Mild Dish Soap: A few drops in warm water wash greasy film. Fine dust off washable filters safely.
- Flashlight or Headlamp: A bright beam helps you spot small debris lodged inside the wand or hose connector.
Keep these items near your vacuum storage spot so you always have them at hand. A five-minute supply check before a big clean saves you from stopping mid-job to hunt for the right tool. That small setup habit keeps your workflow smooth and your suction strong.
Common Clog Zones and How to Clear Them
Every vacuum has a few spots where debris collects and slows airflow down. The hose, wand, and dustbin area trap the most common clog material. Learning where these zones sit helps you check the right places first when suction drops.
A clog in the hose feels like the machine suddenly loses all pull, even when the bin is not full. A clog near the brush roll shows up as a grinding sound or weak carpet agitation.
The dustbin area clogs when fine dust packs around the filter or when the bin seal gets blocked. Each zone needs a slightly different clearing method. But all of them start with a quick visual check.


- Hose Interior: Push a soft broom handle or plastic dowel through the hose to gently dislodge packed dust and hair clumps.
- Wand Connector: Check the small opening where the hose meets the wand. That is because small pebbles or crumbs often lodge there.
- Brush Roll Guard: Remove the plate or clip holding the roller, then cut away hair wraps with scissors before they tighten further.
- Filter Housing: Tap the filter gently over a trash can to knock loose fine dust. Wash it if the manual says it is safe.
- Bin Seal Area: Wipe the rim. Seal strip with a dry cloth so dust does not build up and block the suction path.
Clearing these zones regularly stops small blockages from turning into full suction loss. A quick pass with the dowel. A wipe of the seal takes less than three minutes. Make it part of your weekly routine. The vacuum will keep pulling strong through every cleaning session. For broader testing and full category picks, explore our in-depth guide to The Difference Between Hepa and Standard Vacuum Filters.
Maintenance Schedule That Stops Clogs Before They Start
A simple upkeep schedule turns clog prevention into a set-and-forget habit. Instead of reacting to a blocked vacuum, you check the machine on a regular rhythm that stops problems before they grow. Most tasks take only a few minutes. Can be grouped into weekly, monthly, and seasonal checks.
Following a set schedule means you never forget to check the filter or clear the brush roll. You also avoid the surprise suction loss that hits when a clog has been building for weeks. A steady routine keeps airflow open and the motor running cool. So the vacuum stays steady for years.
- Weekly Bin Check: Empty the dustbin or replace the bag every few uses so loose debris never packs down into a hard plug.
- Biweekly Brush Roll: Cut away hair wraps from the roller every two weeks, most in homes with long hair or shedding pets.
- Monthly Filter Care: Wash or replace filters once a month to stop fine dust from clogging the inner air channel and exhaust path.
- Quarterly Hose Pass: Run a soft dowel through the hose each quarter to clear any hidden debris that builds up out of sight.
- Seasonal Deep Review: Once a season, check the belt, wheels. Housing for wear, and replace any part that looks cracked or worn.
Sticking to this schedule stops most clogs before they start. Keeps the vacuum running at full power. You save time during cleaning sessions. This happens because the machine never loses suction halfway through a room. A few minutes of scheduled care each week adds up to years of strong, steady power.
Best Practices to Keep Airflow Open and Strong
Good habits around your vacuum stop clogs from forming in the first place. These practices focus on what you feed into the machine. How you store it after use. Small changes in your routine make a big difference in how long the vacuum stays clear.
Never use sharp metal tools inside the hose or filter housing. That is because scratches can create rough spots where debris catches and builds up again faster.
For example, picking up large debris by hand before vacuuming keeps the hose from jamming with objects that do not break down. Also, storing the vacuum in a dry spot stops moisture from clumping dust into a hard plug inside the hose. Simple awareness of what goes into the machine saves you from the worst clogs.
- Pick Up Large Debris: Remove big objects, coins. Small toys from the floor before you turn the vacuum on.
- Avoid Wet Dust: Never vacuum damp sawdust or wet crumbs. That is because moisture glues fine particles together into hard clumps.
- Check Floor Height: Adjust the brush height for carpet or hard floor so the roller does not grab too much material at once.
- Use the Right Attachment: Pick the crevice tool for tight gaps. The dusting brush for delicate surfaces to avoid overloading the suction path.
- Store Upright: Stand the vacuum upright after use so the hose does not develop a permanent bend that traps debris later.
These best practices keep the airflow path wide open. Protect the motor from extra strain. They also reduce the number of times you have to stop and clear a blockage mid-cleaning. A few mindful habits now mean less frustration and a longer machine life later.
How to Prevent Vacuum Clogs with Smart Material Handling
What you put into the vacuum matters just as much as how you clean it. Some materials pack down into dense plugs that regular airflow cannot pull through. Knowing which items to avoid or handle carefully stops clogs before they form inside the hose or bin. For broader testing and full category picks, explore our in-depth guide to How Do I Make Baked Potatoes in Oven Perfect Every Time.
Heavy soil, wet dust, and large fibrous pieces are the top culprits that cause blockages. When you sweep these up by hand first, the vacuum handles only the fine particles that it was built for. That simple habit cuts down on clogs. Keeps the machine running at peak speed every time you use it.
- Heavy Soil First: Scoop up thick mud, wet leaves, or heavy gravel by hand so the vacuum only picks up light dust.
- Fibrous Material Care: Cut long string, ribbon, or hair into short pieces before vacuuming so they do not wrap around the roller.
- Sharp Object Check: Look for glass shards or pins on the floor. Remove them by hand to protect the hose and bin.
- Dust Control: Lightly mist very fine drywall dust with water so it stays damp. Does not puff back into the air.
- Pet Hair Strategy: Use a rubber glove to gather pet hair from floors first, then vacuum the smaller pile left behind.
Smart material handling turns a potential clog into a simple, easy cleanup. You protect the vacuum’s inner parts from damage. Keep suction strong for the next room. This habit works for all vacuum types, from uprights to handheld models.
Summary Table: Cleaning Methods Compared
| Method | Frequency | Best For | Time Needed | Clog Prevention Level |
|---|---|---|---|---|
| Empty Dustbin | Every 3–5 uses | Loose dust and light debris | 30 seconds | High |
| Clear Brush Roll | Every 2 weeks | Hair and string wraps | 2–3 minutes | Very High |
| Wash Filters | Monthly | Fine dust and grease film | 5–10 minutes | High |
| Dowel Hose Pass | Quarterly | Hidden clumps and small debris | 1–2 minutes | Medium-High |
| Full Inspection | Seasonal | Belts, seals, and housing wear | 15 minutes | Very High |
This table helps you plan your clog prevention routine around real time costs and clear benefits. The most frequent tasks take under a minute and stop the most common blockages. A quarterly deep pass catches hidden debris that weekly checks might miss.
Frequently Asked Questions
What Causes a Vacuum to Clog Even When the Bin Is Empty?
A clog can form inside the hose, wand, or near the brush roll even when the bin looks clear. Hair, string, or fine dust packs into a tight plug that blocks airflow. Check these hidden spots first when the suction drops but the bin is still empty.
How Often Should I Clean the Brush Roll to Stop Clogs?
Clean the brush roll every two weeks in most homes. Homes with long hair or shedding pets need a weekly check. Cutting away hair wraps keeps the roller spinning freely. Stops debris from being pulled back into the hose.
Can I Wash My Vacuum Filter to Prevent Clogs?
Yes, if the filter is labeled washable. Let it dry completely for 24 hours before putting it back in. A damp filter can grow mold or block airflow. So always follow the manual cleaning instructions carefully.
Why Does My Vacuum Lose Suction After a Few Minutes?
The dustbin or filter is likely filling up and restricting airflow. Empty the bin and check the filter for dust buildup. A clogged pre-filter often causes this slow suction drop after the machine warms up.
Does Vacuuming Wet Floors Cause Clogs?
Yes, wet dust and moisture glue fine particles into hard clumps inside the hose. Only use a wet-dry vac for damp spills. Regular vacuums should stay away from wet surfaces to prevent blockages and motor damage.
What Is the Fastest Way to Clear a Hose Clog at Home?
Push a soft broom handle or plastic dowel through the hose from both ends. The gentle pressure breaks up most soft clogs without scratching the inside. Follow up with a quick shake to dislodge any remaining debris.
Final Thoughts and Next Steps
Preventing vacuum clogs comes down to a few simple habits done on a regular basis. You check the hose, clear the brush roll. Wash the filters before small problems turn into big blockages. That steady care keeps suction strong and the motor running cool through every cleaning session.
Use the checklist and schedule in this guide to build your own clog-free routine. Start with the weekly bin empty. The biweekly brush roll check, then add the monthly filter care as the habit sticks. Soon these steps feel auto. You will spend less time fixing jams and more time enjoying clean floors.
Strong suction means a cleaner home, less strain on the machine. A vacuum that lasts for years. Follow the steps in this guide, keep your airflow path clear. Let your vacuum do the hard work it was built for. A little care today saves you time, money, and frustration every time you clean.