A smelly vacuum cleaner is often a sign of trapped debris like pet dander, mold, or food particles decomposing inside. This unpleasant odor indicates it’s time for a thorough cleaning and maintenance check. Addressing the root cause will not only eliminate the stench but also improve your vacuum’s performance and air quality in your home, ensuring your cleaning efforts don’t just spread a bad smell around.
There’s nothing quite like the satisfaction of a freshly vacuumed floor, right? That clean, crisp feeling that comes from tidying up your living space. But what if, instead of that fresh scent, your vacuum cleaner leaves behind an odor that’s anything but pleasant? Perhaps it’s a musty, stale, or even a downright funky smell that seems to permeate the air as you clean. It’s a common and frustrating problem, leaving many of us asking, “why does my vacuum cleaner smell so bad?”
You’re not alone in this experience. Many homeowners encounter this exact issue, and the good news is that the mystery of the smelly vacuum is usually solvable. That bad smell isn’t just an annoying byproduct; it’s often a clear indicator that something within your vacuum cleaner needs attention. It might be an accumulation of everyday grime, a forgotten snack, or even something a bit more insidious like mold. Understanding the root cause is the first step toward banishing those odors and restoring your vacuum to its fresh-smelling, effective best.
In this comprehensive guide, we’re going to dive deep into the various reasons why your vacuum cleaner might be emitting an unwelcome aroma. We’ll explore the common culprits, from the visible to the hidden, and arm you with practical tips and a step-by-step action plan to get your vacuum smelling clean again. Say goodbye to that lingering stench and hello to a truly fresh home!
Key Takeaways
- Pet Dander & Hair: Accumulated pet fur and dander are prime sources of unpleasant smells, especially as they decompose within the vacuum.
- Mold & Mildew Growth: Damp debris, even small amounts, can lead to mold and mildew, emitting a musty, unhealthy odor.
- Trapped Food Particles: Accidental vacuuming of food crumbs allows them to decompose, creating foul smells and potentially attracting pests.
- Clogged & Dirty Filters: Filters saturated with dust and allergens restrict airflow and can harbor a multitude of odors, blowing them back into your room.
- Overfilled Dust Bags/Canisters: A full collection bin is a cesspool of old dirt, dust, and decaying organic matter, leading to a strong, stale smell.
- Regular Deep Cleaning: Disassembling and thoroughly cleaning parts like the brush roll, hose, and canister is crucial for eliminating persistent smells.
- Preventative Maintenance: Regularly emptying the bin, cleaning filters, and addressing spills immediately are key to keeping your vacuum smelling fresh.
Quick Answers to Common Questions
Can a dirty filter really make my vacuum smell?
Yes, absolutely! Dirty filters become clogged with dust, pet dander, and other debris. As air passes through these saturated filters, it picks up and distributes the accumulated odors back into your room, making your vacuum smell bad.
Is a burning smell from my vacuum dangerous?
A burning smell can be dangerous. It usually indicates an overheating motor, a slipping belt, or an electrical issue. If you smell burning, immediately turn off and unplug the vacuum to prevent further damage or potential fire hazards.
How often should I clean my vacuum?
Regular maintenance is key. Empty the canister/change the bag after every few uses. Clean or replace filters every 1-3 months, depending on usage and your home environment (e.g., pets). A deep clean, including the brush roll and hose, is recommended every 3-6 months.
Can I use baking soda inside my vacuum?
Yes, baking soda can help! After cleaning your vacuum, you can sprinkle a small amount of baking soda into the empty dust bin or new bag before reassembling. It acts as a natural deodorizer, absorbing lingering odors.
What’s the quickest fix for a smelly vacuum?
The quickest fix is to empty the dust bin or change the bag, and then check and clean or replace your main filters. Often, these two steps alone can significantly reduce or eliminate most odors.
📑 Table of Contents
The Usual Suspects – Organic Debris
Most of the time, the answer to “why does my vacuum cleaner smell so bad” lies in the very things it’s designed to pick up: dirt and debris. But not all dirt is created equal when it comes to odors. Organic materials, especially, can turn into a fragrant nightmare once trapped inside your vacuum.
Pet Hair and Dander – The Furry Culprit
If you share your home with furry friends, this is likely one of the biggest reasons for a stinky vacuum. Pet hair, dander, and even tiny flakes of skin all get sucked into your machine. Over time, this organic matter breaks down and decomposes, especially when warm air from the motor passes over it. The result is a distinct, often stale, “wet dog” or dusty animal smell that gets blown back into your room. Imagine all those microscopic particles stewing in a warm, dark environment – it’s a recipe for odor disaster!
- Tip: If you have pets, consider emptying your vacuum’s canister or changing the bag more frequently. A vacuum specifically designed for pet hair might also have better filtration systems to contain these smells.
Trapped Food Particles – A Decomposing Feast
Accidentally vacuuming up a dropped cheerio, a stray crumb of toast, or even a tiny piece of dog food might seem harmless at the time. However, once these food particles are inside your vacuum, they become a prime source of unpleasant smells. They can get stuck in the hose, the canister, or the brush roll, and as they decompose, they create a foul, often rancid odor. This problem is especially noticeable if the food item was moist or greasy.
- Tip: Be mindful of what you’re vacuuming. If you’ve picked up food, empty the canister or change the bag immediately. It also helps to visually inspect the hose and brush roll for any stuck items.
Mold and Mildew – The Damp Invader
This is perhaps one of the most concerning reasons why your vacuum cleaner smells so bad. Mold and mildew thrive in damp, dark environments. If you’ve ever vacuumed up a spill that wasn’t completely dry, or perhaps vacuumed a slightly damp carpet or rug, you’ve created the perfect breeding ground for these fungi. The musty, earthy smell of mold or mildew isn’t just unpleasant; it can also be a health hazard, releasing spores into your home’s air. Even small amounts of moisture in the dust bag or canister can kick-start this problem.
- Tip: Always ensure surfaces are completely dry before vacuuming. If you suspect mold, thoroughly clean and dry all removable parts. In extreme cases, you might need to replace parts that have visible mold growth.
Filter Fiascos and Baggy Blunders
Filters and dust collection systems are crucial components of your vacuum cleaner. When they’re not maintained, they can quickly become hotbeds of odor, amplifying the question, “why does my vacuum cleaner smell so bad?”
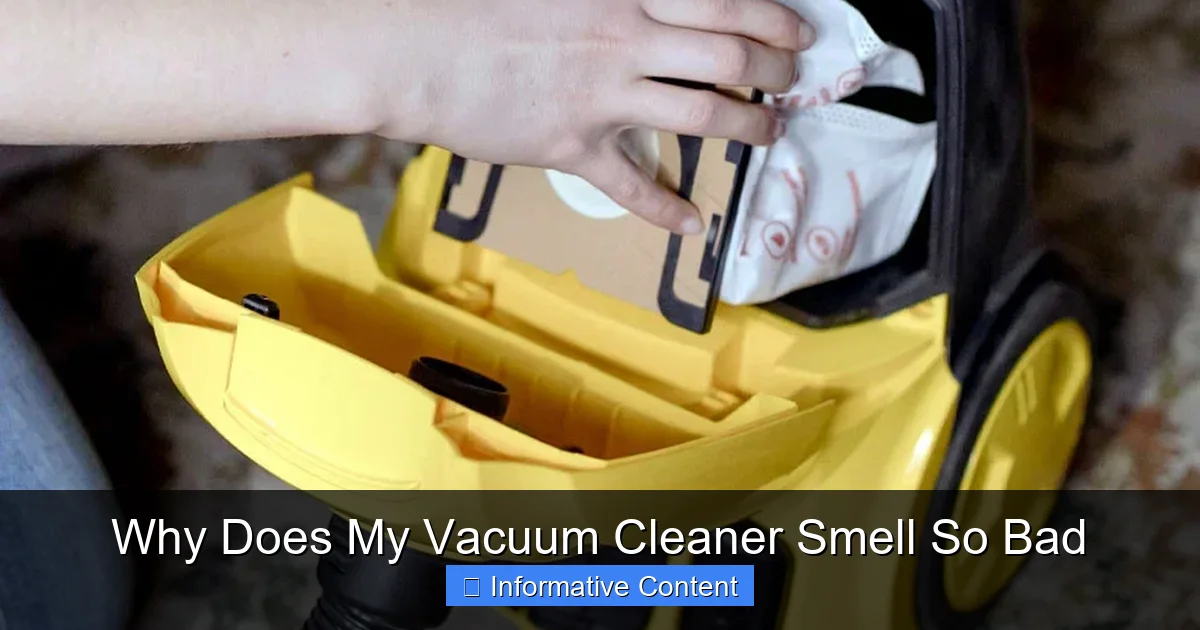
Visual guide about Why Does My Vacuum Cleaner Smell So Bad
Image source: dm.henkel-dam.com
Clogged or Dirty Filters – The Airflow Blocker
Your vacuum’s filters, whether HEPA, foam, or pleated, are designed to trap dust, allergens, and microscopic particles, preventing them from being expelled back into your home’s air. But what happens when these filters become saturated with all that trapped gunk? They get clogged, restrict airflow, and become a repository for all the smelly particles your vacuum has ever picked up. Every time you turn on your vacuum, air is forced through these dirty, smelly filters, picking up the odors and broadcasting them throughout your room.
- Practical Example: Imagine a sponge that’s soaked up months of kitchen spills and dust. Now imagine air being blown through it. That’s essentially what happens with a dirty filter.
- Tip: Check your vacuum’s manual for filter cleaning or replacement recommendations. Washable filters should be cleaned regularly and allowed to dry completely before reinstallation. Disposable filters should be replaced according to the manufacturer’s guidelines, or more frequently if you notice an odor.
Overfilled Dust Bags and Canisters – A Stinky Storage
This seems like an obvious one, but it’s often overlooked. A full dust bag or a canister overflowing with dirt and debris is essentially a warm, dark, enclosed space where all those organic particles we discussed earlier (pet dander, food crumbs, general grime) can sit and decompose. The longer they sit, the more potent the smell becomes. Every time your vacuum runs, the airflow stirs up these decaying contents, pushing the stale, dirty air out through the exhaust.
- Tip: Don’t wait until your bag or canister is bursting at the seams. Empty bagless canisters after every few uses, or when they reach the “max fill” line. Change vacuum bags well before they are completely full, especially if you have pets or notice an odor.
The Motor and Electrical Overheating
Sometimes, the smell coming from your vacuum cleaner isn’t organic at all. A burning smell can be a serious sign that something is mechanically wrong.
Burning Smell – More Than Just a Bad Odor
If you notice a distinct burning smell, it’s usually a sign of electrical or mechanical trouble. This could be caused by:
- Overheating Motor: A clogged filter, a full bag, or a blockage in the hose can make your vacuum’s motor work harder than it should, causing it to overheat and emit a burning smell.
- Worn-out Belt: The belt that drives the brush roll can wear out or become stretched. If it’s slipping or breaking, it can create friction and a burning rubber smell.
- Electrical Short: Less common, but a serious issue. If there’s an electrical fault or a loose wire, it can cause a burning plastic or electrical smell.
What to Do If You Smell Burning
Immediately turn off and unplug your vacuum cleaner. This is crucial for safety. Let it cool down completely. Then, check for blockages in the hose, brush roll, and filters. If the smell persists after addressing these issues, or if you suspect an electrical problem, it’s best to take your vacuum to a professional for repair or consider replacing it. Do not continue to use a vacuum that consistently emits a burning smell.
Hidden Nooks and Crannies – Where Smells Linger
The obvious spots are usually the first place we look, but often the answer to “why does my vacuum cleaner smell so bad” hides in plain sight, or rather, in plain parts that aren’t immediately obvious odor sources.
Hoses, Wands, and Attachments – Forgotten Pathways
The flexible hose, extension wands, and various attachments might seem like mere conduits for dirt, but they can become traps for smelly debris. Pet hair, food particles, and damp dust can get stuck inside the hose, particularly if it has bends or narrow sections. Over time, this trapped gunk decomposes and becomes a potent source of odor that gets released every time air flows through it. Similarly, attachments can accumulate grime and go unnoticed.
- Tip: Detach the hose and inspect it for blockages. You can use a broom handle or a long, flexible brush to dislodge anything stuck inside. Wash attachments with warm, soapy water and allow them to air dry completely.
Brush Roll – A Tangle of Trouble
The rotating brush roll (also known as the beater bar) is designed to agitate carpets and pick up debris. However, it’s also a magnet for hair (human and pet), string, thread, and other fibrous materials. These can wrap tightly around the brush, making it less effective and potentially causing the motor to work harder. But more importantly for our discussion, these tangled materials can also trap dirt, food particles, and even tiny pieces of mold, becoming a source of stale odors that are released as the brush spins.
- Tip: Regularly inspect and clean the brush roll. Use scissors or a seam ripper to carefully cut and remove any tangled hair or debris. Ensure the brush roll spins freely after cleaning.
Your Action Plan – Banish the Bad Odor
Now that we’ve uncovered the various reasons why your vacuum cleaner smells so bad, it’s time to take action. A thorough cleaning and some preventative measures will have your vacuum smelling fresh and working efficiently once again.
Step-by-Step Cleaning Guide
- Unplug Your Vacuum: Safety first! Always ensure your vacuum is unplugged before performing any maintenance or cleaning.
- Empty the Dust Bin/Change the Bag: This is the easiest first step. For bagless vacuums, empty the canister into an outdoor trash can to prevent dust from recirculating indoors. Wash the canister with warm, soapy water, rinse thoroughly, and let it air dry completely. For bagged vacuums, replace the bag with a new one.
- Clean or Replace Filters: Locate all filters (pre-motor and post-motor/HEPA). If they are washable, rinse them under cool water until the water runs clear. Squeeze out excess water and let them air dry for at least 24-48 hours until completely bone-dry. If they are not washable or are heavily soiled, replace them according to your manual.
- Clean the Brush Roll: Turn the vacuum over. Remove any cover if necessary (check your manual). Use scissors or a seam ripper to carefully cut away tangled hair, string, and debris from the brush roll. Wipe the brush roll clean with a damp cloth.
- Clear the Hose and Attachments: Detach the hose. Look through it for any blockages. Use a broom handle, a long brush, or even a flexible drain snake to push out any obstructions. Wash detachable wands and tools in warm, soapy water, rinse, and air dry completely.
- Wipe Down the Exterior: Use a damp cloth with a mild all-purpose cleaner to wipe down the exterior of your vacuum cleaner. Don’t forget the wheels, crevices, and under the base.
- Deodorize (Optional): Once all parts are clean and completely dry, you can add a natural deodorizer. Sprinkle a small amount of baking soda or activated charcoal into the empty dust bin or bag before reassembling. Some manufacturers also offer scented vacuum deodorizers.
Preventative Measures – Keeping it Fresh
- Regular Emptying: Don’t let debris fester. Empty your bagless canister after every use or two, and change bags when they’re about two-thirds full.
- Filter Maintenance: Stick to your vacuum’s recommended filter cleaning/replacement schedule. This is crucial for both performance and odor control.
- Avoid Wet Spills: Never vacuum up anything wet or even damp, as this is a direct invitation for mold and mildew.
- Check for Blockages: Periodically check the hose, brush roll, and intake for blockages, especially if you notice a drop in suction or a new smell.
- Pre-Treat Smelly Areas: If you’re cleaning up a notoriously smelly mess (e.g., pet accidents on carpet), consider pre-treating the area with baking soda or a pet odor eliminator before vacuuming.
- Allow for Airflow: After cleaning the canister or filters, ensure they are completely dry before putting them back. Store your vacuum in a dry, well-ventilated area.
Conclusion
A smelly vacuum cleaner is more than just an annoyance; it’s a signal that your essential cleaning tool needs a little TLC. By understanding the common culprits – from decomposing pet dander and forgotten food to clogged filters and potential mold growth – you’re well-equipped to tackle the problem head-on. The question “why does my vacuum cleaner smell so bad” no longer has to be a mystery.
Taking the time to regularly clean and maintain your vacuum cleaner not only eliminates those unwelcome odors but also significantly improves its performance and extends its lifespan. A clean vacuum means cleaner air for your home and a more effective cleaning experience overall. So, roll up your sleeves, give your trusty vacuum a good scrub, and enjoy the true freshness of a well-cleaned home.
🎥 Related Video: Does Your Vacuum Have an Odor? Here's how to clean that up! #cleaning #vacuum
📺 Clean That Up
Frequently Asked Questions
What are the main reasons why my vacuum cleaner smells so bad?
The primary reasons your vacuum cleaner smells so bad typically involve trapped organic debris like pet hair, dander, and decomposing food particles. Mold and mildew from vacuuming damp areas, along with clogged or dirty filters and overfilled dust bags, are also major contributors to unpleasant odors.
How do I prevent mold from growing in my vacuum?
To prevent mold, always ensure surfaces are completely dry before vacuuming, and never vacuum up wet spills. If you wash any parts, make sure they are thoroughly air-dried for at least 24-48 hours before reassembling your vacuum. Regularly emptying the canister also helps.
Are there specific vacuum parts I should focus on when cleaning for odor?
Yes, definitely! Pay special attention to the dust bin/bag, all filters (pre-motor and post-motor), the brush roll, and the flexible hose. These areas are most prone to accumulating smelly debris and can harbor mold or mildew.
When should I replace my vacuum’s filters?
The replacement frequency depends on your vacuum model and usage, but generally, disposable filters should be replaced every 6-12 months, or more frequently if you have pets or allergies. Washable filters should be cleaned every 1-3 months and replaced annually or if they show signs of damage or permanent discoloration.
Can essential oils help with vacuum odors?
While essential oils can provide a temporary pleasant scent, they don’t address the root cause of the bad smell. You can add a few drops to a cotton ball and place it in the vacuum’s canister or bag, but it’s crucial to clean the vacuum thoroughly first to genuinely eliminate the source of the odor.
Is it normal for a new vacuum to smell?
It’s somewhat normal for a new vacuum to have a slight “new plastic” or “motor” smell during its first few uses as components heat up and settle. However, this smell should dissipate quickly. If it’s a strong, burning, or consistently unpleasant odor, it could indicate a manufacturing defect or an issue that needs to be addressed by the retailer or manufacturer.