Regularly cleaning your Dyson vacuum is crucial for maintaining its powerful suction and extending its life. This comprehensive guide will walk you through how to take apart the Dyson vacuum for cleaning, from emptying the dust bin and washing filters to tackling the brush bar and clearing stubborn blockages. By following these simple steps, you can ensure your Dyson continues to perform at its best, keeping your home spotless.
How to Take Apart the Dyson Vacuum for Cleaning
Your Dyson vacuum is a champion, a true workhorse tirelessly battling dust bunnies and pet hair in your home. It’s designed to be powerful, efficient, and reliable. But even the best heroes need a little R&R, and for your Dyson, that means a good, thorough cleaning. Over time, dust, hair, and debris can build up in its nooks and crannies, reducing its legendary suction power and making it less effective.
Don’t worry, giving your Dyson the deep clean it deserves isn’t as daunting as it sounds. While it might seem complex to take apart the Dyson vacuum for cleaning, many of its parts are designed for easy user maintenance. Think of it like a spa day for your vacuum cleaner – a little effort now will ensure it continues to serve you faithfully for years to come, keeping your floors sparkling clean. Ready to revitalize your cleaning companion? Let’s dive in!
Key Takeaways
- Boost Performance: Regularly taking apart and cleaning your Dyson significantly improves suction power and overall efficiency, just like when it was new.
- Extend Lifespan: Preventing dirt and debris buildup inside the vacuum components helps reduce wear and tear, prolonging your Dyson’s operational life.
- Prioritize Safety: Always unplug your Dyson from the power outlet and ensure it’s completely off before attempting any disassembly or cleaning.
- Start Simple: Begin with easier steps like emptying the dust bin and washing the filters before moving on to more complex parts like the brush bar.
- Gather Tools: Have essential tools like scissors, a small flathead screwdriver, and a microfiber cloth ready for an efficient cleaning process.
- Thorough Drying is Key: Ensure all washed components, especially filters, are completely dry (at least 24 hours) before reassembling to prevent mold and damage.
- Regular Maintenance Pays Off: Incorporate routine checks and minor cleans into your schedule to prevent major blockages and reduce the frequency of full disassemblies.
Quick Answers to Common Questions
How often should I deep clean my Dyson vacuum?
For most households, a deep clean focusing on the brush bar and internal components every 3-6 months is sufficient. Filters should be washed monthly or every three months depending on usage.
Can I use soap or detergent to wash Dyson filters?
No, you should only use cold water to rinse Dyson filters. Soaps and detergents can damage the filter material and affect its ability to trap fine dust and allergens effectively.
What if I can’t remove a stubborn blockage from the hose?
Try using a broom handle or a long, flexible stick to gently push the blockage through. If it’s still stuck, you might need to try a strong vacuum (if you have another one) to suction it out, or in extreme cases, take it to a service center.
How long do Dyson filters take to dry completely?
Dyson filters typically need at least 24-48 hours to air dry completely. They must be bone dry before reinstallation to prevent mold growth and motor damage.
Are all Dyson models taken apart the same way for cleaning?
While many steps are similar across Dyson models, there can be slight variations in how parts like the brush bar or filters are removed. Always refer to your specific model’s manual if you’re unsure.
📑 Table of Contents
- Why Bother Taking Apart Your Dyson? The Benefits of a Deep Clean
- Safety First: Preparations Before You Begin
- The Common Culprits: Parts You’ll Likely Need to Disassemble
- Deeper Dive: Tackling the Brush Bar and Head
- Reassembly: Putting Your Dyson Back Together
- Maintenance Tips for a Longer-Lasting Dyson
- Conclusion
Why Bother Taking Apart Your Dyson? The Benefits of a Deep Clean
You might be thinking, “Can’t I just empty the bin and call it a day?” While emptying the bin is a crucial first step, a deeper clean offers a host of benefits that go far beyond just a clear dust collector. Understanding these advantages will motivate you to learn how to take apart the Dyson vacuum for cleaning properly.
Restore Peak Suction Power
This is perhaps the most immediate and noticeable benefit. When debris clogs the airways, brush bars, and filters, your Dyson struggles to pull in dirt effectively. A deep clean removes these obstructions, allowing air to flow freely and restoring that powerful, “like new” suction you’ve come to expect. You’ll notice a significant difference in how effortlessly it picks up grime.
Extend Your Dyson’s Lifespan
Just like any machine, consistent maintenance prevents premature wear and tear. Accumulated dust and hair can strain the motor, overheat components, and damage delicate parts. By regularly cleaning these components, you reduce stress on the vacuum’s mechanics, helping your Dyson last longer and perform reliably for many years. It’s an investment in its longevity.
Improve Air Quality
Dyson vacuums are famous for their excellent filtration systems, trapping allergens and microscopic particles. However, dirty filters can become breeding grounds for bacteria and mold, or they can become so clogged that they release trapped particles back into your home’s air. Cleaning these filters, and the pathways leading to them, ensures your Dyson continues to trap allergens effectively, contributing to a healthier living environment.
Prevent Costly Repairs
Many common Dyson issues, such as loss of suction or strange noises, are often due to blockages that can be easily cleared with a good clean. Ignoring these signs can lead to motor burnout or other serious component failures, resulting in expensive professional repairs or even the need to replace the entire unit. Knowing how to take apart the Dyson vacuum for cleaning empowers you to address these problems proactively.
Safety First: Preparations Before You Begin
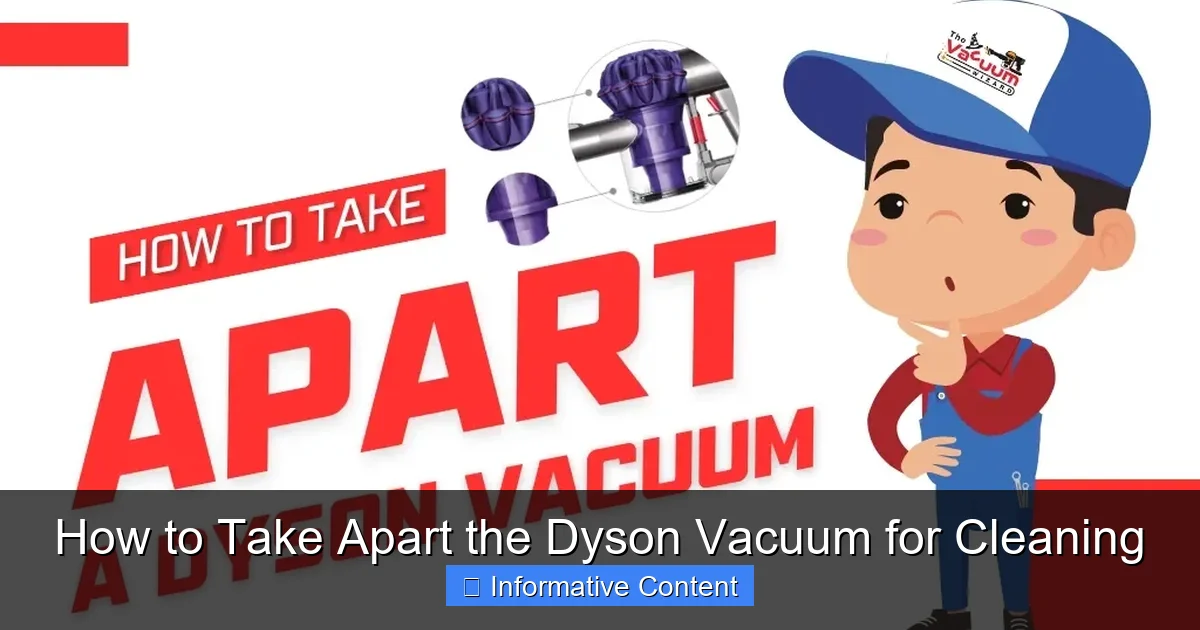
Visual guide about How to Take Apart the Dyson Vacuum for Cleaning
Image source: thevacuumwizard.co.uk
Before you even think about grabbing a screwdriver or pulling at any parts, it’s absolutely essential to prioritize safety. Working with electronics, even when unplugged, requires caution. Taking these simple preparatory steps will make the entire cleaning process smoother and safer.
Unplug Your Dyson
This is non-negotiable. Always, always, *always* unplug your Dyson from the power outlet before you begin any disassembly or cleaning. This prevents accidental power activation and eliminates the risk of electric shock. Make sure the unit is completely off.
Find a Clear Workspace
You’ll be dealing with dirt and potentially small parts. Choose a well-lit, spacious area where you can lay out components without losing them. A large towel or an old sheet on the floor or table can help contain debris and protect your surfaces.
Gather Your Tools
Having the right tools on hand will make the job much easier. Here’s what you’ll typically need:
- Scissors or a seam ripper: For cutting away tangled hair and threads.
- A small flathead screwdriver or coin: Many Dyson models have screw-like fasteners for the brush bar that can be opened with a coin.
- Microfiber cloths: For wiping down surfaces.
- A soft brush or old toothbrush: For dislodging stubborn dirt from crevices.
- A waste bin: For all the dirt and debris you’ll be removing.
Consult Your Manual (Optional but Recommended)
While this guide aims to be comprehensive for general Dyson models, specific disassembly instructions can vary slightly between models (e.g., V8, V10, V11, Ball models). If you have your original manual, a quick glance at the cleaning section can provide model-specific tips and diagrams. This is especially helpful if you’re unsure about a particular component when you try to take apart the Dyson vacuum for cleaning.
The Common Culprits: Parts You’ll Likely Need to Disassemble
Most Dyson models share common components that are prone to accumulating dirt and are designed for user-friendly access. We’ll start with the simplest parts and work our way to the more involved ones. These are the core areas you’ll focus on when you want to take apart the Dyson vacuum for cleaning.
Emptying and Cleaning the Dust Bin (Cyclone Separator)
This is the most frequent cleaning task, but sometimes people don’t go deep enough.
How to empty the bin:
- Press the bin release button (usually a red lever or button) to detach the clear dust bin from the main body of the vacuum.
- Position the bin over a trash can.
- Press the second release button (often a smaller red button on the bin itself) to open the bottom flap and release the contents.
- Shake it gently to ensure all debris falls out.
Cleaning the cyclone shroud:
The central cone (cyclone shroud) inside the bin can get coated with fine dust.
- Wipe the inside and outside of the clear bin with a damp cloth (not wet, and never immerse the entire bin in water unless your specific model states it’s washable).
- Use a dry brush or an old toothbrush to gently clean the mesh shroud in the center of the bin. This is where a lot of fine dust can cling.
- Ensure the bin is completely dry before reattaching it to the vacuum.
Removing and Washing the Filters
Dyson filters are critical for trapping allergens and fine dust. They need regular attention. Most Dyson models have at least one washable filter, often located at the top or rear of the vacuum. Some models have two.
Locating your filters:
- Post-motor filter: Often a cylinder at the top or back of the main unit (e.g., V7, V8, V10, V11).
- Pre-motor filter: Can be under the dust bin (on some uprights) or part of the handle assembly.
How to wash filters:
- Twist or pull the filter out according to your model’s instructions.
- Hold the filter under cold running water.
- Gently squeeze or tap the filter to dislodge dirt until the water runs clear. Do NOT use detergent or hot water, as this can damage the filter material.
- Shake off excess water.
- Leave the filter(s) to air dry for at least 24-48 hours in a warm place with good airflow. They must be COMPLETELY dry before reinstallation. Reinstalling a damp filter can lead to mold growth and damage to the motor.
Detaching and Cleaning the Wand/Hose
Blockages in the wand or hose are common culprits for loss of suction. When you try to take apart the Dyson vacuum for cleaning, don’t forget these essential pathways.
Disconnecting the wand and hose:
- On most stick vacuums, the wand easily detaches from the main body and the cleaner head with a click-release button.
- On uprights, the hose typically unclips or unscrews from the main body.
Clearing blockages:
- Visually inspect the wand and hose for any obstructions.
- Use a broom handle, a long stick, or another flexible tool to carefully push through any clogs. Be gentle to avoid puncturing the hose.
- If the clog is particularly stubborn, you might need to use a strong burst of air (from a compressor, carefully) or run water through it if the hose is detachable and designed to handle it (always check your manual first). Ensure it’s fully dry before reattaching.
Deeper Dive: Tackling the Brush Bar and Head
This is where the magic happens – or gets tangled. The cleaner head and brush bar are magnets for hair, string, and carpet fibers, leading to reduced efficiency and potential motor strain. Learning how to take apart the Dyson vacuum for cleaning this specific component is key to maintaining powerful performance.
Accessing the Brush Bar
The method to access the brush bar varies slightly by model, but generally involves these steps:
For stick vacuums (e.g., V-series cordless):
- Detach the cleaner head from the wand.
- Look for a small red or grey tab/latch on the side of the cleaner head. Push or slide it to release the end cap of the brush bar.
- The brush bar should then slide out. Some models have a small screw (often requiring a coin or a flathead screwdriver) that holds the end cap in place.
For upright/ball models:
- Lay the vacuum down on its back.
- Locate the soleplate (the bottom plate of the cleaner head). It’s usually held in place by a few screws (often Phillips head) or clips.
- Unscrew or unclip the soleplate to expose the brush bar.
- The brush bar can then be lifted out.
Cleaning the Brush Bar
Once the brush bar is removed, you’ll likely find it covered in hair and debris.
Removing tangled hair:
- Use scissors to carefully cut along the length of the brush bar to snip through tangled hair and threads. Be careful not to cut the bristles themselves.
- Once cut, the hair should be easier to pull off by hand.
- Use a damp cloth to wipe down the brush bar, removing any remaining fine dust.
- Ensure the brush bar is completely dry before reinstalling.
Clearing Blockages in the Head
Don’t forget the cavity where the brush bar sits. This area can also accumulate significant dirt.
Inspecting the airway:
- Look into the cleaner head’s internal pathways, especially the opening where dirt enters from the brush bar to the main suction channel.
- Use a soft brush, a pipe cleaner, or even your fingers (if safe and accessible) to dislodge any packed dirt or larger debris.
- For deep clogs, a blast of compressed air can sometimes help, but be careful not to push debris deeper into inaccessible areas.
- Wipe down the inside of the cleaner head with a damp cloth.
Reassembly: Putting Your Dyson Back Together
Once everything is sparkling clean and completely dry, it’s time to put your Dyson back together. This is often just the reverse of the disassembly process, but a few tips can help.
Step-by-Step Reassembly
- Brush Bar: Carefully slide the brush bar back into the cleaner head. Ensure it’s properly seated and the end cap clicks or screws back into place securely. Test it by trying to spin it with your hand – it should move freely.
- Cleaner Head: Reattach the soleplate if you removed it, securing any screws or clips.
- Filters: Reinsert all dry filters into their correct positions. Listen for a click or ensure they’re firmly in place. Remember, damp filters are a no-go!
- Dust Bin: Attach the dust bin to the main body, ensuring it clicks securely.
- Wand/Hose: Reconnect the wand to the main body and the cleaner head. Ensure all connections are firm.
Final Check
Once everything is back together, plug your Dyson back in and give it a quick test run on a low setting. Listen for any unusual noises and check that the brush bar is spinning correctly. You should immediately notice the improved suction power!
Maintenance Tips for a Longer-Lasting Dyson
Knowing how to take apart the Dyson vacuum for cleaning is fantastic, but regular smaller maintenance tasks can reduce the frequency of full disassemblies.
Empty the Bin After Every Use
This prevents debris from compacting and potentially blocking the cyclone. It’s a simple habit that makes a big difference.
Rinse Filters Monthly (or as Recommended)
Depending on your usage, rinse your washable filters every month or two. Mark it on your calendar! Remember the 24-48 hour drying rule.
Check Brush Bar Regularly
Give your brush bar a quick visual inspection after every few uses. If you see hair wrapping around it, snip it off before it becomes a major problem.
Clear Visible Blockages Immediately
If you notice a drop in suction or hear an unusual noise, investigate immediately. Often, it’s a simple blockage in the wand or cleaner head that can be quickly removed before it turns into a major issue.
Use the Right Setting
Using your Dyson on the appropriate power setting for the surface you’re cleaning can reduce strain on the motor and prevent unnecessary clogs from forcing too much debris into the system.
Conclusion
Congratulations! You’ve successfully learned how to take apart the Dyson vacuum for cleaning and given your trusty cleaning companion the TLC it deserves. This isn’t just a chore; it’s an investment in your vacuum’s performance, longevity, and your home’s air quality.
By following these steps to deep clean the dust bin, filters, wand, and especially the brush bar, you’ve restored its powerful suction and ensured it’s ready to tackle the toughest messes. Remember, a little regular maintenance goes a long way. So, empower yourself with this knowledge, keep your Dyson sparkling inside and out, and enjoy a cleaner, healthier home for years to come!
Frequently Asked Questions
Is it safe to get my Dyson vacuum wet when cleaning it?
No, generally only the filters and sometimes the dust bin (if specified by your model) are designed to get wet. Never immerse the main body, motor, or electronic components in water. Always unplug the vacuum before cleaning.
What should I do if my brush bar isn’t spinning after cleaning?
First, check for any remaining hair or debris caught around the brush bar or in its housing. Ensure the brush bar is correctly reinstalled and the end caps or soleplate are securely fastened. A major internal blockage or a faulty motor could also be the cause.
Can I put Dyson parts in the dishwasher?
Absolutely not. Dyson vacuum parts are not designed for dishwasher cleaning. The high heat and harsh detergents can warp plastic components, damage seals, and compromise the vacuum’s functionality.
My Dyson still has low suction after a deep clean. What could be wrong?
Double-check all potential blockage points again, especially the wand, hose, and the entrance to the dust bin. Ensure your filters are completely dry and correctly installed. If the problem persists, there might be a more serious internal blockage or a motor issue requiring professional service.
How often should I replace my Dyson filters?
Even with regular washing, filters can wear out over time. Dyson recommends replacing washable filters roughly every 12 months, or sooner if you notice a persistent odor or significant decrease in performance.
Will taking apart my Dyson void its warranty?
No, performing routine cleaning and maintenance as outlined in your Dyson manual, which often includes disassembling for cleaning purposes, will generally not void your warranty. However, using improper tools or forcing components could cause damage that is not covered.