Mastering your Bissell vacuum cleaner is straightforward when you understand its features, proper operation, and essential maintenance. This guide will walk you through every step, from initial setup and efficient vacuuming techniques to using attachments and keeping your machine in top condition, ensuring you achieve the best cleaning results every time.
Bissell Vacuum Cleaner How to Use
Welcome, fellow cleaner! If you’ve just unboxed a shiny new Bissell vacuum cleaner or perhaps you’ve had one for a while and want to ensure you’re getting the absolute best out of it, you’ve come to the right place. Bissell has been a household name for generations, known for its commitment to powerful cleaning and innovative solutions, especially when it comes to floors and pet messes. From powerful uprights to versatile stick vacuums and robust canisters, each Bissell is designed to make your home cleaner and your life a little easier.
Understanding how to use your Bissell vacuum cleaner properly isn’t just about turning it on and pushing it around. It’s about unlocking its full potential, ensuring deep cleaning, and extending the life of your appliance. Whether you’re battling stubborn pet hair, fine dust, or everyday grime, knowing the ins and outs of your specific Bissell model can dramatically improve your cleaning results. This comprehensive guide is designed to be your friendly companion, walking you through every step from assembly to advanced cleaning techniques and essential maintenance.
So, let’s dive in and transform your cleaning routine. We’ll cover everything you need to know about your Bissell vacuum cleaner: how to use it effectively, maintain it for peak performance, and troubleshoot any minor issues that might pop up. Get ready to experience the satisfaction of a truly clean home with your trusty Bissell by your side!
Key Takeaways
- Familiarize Yourself: Before you begin, take a moment to understand your specific Bissell model, its features, and attachments, as different types (upright, canister, stick) have unique operating nuances.
- Prepare Your Space: Always clear large debris, loose items, and power cords from the area to prevent damage to your vacuum and ensure a smooth, efficient cleaning process.
- Master Vacuuming Technique: Use slow, overlapping passes to allow the Bissell vacuum cleaner’s suction and brush rolls ample time to lift dirt and debris effectively from your carpets and hard floors.
- Utilize Attachments Wisely: Don’t overlook your Bissell’s accessories! They are designed to tackle specific challenges like crevices, upholstery, stairs, and pet hair, enhancing your overall cleaning power.
- Regular Maintenance is Crucial: To keep your Bissell vacuum cleaner performing optimally, regularly empty the dirt bin, clean or replace filters, and check the brush roll for tangles. This prevents loss of suction and extends its lifespan.
- Troubleshoot Common Issues: Be prepared for minor hiccups. Many common problems, such as loss of suction or strange noises, can be resolved quickly by checking for clogs or emptying the dirt tank.
Quick Answers to Common Questions
How do I turn on my Bissell vacuum cleaner?
Locate the power button, usually on the handle or main body, and press it once. If your model has a foot pedal, press that. For cordless models, ensure it’s charged.
Should the brush roll be on for hard floors?
No, generally you should turn the brush roll off for hard floors to prevent scratching and scattering debris. Only use it on for carpets.
How often should I empty the dirt tank?
It’s best practice to empty the dirt tank after every use, or when it reaches the “Max Fill” line, to maintain optimal suction power.
Where are the filters on my Bissell vacuum cleaner?
Most Bissell vacuums have a pre-motor filter (often near the dirt tank) and a post-motor filter (often near the exhaust vent). Refer to your specific model’s manual for exact locations.
Can I vacuum water with my Bissell dry vacuum?
Absolutely NOT. Dry vacuums are not designed to pick up liquids and doing so can cause severe electrical damage, motor failure, and pose a shock hazard. Only use wet/dry vacs or Bissell deep cleaners for liquids.
📑 Table of Contents
Understanding Your Bissell: Types and Features
Before you even think about pressing the power button, it’s super helpful to know a little about your specific Bissell vacuum cleaner. Bissell offers a wide range of vacuums, each with its own strengths and unique features. Knowing what type you have will help you understand how to use it most effectively.
Different Bissell Vacuum Types
Generally, Bissell vacuums fall into a few main categories:
- Upright Vacuums: These are often the workhorses of the home, excellent for large carpeted areas and sometimes hard floors. They typically have powerful suction and a wide cleaning path. Models like the Bissell CleanView or Pet Hair Eraser are popular uprights.
- Canister Vacuums: Offering more maneuverability, canister vacuums are great for hard floors, stairs, upholstery, and reaching tricky spots. The motor and dirt collection are in a separate canister, connected to a long hose and wand.
- Stick Vacuums: Lightweight and slim, stick vacuums are perfect for quick clean-ups, small spaces, and often convert into handheld units. Many are cordless, offering ultimate convenience.
- Handheld Vacuums: Compact and portable, these are designed for small messes, car interiors, and upholstery. Many Bissell pet models come with specialized handheld tools.
- Robot Vacuums: The ultimate in convenience, these autonomous cleaners handle daily maintenance while you relax.
- Deep Cleaners/Carpet Cleaners: While technically not “vacuums” in the dry sense, Bissell is famous for its carpet and upholstery deep cleaners (like the Bissell Revolution Pet Pro or SpotClean). These use water and cleaning solutions to wash surfaces, not just vacuum them. This guide primarily focuses on dry vacuum cleaners, but some maintenance tips apply broadly.
Key Features to Identify
Take a moment to locate these important parts on your Bissell vacuum cleaner:
- Power Button: Sounds obvious, but know its location!
- Brush Roll On/Off Switch: Many Bissell uprights and stick vacuums have a brush roll that agitates carpets. You’ll want to turn this off for delicate rugs and hard floors to prevent scratching or scattering debris.
- Suction Control/Height Adjustment: Some models allow you to adjust the suction power or the height of the vacuum head. This is crucial for different floor types (e.g., lower for hard floors, higher for thick carpets).
- Dirt Tank/Bag: Know how to open, empty, and reattach it.
- Filters: Locate your pre-motor and post-motor filters. These are vital for maintaining suction and air quality.
- Attachments/Tools: Identify your crevice tool, dusting brush, pet turbo brush, etc. Each has a specific purpose!
Before You Vacuum: Essential Pre-Cleaning Steps
Preparation is key to an efficient and effective clean with your Bissell vacuum cleaner. A few quick steps before you start will protect your vacuum and ensure you get the best results.
Clear the Path
Before you even plug in your Bissell, take a quick scan of the area you’re about to clean. Remove any large objects that could damage your vacuum or get stuck in the brush roll. This includes:
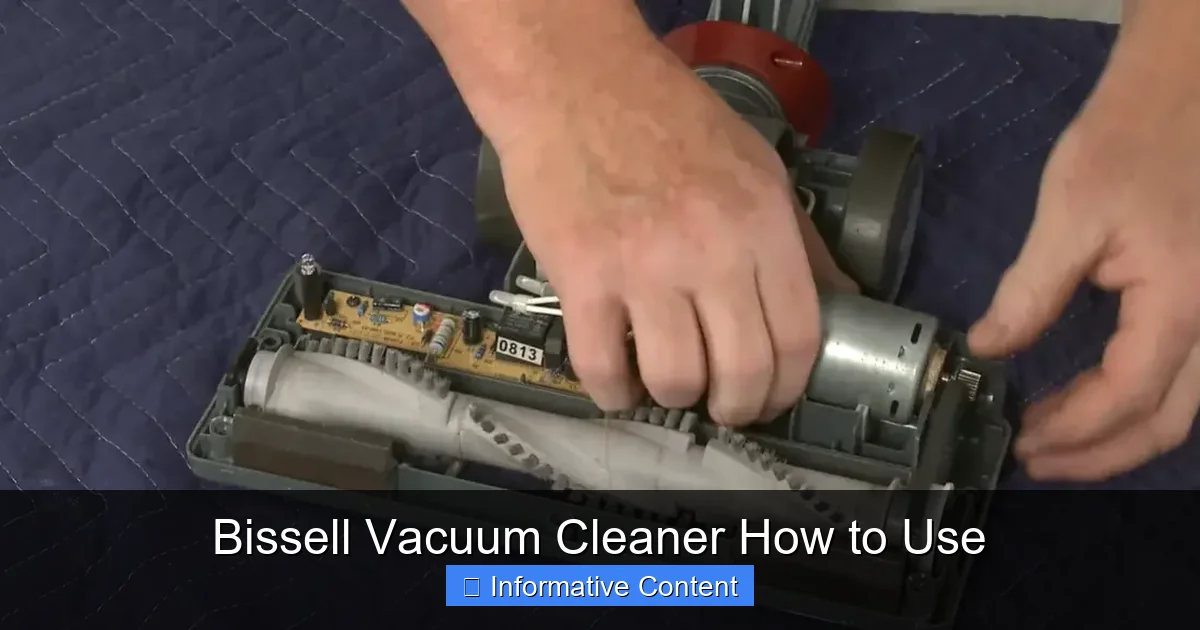
Visual guide about Bissell Vacuum Cleaner How to Use
Image source: bissell.com.au
- Small toys, LEGOs, or craft items
- Loose coins or paper clips
- Power cords, charging cables, or phone chargers
- Small rugs or bath mats that could get sucked in (unless your vacuum is specifically designed for them)
These items can not only clog your Bissell vacuum cleaner but also potentially damage its internal components, leading to costly repairs. A quick tidy-up saves a lot of hassle!
Check the Dirt Tank and Filters
A full dirt tank or clogged filters are the quickest ways to lose suction power. Always give these a quick check:
- Empty the Dirt Tank: If your dirt tank is already half full or more, empty it before you start. A full tank reduces suction and can make your vacuum less effective.
- Inspect Filters: Most Bissell vacuum cleaner models have washable filters. If they look dirty or dusty, consider giving them a rinse and letting them air dry completely before your next cleaning session. Dirty filters restrict airflow, weakening suction.
Set Up Your Bissell for the Task
This is where knowing your Bissell model comes in handy:
- Plug In Securely: Ensure your vacuum is plugged into a grounded outlet. If it’s a cordless stick vacuum, ensure it’s fully charged.
- Adjust Height (if applicable): For upright vacuums, set the height adjustment to suit your floor type. Lower settings are for low-pile carpets and hard floors, while higher settings are for thick carpets and rugs.
- Brush Roll Settings: For carpets, ensure the brush roll is on. For delicate rugs, hard floors, or when using attachments, switch the brush roll off to prevent scratches or scattering debris. This is a crucial “how to use Bissell vacuum cleaner” tip!
The Art of Vacuuming: Mastering Your Bissell
Now that you’re prepared, it’s time to put your Bissell vacuum cleaner to work! There’s a method to vacuuming that ensures maximum cleanliness and efficiency.
Slow and Steady Wins the Race
One of the most common mistakes people make is vacuuming too quickly. Your Bissell needs time to do its job. For best results, use slow, deliberate passes:
- Overlap Your Passes: Move the vacuum slowly forward and then slowly back over the same strip. Overlap each subsequent pass by a few inches to ensure you don’t miss any spots.
- Multiple Directions: For carpets, vacuuming in intersecting directions (e.g., once north-south, then once east-west) helps lift embedded dirt and fluff up the carpet fibers more effectively.
- Don’t Rush: Resist the urge to quickly push the vacuum. Allowing the brush roll and suction to work for a few seconds on each section makes a huge difference, especially with pet hair.
Tackling Different Floor Types
Your Bissell vacuum cleaner is versatile, but how you use it varies slightly depending on what you’re cleaning.
- Carpets and Rugs:
- Ensure the brush roll is ON.
- Adjust the height setting appropriately (higher for plush, lower for short-pile).
- Use slow, overlapping passes. For heavily trafficked areas or pet hair, consider making an extra pass.
- Hard Floors (Hardwood, Tile, Laminate):
- Always turn the brush roll OFF to prevent scattering debris, scratching delicate surfaces, and potentially damaging your floors.
- Use the appropriate height setting (usually the lowest for direct suction).
- For stick or canister vacuums, the soft brush attachment is ideal for hard floors.
- For large hard floor areas, consider a Bissell that has a specific hard floor mode or a dedicated hard floor tool.
Specialized Cleaning: Using Attachments and Specific Models
Your Bissell vacuum cleaner comes with a suite of accessories for a reason! These tools are designed to extend your cleaning capabilities beyond just the floor. Learning how to use them properly will make your cleaning routine much more thorough.
Utilizing Your Bissell Attachments
Don’t let those extra pieces sit in a cupboard! Each one has a purpose:
- Crevice Tool: This long, narrow nozzle is perfect for tight spaces like between couch cushions, along baseboards, in car seats, or under appliances. It’s fantastic for sucking up crumbs and dust where the main vacuum head can’t reach.
- Dusting Brush: With soft bristles, this tool is ideal for delicate surfaces like lampshades, blinds, shelves, electronics, and intricate furniture. The bristles gently dislodge dust while the suction whisks it away, preventing it from just settling elsewhere.
- Upholstery Tool: Often wider than the crevice tool and sometimes with a velvet strip, this attachment is designed to clean fabric surfaces like sofas, chairs, and curtains. It’s effective for removing pet hair and general dust without damaging the material.
- Pet Turbo Brush/Tool: A lifesaver for pet owners! This attachment usually has a small, air-powered brush roll that agitates and lifts embedded pet hair from upholstery, stairs, and pet beds. It’s much more effective than a standard upholstery tool for pet hair removal.
- Extension Wand: Some Bissell models come with an extension wand, which gives you extra reach for high ceilings, cobwebs, or behind heavy furniture without bending over.
To use an attachment, simply detach the main hose or wand from the vacuum and firmly push the desired tool onto the end. Ensure it’s secure before turning the vacuum on.
Tips for Specific Bissell Models
- Cordless Stick Vacuums: Many Bissell stick vacuums convert into handhelds. This is fantastic for quick spot cleans, car interiors, or reaching high shelves. Make sure to keep them charged for optimal performance.
- Pet Hair Eraser Models: These Bissell vacuums are specifically engineered for pet hair. Look for features like tangle-free brush rolls and specialized pet tools. Use the pet turbo brush on upholstery and pet beds for maximum hair removal.
- Bagless Vacuums: The majority of modern Bissell vacuum cleaners are bagless. This means you’ll be emptying a dirt bin. We’ll cover this in the maintenance section, but remember to do it regularly!
Post-Vacuum Care: Maintenance for Longevity
Learning how to use your Bissell vacuum cleaner effectively also includes knowing how to take care of it *after* you’ve cleaned. Regular maintenance is not just about hygiene; it’s about preserving your vacuum’s suction power, efficiency, and extending its lifespan.
Emptying the Dirt Tank (Bagless Models)
This is arguably the most frequent maintenance task. For bagless Bissell vacuum cleaner models:
- Locate the Release Button: Most tanks have a clear indicator for where to press to release them from the main unit.
- Position Over a Trash Can: Always empty the tank directly into a trash can to avoid dust clouds.
- Open the Bottom Lid: There’s usually a latch or button to open the bottom of the tank, allowing debris to fall out.
- Tap and Dust Off: Gently tap the tank to dislodge any stuck dirt or hair. You can use a small brush or even an old toothbrush to clean out the inside if needed, but avoid water unless specified by your manual.
- Reassemble: Close the bottom lid firmly and reattach the tank to your Bissell vacuum cleaner until it clicks securely into place.
Pro Tip: Emptying the tank after *every* use is ideal, especially if you have pets or do a lot of vacuuming. This prevents debris from compacting and ensures maximum suction for your next clean.
Cleaning and Replacing Filters
Filters are the unsung heroes of your Bissell vacuum cleaner, capturing fine dust and allergens. Neglecting them is the fastest way to lose suction.
- Pre-Motor Filters: These usually protect the motor from larger debris. Many are washable.
- How to Clean: Remove the filter (check your manual for location). Rinse it under cool, running water until the water runs clear. Gently squeeze out excess water.
- Drying is Crucial: Allow the filter to air dry completely for at least 24-48 hours before putting it back. A damp filter can damage the motor and promote mold growth.
- Frequency: Wash monthly, or more often if you vacuum frequently or have pets.
- Post-Motor Filters (HEPA filters): These capture the finest particles, exhausting cleaner air. Some are washable, others are not.
- Check Manual: Always refer to your Bissell manual to see if your post-motor filter is washable or needs to be replaced.
- Frequency: If washable, clean as directed. If not, replace every 6-12 months, or as recommended.
Checking and Cleaning the Brush Roll
The brush roll (or beater bar) is vital for lifting dirt and debris from carpets. It’s also a magnet for hair and strings.
- Unplug the Vacuum: Safety first! Always unplug your Bissell vacuum cleaner before inspecting the brush roll.
- Flip it Over: Lay the vacuum on its back to access the brush roll.
- Remove Tangles: Use scissors or a seam ripper to carefully cut away any tangled hair, string, or carpet fibers wrapped around the brush roll. Be careful not to cut the bristles themselves.
- Inspect for Damage: Check if the bristles are worn down or if anything is obstructing the brush roll’s movement.
- Reassemble: If your model requires removing the brush roll for cleaning, ensure it’s reinserted correctly before closing the cover.
Frequency: Check the brush roll monthly, or more often if you have long-haired household members or pets.
Troubleshooting Common Bissell Issues
Even with the best care, sometimes your Bissell vacuum cleaner might act up. Don’t panic! Many common issues are easy to diagnose and fix yourself.
Loss of Suction
This is the most common complaint, and thankfully, often the easiest to fix:
- Full Dirt Tank: Is it full? Empty it!
- Clogged Filters: Are your filters dirty? Clean or replace them.
- Hose Clog: Detach the hose and look through it for blockages. You might need to use a broom handle or a long, blunt object to dislodge anything stuck.
- Brush Roll Area: Check for large debris or excessive hair wrapped around the brush roll opening that might be blocking airflow.
- Main Airpath Clog: Sometimes debris can get stuck in the main air path between the brush roll and the dirt tank. Refer to your manual for how to access and clear this.
Strange Noises or Burning Smell
- Strange Noises (clunking, grinding):
- Brush Roll Obstruction: Unplug the vacuum and check the brush roll for anything caught in it that’s hitting the housing.
- Broken Belt: If the brush roll isn’t spinning but the motor is running, the belt might be broken or dislodged. This usually requires a replacement belt.
- Burning Smell:
- Brush Roll Jam: Often caused by a severely tangled brush roll or a large object jamming it. Unplug immediately, clear the obstruction, and check if the belt is intact.
- Motor Overheating: Can be caused by prolonged use, a full dirt tank, or severely clogged filters. Turn off the vacuum, unplug it, and let it cool down for at least 30 minutes. Perform maintenance (empty, clean filters) before using it again.
Vacuum Not Turning On
- Power Cord/Outlet: Check if the power cord is securely plugged into a working outlet. Try a different outlet.
- Circuit Breaker: Has a circuit breaker tripped?
- Cord Damage: Inspect the power cord for any visible damage. If damaged, do not use the vacuum and consider professional repair or replacement.
Learning how to use your Bissell vacuum cleaner effectively and maintain it properly ensures it remains a powerful cleaning ally for years to come. By following these simple steps, you’ll not only keep your home sparkling clean but also save yourself time and frustration in the long run.
Conclusion
Congratulations! You’ve now got the knowledge to truly master your Bissell vacuum cleaner. From understanding its various types and features to executing efficient cleaning techniques and performing crucial maintenance, you’re well-equipped to tackle any mess your home throws at you. Remember, a well-used and well-maintained Bissell isn’t just a vacuum; it’s a partner in creating a cleaner, healthier living space.
Don’t be afraid to consult your specific Bissell user manual for model-specific details, as some features or maintenance steps might vary slightly. But with the general principles outlined here, you’re ready to embark on a journey of pristine floors and fresh carpets. Go forth and vacuum with confidence, knowing you’re getting the absolute best performance from your trusty Bissell!
Frequently Asked Questions
How do I assemble my new Bissell vacuum cleaner?
Assembly steps vary by model, but typically involve attaching the handle to the main body and securing any hoses or tool caddies. Always refer to the assembly instructions provided in your specific Bissell user manual for detailed, step-by-step guidance to ensure proper setup.
What do I do if my Bissell vacuum cleaner loses suction?
First, check if the dirt tank is full and empty it. Next, inspect all filters for clogs and clean or replace them if necessary. Finally, check the hose, brush roll, and main air path for any blockages or obstructions that might be restricting airflow.
How often should I clean or replace the filters on my Bissell?
For most Bissell models, pre-motor filters should be cleaned monthly (if washable) or replaced every 3-6 months. Post-motor or HEPA filters generally need replacement every 6-12 months, or as recommended in your specific model’s manual. Regular filter maintenance is crucial for optimal performance.
My Bissell vacuum cleaner smells bad when I use it. What should I do?
A bad smell often indicates a build-up of dirt, pet hair, or mold in the dirt tank, filters, or brush roll. Empty and thoroughly clean the dirt tank, wash or replace all filters, and clear any tangles from the brush roll. Consider using Bissell Febreze filters or fresheners if available for your model.
Can I use my Bissell upright vacuum on stairs?
While some uprights can be awkward, many Bissell uprights come with a removable hose and attachments specifically designed for stairs and upholstery. Detach the hose, attach the crevice tool or pet turbo brush, and use these tools for more effective and safer cleaning on staircases.
How do I know if the brush roll is on or off?
Most Bissell vacuum cleaners with a brush roll have an indicator light or a switch that clearly shows its status. When on, you can typically hear a distinct whirring sound or see the brush roll spinning when the vacuum is tilted back. Always check your manual for your specific model’s indicators.