
Give your vacuum cleaner a new lease on life with our 2025 expert guide on how to wash your vacuum cleaner! Discover easy, step-by-step instructions to deep clean every component, from filters to brush rolls, ensuring maximum suction and a fresh home. Learn essential safety tips and clever techniques to prolong your vacuum’s lifespan, reduce odors, and enhance its overall performance, making your cleaning routine more efficient than ever.
How to Wash Your Vacuum Cleaner 2025 Expert Tips Revealed
Hello, fellow clean enthusiasts! In the bustling world of 2025, where smart homes and spotless living spaces are more common than ever, your trusty vacuum cleaner remains an unsung hero. But just like any hardworking appliance, it needs some TLC to perform its best. Over time, dust, dirt, pet dander, and even microscopic particles accumulate not just in the dustbin, but *within* the vacuum’s very components. This buildup can reduce suction, spread odors, and shorten its lifespan.
Have you ever noticed a strange smell wafting from your vacuum, or perhaps it just isn’t picking up dirt like it used to? These are classic signs it’s time for a deep clean – and yes, you absolutely *can* wash parts of your vacuum cleaner!
This comprehensive 2025 guide will walk you through exactly how to wash your vacuum cleaner, step-by-step, ensuring you restore it to peak performance and freshness. We’ll cover everything from filters to brush rolls, offering expert tips to make the process easy and effective. Get ready to transform your vacuum from a grime collector to a gleaming dirt destroyer!
Key Takeaways
- Safety First: Always unplug your vacuum cleaner and consult its user manual before disassembling or washing any part to prevent electrical hazards or damage.
- Filter Care is Crucial: Identify washable filters (typically foam or felt) and clean them properly with water and mild soap. Non-washable HEPA filters should only be tapped clean or replaced, never washed with water.
- Thorough Drying Prevents Damage: Ensure all washed components, especially filters and dustbins, are completely dry (at least 24 hours, or until bone-dry) before reassembly to prevent mold, mildew, bacterial growth, and potential electrical issues.
- Don’t Forget the Brush Roll: Regularly remove tangled hair, threads, and debris from the brush roll to maintain optimal cleaning performance, prevent motor strain, and ensure effective dirt pickup.
- Clean Beyond the Dustbin: Hoses, wands, attachments, and the exterior body also accumulate dirt and odors. Give them a good wash or wipe down to keep your entire vacuum hygienic and functional.
- Regular Maintenance Extends Lifespan: A routine deep clean, following these expert steps, significantly improves your vacuum’s suction power, eliminates stale odors, and extends its operational life, saving you money in the long run.
Quick Answers to Common Questions
What’s the best way to clean my vacuum’s hose?
For most hoses, you can carefully run warm, soapy water through them in a sink or bathtub, ensuring any clogs are flushed out. Rinse thoroughly until the water runs clear, then hang it up to air dry completely for at least 24 hours to prevent mildew.
Can I put vacuum filters in the dishwasher?
No, never put vacuum filters (or any vacuum parts) in a dishwasher. The high heat can warp plastics, damage delicate filter materials, and the detergents are too harsh, potentially making your filters ineffective or unusable.
How often should I wash my vacuum cleaner?
For optimal performance, aim to deep clean your vacuum cleaner every 3-6 months, especially if you have pets or allergies. The dustbin should be emptied after every use, and washable filters rinsed monthly.
What if my brush roll isn’t removable?
If your brush roll isn’t designed to be removed, you’ll need to clean it in place. Carefully unplug the vacuum, turn it over, and use scissors to cut away tangled hair. A stiff brush or a damp cloth can help clean the bristles and housing.
Can I use a pressure washer on my vacuum cleaner parts?
Absolutely not. Pressure washers are far too powerful and can easily damage the delicate components, seals, and plastic housing of your vacuum cleaner. Stick to gentle hand washing with mild soap and water.
Safety First: Essential Preparations Before You Begin
Before you even think about grabbing a sponge, safety is paramount. Washing a vacuum cleaner involves water and electricity, so caution is key.
Unplug It!
This is the most critical step. Always, always, *always* unplug your vacuum cleaner from the power outlet before you begin any cleaning or disassembly. This prevents accidental startup, electric shock, and potential damage to the appliance. Treat it like any other electrical device you’re working on.
Consult Your Manual
Every vacuum cleaner is a little different. While this guide offers general best practices, your specific model’s user manual is your ultimate authority. It will tell you which parts are washable, which filters are replaceable (and not washable), specific disassembly instructions, and any warnings unique to your device. Misplacing your manual? Most manufacturers offer digital versions on their websites – a quick search for your model number usually does the trick.
Gather Your Tools
Having everything ready before you start makes the process smoother. Here’s what you’ll likely need:
- Warm water
- Mild dish soap (non-abrasive)
- Soft brushes (an old toothbrush is great for crevices)
- Microfiber cloths or old towels
- Large sink or basin
- Gloves (optional, but recommended for hygiene)
- Scissors or seam ripper (for cutting hair from brush rolls)
- A well-ventilated area for drying
Step 1: Empty the Dustbin/Bag & Pre-Clean
This is where the adventure of how to wash your vacuum cleaner truly begins. You wouldn’t start washing dishes with food still on them, right? The same logic applies here.
For Bagless Vacuums
Remove the dustbin from your vacuum cleaner and empty its contents into a trash can. Tap it gently to dislodge any stuck-on debris. Many modern cyclonic dustbins have multiple compartments or screens – make sure to shake out as much loose dirt as possible from all of them. For those stubborn dust bunnies, a small brush or even a dry paper towel can help.
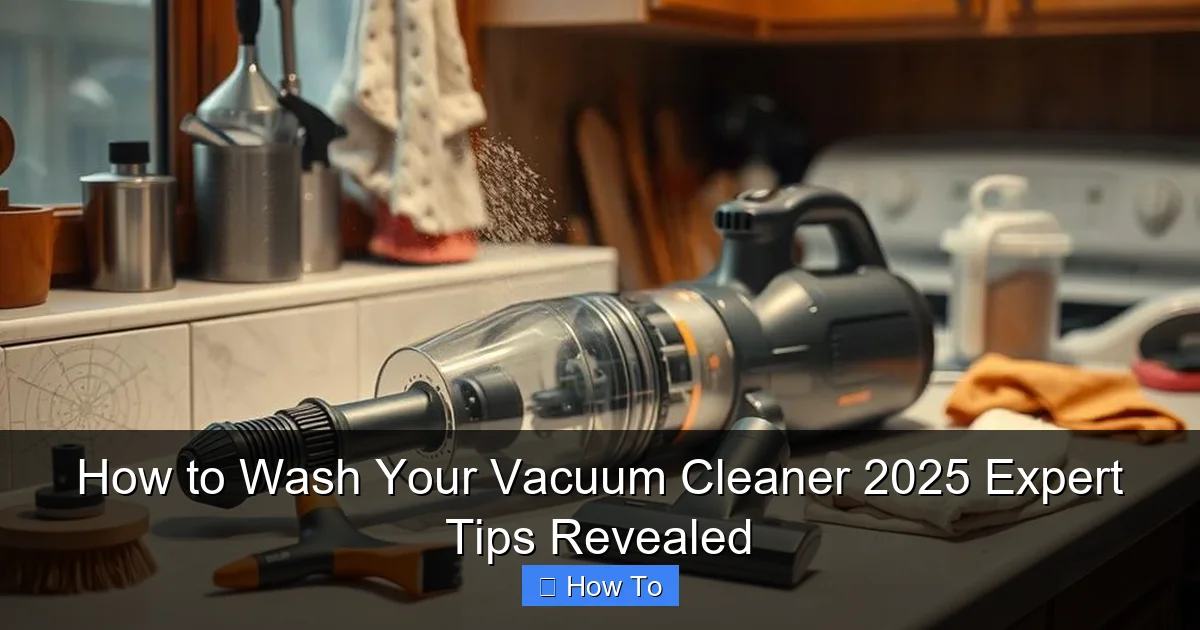
Visual guide about How to Wash Your Vacuum Cleaner 2025 Expert Tips Revealed
Image source: bestvacuumexpert.com
For Bagged Vacuums
If your vacuum uses bags, remove the full bag and dispose of it properly. You won’t be washing the bag, of course, but ensure the bag compartment is clear of any loose debris, dust, or lingering particles that might have escaped the bag. A quick wipe down with a dry cloth here can make a big difference.
Step 2: Tackle the Filters (HEPA, Foam, Felt)
Filters are the lungs of your vacuum cleaner, trapping microscopic particles and allergens. Cleaning them properly is vital for maintaining suction and air quality.
Identify Washable vs. Non-Washable Filters
This is where your user manual is crucial. Generally:
- Foam and Felt Filters: These are often washable. They are typically found in bagless vacuums and might be colored (blue, green) or white.
- HEPA Filters: Many modern HEPA filters are *not* washable. Attempting to wash a non-washable HEPA filter can damage its delicate fibers, rendering it ineffective and potentially letting harmful particles escape. If your HEPA filter is marked “washable,” it’s usually indicated clearly. Otherwise, assume it’s dry-clean only or needs replacement.
Washing Foam and Felt Filters
If your filters are washable, here’s how to wash vacuum cleaner filters effectively:
- Remove: Carefully remove the foam and felt filters from their compartments.
- Tap Clean: Over a trash can, gently tap the filters to knock out loose dust and debris. You’ll be surprised how much comes out!
- Rinse: Rinse the filters under cool, running water until the water runs clear. Gently squeeze foam filters to help dislodge trapped dirt. Do *not* twist or wring them aggressively, as this can damage the material.
- Soak (Optional): For very dirty filters, you can soak them in a basin of cool water with a tiny drop of mild dish soap for 10-15 minutes.
- Rinse Again: Rinse thoroughly until there are no suds and the water is completely clear.
- Dry: This is the most important step for filters. Place them in a well-ventilated area to air dry completely. This can take 24-48 hours, depending on humidity. *Never* put filters back in the vacuum while damp, as this can lead to mold growth and damage the motor. Do not use heat (like a hairdryer or direct sunlight) as it can warp or damage the filter material.
Cleaning HEPA Filters (If Not Washable)
For non-washable HEPA filters, simply hold them over a trash can and gently tap them to dislodge trapped dust. You can also use a soft brush or a dry cloth to wipe away surface dust. Some people use a shop vac on a low setting to gently vacuum the filter surface. Remember, if your manual says it’s not washable, *do not* use water.
Step 3: Deep Clean the Dustbin/Canister
The dustbin (or canister) is often the dirtiest part of your vacuum cleaner, harboring dust, allergens, and odors.
Disassembly and Initial Rinse
Once empty, disassemble the dustbin as much as possible according to your manual. Remove any internal cyclonic components or screens. Rinse all parts under warm, running water to remove loose dirt.
Scrubbing Away Grime
Fill a sink or basin with warm water and a small amount of mild dish soap. Submerge the dustbin components. Using a soft sponge or an old toothbrush, scrub away any caked-on dust, dirt, and grime. Pay special attention to corners, crevices, and internal channels where dirt loves to hide. For stubborn spots, a paste of baking soda and water can be a gentle abrasive.
Thorough Rinsing and Drying
After scrubbing, rinse all parts meticulously under clear running water. Ensure all soap residue is completely gone. Any remaining soap can attract more dust. Like filters, these parts *must* be thoroughly air-dried. Place them on a clean towel in a well-ventilated area, away from direct sunlight or heat, for at least 24 hours. They need to be bone-dry before reassembly.
Step 4: Revitalize the Brush Roll and Nozzle
The brush roll (or beater bar) is crucial for agitation and picking up debris from carpets and hard floors. It often gets tangled with hair and fibers.
Removing Hair and Debris
First, remove the brush roll from the vacuum head according to your manual. This usually involves opening a cover or twisting a lock. Using scissors or a seam ripper, carefully cut away any tangled hair, threads, or strings. Be gentle to avoid damaging the bristles or the brush roll itself. Pull out any remaining debris by hand. Many 2025 models feature “tangle-free” brush rolls, but even these can benefit from a visual check and occasional manual cleaning.
Washing the Brush Roll (If Applicable)
Some brush rolls are entirely plastic or nylon and can be gently washed. If your manual confirms it’s safe to wash:
- Soak: You can soak the brush roll in warm, soapy water for a few minutes to loosen any remaining grime.
- Scrub: Use a brush to scrub the bristles and the main body of the roll.
- Rinse & Dry: Rinse thoroughly and, you guessed it, let it air dry completely for at least 24 hours. Ensure the bearings (the parts that spin) are also dry. *Do not* submerge brush rolls with electrical connections or metal parts that aren’t sealed.
If your brush roll has metal components or electrical wiring that can’t be safely washed, simply clean it dry with a brush and scissors.
Cleaning the Nozzle/Floor Head
The main floor head or nozzle also collects dust and grime. Wipe down the interior and exterior of the nozzle with a damp cloth dipped in soapy water. Pay attention to the edges and any rubber seals. Rinse the cloth and wipe again to remove soap residue, then dry with a clean cloth. Check for any blockages in the suction path from the floor head.
Step 5: Clean Hoses, Wands, and Attachments
Don’t neglect these often-overlooked components! They can harbor dust, pet hair, and even unpleasant odors.
Clearing Blockages
First, check the hose for any blockages. You can often see larger obstructions. For smaller ones, use a broom handle or a long, flexible brush to gently push through any clogs. Be careful not to puncture the hose. You can also carefully run water through the hose from a faucet if it’s safe for your model – but ensure it can fully drain and dry.
Washing Smaller Parts
Detachable wands, crevice tools, upholstery brushes, and other attachments can be washed in warm, soapy water. Submerge them, scrub with a brush to remove embedded dirt, and then rinse them thoroughly. Just like the other parts, they need to air dry completely before being put back into use or stored with the vacuum.
Step 6: Wipe Down the Exterior Body
Now that the internal components are sparkling, it’s time to give the outside of your vacuum cleaner some love.
Gentle Cleaning Solutions
Using a damp microfiber cloth (dampened with plain water or a very mild all-purpose cleaner diluted in water), wipe down the entire exterior of your vacuum cleaner. Avoid harsh chemical cleaners, as they can damage plastic surfaces or fade colors. If you used soapy water for other parts, a very diluted solution of that can work too.
Paying Attention to Crevices
Use a cotton swab or an old toothbrush to clean dust and grime from around buttons, wheels, and seams. Wipe down the power cord (ensuring it’s unplugged!) with a damp cloth, as cords can get surprisingly dirty. Finish by wiping everything with a dry cloth to prevent water spots.
Step 7: The All-Important Drying Phase
This step cannot be rushed. Patience is key to ensure your hard work doesn’t lead to mold or motor damage.
Air Drying is Key
Arrange all washed components (filters, dustbin, brush roll, hose, attachments) in a well-ventilated area. A laundry room, garage, or even a bathtub (with good air circulation) works well. Lay them out on clean towels. Turn components occasionally to expose all surfaces to the air.
Checking for Complete Dryness
This typically takes a minimum of 24 hours, and often longer (up to 48 hours) depending on ambient humidity and the thickness of the parts (especially foam filters). Squeeze foam filters to check for any dampness. If you can feel *any* moisture, they’re not ready. A vacuum cleaner that smells musty after cleaning is usually a sign that parts weren’t completely dry before reassembly.
Step 8: Reassemble Your Sparkling Clean Vacuum
Once every single component is thoroughly, unequivocally dry, it’s time to put your vacuum cleaner back together.
Filter Placement
Carefully reinsert the filters into their correct compartments. Ensure they are seated properly and not bent or forced. Incorrect filter placement can affect suction or cause premature motor wear.
Brush Roll Reinstallation
Guide the brush roll back into its housing and secure it according to your manual’s instructions. Make sure it spins freely without any obstruction before closing the cover.
Final Checks
Reattach the dustbin, hose, and any other parts. Give your newly washed vacuum cleaner a quick visual inspection. Plug it in only once you are absolutely certain everything is dry and correctly assembled. Power it on and listen for any unusual noises. Test the suction. Enjoy that feeling of a clean, powerful vacuum ready to tackle your home!
Troubleshooting Common Issues After Cleaning
Sometimes, even after a thorough clean, you might encounter a hiccup. Here’s what to check:
Vacuum Not Turning On
First, double-check that the power cord is securely plugged into both the outlet and the vacuum. Ensure the outlet itself is working by testing it with another appliance. If your vacuum has a reset button (often found near the power cord entry), try pressing it. Lastly, if any part was wet during reassembly, it might have tripped a safety mechanism or damaged electronics – this is why thorough drying is so crucial.
Reduced Suction Power
This is often due to improper filter installation or a blockage you missed. Recheck that all filters are correctly seated and not clogged. Inspect the hose and all attachments for any remaining obstructions. Ensure the dustbin is properly latched and sealed, and that the brush roll is spinning freely.
Strange Odors
If your vacuum smells worse after cleaning, it almost certainly means a component (most often a filter or dustbin) was not completely dry before reassembly. Mold or mildew can quickly grow in damp, dark environments. You’ll need to disassemble the vacuum again, identify the damp part, and allow it to dry *completely* for an extended period, perhaps with the aid of a fan for better airflow. For persistent odors, consider replacing washable filters or using a vacuum deodorizer tablet.
Conclusion
Congratulations! You’ve successfully learned how to wash your vacuum cleaner and given it the expert spa treatment it deserves. Regular deep cleaning, like the comprehensive steps outlined in this 2025 guide, is not just about keeping your appliance sparkling; it’s about maintaining optimal cleaning performance, extending its lifespan, and ensuring the air in your home remains fresh and healthy.
By taking the time to properly wash your vacuum cleaner – especially its filters, dustbin, and brush roll – you’re investing in a more efficient, hygienic, and long-lasting cleaning companion. Embrace the satisfaction of a job well done, and enjoy a cleaner, fresher home thanks to your revitalized vacuum!
🎥 Related Video: Shark vacuum cleaner NO SUCTION! Why?
📺 Vacuum Help
Customer was going to buy a new vacuum cleaner when her shark stopped sucking #sharkvacuum #sharkclean.