Unlock the full potential of your wet and dry vacuum cleaner with this comprehensive 2025 guide. Learn how to expertly handle everything from dry debris and fine dust to massive liquid spills, transforming your cleaning routine. Master assembly, technique, maintenance, and troubleshooting to keep your spaces spotless and clean like a pro, ensuring your versatile vacuum performs optimally for years to come.
How to use your wet and dry vacuum cleaner like a pro 2025
Welcome to the future of home and workshop cleaning! In 2025, your wet and dry vacuum cleaner isn’t just a powerful tool; it’s an essential partner in maintaining a pristine environment, whether you’re tackling workshop sawdust, garage grime, or unexpected household spills. Gone are the days of struggling with multiple cleaning devices; this versatile machine is designed to handle it all.
This comprehensive guide will transform you from a novice user into a pro, revealing all the secrets to effectively using your wet and dry vacuum cleaner. We’ll cover everything from the basics of assembly and safe operation to advanced techniques for dry and wet cleanups, crucial maintenance tips, and common troubleshooting solutions. By the end, you’ll be confidently wielding your wet/dry vac, ready to face any mess with ease and efficiency. Let’s dive in and unlock the full potential of your ultimate cleaning companion!
Key Takeaways
- Understand Its Versatility: Your wet and dry vacuum cleaner is a powerhouse, capable of tackling dry debris, fine dust, liquid spills, and even blowing functions.
- Use the Right Filter: Always match the filter type (cartridge for dry, foam for wet) to the task to protect the motor and ensure optimal suction.
- Prioritize Safety: Always unplug before making changes or cleaning, and be mindful of electrical hazards, especially when dealing with liquids.
- Master Attachment Usage: Learn which attachment works best for different surfaces and types of debris to maximize efficiency and cleaning power.
- Seamlessly Switch Between Tasks: Know the critical steps for converting your wet and dry vacuum cleaner from dry to wet operation and vice versa, including proper tank and filter changes.
- Perform Regular Maintenance: Clean your filters, hoses, and tank after each use to prolong the life of your machine and maintain peak performance.
- Troubleshoot Common Issues: Familiarize yourself with basic troubleshooting for loss of suction or leaks to quickly resolve problems.
Quick Answers to Common Questions
Should I pre-sweep before dry vacuuming?
For very large or sharp debris like broken glass, it’s often a good idea to sweep up the bulk first. This prevents potential clogs and protects your wet and dry vacuum cleaner’s hose and attachments from damage, making the vacuuming process more efficient.
Can I use my wet/dry vac to clean my car’s interior?
Absolutely! A wet and dry vacuum cleaner is excellent for car interiors. Use a crevice tool for tight spots and a utility nozzle for general debris. For wet stains, use the wet function with a suitable upholstery attachment, ensuring you don’t over-saturate the fabric.
How do I prevent bad smells in my wet/dry vac?
To prevent unpleasant odors, always empty and thoroughly rinse the collection tank, hose, and attachments immediately after wet vacuuming. Allow all components, especially the foam filter, to air dry completely before reassembling and storing your wet and dry vacuum cleaner.
What’s the maximum water level for wet vacuuming?
Your wet and dry vacuum cleaner is designed with an internal float mechanism that automatically shuts off suction when the tank reaches its maximum safe liquid capacity. Pay attention to the change in motor sound; it signals that the tank is full and needs to be emptied promptly.
Can I use my wet/dry vac to clear leaves?
Yes, many wet and dry vacuum cleaner models feature a powerful blowing function. Connect the hose to the exhaust port, and you can effectively blow leaves and light debris from patios, driveways, or out of your garage, making outdoor cleanup quick and easy.
Understanding Your Wet and Dry Vacuum Cleaner
Before you power on, let’s get acquainted with your machine. A wet and dry vacuum cleaner, often called a “shop vac” or “utility vac,” is built tough to handle tasks that would choke a regular household vacuum. It’s designed to pick up both solid debris and liquids, thanks to its unique motor and filtration system.
Key Components You Need to Know
- The Motor Head: This is the brain of your wet and dry vacuum cleaner, containing the motor, power switch, and often the exhaust port for the blowing function.
- The Collection Tank (Drum): A large, robust container that collects all the debris, whether wet or dry. Capacity varies widely.
- The Hose: Typically wider and more flexible than standard vacuum hoses, built for heavy-duty clogs.
- Filters: Crucial for protecting the motor. You’ll usually have a dry filter (cartridge or bag) and a wet filter (foam sleeve).
- Attachments: Various nozzles and brushes for specific tasks, like crevice tools, utility nozzles, and floor brushes.
- Casters/Wheels: For easy mobility around your workspace.
Safety First: Essential Precautions
Using a powerful electrical appliance, especially one that handles liquids, demands respect for safety.
- Read Your Manual: Every wet and dry vacuum cleaner is slightly different. Your owner’s manual is your primary source of safety and operational instructions.
- Unplug Before Adjusting: Always, *always* unplug your machine from the power outlet before changing filters, emptying the tank, or performing any maintenance.
- Check for Damage: Before each use, inspect the power cord, hose, and attachments for any signs of wear, tears, or damage. Never use a damaged machine.
- Use a GFCI Outlet: When vacuuming liquids or working in damp environments, plug your wet/dry vac into a Ground Fault Circuit Interrupter (GFCI) outlet. This protects against electric shock.
- Avoid Flammable Liquids: Never attempt to vacuum up gasoline, paint thinners, or other flammable liquids. The motor can create sparks.
- No Hot Ashes: Do not vacuum hot ashes or burning materials, as this can cause a fire.
- Keep Clear: Ensure the area around the vacuum’s exhaust is clear, especially when using the blowing function.
Preparing for Dry Vacuuming

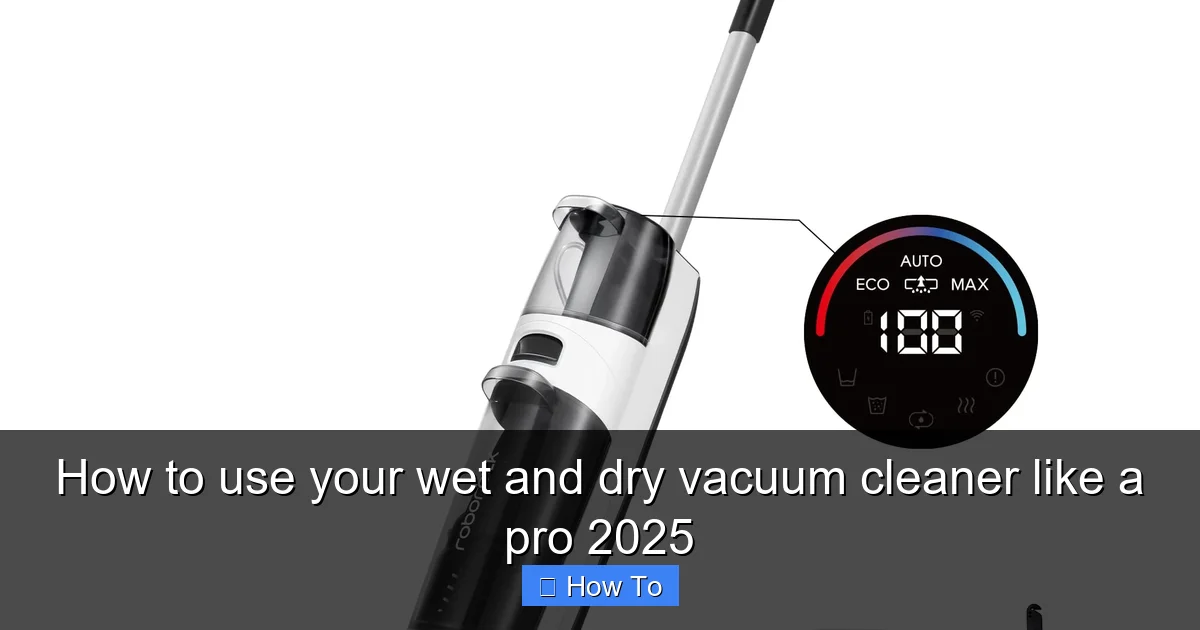
Visual guide about How to use your wet and dry vacuum cleaner like a pro 2025
Image source: cdn.shopify.com
Dry vacuuming is often the first task for your new wet and dry vacuum cleaner. It’s perfect for sawdust, workshop debris, drywall dust, garage dirt, and even large spills like spilled cereal.
Assembling for Dry Use
Your wet and dry vacuum cleaner usually comes with a few parts that need connecting.
- Attach the Casters: If not pre-attached, snap the wheels onto the base of the collection tank.
- Secure the Motor Head: Place the motor head onto the collection tank and secure it with the latches on either side. Ensure it’s sealed tightly.
- Insert the Dry Filter: For dry vacuuming, you need a cartridge filter or a filter bag. Ensure it’s clean and properly seated over the filter cage (usually a plastic cylinder protruding from the motor head inside the tank). If using a filter bag, attach it to the intake port inside the tank.
- Connect the Hose: Twist or push the wider end of the hose into the intake port on the collection tank. Ensure it’s snug.
- Attach Your Preferred Nozzle: Select the appropriate accessory for your task. A wide utility nozzle is good for general debris, while a crevice tool is ideal for tight spaces.
Choosing the Right Dry Filter
The filter is your motor’s best friend.
- Cartridge Filter: This is the most common dry filter. It’s designed to trap fine dust and debris, preventing it from reaching and damaging the motor. Make sure it’s clean and free of holes.
- Filter Bag: Many wet and dry vacuum cleaners also accommodate disposable filter bags. These act as a pre-filter, collecting most of the dry debris and making disposal cleaner and easier. They also extend the life of your main cartridge filter.
- Never Dry Vac Without a Filter: Operating your wet/dry vac without a dry filter will allow dust into the motor, leading to rapid wear and potential failure.
Dry Vacuuming Like a Pro
With your machine prepped, it’s time to clean!
Techniques for Different Surfaces and Debris
- General Debris (Wood Chips, Gravel): Use a wide utility nozzle. Move slowly and deliberately to allow the powerful suction of your wet and dry vacuum cleaner to pick up larger items.
- Fine Dust (Drywall, Sawdust): These require extra care. Ensure your cartridge filter is clean, or consider using a high-efficiency (HEPA-rated) filter or a filter bag designed for fine dust. Move slowly to prevent dust from being kicked up into the air. Work in smaller sections.
- Carpet and Upholstery (Dry): Use a brush attachment or a floor nozzle with a brush insert. The stiff bristles help agitate dirt from fibers, making it easier for the wet and dry vacuum cleaner to suction it away.
- Hard Floors (Concrete, Tile): A wide floor nozzle or utility nozzle works well. Push and pull motions across the surface.
Practical Tips for Dry Vacuuming
- Don’t Overfill: While the tank is large, avoid letting dry debris pile up to the point it impedes suction or gets too close to the filter. Empty it regularly.
- Check for Clogs: If suction drops suddenly, check the hose and attachments for blockages. Your wet and dry vacuum cleaner is powerful, but even it can get clogged.
- Use the Blowing Function: Many wet/dry vacs have a blowing port. Connect the hose here to blow debris out of workshops, clean sawdust off benches, or even dry off wet surfaces (more on this later).
Switching to Wet Vacuuming (or Liquid Pickup)
This is where your wet and dry vacuum cleaner truly shines, tackling spills, water leaks, and even helping with carpet cleaning. But the transition needs to be done correctly.
Crucial Steps for Converting Your Vac
- Empty and Clean the Tank: First, completely empty all dry debris from the collection tank. Rinse it out thoroughly to remove any lingering dust or particles that could mix with liquids.
- Change the Filter: This is perhaps the most critical step. You MUST remove the dry cartridge filter (and any filter bag). Replace it with a foam sleeve filter, designed specifically for wet pickup. Using a dry paper filter for liquids will ruin the filter and potentially damage your motor. Some advanced wet/dry vacs have a “cartridge filter” that’s designed for both wet and dry, but always check your manual. When in doubt, switch to foam for wet.
- Re-secure the Motor Head: Ensure the motor head is latched on tightly to prevent leaks.
- Connect the Hose and Nozzle: Use a squeegee nozzle or a utility nozzle without a brush for optimal liquid pickup.
Why the Filter Change is Essential
The foam filter allows liquids to pass through while still protecting the motor from larger debris. A dry cartridge filter, on the other hand, would quickly become saturated, blocking airflow and potentially disintegrating, sending wet debris directly into your motor. This can cause short circuits and irreversible damage.
Mastering Wet Vacuuming
Now, you’re ready to tackle those liquid messes.
Picking Up Spills and Water
- For Large Spills (e.g., burst pipe, flood): Use a wide squeegee nozzle. Move slowly and steadily, allowing the wet and dry vacuum cleaner to efficiently draw up the water. Work from the edges of the spill inwards.
- For Smaller Spills (e.g., knocked-over drink): A utility nozzle works fine. Again, move deliberately to ensure complete liquid extraction.
- Monitor the Tank: Most wet/dry vacs have a float mechanism that automatically shuts off suction when the tank is full to prevent overflow. You’ll hear the motor’s pitch change significantly when this happens. Immediately turn off the machine, unplug it, and empty the tank.
Cleaning Carpets and Upholstery (with Solution)
Your wet and dry vacuum cleaner can be a powerful ally for deep cleaning.
- Pre-Treat: For heavily soiled areas, pre-treat with a suitable carpet or upholstery cleaner. Follow the product’s instructions for dwell time.
- Apply Solution (Optional): Some users apply a diluted cleaning solution directly to the carpet with a spray bottle, then immediately vacuum it up. Never put cleaning solutions *into* the wet/dry vac’s tank unless your specific model is designed for it and you are using a non-foaming formula. Foaming solutions can damage the motor.
- Vacuum Slowly: Use a specialized wet carpet nozzle or a squeegee tool. Make slow, overlapping passes to extract as much liquid and dirt as possible.
- Rinse Pass: For best results, after vacuuming the cleaning solution, do a “rinse” pass by spraying clean water onto the carpet (again, not through the vacuum itself unless designed for it) and immediately vacuuming it up. This helps remove residual soap.
- Repeat: Continue until the extracted water appears relatively clean.
Drying Surfaces
Once you’ve cleaned a surface, you can use your wet and dry vacuum cleaner’s blowing function to aid in drying.
- Connect to Blowing Port: Move the hose from the intake port to the exhaust/blowing port on the motor head.
- Direct Airflow: Direct the airflow over the wet surface (carpets, floors) to accelerate drying. This helps prevent mildew and musty odors.
Advanced Uses & Maintenance
Beyond general cleaning, your wet and dry vacuum cleaner has a few more tricks up its sleeve.
More About the Blowing Function
- Clear Workspaces: Blow sawdust and debris off workbenches, equipment, or driveways.
- Inflate: Some models come with attachments for inflating air mattresses or pool toys.
- Clean Gutters: With specialized attachments, you can even use it to blow leaves and debris out of gutters.
Cleaning Clogged Drains (Use Caution!)
A wet and dry vacuum cleaner can sometimes help with minor drain clogs.
- Seal the Drain: Ensure a tight seal around the drain opening with a specialized attachment or by wrapping a damp cloth around the hose end.
- Block Overflows: Block any overflow outlets in sinks or tubs to create maximum suction pressure.
- Power On: Turn on your wet/dry vac. The powerful suction can sometimes dislodge hairballs or minor blockages. If it doesn’t work quickly, stop and call a plumber. Never try this with chemical drain cleaners present.
Regular Maintenance: The Key to Longevity
Treat your wet and dry vacuum cleaner well, and it will serve you for years.
- Empty After Every Use: Never store your wet/dry vac with debris, especially liquids, in the tank. This can lead to odors, mold, and corrosion.
- Clean Filters:
- Dry Cartridge Filters: Tap them gently to dislodge dust, or use compressed air to blow dirt out from the inside. Many are washable; check your manual for specific instructions. Ensure they are completely dry before re-use.
- Foam Filters: Rinse thoroughly with water and let them air dry completely before storing.
- Rinse Tank and Hose: Rinse the tank and hose with clean water after wet vacuuming to remove any residue.
- Check for Wear: Periodically inspect the hose, attachments, and power cord for cracks, holes, or fraying. Replace damaged parts immediately.
- Motor Head Care: Keep the motor head clean and dry. Avoid submerging it in water.
Proper Storage for Your Wet and Dry Vacuum Cleaner
Store your wet/dry vac in a clean, dry place, away from extreme temperatures. Coil the hose neatly, wrap the power cord, and keep all attachments together in a mesh bag or the onboard storage provided by your machine. This prevents damage and ensures everything is ready for the next job.
Troubleshooting Common Issues
Even the most reliable wet and dry vacuum cleaner can encounter minor problems. Here’s how to tackle them.
Loss of Suction
- Check for Clogs: The most common culprit. Inspect the nozzle, hose, and intake port for blockages.
- Filter Condition: A dirty or clogged dry filter will severely restrict airflow. Clean or replace it. For wet use, ensure the foam filter isn’t saturated or misplaced.
- Tank Full (Wet Use): If you’re wet vacuuming, the float ball may have risen and shut off suction. Empty the tank.
- Improperly Sealed Lids/Hose: Ensure the motor head is securely latched and the hose is firmly attached to the intake port. Any air leak will reduce suction.
Water Leaking
- Loose Motor Head: Ensure the motor head is latched down tightly and the seal (gasket) is correctly seated and undamaged.
- Damaged Tank: Inspect the collection tank for cracks or holes.
- Hose Connection: Check that the hose is securely fastened to the intake port.
Motor Issues (Not Turning On or Overheating)
- Power Supply: Check if the unit is plugged in correctly, the outlet is working, and the circuit breaker hasn’t tripped.
- Overheating: If the motor suddenly stops, it might have an internal thermal overload switch that trips if the motor gets too hot (often due to prolonged use or a clogged filter/hose). Unplug, let it cool down for 30 minutes, and check for clogs before restarting.
- Damaged Cord/Switch: Inspect the power cord for cuts and the switch for damage. If either is compromised, do not use the machine and seek professional repair.
Conclusion
Congratulations, you’re now equipped with the knowledge to use your wet and dry vacuum cleaner like a true professional in 2025! From dry debris in the garage to unexpected liquid spills in the kitchen, this versatile machine is an indispensable tool.
By understanding its components, practicing safe operation, using the correct filters and attachments, and committing to regular maintenance, you’ll extend the life of your wet and dry vacuum cleaner and ensure it always performs at its peak. Remember, a clean space is a happy space, and with your trusty wet/dry vac, you’re ready to tackle any cleaning challenge with confidence and ease. Happy cleaning!
🎥 Related Video: The best Wet and Dry Vacuum Cleaner to keep your home spotless #vacuumcleaner #vacuum #amazon 36
📺 Best Products
The best Wet and Dry Vacuum Cleaner to keep your home spotless #vacuumcleaner #vacuum #shorts #amazon Looking for the …