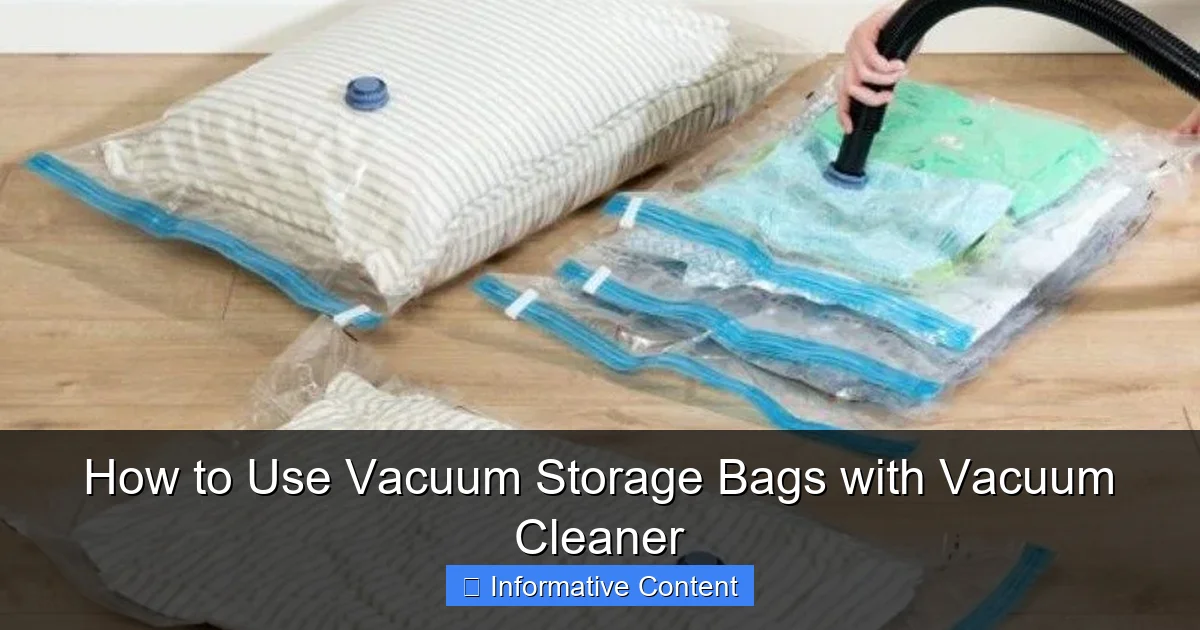
Mastering how to use vacuum storage bags with a vacuum cleaner is a game-changer for decluttering and maximizing space. This simple yet effective method allows you to compress bulky items like bedding and seasonal clothing, protecting them from dust, moisture, and pests. By following a few easy steps, from preparing your items to properly sealing and extracting air with your household vacuum, you can transform chaotic closets into tidy, organized havens.
Are you tired of overflowing closets, cramped cupboards, and the never-ending battle against clutter? Do your seasonal clothes, bulky duvets, and extra pillows consume an unreasonable amount of storage space, making your home feel smaller than it is? If you’ve nodded along to any of these questions, then you’re about to discover a truly revolutionary solution that will transform your living space: vacuum storage bags. And the best part? You already own the most important tool for the job – your trusty vacuum cleaner!
Learning how to use vacuum storage bags with a vacuum cleaner is one of those simple life hacks that delivers huge returns. Imagine shrinking bulky bedding to a fraction of its size, neatly tucking away winter coats in summer, or organizing sentimental items without taking up precious square footage. It’s not magic; it’s smart storage, and it’s incredibly easy once you know the steps. This comprehensive guide will walk you through everything you need to know, from choosing the right bags to mastering the vacuuming technique, ensuring your home becomes a sanctuary of order and spaciousness. Let’s dive in and reclaim your space!
Key Takeaways
- The Right Tools Matter: Always choose high-quality vacuum storage bags appropriate for the size and type of items you intend to store to prevent tearing and air leaks.
- Preparation is Key: Ensure all items are clean, dry, and neatly folded before placing them into the bags. Avoid overstuffing to allow for proper sealing and air extraction.
- Proper Sealing Prevents Leaks: Carefully slide the zipper seal multiple times to ensure an airtight closure. Even a tiny gap can lead to air re-entering the bag.
- Vacuum Cleaner Compatibility: Most household vacuum cleaners with a hose attachment can be used. Ensure the nozzle fits snugly over the bag’s valve for efficient air removal.
- Slow and Steady Air Extraction: Don’t rush the vacuuming process. Allow your vacuum cleaner to slowly and thoroughly remove all the air until the bag is compressed to its maximum potential.
- Monitor and Maintain: Periodically check your vacuum-sealed bags for any signs of air re-entry. If a bag starts to re-inflate, re-vacuum it and check for any damage or sealing issues.
- Smart Storage Habits: Label your bags, store them in a cool, dry place away from sharp objects, and consider rotating seasonal items for optimal organization.
Quick Answers to Common Questions
Can I use any vacuum cleaner with vacuum storage bags?
Yes, most standard household vacuum cleaners with a hose attachment are compatible with vacuum storage bags. Just ensure the nozzle fits snugly over the bag’s air valve.
How long do items stay compressed in vacuum storage bags?
When properly sealed and free from punctures, items can remain compressed for months, even years. Periodically check for re-inflation and re-vacuum if necessary.
Can I store delicate items like silk or lace in vacuum bags?
It’s generally not recommended for extremely delicate fabrics that might be damaged by compression or lack of air circulation. Stick to sturdy items like cotton, woolens, and synthetic fabrics.
What if my vacuum cleaner nozzle doesn’t fit the bag’s valve?
Most bags have universal valves, but if your nozzle is a poor fit, try gently holding it firmly over the valve to create a seal, or check if your vacuum came with smaller attachment nozzles.
Can vacuum storage bags be reused?
Absolutely! High-quality vacuum storage bags are designed to be durable and reusable multiple times. Just make sure to handle them carefully to avoid tears or punctures.
📑 Table of Contents
- Understanding Vacuum Storage Bags and Why They’re Amazing
- Choosing the Right Vacuum Storage Bags for Your Needs
- Preparing Your Items for Vacuum Sealing Success
- The Step-by-Step Guide to Vacuum Sealing with Your Vacuum Cleaner
- Tips for Maximizing Space and Longevity
- Troubleshooting Common Issues
- Conclusion
Understanding Vacuum Storage Bags and Why They’re Amazing
Vacuum storage bags are essentially heavy-duty plastic bags designed with a special valve and a robust zipper seal. Their primary function is to allow you to remove the air from within the bag, compressing its contents dramatically. This process isn’t just about saving space; it offers a multitude of benefits that make them an indispensable tool for any organized home.
The Magic of Compression
The most obvious and compelling reason to use vacuum storage bags is the incredible space-saving capability. By extracting the air, you can reduce the volume of bulky items like blankets, comforters, pillows, and puffer jackets by up to 80%! This means you can fit significantly more items into a drawer, under a bed, or in a storage bin, freeing up valuable closet and shelf space. If you’re wondering how to use vacuum storage bags with a vacuum cleaner to achieve this, you’re in the right place.
Protection Against the Elements
Beyond space, vacuum bags offer superior protection for your stored items. Once sealed and decompressed, your clothes and linens are shielded from:
- Dust and Dirt: No more dusty blankets when you pull them out of storage.
- Moisture and Humidity: A sealed bag keeps moisture out, preventing mildew and musty smells, which is particularly useful in damp basements or garages.
- Insects and Pests: Pests like moths and silverfish can’t get to your precious woolens or linens when they’re sealed airtight.
- Odors: The airtight seal also locks out any external odors, keeping your items fresh.
This protective barrier ensures that when you retrieve your items, they’re in the same pristine condition as when you stored them.
Choosing the Right Vacuum Storage Bags for Your Needs
Visual guide about How to Use Vacuum Storage Bags with Vacuum Cleaner
Image source: i5.walmartimages.com
Before you even think about how to use vacuum storage bags with a vacuum cleaner, you need the right bags! Not all vacuum storage bags are created equal. Considering a few factors will help you select the best ones for your specific storage challenges.
Size Matters
Vacuum storage bags come in a variety of sizes, from small travel bags to jumbo-sized bags capable of holding multiple king-sized comforters.
- Small/Travel Bags: Perfect for packing clothes in a suitcase or storing a few sweaters.
- Medium Bags: Ideal for daily clothing, towels, or smaller blankets.
- Large Bags: Great for storing seasonal clothing collections or a single duvet.
- Jumbo/XXL Bags: Designed for bulky items like multiple duvets, pillows, or winter coats.
- Cube Bags: These have a gusseted bottom, allowing them to form a cube shape when vacuumed, making them easier to stack and store in specific spaces like shelves or under beds.
Think about what you intend to store and measure your available storage space to determine the best sizes.
Valve Types and Compatibility
Most vacuum storage bags feature a universal valve designed to accommodate various vacuum cleaner nozzles. However, it’s worth checking if your vacuum cleaner’s hose attachment has a standard round nozzle or a more unusual shape. Typically, a standard round hose end will fit snugly over most bag valves. Some bags also come with a hand pump, which is useful for travel or if you don’t want to use your vacuum cleaner for smaller items. But for maximum compression and ease, learning how to use vacuum storage bags with a vacuum cleaner is the way to go.
Material Quality and Durability
Look for bags made from durable, multi-layer plastic (often a blend of PA and PE) that is resistant to punctures and tears. Thicker bags tend to last longer and are less likely to leak air over time. Read reviews and consider reputable brands to avoid flimsy bags that might fail after a few uses. Remember, you’re investing in long-term storage, so quality pays off.
Preparing Your Items for Vacuum Sealing Success
Proper preparation is crucial to ensure your items are well-preserved and your vacuum bags function effectively. This step is just as important as knowing how to use vacuum storage bags with a vacuum cleaner itself.
Clean and Dry is Non-Negotiable
Always ensure your items are completely clean and dry before sealing them. Storing dirty or damp items can lead to mildew, unpleasant odors, and damage to the fabric. Even a tiny bit of moisture trapped inside an airtight bag can create a breeding ground for mold. Launder or dry-clean items as needed, and make sure they are thoroughly air-dried before packing.
Fold Neatly and Avoid Overstuffing
Folding your items neatly will help them compress more evenly and prevent excessive creasing. Try to fold clothes or blankets into shapes that fit the dimensions of the bag. Do not overstuff the bags! Overstuffing makes it difficult to zip the bag closed properly, puts undue stress on the seams, and hinders the vacuum cleaner from extracting air efficiently. Leave enough room for the bag to flatten out. A good rule of thumb is to fill the bag only to about 80% capacity.
Protecting Sharp or Pointy Items
While vacuum bags are durable, sharp edges can still puncture them. If you’re storing items with zippers, buttons, or embellishments, turn them inside out or cover any potentially sharp parts with a layer of tissue paper or a soft cloth. This small step can prevent tears and ensure the bag remains airtight.
The Step-by-Step Guide to Vacuum Sealing with Your Vacuum Cleaner
Now for the main event! Here’s exactly how to use vacuum storage bags with a vacuum cleaner to achieve amazing compression and organization.
H3: Gathering Your Tools
Before you start, make sure you have everything you need:
- Your chosen vacuum storage bags
- The items you want to store (clean and dry!)
- Your household vacuum cleaner with a hose attachment (and any relevant nozzles)
H3: Loading the Bag Correctly
- Open the Bag: Unzip the double zipper seal completely.
- Place Items Inside: Carefully place your folded items into the bag. Distribute them as evenly as possible to ensure uniform compression. Remember the 80% rule – don’t overfill!
H3: Sealing the Zipper
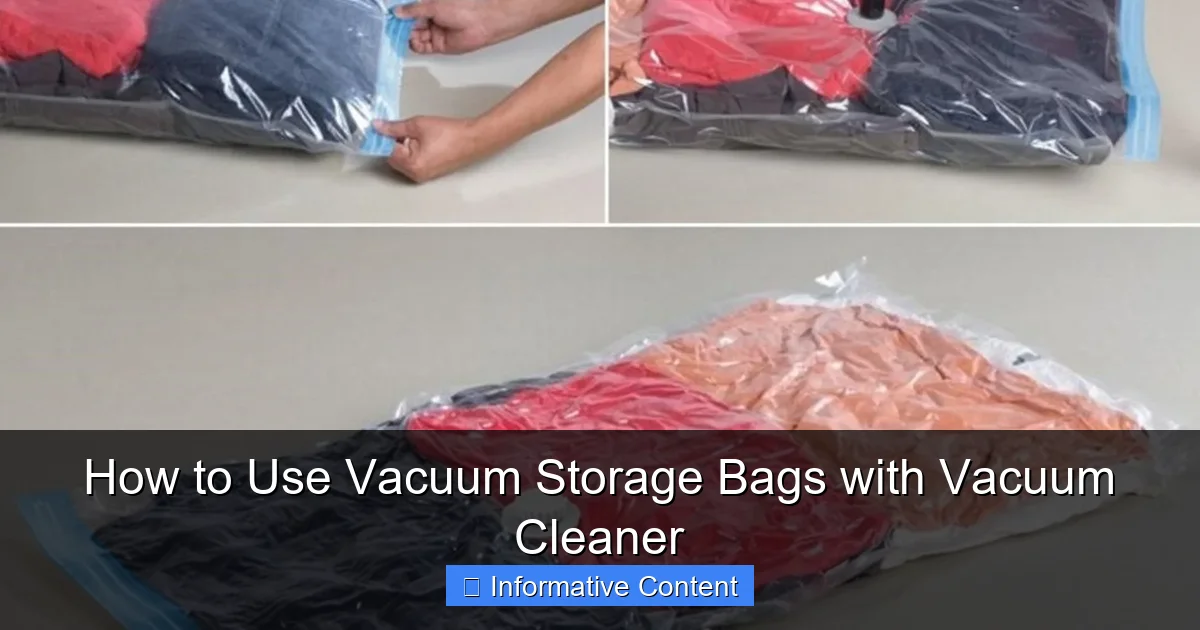
- Close the Zipper: This is a critical step for how to use vacuum storage bags with a vacuum cleaner effectively. Once your items are inside, carefully close the double zipper seal. Many bags come with a plastic slider tool to help you do this. Run the slider back and forth along the zipper several times to ensure it’s completely sealed. Check for any gaps or unsecured sections – even a tiny gap will cause the bag to re-inflate.
H3: Attaching Your Vacuum Cleaner
- Open the Valve Cap: Twist or pull open the cap on the air valve, which is usually located on the flat side of the bag.
- Attach the Vacuum Nozzle: Take the hose attachment of your vacuum cleaner and place its nozzle directly over the opened valve. Ensure there’s a good, snug fit. You want to create as airtight a connection as possible to maximize suction. Some vacuum cleaners come with special small nozzles that fit perfectly; others may just require the standard hose end.
H3: Extracting the Air
- Turn on Your Vacuum Cleaner: Switch on your vacuum cleaner. You’ll immediately hear the air being sucked out of the bag.
- Watch It Shrink: As the air is removed, the bag will begin to flatten and compress around your items. You’ll be amazed at how quickly bulky items shrink!
- Monitor the Process: Keep the vacuum cleaner running until no more air is being extracted and the bag has reached its maximum compression. The bag should feel firm and solid. Avoid going too long once it’s fully compressed, as this could strain your vacuum cleaner or the bag.
H3: Final Check and Storage
- Remove the Vacuum and Close Valve: Once the bag is fully compressed, quickly remove your vacuum cleaner nozzle from the valve and immediately close the valve cap tightly. This prevents any air from rushing back in.
- Inspect for Leaks: Give the bag a gentle squeeze or press to see if it starts to re-inflate. If it does, you likely have an issue with the zipper seal (re-seal it) or a small puncture (which might require a new bag).
- Store Your Bag: Your vacuum-sealed items are now ready for compact storage! Place them in your chosen location – under the bed, in a closet, attic, or garage.
Tips for Maximizing Space and Longevity
Learning how to use vacuum storage bags with a vacuum cleaner is just the beginning. A few extra tips can enhance your experience and the lifespan of your bags and stored items.
Stacking and Organizing
Once compressed, these bags become rigid blocks. This makes them incredibly easy to stack in closets or on shelves. For optimal organization, consider purchasing vacuum bags designed as cubes, which retain a structured shape, making them even easier to stack neatly. Labeling each bag with its contents and the date stored will save you a lot of time later.
Avoiding Over-Compression
While the goal is to save space, avoid over-compressing items that are extremely delicate or could be damaged by excessive pressure. For most fabrics, gentle compression is fine, but be mindful of items with intricate details or delicate embellishments.
Monitoring for Air Leaks
Periodically check your vacuum-sealed bags, especially if they are stored for extended periods. If you notice a bag starting to re-inflate, it means there’s a leak. This could be due to an improper seal, a small puncture, or even stress on the material. Re-vacuum the bag after checking the zipper, and if it still leaks, transfer the contents to a new bag. This vigilance is part of how to use vacuum storage bags with a vacuum cleaner effectively over time.
Re-using Your Bags
Most vacuum storage bags are designed for multiple uses. When you need to retrieve your items, simply open the valve, and the bag will re-inflate. Fold the bags neatly once empty to store them for future use, prolonging their life and saving you money.
What NOT to Vacuum Seal
While versatile, some items are best kept out of vacuum storage bags:
- Natural Fibers (e.g., leather, fur, down-filled items): These items need to breathe to maintain their loft and quality. Compressing them too much can damage their natural structure.
- Food Items: Unless the bag is specifically designed for food vacuum sealing, do not use regular storage bags for food, as they are not food-grade and may not create the necessary food-safe vacuum.
- Items with sharp edges: We mentioned this before, but it bears repeating – sharp objects can puncture bags.
- Wet or Damp Items: As mentioned, mold and mildew can quickly destroy items.
Troubleshooting Common Issues
Even when you know how to use vacuum storage bags with a vacuum cleaner, you might encounter a few hiccups. Here’s how to address them:
Bag Won’t Compress or Re-inflates Quickly
This is the most common issue.
- Check the Zipper Seal: This is the culprit 90% of the time. Run your fingers (or the slider tool) along the double zipper multiple times. Listen for any air escaping.
- Inspect for Punctures: Look for small holes or tears, especially near seams or if you stored something with a hidden sharp edge.
- Valve Cap Not Closed Properly: Ensure the valve cap is screwed or pushed on tightly immediately after removing the vacuum.
- Overstuffing: If the bag is too full, it might not seal correctly or compress efficiently.
Vacuum Cleaner Doesn’t Create Enough Suction
If your vacuum cleaner seems to be working fine but the bag isn’t compressing much:
- Nozzle Fit: Ensure your vacuum cleaner’s nozzle forms a tight seal over the bag’s valve. You might need to adjust the nozzle or hold it firmly in place.
- Vacuum Filter: A clogged vacuum filter can reduce suction power. Clean or replace your vacuum cleaner’s filter.
- Hose Blockage: Check if your vacuum hose is clear of any blockages.
Bag Appears Stretched or Damaged
This usually indicates poor quality bags or improper handling.
- Material Quality: Cheaper bags are more prone to stretching and tearing. Investing in higher quality bags can prevent this.
- Overstuffing: Pushing too many items into a bag can stress the seams and plastic.
Conclusion
Learning how to use vacuum storage bags with a vacuum cleaner is a simple, effective, and incredibly rewarding skill for anyone looking to optimize their living space. From reclaiming precious closet real estate to protecting your belongings from dust, moisture, and pests, the benefits are clear. By following the straightforward steps of preparing your items, carefully sealing the bags, and efficiently extracting air with your household vacuum, you can transform chaotic clutter into neatly organized bundles. So go ahead, grab your bags, fire up your vacuum cleaner, and embark on a journey to a more spacious, organized, and stress-free home! You’ll wonder how you ever managed without them.
Frequently Asked Questions
Are vacuum storage bags good for all types of clothing?
Vacuum storage bags are excellent for bulky items like sweaters, jackets, and bedding made from cotton, fleece, or synthetics. However, for delicate fabrics like silk, leather, or items with natural down or fur, it’s best to avoid vacuum sealing as compression can damage their fibers and loft.
How do I prevent my vacuum storage bags from leaking air?
To prevent air leaks, ensure the double zipper seal is completely closed by running the slider back and forth several times. Also, make sure the valve cap is securely tightened immediately after vacuuming, and inspect the bag for any small punctures or tears before use.
Can vacuum bags protect items from insects?
Yes, one of the significant advantages of vacuum storage bags is their airtight seal, which effectively protects stored items from dust, moisture, odors, and common household pests like moths, silverfish, and dust mites. This makes them ideal for long-term storage of seasonal clothing or cherished linens.
Is it okay to store vacuum-sealed bags in the attic or garage?
While vacuum bags offer protection, extreme temperature fluctuations in attics and garages can still impact the bags and their contents. A cool, dry, and stable environment like a closet, under a bed, or in a climate-controlled storage unit is generally preferable for optimal preservation and bag longevity.
How much space can I realistically save using these bags?
You can typically save an astonishing 70-80% of storage space, especially with bulky items like comforters, pillows, and large winter coats. The exact amount depends on the item’s compressibility and how effectively you remove the air with your vacuum cleaner.
What should I do if my vacuum storage bag gets a small hole?
If a vacuum storage bag gets a small hole, it will lose its seal and re-inflate. For very minor punctures, clear packing tape might offer a temporary fix, but for reliable long-term storage, it’s generally best to transfer the contents to a new, undamaged vacuum storage bag to ensure complete air retention and protection.