Replacing your Kirby vacuum cleaner’s belt is a crucial maintenance task that ensures optimal cleaning power. This comprehensive guide walks you through the entire process, making it simple and stress-free for 2025. You’ll learn how to identify a worn belt, safely remove the old one, and expertly install a new belt, guaranteeing your Kirby performs like a brand new machine.
Master How to Put a Belt on a Kirby Vacuum Cleaner 2025
Welcome to the ultimate guide for keeping your beloved Kirby vacuum cleaner in top-notch condition! If you own a Kirby, you know it’s a powerful and durable machine designed to last for years. However, even the most robust appliances require a little maintenance to perform their best. One of the most common tasks, and one that makes a huge difference in cleaning effectiveness, is replacing the drive belt.
Perhaps your Kirby isn’t picking up dirt like it used to, or maybe you’ve noticed a tell-tale burning rubber smell. These are classic signs that your Kirby vacuum cleaner belt is either worn out, stretched, or broken. Don’t worry, you don’t need to be a vacuum repair expert to fix this! This comprehensive, easy-to-follow guide will walk you through every step of putting a new belt on your Kirby vacuum cleaner in 2025. We’ll use simple language and clear instructions, ensuring you can tackle this job with confidence, saving you time and money. By the end, your Kirby will be back to its powerful best, effortlessly cleaning your floors.
Why is the Kirby Vacuum Cleaner Belt So Important?
The belt on your Kirby vacuum cleaner is a critical component. It connects the motor’s spinning shaft to the brush roll, which is the part that agitates carpets, lifting dirt and debris into the vacuum’s suction path. If the belt is loose, stretched, or broken, the brush roll won’t spin effectively, or at all. This results in poor cleaning performance, leaving your carpets looking less than pristine. Regular belt replacement is a small effort for a huge reward in cleaning efficiency.
Key Takeaways
- Safety First: Always unplug your Kirby vacuum cleaner before performing any maintenance, including belt replacement, to prevent accidental starts and ensure your safety.
- Identify the Problem: A loss of suction, a burning rubber smell, or a non-spinning brush roll are clear indicators that your Kirby vacuum cleaner belt needs to be replaced.
- Gather the Right Tools: Before starting, ensure you have a new, genuine Kirby vacuum cleaner belt, a flathead screwdriver, and possibly a pair of work gloves readily available.
- Follow Step-by-Step: The process involves adjusting the nozzle, releasing the brush roll housing, removing the old belt, carefully positioning the new belt, and reassembling the components.
- Test Thoroughly: After installing the new belt, perform a quick test run to confirm the brush roll spins correctly and there are no unusual noises, ensuring proper function.
- Regular Maintenance: Periodically checking your Kirby vacuum cleaner belt and replacing it when signs of wear appear will significantly extend the life and efficiency of your appliance.
Quick Answers to Common Questions
How often should I check my Kirby vacuum cleaner belt?
It’s a good practice to visually inspect your Kirby vacuum cleaner belt every 3 to 6 months, or more frequently if you use your vacuum daily or on very high-pile carpets. Look for signs of wear like fraying, cracks, or stretching. This proactive approach can help prevent sudden belt failure.
Can I use any generic belt for my Kirby?
While generic belts might be available, it’s highly recommended to use a genuine Kirby vacuum cleaner belt specifically designed for your model. Generic belts may not have the correct elasticity, thickness, or durability, which can lead to poor performance or even damage to your vacuum’s motor or brush roll. Always opt for the manufacturer-approved part.
What if the new belt feels too tight to install?
A new Kirby vacuum cleaner belt will naturally feel much tighter than an old, stretched-out one. This tension is necessary for proper brush roll rotation. Use firm, steady pressure when stretching it over the motor shaft. If you’re absolutely certain you have the correct belt and it still feels impossibly tight, double-check your model number and the belt’s compatibility.
My brush roll isn’t spinning even with a new belt. What’s wrong?
First, ensure the belt is correctly seated on both the brush roll and the motor shaft, and that the brush roll itself isn’t obstructed by hair or debris. If those are clear, check if the brush roll can spin freely by hand when removed. If it feels stiff or makes grinding noises, the brush roll bearings might be worn, requiring replacement beyond just the belt.
Is this process similar for all Kirby models (e.g., G series, Sentria, Avalir)?
Yes, the fundamental process of how to put a belt on a Kirby vacuum cleaner is largely consistent across most modern Kirby models, including the G series, Sentria, and Avalir. The main differences usually lie in the exact location or type of latch for releasing the nozzle or brush roll housing. Always refer to your specific model’s owner’s manual for precise details if you encounter any unique challenges.
Safety First: Preparing for Belt Replacement
Before we dive into the nitty-gritty of replacing your Kirby vacuum cleaner belt, safety must be your absolute top priority. Working with electrical appliances always carries a risk, so let’s make sure you’re prepared.
Unplug Your Kirby Vacuum Cleaner
This cannot be stressed enough: always unplug your Kirby vacuum cleaner from the wall outlet before you begin any maintenance or repairs. This eliminates any risk of accidental startup and potential injury from the moving parts or electrical shock. Make sure the power cord is completely disconnected.
Gather Your Tools and Supplies
Having everything ready before you start will make the process much smoother. You’ll need just a few items:
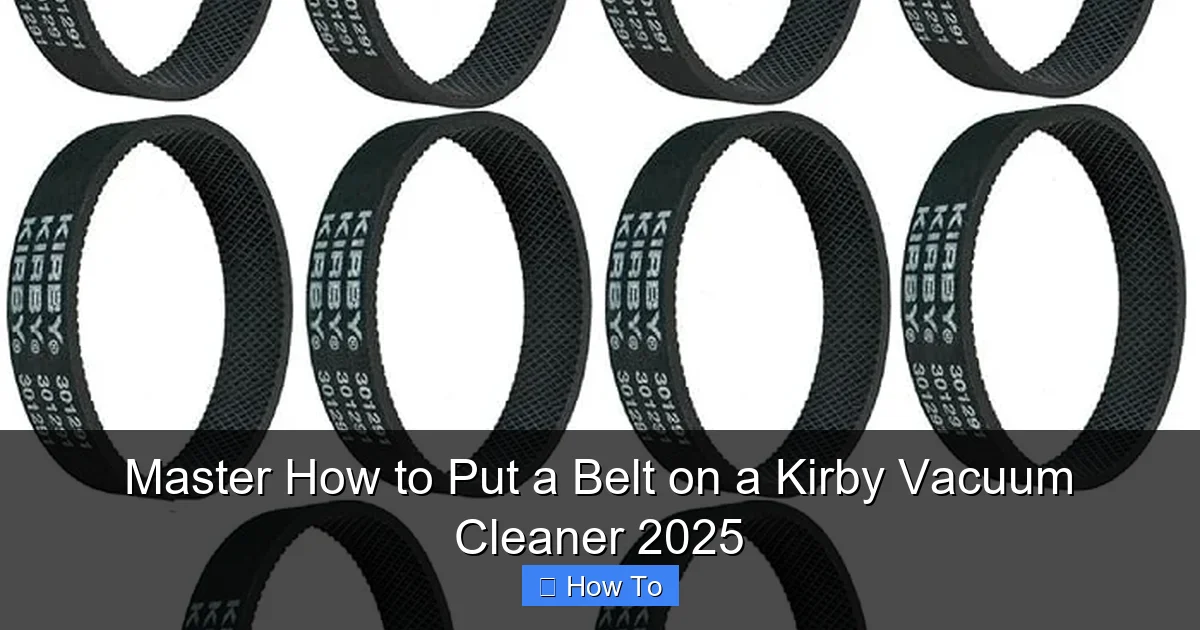
- New Kirby Vacuum Cleaner Belt: Ensure you have the correct belt for your specific Kirby model. There are different types (e.g., standard, F-style, Twister). Check your owner’s manual or the existing belt for a part number if you’re unsure. Using a genuine Kirby belt is always recommended for optimal performance and longevity.
- Flathead Screwdriver: You’ll likely need this to adjust or remove certain parts, depending on your Kirby model.
- Work Gloves (Optional but Recommended): Gloves can provide a better grip and protect your hands from any sharp edges or dirt.
- Cleaning Cloth: This is a great opportunity to clean out any accumulated hair or debris from the brush roll area.
Recognizing When to Replace Your Kirby Vacuum Cleaner Belt
How do you know it’s time to put a new belt on your Kirby vacuum cleaner? Your vacuum will give you clear signals:
Visual guide about Master How to Put a Belt on a Kirby Vacuum Cleaner 2025
Image source: cleaningbeasts.com
- Loss of Suction/Cleaning Power: This is the most common sign. If your Kirby isn’t picking up dirt and hair from your carpets as effectively as it used to, even with a clean bag, a worn belt is often the culprit.
- Brush Roll Not Spinning: The brush roll is essential for deep cleaning carpets. If you tip your Kirby back and the brush roll isn’t spinning when the vacuum is on, the belt is broken or too loose.
- Burning Rubber Smell: A distinct burning smell is a strong indicator that the belt is slipping or rubbing excessively, creating friction and heat. This means it’s severely worn and needs immediate replacement.
- Visible Wear and Tear: Sometimes, you can simply inspect the belt. If it looks frayed, stretched, cracked, or has flat spots, it’s time for a new one.
Step-by-Step Guide: How to Put a Belt on a Kirby Vacuum Cleaner
Now that you’re prepared and know what to look for, let’s get down to the actual belt replacement process. These steps are generally applicable to most modern Kirby models (like the G series, Ultimate G, Sentria, Avalir, etc.), though minor variations may exist. Always refer to your specific owner’s manual if you encounter difficulty.
Step 1: Prepare Your Kirby Vacuum Cleaner for Access
The first part of putting a belt on a Kirby vacuum cleaner involves getting it into the right position.
Lay the Vacuum on its Side or Back
Carefully lay your Kirby vacuum cleaner down so that the underside, where the brush roll and nozzle are located, is easily accessible. Many people find it easiest to lay it flat on its back or side on a clean, stable surface.
Adjust the Height Setting
For some Kirby models, you might need to adjust the height setting to its highest position. This can sometimes give you more clearance to access the nozzle and belt area. Check your owner’s manual if this step seems unclear for your specific model.
Step 2: Access the Brush Roll Housing
This is where we get to the core of the issue – gaining access to the worn Kirby vacuum cleaner belt.
Locate and Release the Nozzle Lever/Clip
The front nozzle of your Kirby, which houses the brush roll, needs to be removed or opened. Look for a lever or a clip that secures the nozzle. On many Kirby models, this is a metal lever usually found on the right side of the nozzle when looking at the vacuum from the front. Flip this lever downwards to unlock the nozzle.
Remove or Tilt the Nozzle Assembly
Once unlocked, the nozzle assembly can usually be tilted forward and lifted off, or it might pivot open to reveal the brush roll and belt. Gently remove the entire nozzle if it detaches completely, setting it aside. Be careful not to force anything.
Step 3: Remove the Worn or Broken Belt
Now you can clearly see the old Kirby vacuum cleaner belt and the brush roll.
Locate the Belt
The belt will be stretched around the brush roll and a drive shaft or pulley coming from the motor. It might be snapped, or simply loose and frayed.
Remove the Brush Roll (If Necessary)
In many Kirby models, you’ll need to remove the brush roll itself to easily get the old belt off and the new one on. There are usually clips or tabs on either end of the brush roll that hold it in place. Gently push or release these clips and slide the brush roll out. You may need your flathead screwdriver for a bit of leverage, but be gentle to avoid damage.
Remove the Old Belt
With the brush roll removed, simply slide the old belt off the motor shaft/pulley. If it’s broken, you might just be collecting pieces. Take a moment to clean any accumulated hair, string, or debris from the brush roll and the belt area. This is a great opportunity for preventative maintenance.
Step 4: Install the New Kirby Vacuum Cleaner Belt
This is the most crucial step – getting that fresh, new Kirby vacuum cleaner belt into position!
Position the Belt on the Brush Roll
Take your new belt. Loop it around the center of the brush roll first. Ensure it’s centered and not twisted. The new belt will feel much tighter and less flexible than the old one, which is exactly what you want.
Align the Brush Roll and Belt with the Motor Shaft
Now, carefully guide the brush roll back into its housing. Before snapping the brush roll back into its end caps, you need to get the belt properly positioned. The belt needs to go around the motor’s drive shaft (or pulley) inside the nozzle housing. This is often the trickiest part as the belt will be tight.
- Method 1 (Common): Hold the brush roll with the belt on it. Guide one end of the brush roll into its retaining slot. Then, carefully stretch the belt over the motor shaft/pulley. This often requires some steady pressure and a bit of stretching. Once the belt is over the motor shaft, guide the other end of the brush roll into its slot and secure it.
- Method 2 (For some models): You might put the belt around the motor shaft first, then carefully stretch it over the brush roll as you install the brush roll. This can be harder due to the tension.
Whichever method you use, ensure the belt sits squarely on both the brush roll and the motor shaft. It should be taut, but not so tight that it feels like it’s under extreme stress, nor should it be loose. A correctly installed Kirby vacuum cleaner belt will be snug.
Secure the Brush Roll
Once the belt is in place, firmly snap the brush roll back into its retaining clips or slots. Make sure it’s secure and spins freely by hand.
Step 5: Reassemble Your Kirby Vacuum Cleaner
You’re almost there! It’s time to put everything back together.
Reattach the Nozzle Assembly
Carefully place the nozzle assembly back onto the main body of the Kirby vacuum cleaner. Ensure it aligns correctly with any guides or pins. Push it down firmly.
Secure the Nozzle Lever/Clip
Flip the nozzle locking lever or clip back upwards to secure the nozzle in place. It should click or lock firmly, indicating that the nozzle is properly attached and won’t come loose during operation.
Step 6: Test Your Kirby Vacuum Cleaner
The moment of truth! A final check ensures your hard work paid off.
Plug In and Power On
Plug your Kirby vacuum cleaner back into a wall outlet. Turn it on. Listen for any unusual noises. The brush roll should immediately begin spinning powerfully. Tip the vacuum back and observe the brush roll – it should be rotating smoothly and quickly.
Perform a Test Clean
Run your Kirby over a section of carpet. You should immediately notice improved suction and cleaning performance. If everything looks and sounds normal, congratulations! You’ve successfully replaced your Kirby vacuum cleaner belt.
Practical Tips for Kirby Belt Longevity and Performance
Keeping your Kirby in peak condition involves more than just knowing how to put a belt on a Kirby vacuum cleaner. Here are some extra tips:
- Regular Inspections: Periodically check your belt (perhaps every 3-6 months, depending on usage) for signs of wear. Early detection can prevent a complete belt failure during a cleaning session.
- Avoid Overfilling Bags: An overfilled dust bag can restrict airflow and make the motor work harder, potentially stressing the belt. Change your bag when it’s about two-thirds full.
- Clean Brush Roll Regularly: Hair, string, and debris can wrap around the brush roll, causing friction and making the belt work harder. Clean your brush roll regularly to prevent this.
- Don’t Vacuum Cords or Obstructions: Accidentally vacuuming up power cords, large toys, or other immovable objects can cause the belt to snap instantly due to sudden resistance.
- Use Genuine Kirby Belts: While generic belts might seem cheaper, genuine Kirby belts are designed to specific tolerances for your machine, offering better fit, performance, and durability.
Troubleshooting Common Belt Issues
Even with the best instructions, sometimes things don’t go perfectly. Here are a few common issues you might encounter after replacing your Kirby vacuum cleaner belt and how to troubleshoot them:
Brush Roll Still Not Spinning
- Check Belt Installation: Ensure the new belt is properly seated on both the brush roll and the motor shaft. It should be taut.
- Obstruction: Is there anything wrapped around the brush roll or the motor shaft that’s preventing it from spinning freely?
- Motor Issue: In rare cases, the motor itself might have an issue. If the belt is correctly installed and there are no obstructions, and the brush roll still doesn’t spin, it might be time for a professional check.
New Belt Snapped Quickly
- Obstruction: This is almost always due to an obstruction that caused sudden resistance. Double-check your brush roll and the area where you were cleaning.
- Incorrect Belt Type: Ensure you installed the correct belt for your Kirby model. An incompatible belt might be too tight or too weak.
- Worn Brush Roll Bearings: If the brush roll bearings are worn, it can create excessive friction, leading to premature belt failure. The brush roll might feel stiff or make grinding noises when spun by hand.
Burning Smell After New Belt Installation
- Tightness: A new belt might initially have a slight “new rubber” smell. However, a strong burning smell indicates excessive friction. Double-check that the belt isn’t too tight (unlikely with a genuine Kirby belt) or rubbing against something it shouldn’t be.
- Obstruction: Again, check for anything wrapped around the brush roll or motor shaft.
Conclusion: Empowering Your Kirby for 2025 and Beyond
Congratulations! You’ve just completed a vital maintenance task that will breathe new life into your Kirby vacuum cleaner. Knowing how to put a belt on a Kirby vacuum cleaner not only saves you money on service calls but also empowers you to keep your powerful cleaning machine operating at its absolute best. In 2025 and for many years to come, your floors will thank you for this simple yet impactful maintenance. With a properly functioning belt, your Kirby will continue to deliver that deep, thorough clean it’s famous for, ensuring your home remains spotless. Keep up the great work, and enjoy your perfectly running Kirby!
🎥 Related Video: 5 Things You Never Knew A Kirby Vacuum Could Do!
📺 Great Vacs
Before you visit our site, make sure you grab this DISCOUNT CODE “YT5%OFF” for 5% off your order!