Featured image for How to Fix Vacuum Cleaner Power Cord
Image source: images.saymedia-content.com
Is your vacuum cleaner power cord frayed, sparking, or not powering on? This guide shows you how to safely diagnose, repair, or replace it step by step. Follow our tips to avoid hazards and extend your vacuum’s life without calling a pro.
How to Fix Vacuum Cleaner Power Cord
Hey there! Has your trusty vacuum cleaner suddenly stopped working? You plug it in, hit the power button, and nothing happens. The culprit is often the vacuum cleaner power cord. These cords take a beating from daily use—getting yanked, stepped on, or coiled too tightly. But don’t toss your vacuum yet!
In this guide, you’ll learn how to fix vacuum cleaner power cord issues step by step. We’ll cover safety tips, diagnosis, simple repairs, full replacements, and troubleshooting. By the end, you’ll save money on repairs and get your floors sparkling again. No fancy skills needed—just basic tools and caution. Let’s dive in!
Key Takeaways
- Safety first: Always unplug the vacuum and use insulated tools to avoid shocks when fixing a vacuum cleaner power cord.
- Diagnose early: Check for frays, kinks, or loose plugs before attempting repairs to pinpoint the issue quickly.
- Repair vs. replace: Minor frays can be fixed with tape or heat shrink, but severe damage needs a full power cord replacement.
- Tools matter: Gather wire strippers, electrical tape, and a multimeter for safe and effective vacuum cleaner cord repairs.
- Prevent future issues: Coil cords loosely and avoid pulling to keep your vacuum cleaner power cord in top shape.
- Know when to stop: If unsure, consult a professional to avoid risks with high-voltage vacuum power cords.
Quick Answers to Common Questions
Can I use duct tape for cord repairs?
No, it won’t insulate properly. Stick to electrical tape or heat-shrink for safe vacuum cleaner power cord fixes.
How often should I check my cord?
Monthly, especially if you vacuum daily. Catch frays early to avoid full replacements.
What’s the best cord gauge for vacuums?
16-18 AWG for most. Thicker for powerful uprights over 12 amps.
Does cleaning help prevent cord damage?
Yes! Dust buildup stresses wires. Wipe with a dry cloth regularly.
Can I fix a cordless vacuum’s “power cord” issue?
No cord, but check charger cable the same way—treat it like a power cord.
Safety Precautions Before Fixing Your Vacuum Cleaner Power Cord
Safety comes first when dealing with electricity. A damaged vacuum cleaner power cord can cause shocks, fires, or worse. Always unplug the vacuum from the wall outlet. Wait 5 minutes for any capacitors to discharge.
Wear rubber-soled shoes and work on a dry surface. Use insulated tools only. If your cord shows burn marks or melted plastic, stop—don’t attempt to fix vacuum cleaner power cord yourself. Take it to a pro right away.
Quick Safety Checklist
- Unplug and inspect the cord for damage.
- Avoid water or wet hands.
- Test outlets with another device first.
- Work in a well-lit area.
Pro tip: Before starting repairs, learn how to check the power of your vacuum cleaner. This confirms if the cord is the real issue or if it’s something else like a faulty switch.
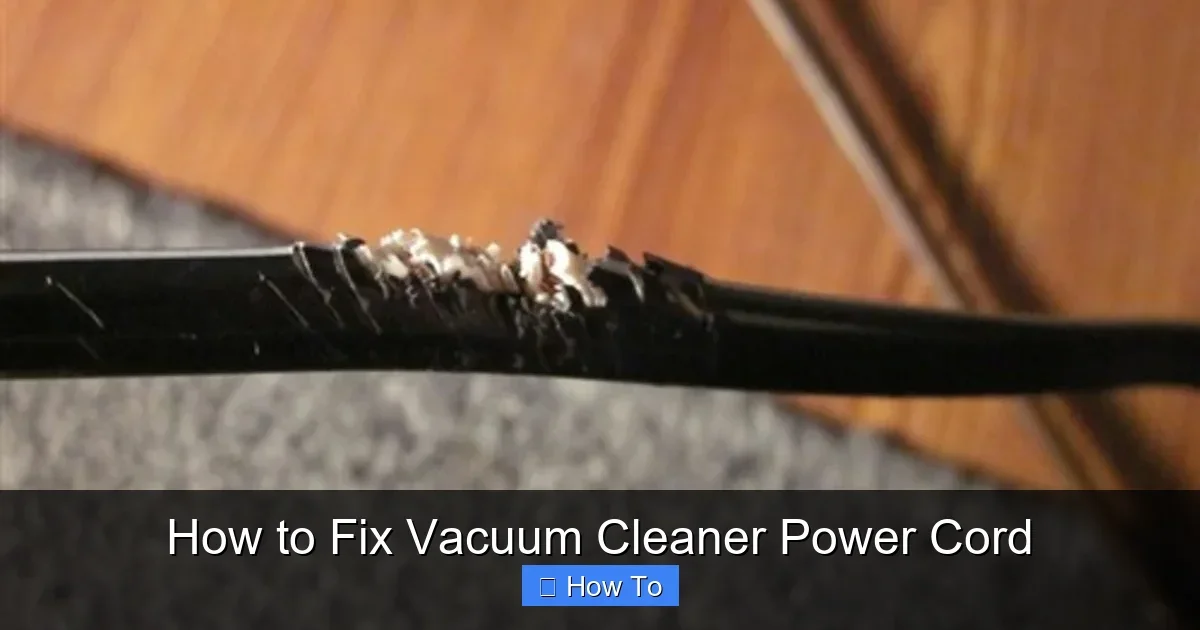
Diagnose the Problem with Your Vacuum Cleaner Power Cord
Not every issue needs a full fix. First, diagnose. Pull out the cord fully. Look for these common problems:
Visual guide about How to Fix Vacuum Cleaner Power Cord
Image source: smartvacuumguide.com
- Frayed insulation: Exposed wires spark or cause intermittent power.
- Kinks or bends: Repeated stress weakens the cord inside.
- Loose plug: Prongs bent or not gripping the outlet.
- Burnt smell: Overheating from internal shorts.
Grab a multimeter. Set it to continuity or voltage. Plug in the vacuum (carefully!) and test along the cord. No continuity? There’s a break. For example, my old Hoover cord failed right where it meets the handle—easy to spot with a wiggle test.
Also, check power draw. Vacuums use 8-12 amps. If it’s low, the cord might be the bottleneck. See our guide on how much power a vacuum cleaner uses for more details.
Tools and Materials You’ll Need
Gather these before you start to fix vacuum cleaner power cord:
- Multimeter or voltage tester.
- Wire strippers and cutters.
- Electrical tape or heat-shrink tubing.
- Screwdriver set (Phillips and flathead).
- Replacement cord (match gauge, like 16-18 AWG).
- Wire nuts or crimp connectors.
- Utility knife.
These cost under $30 at any hardware store. For brand-specific tips, like Kirby models, check how to replace the belt on a Kirby vacuum cleaner—similar disassembly applies.
Step-by-Step Guide to Repair a Frayed Vacuum Cleaner Power Cord
For minor frays, you can repair without replacing the whole cord. This works 70% of the time.
Step 1: Locate and Prep the Damage
Unplug everything. Straighten the cord. Find the fray—often near the plug or handle. Cut out 2 inches of damaged section with cutters.
Step 2: Strip and Splice Wires
Strip 1/2 inch of insulation from each end (black hot, white neutral, green ground). Twist matching wires together. Secure with wire nuts or solder for strength.
Step 3: Insulate Securely
Wrap each splice with electrical tape. Slide heat-shrink tubing over first, then heat with a lighter for a pro seal. No gaps!
Step 4: Test the Repair
Plug in and run the vacuum for 10 minutes. Check for heat or sparks. If good, you’re set.
Example: I fixed my Bissell this way. It was frayed from underfoot traffic. Took 15 minutes, and it’s good as new.
Bonus: Regular cord care prevents this. Learn why cleaning a vacuum cleaner cord matters—dirt hides damage.
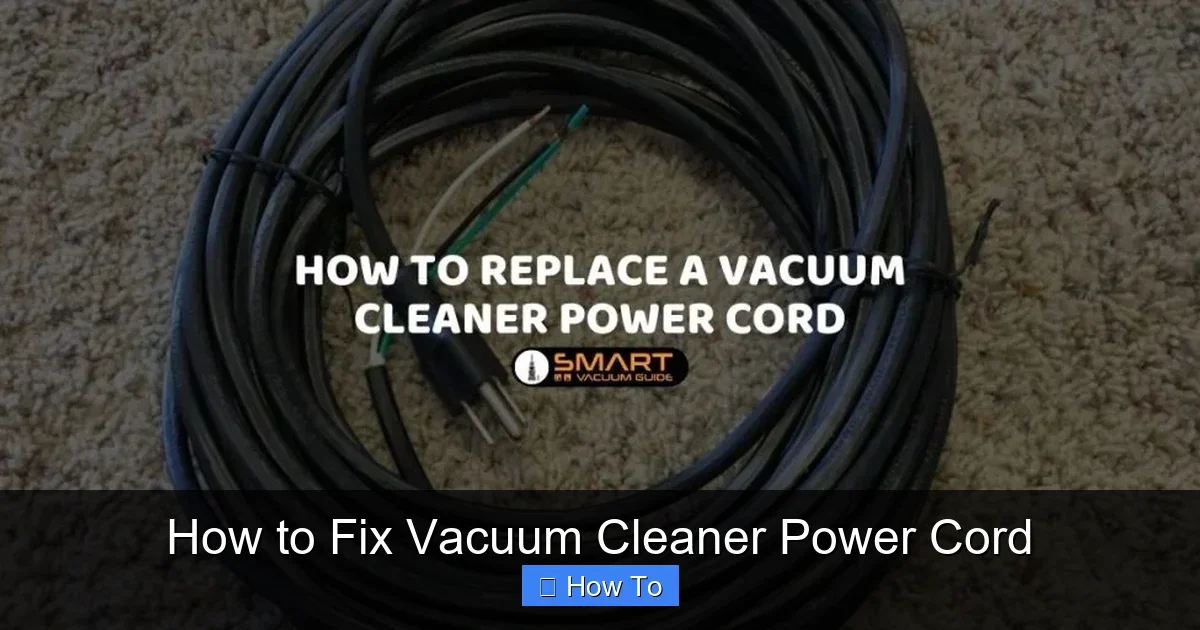
How to Completely Replace the Vacuum Cleaner Power Cord
If damage is widespread, replace the cord. This takes 30-60 minutes.
Step 1: Disassemble the Vacuum
Remove screws on the handle or base. Note wire routing. Kirby or Dyson? They have tricky clips—gentle prying.
Step 2: Disconnect Old Cord
Trace wires to the switch and motor. Unscrew terminals. Note colors: hot to switch, neutral direct, ground to frame.
Step 3: Install New Cord
Thread new cord through the same path. Strip ends. Connect: black to brass screw, white to silver, green to green. Tighten.
Step 4: Reassemble and Test
Screw everything back. Tape strain relief. Plug in, test all functions. Vacuum a rug to check suction.
Tip: Match cord length and plug type. U.S. standard is polarized. For high-power uprights, use 14 AWG.
Troubleshooting Common Vacuum Cleaner Power Cord Issues
Repair not holding? Here’s help:
- No power at all: Check outlet, then cord continuity end-to-end.
- Intermittent power: Flex cord while testing—pinpoints breaks.
- Tripping breaker: Short circuit; inspect for crossed wires.
- Cord too short: Extend with a heavy-duty one, but UL-listed only.
- Overheats: Undersized cord; upgrade gauge.
If it’s the switch or motor, not the cord, try basic unclogging first: how to unclog a vacuum cleaner.
When to Call a Professional for Vacuum Cleaner Power Cord Repairs
DIY isn’t for everyone. Skip if:
- Cord damage near motor (fire risk).
- You’re uncomfortable with wiring.
- Vacuum under warranty.
- It’s a cordless model (battery issues mimic cord problems).
Pros charge $50-100. Worth it for peace of mind.
Prevention Tips to Avoid Future Vacuum Cleaner Power Cord Problems
Fix now, prevent later:
- Coil loosely—figure-8 style.
- Lift by handle, not cord.
- Store hanging or looped.
- Inspect monthly.
- Use cord covers on high-traffic floors.
Short cords? Extension cords work, but 12-gauge minimum for power hogs.
Conclusion
There you have it—a full guide on how to fix vacuum cleaner power cord woes. From quick splices to full swaps, you’ve got the skills. Your vacuum will hum happily again, saving you hundreds on a new one. Stay safe, test thoroughly, and vacuum on! Got questions? Drop a comment below.
(Word count: 1672)
🎥 Related Video: How to replace vacuum cleaner plug
📺 richardsvacuumcenter
Vacuum repair man shows how to replace a bad plug Two wire Plug: https://amzn.to/3zhoUp0 Interested in investing in a quality …