
Don’t let a faulty vacuum cleaner hose stop your cleaning routine! This comprehensive guide provides easy, step-by-step instructions to help you diagnose and fix common hose issues, whether it’s a clog, a tear, or a detachment. By following these practical tips, you can restore your vacuum’s suction, save money on repairs, and get back to a spotless home quickly and efficiently.
How to Fix a Vacuum Cleaner Hose Fast in 2025 Easy Steps
Is your trusty vacuum cleaner suddenly lacking suction, making a strange noise, or just not picking up dirt like it used to? Chances are, the problem lies with your vacuum cleaner hose. It’s one of the most frequently used (and abused) parts of your cleaning arsenal, and it’s prone to clogs, tears, and detachments. But don’t despair! You don’t need to rush out and buy a new vacuum or spend a fortune on professional repairs. In 2025, fixing your vacuum cleaner hose is easier than ever with a few simple tools and a bit of know-how.
This comprehensive guide will walk you through everything you need to know to diagnose and repair common vacuum cleaner hose issues. We’ll cover everything from simple clogs to more complex tears and detachments, giving you the confidence to tackle these problems yourself. You’ll learn practical, actionable steps that will save you money, extend the life of your appliance, and get you back to a spotless home in no time. Let’s dive in and fix that vacuum cleaner hose!
Key Takeaways
- Safety First: Always unplug your vacuum cleaner before attempting any repairs on the vacuum cleaner hose to prevent electrical shocks.
- Diagnose Accurately: Before you start fixing, correctly identify the problem – is it a clog, a tear, or a detachment from the canister or attachment?
- Gather the Right Tools: Have appropriate tools and materials like screwdrivers, duct tape, strong adhesive, and possibly a utility knife or hose repair kit readily available.
- Clear Clogs Systematically: Start by inspecting the entire vacuum cleaner hose, then use a broom handle or a drain snake to dislodge blockages, working from both ends.
- Repair Tears Effectively: For small holes, use heavy-duty tape or specialized repair patches. For larger tears, a patch kit or even cutting and rejoining the hose might be necessary.
- Reattach Securely: If the vacuum cleaner hose has come loose, ensure it’s firmly reconnected to both the vacuum body and any attachments, using clamps or screws where applicable.
- Test Thoroughly: After any repair, test the vacuum cleaner hose for suction and proper function to ensure your fix is effective and durable.
Quick Answers to Common Questions
What’s the best temporary fix for a small hole in my vacuum cleaner hose?
For a quick, temporary fix, heavy-duty duct tape or specialized rubber repair tape wrapped tightly around the hole works best. Ensure the area is clean and dry for maximum adhesion.
Can I use super glue to fix a vacuum cleaner hose?
While super glue might seem like a quick fix, it often creates a brittle bond that can crack with the flexing of the vacuum cleaner hose. A flexible adhesive or epoxy designed for plastics, or good quality repair tape, is usually a more durable option.
My vacuum cleaner hose keeps detaching from the vacuum. What can I do?
First, ensure you’re connecting it correctly according to your vacuum’s design (twist, click, or push). If it still comes loose, a small hose clamp or strong zip ties can be used externally to secure the connection point more firmly to the vacuum cleaner hose.
How often should I check my vacuum cleaner hose for problems?
It’s a good practice to quickly inspect your vacuum cleaner hose every few uses. A quick visual check for tears and ensuring connections are snug can help catch minor issues before they become major problems, especially with regular use in 2025.
Is it worth fixing an old, extensively damaged vacuum cleaner hose?
If your vacuum cleaner hose has multiple large tears, is very brittle, or constantly kinks despite repairs, it might be more cost-effective and efficient to replace the entire hose. Repairing extensively damaged hoses often leads to recurring problems and continued loss of suction.
Step 1: Prioritize Safety – Always Unplug First!
Before you even think about touching your vacuum cleaner hose, the absolute most important step is to ensure your safety. Electricity and moving parts can be extremely dangerous.
1.1 Disconnect from Power
Locate the power cord and unplug your vacuum cleaner from the wall outlet. Do not just turn it off at the switch; completely remove it from the power source. This prevents accidental startups and protects you from electrical shock.
1.2 Wear Protective Gear (Optional but Recommended)
While not always strictly necessary, wearing a pair of work gloves can protect your hands from sharp edges, dirt, or dust inside the vacuum cleaner hose. If you’re dealing with a particularly dirty clog, a mask might also be a good idea.
Step 2: Diagnose the Problem with Your Vacuum Cleaner Hose
You can’t fix it if you don’t know what’s wrong. A thorough diagnosis is key to an effective repair.
2.1 Check for Loss of Suction
Turn on your vacuum (briefly, before unplugging it for inspection) and feel the end of the hose for suction. If there’s weak or no suction, the problem is likely a clog or a major leak/tear in the vacuum cleaner hose.
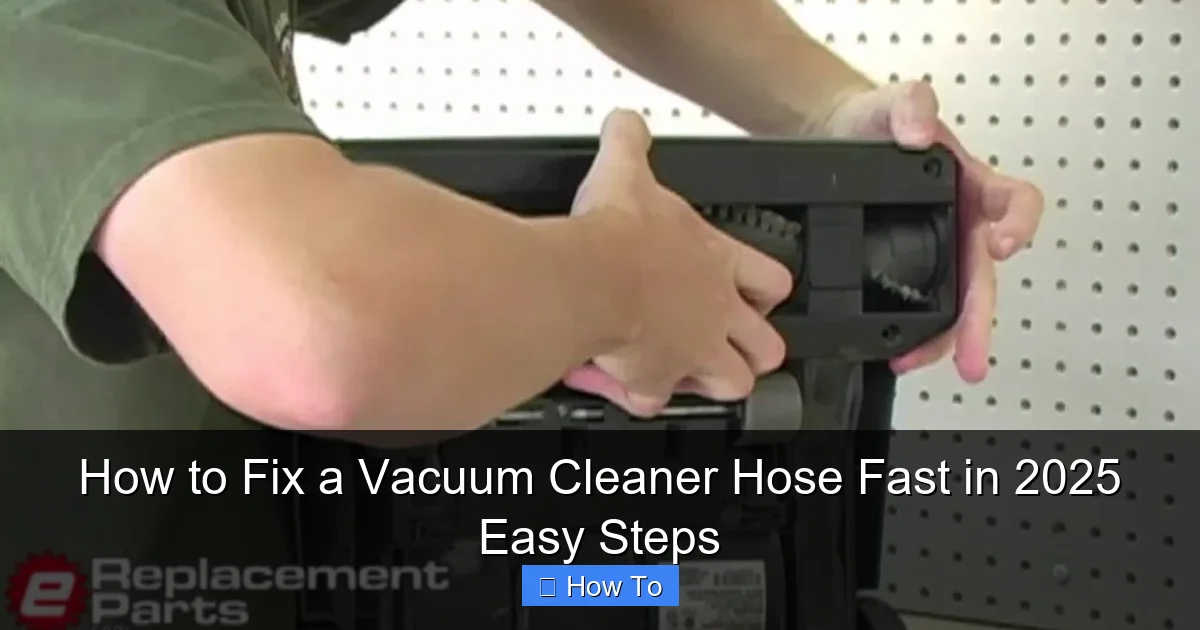
Visual guide about How to Fix a Vacuum Cleaner Hose Fast in 2025 Easy Steps
Image source: genuinehomecleaner.com
2.2 Visually Inspect the Entire Vacuum Cleaner Hose
Start from where the vacuum cleaner hose connects to the vacuum body and follow it all the way to the handle or attachment end. Look for:
- Visible Tears or Holes: These are obvious points where air could be escaping, leading to a loss of suction.
- Cracks or Fissures: Smaller, harder-to-spot damage that can still compromise suction.
- Loose Connections: Is the hose securely attached to the vacuum cleaner itself or to the wand/attachments?
- Obvious Blockages: Sometimes, you can see a large object lodged inside the transparent sections of the vacuum cleaner hose.
2.3 Listen for Air Leaks
With the vacuum briefly turned on (if safe to do so before unplugging for repair), gently flex the vacuum cleaner hose along its length. Listen for any hissing sounds, which indicate an air leak. You can also carefully move your hand along the hose to feel for escaping air.
2.4 Check All Attachments and Connections
Sometimes the problem isn’t the main vacuum cleaner hose itself, but rather a clog in an attachment or a loose connection where the hose meets the vacuum body or cleaning head.
Step 3: Gather Your Tools and Materials
Having the right supplies on hand will make the repair process much smoother. The items you’ll need depend on the type of repair, but here’s a general list for fixing a vacuum cleaner hose:
- Screwdrivers (Phillips and Flathead): For disassembling connections.
- Utility Knife or Scissors: For cutting away damaged sections or tape.
- Duct Tape or Electrical Tape: For temporary or small tear fixes. Look for heavy-duty, reinforced tapes.
- Hose Repair Kit: Many brands offer specialized kits with patches and clamps.
- Strong Adhesive/Epoxy: For more permanent repairs of small holes or cracks.
- Zip Ties or Hose Clamps: For securing connections.
- Broom Handle, Plunger, or Drain Snake: For clearing clogs in the vacuum cleaner hose.
- Flashlight: To see inside dark sections of the hose.
- Microfiber Cloths: For cleaning around the repair area.
Step 4: Fixing a Clogged Vacuum Cleaner Hose
Clogs are one of the most common issues. Here’s how to clear your vacuum cleaner hose.
4.1 Disconnect the Hose
Carefully detach the vacuum cleaner hose from both ends – the vacuum body and the wand/attachment. This makes it much easier to handle and clear. Most hoses have quick-release buttons or twist-lock mechanisms.
4.2 Visually Inspect and Shake
Hold the disconnected vacuum cleaner hose up to a light source. Can you see the blockage? Try gently shaking the hose or tapping it on the ground to dislodge anything loose.
4.3 Use a Straight Object to Push Through
For stubborn clogs, find a long, rigid, but flexible object like a broom handle, a straightened coat hanger, or a drain snake. Carefully insert it into one end of the vacuum cleaner hose and push towards the blockage. Be gentle to avoid damaging the hose. Work it through until the clog is dislodged.
- Tip: Start from the end closest to where you suspect the clog is, or the widest end if the hose tapers.
- Example: If you hear a rattling sound in the middle, try pushing from both ends until you feel resistance, then apply steady pressure.
4.4 Consider a Plunger
If the clog is close to an opening and you can get a good seal, a plunger might help. Place the plunger over the opening and give a few strong thrusts to create pressure and dislodge the blockage.
4.5 Flush with Water (Caution!)
Only do this if your vacuum cleaner hose is completely detached and designed to be wet (check your manual!). For extreme, non-electrical clogs (like mud or wet debris), you might gently flush the hose with water. ENSURE THE HOSE IS COMPLETELY DRY FOR AT LEAST 24-48 HOURS BEFORE REATTACHING IT TO YOUR VACUUM. Moisture can damage your vacuum cleaner’s motor.
4.6 Reconnect and Test
Once you’re certain the vacuum cleaner hose is clear, reattach it securely to your vacuum cleaner and attachments. Plug in the vacuum and test the suction to ensure the clog is fully removed.
Step 5: Repairing Tears or Holes in Your Vacuum Cleaner Hose
Even a small tear can drastically reduce suction. Here’s how to patch it up.
5.1 Clean the Area
Use a microfiber cloth to clean the area around the tear on the vacuum cleaner hose. Remove any dust, dirt, or debris. A clean surface ensures better adhesion for tape or glue.
5.2 For Small Punctures or Minor Cracks
If you have a tiny hole or a hairline crack in your vacuum cleaner hose, a strong, flexible adhesive or epoxy designed for plastics can work wonders.
- Application: Apply a small amount of adhesive directly over the hole. Allow it to cure completely according to the product instructions. You might need multiple thin layers.
- Alternative: Heavy-duty electrical tape or rubberized repair tape can also be wrapped tightly around the area for a quick fix.
5.3 For Larger Tears or Splits
For more significant damage, you’ll need a more robust solution.
5.3.1 Using Repair Tape
Wrap the damaged section of the vacuum cleaner hose tightly with high-quality duct tape, Gorilla tape, or specialized rubber repair tape. Start wrapping several inches before the tear and extend several inches past it, overlapping each turn by at least half the tape’s width. Apply multiple layers for durability. This is often the fastest and easiest temporary fix for a vacuum cleaner hose.
5.3.2 Using a Hose Repair Kit
Many vacuum brands offer specific hose repair kits, often including self-adhesive patches or sleeves. Follow the kit’s instructions carefully. These are designed to blend better with the hose and provide a more durable seal for your vacuum cleaner hose.
5.3.3 Cutting and Rejoining (for specific hose types)
If the damaged section of your vacuum cleaner hose is relatively short and in an accessible, straight area, and your hose design allows, you might be able to cut out the damaged part and rejoin the two ends. This usually requires a specialized hose coupler (available at hardware stores or online) that fits snugly inside the hose and can be secured with clamps or strong adhesive. This method can be tricky and isn’t suitable for all hose types, especially those with internal wiring.
- Tip: Ensure your cuts are clean and straight using a utility knife.
5.4 Allow to Cure and Test
If you used adhesive or a repair kit, allow the recommended curing time before testing. Once cured, reattach the vacuum cleaner hose to your vacuum and check the suction. Listen closely for any remaining air leaks.
Step 6: Reattaching a Detached Vacuum Cleaner Hose
Sometimes the hose itself is fine, but it has simply come loose from the vacuum body or an attachment.
6.1 Identify the Connection Type
Vacuum cleaner hoses connect in various ways:
- Twist-Lock: The hose twists into a receptacle until it locks into place.
- Clip/Button Release: Pressing a button or clip allows the hose to snap into place.
- Screw-On: Some older or specialized hoses screw directly onto a port.
- Friction Fit: Simply pushes into place and is held by tightness.
6.2 Reconnect Securely
Align the end of the vacuum cleaner hose with the corresponding port on your vacuum or attachment. Push, twist, or clip it into place until you feel or hear it lock. Ensure it’s flush and doesn’t wiggle.
6.3 Secure with Clamps or Zip Ties (If Needed)
If a connection repeatedly comes loose, or if there’s no inherent locking mechanism, you might need to add external reinforcement. A small hose clamp (the kind used for car hoses, often found at hardware stores) can be tightened around the connection point. Alternatively, heavy-duty zip ties can be used for a similar effect, offering a strong grip around the vacuum cleaner hose connection.
6.4 Test the Connection
Gently tug on the vacuum cleaner hose to ensure it’s firmly attached. Then, plug in your vacuum and test the suction to confirm the connection is airtight and functional.
Step 7: Troubleshooting Common Post-Repair Issues
Even after a repair, you might encounter new challenges.
7.1 Still No Suction After Fixing the Vacuum Cleaner Hose?
- Re-Check for Clogs: The clog might have been deeper than you thought, or another one formed.
- Inspect Other Parts: The problem might not have been the vacuum cleaner hose at all! Check the filter, the bag/canister, the brush roll area, and other connections for blockages or damage.
- Hidden Leaks: A small leak could be somewhere else in the hose, or in the vacuum body itself.
7.2 Tape/Patch Coming Off?
- Cleanliness: Ensure the surface was thoroughly clean and dry before application.
- Quality of Material: Use higher-quality tape or adhesive designed for heavy-duty use or plastics.
- Application Method: Wrap tape tightly with significant overlap. For adhesives, ensure proper curing time and application technique.
7.3 Hose Still Kinking?
- If your vacuum cleaner hose is older, it might have lost its flexibility and integrity. Repairs might only be temporary. Consider replacement in this case.
Step 8: When to Replace Your Vacuum Cleaner Hose
Sometimes, a repair just isn’t worth it or isn’t possible.
If your vacuum cleaner hose has multiple large tears, is excessively brittle, constantly kinks, or if the internal wiring (for powered brushes) is damaged, it might be time for a replacement. While DIY fixes save money, a completely new hose ensures optimal performance and durability. Check your vacuum’s manufacturer for genuine replacement parts, or look for compatible universal hoses online or at appliance stores in 2025.
Conclusion: Empowering Your Home Maintenance in 2025
Congratulations! You’ve just learned how to tackle a common household problem and potentially saved yourself a significant amount of money and hassle. Fixing your vacuum cleaner hose isn’t just about repairing an appliance; it’s about empowering yourself with practical skills and extending the life of your household tools. By following these easy, step-by-step instructions, you can keep your vacuum cleaner running efficiently for years to come. Remember, a well-maintained vacuum cleaner hose is key to a truly clean home. So, next time your vacuum starts acting up, you’ll know exactly how to fix that vacuum cleaner hose and get back to sparkling floors! Happy cleaning!
🎥 Related Video: You're Probably Hooking Your Pool Vacuum Up WRONG!
📺 Hallmark Pool Supplies
Are you making this common mistake? ⏩ HAVE A QUESTION FOR MARK? ⏪ If you have a question you’d like answered or …