Learning how to fix a vacuum cleaner involves systematically identifying common problems like clogs, broken belts, or full filters and then performing simple, targeted repairs. This guide offers practical, step-by-step advice to help you troubleshoot and resolve most vacuum issues yourself, saving time and extending your appliance’s life.
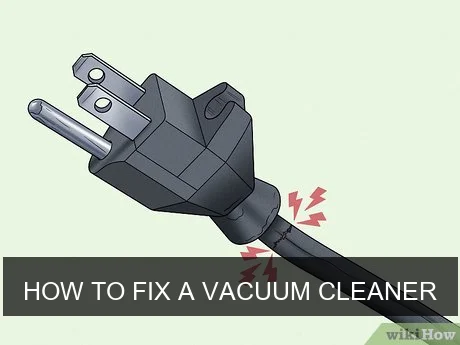
Image source: Wikihow
To fix a vacuum cleaner, you’ll typically start by checking for obvious issues such as a clogged hose, a full dust bag or canister, or a dirty filter, as these are the most frequent culprits behind poor performance. Systematically inspect the brush roll for tangled hair or debris, examine the belt for wear or breakage, and confirm the power cord and outlet are functioning correctly. Many common problems have straightforward solutions that don’t require professional help.
📋 Table of Contents
- 🔹 Introduction: Understanding Vacuum Cleaner Woes
- 🔹 Understanding Your Vacuum Cleaner’s Common Issues
- 🔹 The Step-by-Step Guide: How to Fix a Vacuum Cleaner
- 🔹 Why Fixing Your Vacuum Cleaner Matters
- 🔹 Common Mistakes to Avoid When Fixing a Vacuum
- 🔹 Tips for Vacuum Cleaner Maintenance (Preventative Fixes)
- 🔹 Real-Life Scenarios: When to DIY vs. Call a Pro
- 🔹 Frequently Asked Questions
- 🔹 Conclusion: Empowering Your Cleaning Routine
Introduction: Understanding Vacuum Cleaner Woes
There’s nothing quite as frustrating as pulling out your vacuum cleaner, ready to tackle dirt and dust, only to find it’s not working right. Maybe it’s lost suction, making strange noises, or simply refusing to turn on. Before you panic or consider tossing it, know that many common vacuum cleaner problems are surprisingly simple to diagnose and fix yourself.
This guide is here to walk you through how to fix a vacuum cleaner, no matter your experience level. We’ll cover the most frequent issues, provide clear, step-by-step instructions, and share practical tips to keep your machine running smoothly. Understanding the basics of vacuum repair can save you money, reduce waste, and give you a real sense of accomplishment.
Understanding Your Vacuum Cleaner’s Common Issues
Vacuum cleaners are pretty reliable machines, but they do encounter a handful of common problems. Knowing what these are can help you pinpoint the issue quickly.
- Loss of Suction: This is perhaps the most common complaint. Your vacuum might seem to be running, but it’s just not picking up dirt like it used to.
- Strange Noises: Grinding, whining, rattling, or squealing sounds can indicate anything from a blocked airway to a failing motor or a worn-out belt.
- Brush Roll Not Spinning: The rotating brush underneath the vacuum is crucial for agitation and picking up debris, especially on carpets. If it stops, cleaning efficiency plummets.
- No Power: The vacuum doesn’t turn on at all, or it suddenly stops mid-task. This could be electrical or mechanical.
- Burning Smell: A very serious sign that often points to a motor issue, belt friction, or something severely overheating.
Most of these issues stem from just a few root causes. Let’s dive into how to fix them.
The Step-by-Step Guide: How to Fix a Vacuum Cleaner
Before you begin any repair, always remember this golden rule: unplug your vacuum cleaner from the wall outlet. This is critical for your safety!
Addressing Clogs and Brush Roll Problems
Clogs are probably the number one reason vacuums lose suction or make odd noises. The brush roll, also called a beater bar, is often where dirt, hair, and string get tangled.
- Inspect the Brush Roll:
- Turn the vacuum over. You’ll usually need to remove a bottom plate (often secured with screws or clips) to access the brush roll.
- Carefully cut away any tangled hair, string, or carpet fibers with scissors. Be gentle not to damage the bristles or the roll itself.
- Spin the brush roll by hand. It should turn freely. If it’s stiff or doesn’t move, there might be debris inside its bearings.
- Check for Clogs in the Nozzle and Hose:
- Remove any attachments. Look directly into the nozzle opening where the brush roll sits.
- Detach the main hose from the vacuum body (where possible) and from any attachments.
- Visually inspect the hose. If you can’t see through it, try using a broom handle or a piece of wire (like a coat hanger, straightened out) to push through any blockages. Be cautious not to puncture the hose.
- For stubborn clogs, you might need to try working from both ends of the hose.
- Check the Airway to the Dust Bin/Bag:
- With the dust bin or bag removed, look into the vacuum’s intake port. Sometimes debris gets stuck right before the collection area.
Replacing a Broken Belt
The brush roll in most upright vacuums is driven by a rubber belt that connects it to the motor. If your brush roll isn’t spinning but the motor is running, chances are the belt is broken or stretched.
- Access the Belt:
- Unplug the vacuum.
- Flip it over and remove the bottom plate, just like you did for brush roll inspection.
- Locate the belt. It’s usually a flat or round rubber band wrapped around the brush roll and a motor shaft.
- Identify the Problem:
- Is the belt broken?
- Is it stretched out and slipping?
- Is it simply dislodged?
- Replace the Belt:
- If broken or stretched, you’ll need a replacement. Make sure to get the correct type for your specific vacuum model.
- Carefully remove the old belt.
- Loop the new belt around the motor shaft first, then stretch it around the brush roll. This can be a bit tricky, often requiring you to hold the brush roll in place while you stretch the belt.
- Ensure the belt is centered and taut.
- Reassemble:
- Once the new belt is in place and the brush roll spins freely with the belt, reattach the bottom plate.
Dealing with Full Bags or Dirty Filters
These are often overlooked but significantly impact performance and are incredibly easy fixes.
- Check the Dust Bag or Canister:
- If your vacuum uses bags, check if it’s full. A full bag severely restricts airflow and suction. Replace it if it’s more than two-thirds full.
- If it’s a bagless model, empty the dust canister. Don’t let it get completely full.
- Inspect and Clean/Replace Filters:
- Most vacuums have at least one filter, sometimes multiple (pre-motor and post-motor/HEPA).
- Locate your filters. They are usually accessible near the dust bin or on the side/back of the vacuum. Your manual will show you where.
- If washable, rinse them thoroughly under cool water until the water runs clear. Let them air dry completely (usually 24-48 hours) before putting them back. Putting a damp filter back can damage the motor and cause mold.
- If non-washable, tap them gently against a trash can to dislodge dust. If they’re heavily soiled and cannot be cleaned, they need replacing. Filters are critical for maintaining suction and air quality.
Restoring Lost Suction
Beyond clogs and full bags, sustained loss of suction might point to less obvious air leaks.
- Check Seals and Gaskets:
- Inspect where the hose connects to the vacuum body, and where the dust bin or bag housing seals.
- Look for cracks or gaps in the plastic housing or worn-out rubber gaskets that could be letting air escape.
- Examine Attachments:
- Sometimes the issue isn’t the vacuum itself, but a faulty attachment. Try using the vacuum without any attachments or with a different one to see if suction improves.
- Test for Leaks:
- A simple way to test for leaks is to turn the vacuum on (if it powers on) and listen closely for whistling or hissing sounds, especially around connections and seals. You can also feel for air escaping with your hand.
Investigating Strange Noises
Noise issues can be concerning, but often have simple explanations.
- Grinding/Rattling:
- This often points to something caught in the brush roll or fan, or a problem with the brush roll bearings. Perform the brush roll inspection described earlier.
- If you hear rattling inside the hose, there’s likely debris trapped there.
- High-Pitched Whine:
- Could indicate a motor issue (bearings wearing out) or a severe obstruction making the motor work harder. Check for clogs first.
- Squealing:
- Sometimes a belt that is slightly off-kilter or a worn-out bearing on the brush roll can squeal. Ensure the belt is properly aligned.
- Burning Smell with Noise:
- This is serious. Immediately unplug the vacuum. A burning smell often means the motor is overheating (possibly from a severe clog or worn motor bearings) or the belt is slipping and creating friction. Do not operate the vacuum until the cause is found and resolved.
Troubleshooting Power Issues
If your vacuum doesn’t turn on, or cuts out, it’s usually an electrical problem.
- Check the Outlet and Circuit Breaker:
- Plug another appliance into the same outlet to ensure the outlet is working.
- Check your home’s circuit breaker box to see if a breaker has tripped. Reset it if needed.
- Inspect the Power Cord:
- Carefully look along the entire length of the power cord for any visible cuts, frays, or damage.
- Check the plug for bent prongs or signs of scorching.
- If any damage is found, the cord will need professional replacement or repair, as this poses an electrical hazard.
- Internal Wiring/Motor:
- If the cord and outlet are fine, the issue might be internal wiring or the motor itself. These repairs are generally more complex and often require a professional.
- Some vacuums have a thermal cutoff switch that trips when the motor overheats (often due to a clog or full bag). Let the vacuum cool for 30 minutes to an hour, then try again. Resolve any clogs or full bags before restarting.
Why Fixing Your Vacuum Cleaner Matters
Deciding to fix your vacuum cleaner instead of immediately replacing it carries several important benefits.
- Cost Savings: Simple repairs like clearing a clog or replacing a belt are much cheaper than buying a whole new vacuum. Even more complex part replacements are often more economical than a new appliance.
- Environmental Impact: Repairing extends the life of your appliance, reducing electronic waste that ends up in landfills. This is a small but meaningful step towards sustainability.
- Empowerment and Skill Building: Learning to troubleshoot and fix common household items can be incredibly satisfying. It builds practical skills and confidence.
- Familiarity: You know your vacuum’s quirks. Getting a new one means learning a new machine. Fixing your old one means keeping a familiar tool in action.
Common Mistakes to Avoid When Fixing a Vacuum
When you’re trying to figure out how to fix a vacuum cleaner, avoiding a few common pitfalls can save you time and prevent further damage.
- Not Unplugging the Vacuum: This is the most crucial safety mistake. Always, always unplug the machine before inspecting or repairing.
- Forgetting to Check the Obvious: Many people jump to complex solutions when the problem is a full bag, a dirty filter, or a simple clog. Start with the easiest checks.
- Using the Wrong Tools: Prying with a screwdriver instead of using the right bit can strip screws or damage plastic parts. Refer to your manual if special tools are mentioned.
- Ignoring the Manual: Your vacuum’s user manual is a treasure trove of information specific to your model, including diagrams for disassembly, filter locations, and troubleshooting tips.
- Forcing Parts: If something isn’t coming apart easily, there’s likely a hidden screw, clip, or a specific technique required. Forcing it can break plastic tabs or other components.
- Putting a Wet Filter Back In: This can damage the motor, encourage mold growth, and create odors. Filters must be completely dry.
- Assuming the Worst: Don’t immediately assume the motor is dead. Most issues are minor and easily fixable.
Tips for Vacuum Cleaner Maintenance (Preventative Fixes)
Prevention is always better than cure. Regular maintenance can significantly extend your vacuum’s life and reduce the need for repairs.
- Empty the Dust Bin/Change Bags Regularly: Don’t wait until they’re overflowing. Aim for two-thirds full for optimal performance.
- Clean or Replace Filters: Follow your manual’s recommendations. This might be monthly for heavy use, or every few months for lighter use.
- Inspect the Brush Roll: After every few uses, turn the vacuum over and clear any hair or debris from the brush roll.
- Check the Belt: Annually, or if you notice performance issues, check the belt for wear, cracks, or stretching. Replace if necessary.
- Clear Hoses and Attachments: Periodically check hoses and attachments for blockages, especially if you vacuum up larger debris.
- Inspect the Power Cord: Regularly check the power cord for damage. Address any issues immediately.
- Avoid Vacuuming Up Water or Sharp Objects: These can severely damage the motor, fan, or hose.
- Store Properly: Keep your vacuum in a clean, dry place to prevent dust buildup and corrosion.
Real-Life Scenarios: When to DIY vs. Call a Pro
Knowing when to tackle a fix yourself and when to seek professional help is part of smart ownership.
| Issue Type | DIY Fix (Usually) | Call a Professional (Usually) |
|---|---|---|
| Loss of Suction | Clogged hose, full bag/canister, dirty filter, tangled brush roll. | Internal air leak, motor seal failure. |
| Brush Roll Not Spinning | Tangled hair, broken or dislodged belt. | Motor issues affecting brush roll drive, complex gear train problems. |
| No Power | Tripped circuit breaker, unplugged cord, thermal cutoff reset. | Damaged power cord (internal to vacuum), motor failure, switch malfunction. |
| Strange Noises | Debris in brush roll or fan, minor clog, slightly misaligned belt. | Loud grinding (motor bearings), burning smell (motor overheating/short). |
| Physical Damage | Broken external attachment, simple plastic casing crack (non-functional). | Cracked main housing affecting suction, significant internal component damage. |
If you’re ever uncomfortable with a repair, especially if it involves electrical components beyond the cord, it’s always best to consult a qualified repair technician. Your safety comes first.
Frequently Asked Questions
What is the most common reason a vacuum cleaner stops working?
The most common reasons a vacuum cleaner stops working or loses effectiveness are a clogged hose or brush roll, a full dust bag or canister, or a dirty filter. These issues restrict airflow and prevent the vacuum from doing its job.
Can I fix my vacuum cleaner myself?
Yes, many common vacuum cleaner problems can be fixed by yourself with basic tools and a little patience. Issues like clearing clogs, replacing a drive belt, or changing filters are very DIY-friendly. More complex electrical or motor problems might require professional help.
How often should I clean my vacuum’s filter?
The frequency for cleaning your vacuum’s filter depends on your usage and the filter type. Generally, washable filters should be rinsed monthly for average use, and non-washable filters should be tapped clean periodically and replaced every 6-12 months. Always check your vacuum’s user manual for specific recommendations.
What causes a vacuum to lose suction?
A vacuum typically loses suction due to several factors: a clogged hose or internal airway, a full dust bag or canister, a dirty or blocked filter, a loose or broken drive belt (which prevents the brush roll from agitating dirt), or an air leak in the system.
Is it worth fixing an old vacuum cleaner?
It’s often worth fixing an old vacuum cleaner, especially if the problem is a common, inexpensive repair like a clog, belt replacement, or filter change. These repairs are usually much cheaper than buying a new vacuum. However, if the motor is failing or the cost of parts and labor for a complex repair approaches the price of a new machine, then replacement might be more practical.
Conclusion: Empowering Your Cleaning Routine
Learning how to fix a vacuum cleaner isn’t just about saving money; it’s about gaining a deeper understanding of your household tools and fostering a more sustainable lifestyle. Most vacuum issues are minor and easily resolved with a little troubleshooting and basic maintenance.
By regularly inspecting for clogs, keeping filters clean, and watching for signs of wear, you can significantly extend the life of your vacuum. Remember to prioritize safety by always unplugging the machine before any inspection or repair. With these practical steps, you’ll be well-equipped to tackle common vacuum problems, ensuring your cleaning routine stays smooth and efficient.