Learning how to fix a vacuum cleaner often involves simple troubleshooting steps like clearing clogs, cleaning filters, or replacing a drive belt. Most common vacuum problems, from lost suction to a non-spinning brush, can be resolved with a bit of patience and a few basic tools, saving you time and hassle. This guide will walk you through diagnosing and repairing typical issues to get your vacuum back to peak performance.
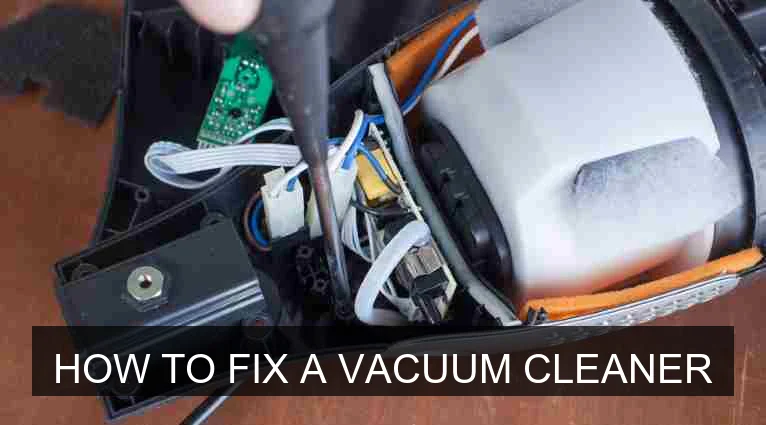
Image source: Vacuumjudge
📋 Table of Contents
- 🔹 Introduction: Why Fix Your Vacuum?
- 🔹 Safety First: Essential Precautions
- 🔹 Common Vacuum Cleaner Problems and Their Causes
- 🔹 Tools and Materials You’ll Need
- 🔹 How to Fix a Vacuum Cleaner: Step-by-Step Troubleshooting
- 🔹 Preventive Maintenance: Keeping Your Vacuum Running Smoothly
- 🔹 Common Mistakes to Avoid When Fixing Your Vacuum
- 🔹 When to Seek Professional Help
- 🔹 Frequently Asked Questions About Vacuum Cleaner Repair
- 🔹 Conclusion: Empowering Your Home Appliance Repair Skills
Introduction: Why Fix Your Vacuum?
Vacuum cleaners are workhorses in our homes, tirelessly battling dust and dirt. But like any appliance, they can sometimes act up or stop working altogether. When your vacuum cleaner starts sputtering or loses its oomph, your first thought might be to replace it. However, many common vacuum problems are surprisingly simple to fix yourself.
Learning how to fix a vacuum cleaner isn’t just about saving money, though that’s a nice bonus. It’s about understanding how your everyday tools work, extending their lifespan, and reducing waste. This guide will help you confidently troubleshoot and resolve the most frequent issues, empowering you with practical skills and keeping your home clean without the immediate need for a new purchase.
Safety First: Essential Precautions
Before you even think about starting to fix a vacuum cleaner, remember this golden rule: always unplug the vacuum from the wall outlet. This prevents accidental shocks or the vacuum turning on while your hands are inside, which could cause serious injury. Treat every repair as if it could be live, even if you think it’s off.
Also, it’s a good idea to wear gloves, especially if you’re dealing with sharp objects like broken glass or lots of dusty, gritty debris. Safety goggles can protect your eyes from dislodged dust or small particles as you work.
Common Vacuum Cleaner Problems and Their Causes
Most vacuum cleaner troubles fall into a few main categories. Understanding these common issues is the first step in learning how to fix a vacuum cleaner effectively. Here’s a quick rundown:
- No Power: The vacuum simply won’t turn on. This could be anything from a tripped breaker to a faulty cord.
- Loss of Suction: The vacuum runs, but it just isn’t picking up dirt like it used to. Often, this points to blockages or filter problems.
- Brush Roll Not Spinning: The rotating brush on the bottom isn’t doing its job, leaving debris behind. This is frequently due to hair tangles or a broken belt.
- Strange Noises or Smells: Grinding sounds, screeching, or a burning smell can indicate motor issues, blockages, or worn-out parts.
- Overheating: The vacuum gets unusually hot and might shut off automatically. Poor airflow is usually the culprit.
Knowing what symptom goes with which problem makes troubleshooting much more efficient. Let’s look at what tools you’ll need.
Tools and Materials You’ll Need
You don’t need a professional workshop to fix a vacuum cleaner. Most repairs can be done with basic household items. Here’s what you might find useful:
- Screwdrivers: Phillips head and flathead are usually enough.
- Scissors or a Seam Ripper: Essential for cutting tangled hair and threads from the brush roll.
- Utility Knife or Box Cutter: Useful for stubborn tangles or cutting through thick debris in a hose.
- Needle-Nose Pliers: Good for grabbing small objects or pulling out stubborn debris.
- Flashlight: Helps you see into dark crevices and hoses.
- Gloves: Protect your hands from dirt and sharp objects.
- New Vacuum Bags/Filters: If yours are clogged or full.
- Replacement Belts: If your brush roll isn’t spinning.
- Manual: Always refer to your vacuum’s user manual for specific instructions and diagrams.
With these items ready, you’re prepared to start the diagnostic process.
How to Fix a Vacuum Cleaner: Step-by-Step Troubleshooting
Now, let’s get into the practical steps for how to fix a vacuum cleaner for the most common issues. Remember to stay calm and methodical.
Step 1: Checking for Power Issues
If your vacuum won’t turn on at all, start with the power supply. This is often the simplest fix.
- Check the Outlet: Plug another appliance into the same outlet to ensure it’s working. If not, check your home’s circuit breaker and reset it if necessary.
- Inspect the Power Cord: Look closely for any cuts, frayed wires, or kinks in the cord. A damaged cord is a serious safety hazard and usually requires professional repair or replacement.
- Examine the Plug: Ensure the prongs aren’t bent or damaged.
- Test the On/Off Switch: Sometimes, the switch itself can fail. If you’ve ruled out all other power issues, this might be the culprit, though it’s a less common DIY fix.
Step 2: Restoring Lost Suction
Lost suction is one of the most frustrating but often easiest problems to fix.
- Empty the Dustbin/Change the Bag: This sounds obvious, but a full bag or dustbin severely restricts airflow and reduces suction. Always check this first!
- Clean or Replace Filters: Most vacuums have at least one filter, often a pre-motor filter and a post-motor (HEPA) filter.
- Locate your filters (check your manual).
- If they’re washable, rinse them under cool water until the water runs clear. Let them air dry completely for at least 24 hours before putting them back.
- If they’re disposable, replace them. Clogged filters are a primary reason for suction loss.
- Clear Hose Blockages:
- Remove the hose from the vacuum.
- Look through both ends, shining a flashlight to spot any obstructions.
- Use a broom handle, a straightened coat hanger, or even a flexible drain snake to push out clogs. Be gentle to avoid damaging the hose.
- Check the hose connection points on the vacuum itself for blockages.
- Inspect the Intake and Exhaust Ports: Debris can build up where the hose connects to the vacuum, or even in the main intake nozzle under the brush roll. Clear these areas carefully.
Clearing these common blockages will almost always restore your vacuum’s suction power.
Step 3: Fixing a Non-Spinning Brush Roll
A brush roll that doesn’t spin means your vacuum isn’t agitating carpet fibers, leaving dirt behind. This is a very common fix for how to fix a vacuum cleaner.
- Unplug the Vacuum: (Already done, right? But it bears repeating for this step!)
- Flip the Vacuum Over: Lay it down carefully so you can access the brush roll assembly.
- Remove the Bottom Plate: You’ll likely need your screwdriver to unscrew the plate covering the brush roll.
- Clear Hair and Debris: Use scissors or a seam ripper to carefully cut and remove all tangled hair, threads, and debris wrapped around the brush roll. Be thorough, checking the ends where the brush roll spins on its axle.
- Check the Drive Belt: Once the brush roll is clear, inspect the belt. It’s usually a rubber band connecting the motor to the brush roll.
- Is it broken?
- Is it stretched out and loose?
- Has it slipped off its pulleys?
- Replace the Belt: If the belt is broken or stretched, you’ll need a new one. Refer to your manual for the correct replacement part number. Carefully stretch the new belt around the motor spindle and the brush roll, ensuring it sits properly in any grooves.
- Reassemble: Once everything is clear and the belt is in place, put the bottom plate back on and secure it with screws.
Step 4: Addressing Strange Noises or Smells
Unusual sounds or odors are often early warning signs.
- Grinding/Screeching: This can indicate something caught in the brush roll or fan assembly, or a motor bearing issue. Clear any blockages as described in Step 3. If the noise persists and seems to come from the motor, it might be a job for a professional.
- Burning Smell: A burning smell usually means something is overheating.
- Clogged Airflow: The most common cause is restricted airflow (full bag, clogged filter, blocked hose). Clear all blockages as described in Step 2.
- Belt Friction: If the brush roll is jammed with hair and the motor is trying to turn it, the belt can burn. Clear the brush roll (Step 3) and check the belt for damage.
- Motor Issues: If clearing everything doesn’t stop the smell, it could be a motor problem, which is more serious and often requires professional attention or replacement.
Step 5: Preventing Overheating
Many modern vacuums have thermal cut-offs that will shut the unit off if it gets too hot to prevent damage. If your vacuum frequently shuts off:
- Check for Clogs and Full Bags/Filters: Overheating is almost always a sign of restricted airflow. When air can’t flow freely, the motor has to work harder, generating more heat. Go through all the steps for restoring lost suction (Step 2) and clearing the brush roll (Step 3).
- Allow for Cooling: If your vacuum shuts off, let it cool down for at least 30-60 minutes before trying to restart it after clearing any issues.
Following these steps will resolve the vast majority of common vacuum cleaner problems.
Preventive Maintenance: Keeping Your Vacuum Running Smoothly
Preventive maintenance is key to avoiding frequent repairs. Many people ask, “Is how to fix a vacuum cleaner necessary?” The answer is yes, but good maintenance reduces how *often* it’s necessary. By taking a few minutes regularly, you can keep your vacuum in top shape and lessen the chances of needing to fix a vacuum cleaner.
Here’s a simple maintenance checklist:
- Empty the Dustbin or Change the Bag Regularly: Don’t wait until it’s overflowing. A full dustbin reduces suction and makes the motor work harder.
- Clean or Replace Filters Consistently: Follow your manual’s recommendations. For washable filters, aim for at least once a month; for disposable ones, replace them every 3-6 months, or more often if you vacuum frequently or have pets.
- Clear the Brush Roll: Periodically flip your vacuum over and remove tangled hair, threads, and debris from the brush roll. This prevents the motor from straining and keeps the brushes effective.
- Check the Hose and Attachments for Blockages: A quick visual check can catch small clogs before they become major obstructions.
- Inspect the Drive Belt: Every few months, check the brush roll belt for signs of wear, stretching, or cracks. Replacing it before it breaks saves you from a non-spinning brush roll mid-clean.
Think of it like an oil change for your car; a little regular care goes a long way.
Common Mistakes to Avoid When Fixing Your Vacuum
While fixing your vacuum can be rewarding, some missteps can make things worse or even dangerous. When you fix a vacuum cleaner, try to avoid these common errors:
- Forgetting to Unplug: This is the absolute biggest mistake. Always, always unplug the vacuum first.
- Ignoring the User Manual: Your vacuum’s manual has diagrams, specific part locations, and model-specific instructions that are invaluable. Don’t guess; refer to it.
- Forcing Parts: If something isn’t coming apart easily, stop. You might be missing a hidden screw or a latch. Forcing it can break plastic tabs or other components.
- Using the Wrong Replacement Parts: Belts and filters aren’t universal. Using the wrong size or type can lead to poor performance or further damage. Always use parts recommended for your specific model.
- Overlooking Simple Solutions: It’s easy to jump to complex conclusions when a vacuum isn’t working. Always start with the simplest checks: is it plugged in? Is the bag full? Is the filter dirty?
- Not Cleaning Thoroughly: When clearing clogs or hair, make sure you get everything. Even a small amount of residual debris can quickly build back up and cause the same problem again.
When to Seek Professional Help
While many issues can be fixed at home, there are times when it’s wiser to call in an expert or consider other options. You might wonder, “When should how to fix a vacuum cleaner be left to a pro?”
- Motor or Electrical Component Failure: If you’ve ruled out all common issues and suspect the motor itself, or if there’s a serious electrical fault (like sparking), it’s best left to trained technicians. These repairs can be complex and dangerous for the untrained.
- Beyond Your Comfort Level: If you feel uncomfortable or out of your depth, don’t push it. Your safety is paramount.
- Specialized Parts: Some vacuums have intricate designs or require specialized tools for certain repairs that you might not have.
- Cost vs. Value: For very old vacuums, or models that weren’t expensive to begin with, the cost of professional repair might approach or exceed the cost of a new unit. In such cases, carefully weigh the options.
Remember, knowing your limits is part of being a smart homeowner.
Frequently Asked Questions About Vacuum Cleaner Repair
Here are some common questions people ask when trying to fix a vacuum cleaner.
What causes a vacuum cleaner to lose suction?
The most common culprits for lost suction are a full dustbin or bag, clogged filters (pre-motor or post-motor), and blockages in the hose, brush roll housing, or intake ports. Restricted airflow is almost always the root cause.
How often should I clean my vacuum’s filter?
It depends on the filter type and your usage. Washable filters should generally be cleaned every 1-3 months. Disposable HEPA filters often need replacement every 6-12 months. If you have pets or use your vacuum frequently, you might need to clean/replace them more often. Always check your vacuum’s manual for specific recommendations.
Can I replace a vacuum belt myself?
Yes, replacing a vacuum belt is one of the most common and straightforward DIY repairs. You typically need to flip the vacuum over, remove a bottom plate, and then carefully stretch the new belt onto the motor spindle and brush roll. Always ensure you have the correct belt for your specific model.
Why does my vacuum smell like burning?
A burning smell usually indicates overheating. This often happens because the motor is overworking due to restricted airflow (full bag, clogged filter, blocked hose) or because the brush roll is jammed with tangled hair, causing the belt to slip and generate friction. Clearing blockages and cleaning the brush roll usually resolves the issue.
Is it worth fixing an old vacuum cleaner?
Often, yes! Simple fixes like clearing clogs, changing belts, or cleaning filters can give an old vacuum many more years of life. For more complex repairs, compare the cost of the repair to the cost of a new vacuum, considering the age and overall condition of your current unit. If it’s a quality vacuum, a repair is often a more sustainable and economical choice.
Conclusion: Empowering Your Home Appliance Repair Skills
Learning how to fix a vacuum cleaner is a valuable skill that can save you time, money, and unnecessary waste. Many common issues, from a lack of power to lost suction or a non-spinning brush roll, can be resolved with a bit of patience and some basic tools. By understanding the typical culprits and following systematic troubleshooting steps, you’ll be amazed at what you can accomplish.
Regular preventive maintenance is your best friend in keeping your vacuum running smoothly and avoiding breakdowns in the first place. So, the next time your trusty vacuum cleaner falters, don’t despair. Unplug it, take a deep breath, and use the knowledge you’ve gained here to get it back to its dirt-busting best. You’ve got this!