Keeping your vacuum cleaner filter clean is paramount for maintaining optimal suction and extending your appliance’s lifespan. This comprehensive guide will walk you through the simple, step-by-step process of how to clean vacuum cleaner filter effectively, regardless of its type, ensuring your home remains spotless and your air quality high. You’ll learn essential safety tips, drying methods, and advanced maintenance for a powerful and efficient vacuuming experience throughout 2025.
How to Clean Vacuum Cleaner Filter for Best Suction 2025
Hey there, fellow clean-home enthusiast! It’s 2025, and while our smart homes might be doing more for us, some things still need a good, old-fashioned human touch. One of the most critical, yet often overlooked, parts of maintaining a sparkling home is keeping your vacuum cleaner in tip-top shape. And guess what the secret weapon is? Yep, it’s all about knowing how to clean vacuum cleaner filter properly.
Think about it: Your vacuum works hard. It sucks up dust, pet hair, crumbs, and all sorts of microscopic nasties. But where does all that go? Into the dust bin, sure, but before that, it passes through the filter. If that filter gets clogged, your vacuum struggles. It loses suction, works harder, makes more noise, and might even start blowing dust back into your freshly cleaned air! Not exactly the high-tech, efficient cleaning we expect in 2025, right?
This comprehensive guide is your go-to resource for everything you need to know about cleaning your vacuum cleaner filter. We’ll cover different filter types, step-by-step instructions for both dry and wet cleaning, essential safety tips, and even some advanced maintenance wisdom. By the end of this, you’ll be a filter-cleaning pro, ready to get the absolute best suction from your vacuum, extend its life, and enjoy cleaner air in your home. Let’s dive in!
Key Takeaways
- Unplug for Safety: Always disconnect your vacuum from power before starting any cleaning or maintenance to prevent accidents.
- Identify Your Filter Type: Not all filters are washable. Consult your vacuum’s manual to determine if your specific filter can be wet cleaned or only requires dry cleaning.
- Thorough Dry Cleaning First: Before any wet washing, vigorously shake and tap your filter outdoors to remove as much loose dust and debris as possible.
- Rinse Until Clear: If your filter is washable, rinse it under cold, running water without soap until the water runs completely clear, indicating all dirt has been flushed out.
- Complete Drying is Crucial: Allow washable filters to air dry *completely* for 24-48 hours before reinstallation. Installing a damp filter can lead to mold growth and damage to your vacuum.
- Regular Maintenance is Key: Cleaning your vacuum cleaner filter every 1-3 months (depending on usage) ensures consistent performance, better air quality, and prolongs the life of your appliance.
Quick Answers to Common Questions
How often should I clean my vacuum cleaner filter?
Generally, you should clean your vacuum cleaner filter every 1 to 3 months, depending on how often you vacuum and if you have pets or allergies. Heavily used vacuums, or those in homes with a lot of pet hair, might benefit from monthly cleaning.
Can I put my vacuum cleaner filter in the washing machine?
No, absolutely not. Never put your vacuum cleaner filter in a washing machine or dishwasher. The harsh detergents, high heat, and aggressive agitation can severely damage the filter material, rendering it ineffective or even destroying it.
What if my vacuum filter isn’t washable?
If your filter isn’t washable, you should still dry clean it regularly. Take it outdoors and tap it vigorously to dislodge dust. Use a soft brush to remove embedded debris. When it becomes too clogged or discolored, it must be replaced according to your vacuum’s manufacturer recommendations.
How can I speed up the drying process for a washable filter?
While patience is key, you can gently squeeze out excess water with a clean towel and place the filter in a well-ventilated area with good airflow. Avoid direct heat sources like hair dryers or radiators, as they can damage the filter material.
Will cleaning my filter improve suction immediately?
Yes, in most cases, cleaning a clogged filter will significantly and immediately improve your vacuum cleaner’s suction. A clean filter allows air to flow freely, restoring the machine’s ability to create strong suction and pick up dirt effectively.
Why Cleaning Your Vacuum Filter Matters (Beyond Just Suction)
You might think cleaning the filter is just about getting better suction, and while that’s a huge part of it, there’s more to the story.
Optimal Performance and Suction
A clean filter allows air to flow freely, which is essential for your vacuum to create the strong suction needed to lift dirt effectively. A clogged filter chokes your machine, making it less effective and requiring more passes to clean an area. To truly clean vacuum cleaner filter, you’re restoring its core function.
Extends Vacuum Life
When your filter is clogged, your vacuum’s motor has to work much harder to pull air through. This extra strain can cause the motor to overheat and wear out prematurely. Regular filter cleaning is one of the easiest ways to prolong the life of your expensive appliance.
Better Air Quality
Vacuum filters, especially HEPA filters, are designed to trap tiny particles like allergens, pet dander, and dust mites, preventing them from recirculating into your home’s air. A dirty filter can’t do its job properly, meaning those irritants get blown right back out, potentially affecting allergy sufferers and general air quality. Knowing how to clean vacuum cleaner filter contributes directly to a healthier indoor environment.
Saves Money
Failing to clean your filter regularly might force you to buy replacement filters more often than necessary, or even worse, replace your entire vacuum sooner. Proper maintenance means fewer expenses down the line.
Energy Efficiency
A struggling motor due to a dirty filter consumes more electricity to achieve the same (or worse) results. Keeping your filter clean can contribute to slightly lower energy bills – every little bit counts in 2025!
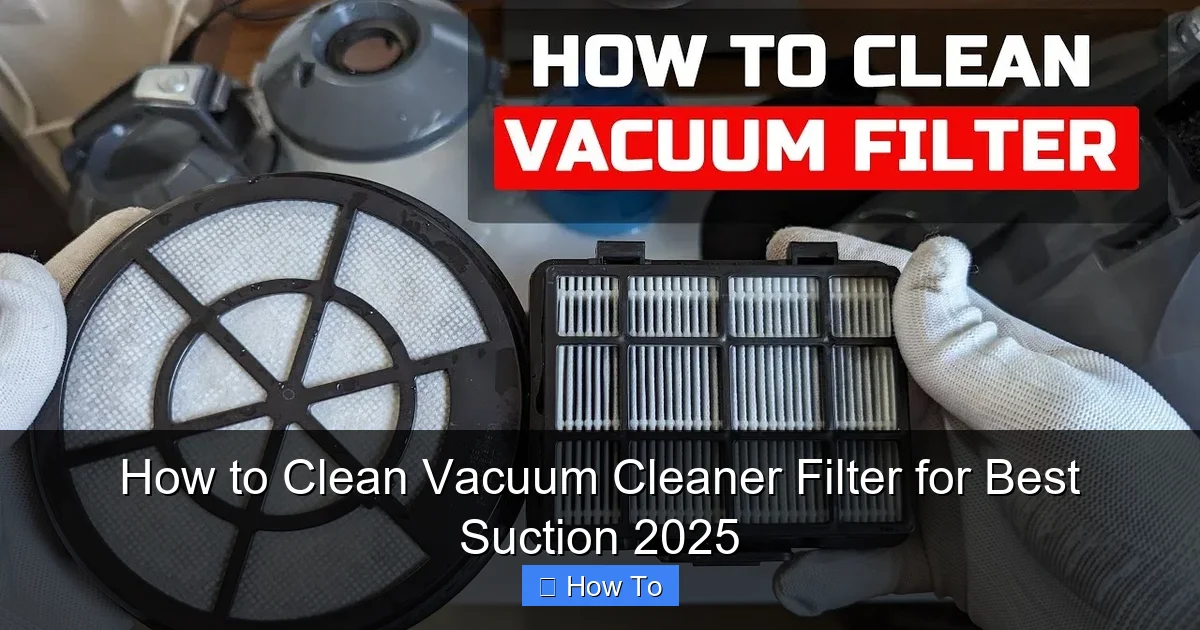
Understanding Your Vacuum Cleaner Filter Types

Visual guide about How to Clean Vacuum Cleaner Filter for Best Suction 2025
Image source: i.pinimg.com
Before we get to the “how-to,” it’s crucial to know what kind of filter your vacuum uses. This will dictate whether you can wash it with water or if it needs a dry clean. Always check your vacuum’s user manual first! If you don’t have it, a quick online search with your vacuum’s model number usually works wonders.
HEPA Filters
Many modern vacuums, especially those designed for allergy sufferers, feature HEPA (High-Efficiency Particulate Air) filters. These are excellent at trapping microscopic particles. Some HEPA filters are washable, while others are not. A washable HEPA filter will usually be explicitly labeled as such in your manual or on the filter itself. Non-washable HEPA filters are typically pleated paper and must be replaced when dirty.
Foam Filters
These are common in many bagless vacuums. Foam filters are typically very durable and almost always washable. They often act as a pre-filter, catching larger debris before it reaches a finer filter.
Felt/Pleated Filters
Similar to foam, but often made of a thicker, sometimes fabric-like material. These can also be washable, but again, check your manual. Some pleated filters, especially very fine ones, might be designed for dry cleaning only.
Cyclonic Filters (Screens/Cups)
In bagless vacuums, the cyclonic action separates dirt from the air, often using a mesh screen or plastic cone before the air even hits the main filter. These components aren’t strictly filters but are crucial for the vacuum’s efficiency and get incredibly dirty. They are almost always washable.
Pre-Cleaning Checklist: What You’ll Need
Gathering your tools beforehand makes the cleaning process smooth and efficient.
* Safety Gear: A pair of utility gloves and a dust mask (especially if you have allergies) are highly recommended. You’re about to stir up a lot of dust!
* Small Brush: An old toothbrush, a stiff-bristled paint brush, or a dedicated vacuum filter cleaning brush works wonders for dislodging stubborn dust.
* Microfiber Cloth: For wiping down the dust bin and other parts.
* Access to Water: A sink or an outdoor hose for washable filters.
* Drying Setup: A drying rack, clothesline, or a clean towel in a well-ventilated area.
* Designated Dirty Area: A trash can, an outdoor space, or a sink you don’t mind getting dusty.
Step-by-Step Guide: How to Clean Your Vacuum Cleaner Filter
Now, let’s get down to the nitty-gritty of how to clean vacuum cleaner filter for maximum effectiveness. Remember to prioritize safety and consult your specific vacuum’s manual for any unique instructions.
Step 1: Safety First! Unplug Your Vacuum
This step is non-negotiable. Before you do *anything* else, make sure your vacuum cleaner is unplugged from the wall outlet. This prevents accidental starts and potential injury. Safety is paramount when you clean vacuum cleaner filter.
Step 2: Locate and Remove the Filter(s)
Most bagless vacuums have at least one filter, and sometimes two (a pre-motor filter and a post-motor filter, often HEPA).
H3 Consult Your Manual
This is always your best bet. It will show you exactly where the filters are located and how to remove them without damage.
H3 Common Filter Locations
* Inside the Dust Bin/Canister: Many pre-motor filters are situated right on top of or within the dust collection bin. You might need to twist or pull to release them.
* Behind a Panel: Post-motor (exhaust) filters are often behind a small grill or panel, usually near the back or side of the vacuum. You might need to press a latch or pry open a cover.
Handle the filter gently as you remove it. It’s likely covered in dust!
Step 3: Empty the Dust Bin/Canister
If your vacuum is bagless, empty the dust bin into a trash can first. Give it a good tap to release any clinging debris. A clean bin makes the whole process smoother.
Step 4: Dry Cleaning – Shake and Tap
This is the most important first step for *any* filter, washable or not.
H3 Take it Outdoors
Seriously, do this outside if you can. It prevents all that trapped dust and allergens from being released back into your home.
H3 Shake and Tap Vigorously
Hold the filter over a trash can or outdoors. Shake it firmly. Tap it against the side of the trash can or a hard surface. You’ll be amazed at how much dust clouds out. This physically dislodges the majority of embedded dirt. Repeat until significantly less dust comes out.
H3 Use a Brush for Stubborn Debris
For pleated filters or those with tightly packed dirt, use a small brush (like an old toothbrush) to gently brush away debris from between the pleats. Work carefully to avoid damaging the filter material.
Step 5: Wet Cleaning (If Your Filter is Washable)
Only proceed with wet cleaning if your vacuum’s manual explicitly states that the filter is washable. If not, skip to Step 6 (Replacement).
H3 Rinse Under Cold Water
Hold the filter under cold, running water. Avoid hot water, as it can sometimes damage filter materials or set stains.
H3 Gentle Massaging and Squeezing
Gently massage or squeeze foam filters under the water to help dislodge embedded dirt. For pleated filters, let the water run through the pleats from the clean side (usually the side facing the motor) outwards. You’ll see murky water running off – keep going!
H3 Avoid Soap or Detergents
Unless your manual specifically instructs you to use a mild detergent, avoid soap. Soap residues can clog the filter’s pores and reduce its effectiveness. Water alone is usually sufficient.
H3 Rinse Until Water Runs Clear
Continue rinsing and gently working the filter until the water running off it is completely clear. This can take a few minutes, so be patient.
Step 6: Thorough Drying is Key!
This step is absolutely critical and often where people make mistakes. A damp filter can lead to mold and mildew growth inside your vacuum, causing terrible odors and potentially damaging the motor.
H3 Press Out Excess Water
For foam filters, gently squeeze out as much water as possible. For pleated filters, shake off excess water. You can also press them between layers of a clean, dry towel.
H3 Air Dry Completely
Place the filter in a well-ventilated area to air dry. A drying rack, a clothesline, or simply on a clean towel on a countertop works. Ensure it’s not in direct sunlight or near a heat source like a radiator, as excessive heat can warp or damage the filter material.
H3 Patience is a Virtue (24-48 Hours)
This is the hardest part for many! Depending on humidity and air circulation, filters can take anywhere from 24 to 48 hours (or even longer) to dry completely. *Do not* reassemble your vacuum until the filter is bone dry.
H3 The “Sniff Test”
A good indicator of dryness is the sniff test. If it smells damp or musty, it’s not dry yet. It should have no smell, or a clean, neutral scent.
Step 7: Reassemble Your Vacuum
Once you are absolutely certain the filter is dry, carefully place it back into its compartment. Ensure it’s seated correctly and all clips, covers, or lids are securely fastened. Improper installation can lead to dirt bypass, reducing filtration efficiency and potentially damaging the motor.
Step 8: Perform a Test Run
Plug your vacuum back in and give it a quick test run. You should immediately notice the difference: stronger suction, potentially quieter operation, and a general feeling of renewed power. Congratulations, you’ve successfully learned how to clean vacuum cleaner filter and reinvigorated your cleaning machine!
Advanced Tips for Filter Maintenance in 2025
Want to get even more out of your vacuum and its filters? Here are some pro tips:
* **Regularity is King:** How often should you clean vacuum cleaner filter? For average use, aim for every 1-3 months. If you have pets, allergies, or vacuum frequently, consider cleaning it monthly. HEPA filters might need replacement every 6-12 months, even if washable, depending on the brand and usage.
* **Have a Spare Filter:** This is a game-changer! Having a second, dry filter on hand means you can swap out the dirty one immediately, clean it, and let it dry without any downtime for your vacuum.
* **Don’t Forget the Other Parts:** While focusing on the filter, take a moment to check your vacuum’s brush roll for tangled hair, clear any hose blockages, and wipe down the dust bin. A truly clean vacuum works best.
* **Know When to Replace:** Even washable filters don’t last forever. If your filter is torn, discolored, or you notice a persistent musty smell even after thorough cleaning and drying, it’s time for a replacement. A filter’s performance degrades over time, even with cleaning.
* **The Power of Pre-Motor vs. Post-Motor Filters:** Many vacuums have two filters. The pre-motor filter protects the motor from large debris, and the post-motor (exhaust) filter cleans the air before it’s expelled back into your room. Both need regular attention. Often, the pre-motor filter is washable, while the post-motor HEPA filter may need replacement.
Troubleshooting Common Filter Cleaning Issues
Even with the best intentions, you might run into a snag or two.
Still Poor Suction After Cleaning?
* Is the filter *completely* dry? Even slight dampness can hinder airflow.
* Check for blockages: The filter might be clean, but the hose, brush roll, or internal air passages might be clogged.
* Filter damage: Is the filter torn or misshapen? It might need replacement.
* Motor issue: In rare cases, the motor itself might be failing, which no amount of filter cleaning can fix.
Filter Smells Musty After Cleaning?
* This almost always means it wasn’t dried completely before reinstallation, leading to mold or mildew growth. Try re-cleaning it thoroughly and extending the drying time. If the smell persists, it’s best to replace the filter.
Damage During Cleaning?
* If you notice tears, holes, or significant fraying, especially in pleated filters, it’s time for a new one. A damaged filter won’t effectively trap particles.
Conclusion
Congratulations! You’ve just equipped yourself with the knowledge and skills to master the art of how to clean vacuum cleaner filter. By dedicating a little time to this essential maintenance task, you’re not just ensuring your vacuum operates at peak performance; you’re also protecting your investment, improving your home’s air quality, and making your cleaning routine more effective and enjoyable in 2025 and beyond.
Remember, a clean filter equals a happy vacuum, and a happy vacuum means a cleaner, healthier home for you and your family. So go forth, clean those filters, and enjoy the satisfaction of a job well done and a home truly spotless!
🎥 Related Video: The best Wet and Dry Vacuum Cleaner to keep your home spotless #vacuumcleaner #vacuum #amazon 53
📺 Best Products
The best Wet and Dry Vacuum Cleaner to keep your home spotless #vacuumcleaner #vacuum #shorts #amazon Looking for the …