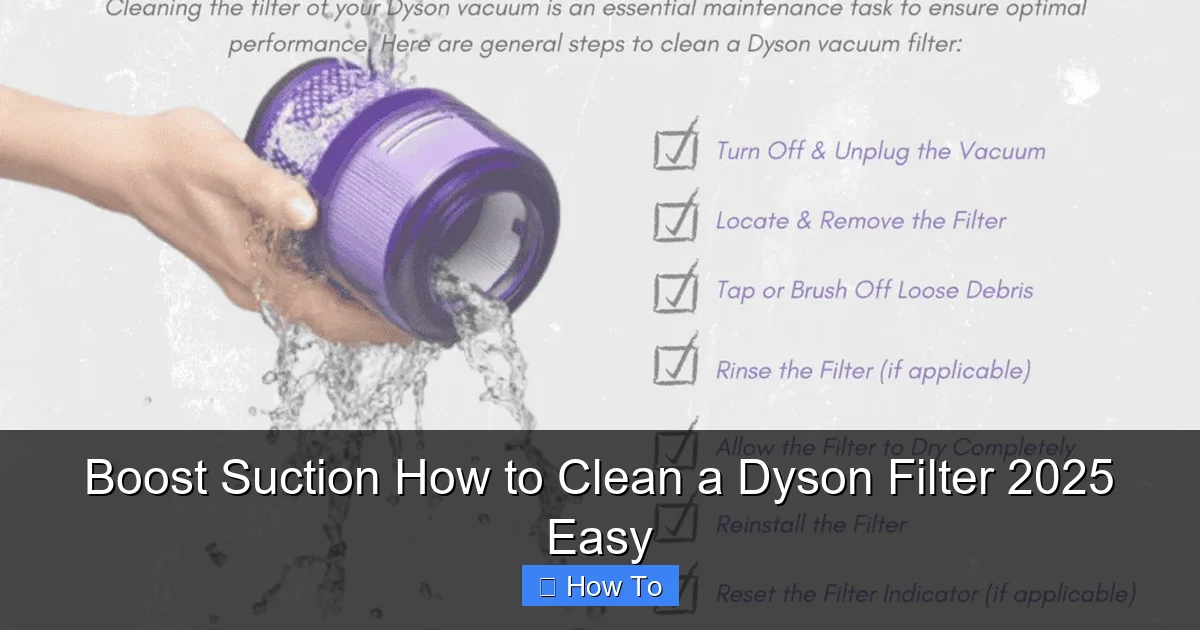
Keeping your Dyson vacuum filter clean is absolutely essential for maintaining powerful suction and extending the life of your appliance. This comprehensive 2025 guide will walk you through everything you need to know, from identifying your filter type to step-by-step washing and critical drying instructions. By regularly cleaning your Dyson filter, you’ll prevent reduced performance, avoid costly replacements, and ensure your home stays spotlessly clean.
Boost Suction: How to Clean a Dyson Filter 2025 Easy
Welcome to 2025, and congratulations on owning a Dyson – a true marvel of cleaning technology! You love your Dyson for its incredible suction power and innovative design, right? But even the most advanced machines need a little TLC to keep performing at their best. If you’ve noticed your Dyson isn’t sucking up dirt like it used to, or perhaps an annoying indicator light has popped up, chances are your Dyson filter needs a good clean.
Don’t worry, it’s a super easy process, and we’re here to guide you through every step. This comprehensive guide will show you exactly how to clean a Dyson filter, ensuring your vacuum runs with maximum efficiency, captures more dust, and keeps your home sparkling clean well into 2025 and beyond. Regular Dyson filter cleaning isn’t just about boosting suction; it’s about extending the life of your valuable appliance and maintaining a healthier home environment by preventing dust and allergens from re-entering the air. Let’s get that Dyson back to peak performance!
Key Takeaways
- Identify Your Filter: Dyson vacuums typically have washable pre-motor filters and sometimes non-washable or HEPA post-motor filters. Always check your model’s manual.
- Wash with Water ONLY: For washable filters, use cold water without any soap or detergents, which can damage the filter material. Rinse until the water runs clear.
- DRY COMPLETELY: This is the most crucial step! Allow washable filters to air dry for a minimum of 24-48 hours. Reinserting a damp filter can cause irreversible damage and bad odors.
- Regular Maintenance is Key: Clean your washable Dyson filter at least once a month, or more often if you vacuum frequently or have pets, to maintain optimal suction.
- Know When to Replace: Even with regular cleaning, filters have a lifespan. Consider replacing your Dyson filter every 6-12 months, or if it’s damaged, smells persistently, or shows signs of wear.
- Troubleshoot Suction Issues: If suction remains low after cleaning, check other areas like the brush bar, hose for blockages, or consider if the filter needs replacing.
Quick Answers to Common Questions
What happens if I don’t clean my Dyson filter?
Ignoring your Dyson filter leads to significantly reduced suction power, forcing the motor to work harder and potentially overheat. This can result in your vacuum cutting out, expelling dust back into the air, and ultimately shortening its lifespan.
Can I put my Dyson filter in the washing machine?
No, absolutely not. Dyson filters are designed for hand-washing under cold tap water only. A washing machine can damage the delicate filter material, distort its shape, or even break it, making it unusable.
How often should I clean a Dyson filter?
For washable filters, Dyson recommends cleaning at least once a month, or more frequently (every 2 weeks) if you have pets, allergies, or vacuum very often. Non-washable filters should be tapped out every 3-6 months.
Why does my Dyson filter still smell after washing?
A persistent smell usually indicates the filter wasn’t completely clean or, more commonly, wasn’t fully dry, allowing mold or mildew to develop. Re-wash thoroughly with only cold water and ensure it air dries for a full 48 hours in a well-ventilated area. If the smell remains, replacement is the best option.
Can I use a hairdryer to speed up Dyson filter drying?
No, do not use a hairdryer, tumble dryer, or any direct heat source. High heat can melt, warp, or permanently damage the filter material, compromising its ability to filter effectively and potentially making it unsafe for use.
Understanding Your Dyson Filter: A Quick 2025 Guide
Before we dive into the cleaning process, it’s important to understand that not all Dyson filters are created equal, and knowing your filter type is the first step to successful cleaning. Dyson engineers design their vacuums with various filtration systems, and while most models feature at least one washable filter, some may have additional filters that require different care.
Generally, Dyson vacuums have one or two main filters:
-
The Washable Pre-Motor Filter (Often Cylindrical or Cone-Shaped)
This is the most common type and the one you’ll clean most frequently. It’s usually located near the cyclone assembly, often at the top or side of the main body, and is designed to capture larger dust particles and debris before they reach the motor. Most V-series (V6, V7, V8, V10, V11, V15 Detect), Cinetic Big Ball/Big Ball, and some older upright models have a washable pre-motor filter. These are typically bright purple or blue and clearly marked “washable.”
-
The Post-Motor HEPA Filter (Sometimes Non-Washable)
Some Dyson models, especially older uprights and canisters, also feature a HEPA (High-Efficiency Particulate Air) filter positioned after the motor. This filter is designed to capture microscopic particles, allergens, and pollutants, ensuring that only clean air is expelled from the vacuum. While some newer Dyson models integrate the HEPA filtration into the washable pre-motor filter or have a lifetime washable post-motor filter, many older HEPA filters are non-washable and require only dusting or replacement. Always check your specific model’s manual.
Pro Tip for 2025: If you’re unsure about your specific model’s filter type or location, refer to your Dyson’s user manual. Dyson’s website also offers digital manuals for all its models, making it easy to confirm your filter’s specifics. Knowing how to clean your Dyson filter correctly starts here!
Signs Your Dyson Filter Needs Cleaning
Your Dyson is a smart machine, and it often tells you when it’s time for a filter refresh. Here are the common indicators:
- Reduced Suction Power: This is the most obvious sign. If your vacuum isn’t picking up dirt and debris effectively, or you find yourself having to go over the same spot multiple times, a clogged Dyson filter is likely the culprit.
- Unusual Noises: A struggling motor working harder to pull air through a dirty filter can sometimes sound different – perhaps louder or more strained.
- Dust or Debris Escaping: If you see fine dust coming out of the vacuum’s exhaust, it means the filter isn’t doing its job properly and needs immediate attention.
- Vacuum Pulsing or Cutting Out: Dyson vacuums have safety mechanisms. If airflow is severely restricted by a dirty filter, the motor might pulse or shut off intermittently to prevent overheating.
- Indicator Light: Many modern Dyson models (like the V10, V11, V15 Detect) feature an intuitive LCD screen or an LED indicator light that illuminates to alert you when it’s time to clean a Dyson filter. Don’t ignore these!
- Bad Odor: A stale or musty smell coming from your vacuum can indicate trapped dust, mold, or bacteria in a dirty filter.
Gather Your Tools
Good news! You don’t need much to effectively clean a Dyson filter.
- Your Dyson Vacuum: Of course!
- Running Water: A sink with cold tap water.
- A Clean Towel: For initial drying and protecting surfaces.
- A Hard Surface (Optional): For gently tapping out dry debris from non-washable filters.
Safety First!
Before you even think about cleaning a Dyson filter, always remember these crucial safety steps:
- Unplug Your Vacuum: For corded models, disconnect it from the power outlet. For cordless models, ensure it’s powered off and consider removing the battery pack if your model allows for easy removal. This prevents accidental activation.
- Empty the Bin: It’s always a good practice to empty the dust bin before filter maintenance.
- Let it Cool (if applicable): If you’ve just used your Dyson extensively, give the motor a few minutes to cool down.
Step-by-Step Guide: Cleaning a Washable Dyson Filter
This section focuses on the washable pre-motor filter, which is the one you’ll be cleaning most often. Follow these steps carefully to ensure a thorough and safe clean.
Locating the Washable Filter
Dyson designs its filters for easy access. The washable pre-motor filter is typically a distinct, often brightly colored (purple, blue, or gray) cylindrical or cone-shaped unit.

Visual guide about Boost Suction How to Clean a Dyson Filter 2025 Easy
Image source: static-01.daraz.com.bd
-
For Dyson Cordless Models (V6, V7, V8, V10, V11, V15 Detect, Outsize):
The filter is usually located at the very top of the main cyclone assembly, directly above the dust bin. It often has a twist-lock or pull-out mechanism. Look for a label that says “FILTER” or “WASH FILTER.”
-
For Dyson Canister & Upright Models (e.g., Cinetic Big Ball, Ball Animal):
The filter location varies but is commonly found either on the side of the cyclone unit, sometimes under a removable flap, or integrated into the main body. Again, look for clear markings or consult your manual.
Removing the Washable Filter
Once located, removing the filter is straightforward:
-
Twist and Pull:
For most cordless models, gently twist the filter anti-clockwise (to the left) and then pull it straight up and out. It should come out with minimal effort.
-
Release Mechanism:
For some canister or upright models, there might be a button or latch to press before you can pull the filter free. Refer to your manual if unsure.
Washing the Filter
This is where the magic happens! Proper washing is crucial to effectively clean a Dyson filter.
-
Rinse Under Cold Water:
Hold the filter under cold, running tap water. Crucially, do not use hot water, as it can damage the filter material. Rinse the outside of the filter first, allowing the dirty water to run off.
-
Rinse Inside and Out:
Turn the filter over and rinse the inside. You’ll likely see a lot of trapped dust and dirt being flushed out. Continue rinsing until the water running off the filter is completely clear. This might take a few minutes of continuous rinsing, especially if your Dyson filter is particularly dirty.
-
Gently Squeeze and Twist:
While still under the running water, gently squeeze and twist the filter to help dislodge deeply embedded dust. Imagine you’re wringing out a sponge. For conical filters, gently tap the open end against the side of the sink to dislodge debris. Keep rinsing and squeezing until no more dirt comes out.
-
Avoid Soap or Detergents:
This is critical! Never use any soap, detergent, cleaning agents, or harsh chemicals. These can leave residues that clog the microscopic pores of the filter, permanently damaging it and reducing its effectiveness. Plain cold water is all you need to clean a Dyson filter properly.
Drying the Filter – THE MOST CRITICAL STEP
This cannot be emphasized enough: your Dyson filter must be absolutely, 100% bone-dry before reinserting it into your vacuum. Reinserting a damp filter can lead to serious problems, including mold growth, unpleasant odors, and even permanent damage to your vacuum’s motor, voiding your warranty. Be patient!
-
Squeeze Out Excess Water:
Once the water runs clear, shake off as much excess water as possible. Then, vigorously squeeze the filter repeatedly over the sink to remove any remaining moisture. You’ll be surprised how much water can still come out!
-
Air Dry for at Least 24-48 Hours:
Place the filter in a well-ventilated area to air dry. A windowsill, near an open window, or in front of a fan are ideal spots. Do NOT place it near a direct heat source like a radiator, heater, or in direct strong sunlight, as extreme heat can distort the filter material. Similarly, do not use a tumble dryer, hairdryer, or microwave.
Allow a minimum of 24 hours for drying, but 48 hours is highly recommended, especially in humid environments or if you want to be absolutely sure. The filter must be dry to the touch, inside and out. It should feel lightweight, just like when it was new.
-
Visual Check for Dryness:
Before reinsertion, hold the filter up to a light. Look for any dark, damp patches. If you see any, it’s not dry yet. Even a small amount of moisture can cause issues. Err on the side of caution and give it more time.
Reinserting the Dry Filter
Once your Dyson filter is completely dry:
-
Align and Insert:
Place the filter back into its original housing. For cordless models, slide it down into the cyclone assembly.
-
Twist to Lock:
Gently twist it clockwise (to the right) until it clicks securely into place. It should feel snug and properly seated. Do not force it.
-
Reconnect Power:
Plug your corded Dyson back in, or reinsert the battery pack for cordless models. You’re now ready to enjoy boosted suction!
Step-by-Step Guide: Maintaining a Non-Washable or HEPA Post-Motor Filter
If your Dyson model has a secondary, non-washable, or HEPA post-motor filter, the cleaning process is different. These filters cannot be washed with water. Attempting to wash them can destroy their intricate filtration media.
Locating the Non-Washable/HEPA Filter
These filters are often located in different spots depending on the model:
-
Rear of the Machine:
Often found at the back of the motor housing on upright or canister models, sometimes behind a removable cover or grill.
-
Side of the Machine:
Less common, but some models might have them on the side.
Again, consult your Dyson manual if you’re unsure where your secondary filter is located.
Removing the Filter
Carefully remove the filter according to your model’s instructions. There might be a latch, button, or simple pull-out mechanism.
Gently Dusting the Filter
Since these filters cannot be washed, the goal is to remove as much loose surface dust as possible.
-
Tap Gently:
Take the filter outside or over a trash can. Gently tap it against a hard surface (like a waste bin or the palm of your hand) to dislodge accumulated dust. You’ll see a cloud of fine dust emerge – that’s good!
-
Avoid Brushing Too Hard:
You can use a soft brush (like an old, clean paintbrush) to gently brush off surface dust, but be very careful not to damage the delicate pleated filter material.
-
NO WATER, NO COMPRESSED AIR:
Do not use water or compressed air on these filters. Water will ruin the filter, and compressed air can force fine particles deeper into the filter, making it less effective.
Reinserting the Filter
Once dusted, carefully place the filter back into its housing and secure any covers or latches. Make sure it’s properly seated to maintain the vacuum’s sealed system.
General Tips for Dyson Filter Maintenance in 2025
To keep your Dyson performing like new and make cleaning a Dyson filter easier each time:
- Stick to a Schedule: Aim to clean your washable Dyson filter at least once a month. If you have pets, allergies, or vacuum frequently, consider cleaning it every two weeks. Non-washable filters should be dusted every 3-6 months.
- Don’t Overfill the Bin: Empty your dust bin regularly, ideally after every use, or when it reaches the “MAX” line. An overfilled bin can put extra strain on the filter and motor.
- Use Genuine Dyson Filters for Replacement: When it’s time to replace your filter, always opt for genuine Dyson replacement parts. Third-party filters might seem cheaper, but they can compromise your vacuum’s performance, filtration efficiency, and even void your warranty.
- Check Other Parts: If suction remains low after cleaning your Dyson filter, check the brush bar for tangled hair or debris, and inspect the hose and wand for any blockages.
Troubleshooting Common Issues After Cleaning a Dyson Filter
Even after following all the steps, you might encounter a few hiccups. Here’s how to address them:
-
Filter Still Smells After Washing:
This can happen if the filter wasn’t thoroughly cleaned or didn’t dry completely, leading to mold or mildew. Re-wash the filter meticulously, ensuring all dirty water runs clear, and extend the drying time to a full 48 hours in a very well-ventilated spot. If the smell persists, it might be time to replace the filter entirely.
-
Suction Still Poor After Cleaning:
If cleaning your Dyson filter didn’t fix the suction issue, the problem likely lies elsewhere. Check for blockages in the main wand, hose, or brush bar. Turn off and unplug the vacuum, then carefully inspect all detachable parts for obstructions. Also, consider if your filter is simply too old and needs replacement.
-
Filter Won’t Dry Completely:
Humidity is the enemy here. Ensure you’ve squeezed out as much water as possible. Place the filter in a room with good airflow, perhaps near a fan or dehumidifier. Avoid enclosed spaces. If after 48 hours it’s still damp, you might need to leave it longer or ensure better air circulation.
-
Filter Indicator Light Still On:
Some Dyson models require a few minutes of vacuuming after a filter clean before the light resets. If it stays on consistently, double-check that the filter is correctly inserted and fully dry. If the issue persists, contact Dyson support, as there might be another underlying problem.
When to Replace Your Dyson Filter
While cleaning a Dyson filter regularly extends its life, filters don’t last forever. Even washable filters degrade over time.
- General Recommendation: Dyson typically recommends replacing washable filters every 6-12 months, depending on usage. Non-washable HEPA filters often have a longer lifespan, but should be replaced if significantly damaged or if odors persist.
- Visible Damage: If your filter shows signs of wear, tears, holes, or the material appears degraded, it’s time for a new one.
- Persistent Odors: If your vacuum still emits a stale or unpleasant odor even after thorough cleaning and drying, the filter material might be permanently compromised and harboring bacteria or mold.
- Permanent Clogging: If despite your best efforts, the filter remains discolored, stiff, or visibly clogged after cleaning, its effectiveness is likely diminished, and a replacement will restore performance.
Investing in a new genuine Dyson filter every so often is a small price to pay to maintain the premium performance you expect from your Dyson vacuum.
Conclusion
Congratulations! You now have all the knowledge to master the art of how to clean a Dyson filter. By following these simple yet crucial steps, you’re not just cleaning a part of your vacuum; you’re investing in its longevity, optimizing its suction power, and ensuring a healthier, cleaner home environment. In 2025, regular Dyson filter maintenance is a simple act that yields significant benefits, keeping your Dyson performing like the day you bought it. So go ahead, give your Dyson filter the clean it deserves, and enjoy that boosted suction! Your floors (and your lungs) will thank you.
🎥 Related Video: How to clean a Dyson vacuum filter #shorts
📺 LiTT Tech (mostly!)
Doing this on the Dyson V12 Detect Slim: https://littwebsite.com/2021/11/08/dyson-v12-detect-slim-review/ Get one for yourself …