Keeping your Dyson Animal vacuum cleaner sparkling clean is simpler than you think and crucial for its longevity and performance. This 2025 guide provides an easy-to-follow, step-by-step process covering everything from filters to brush bars, ensuring your Dyson always performs at its best. Regular cleaning not only enhances suction power and hygiene but also significantly extends the lifespan of your valuable appliance.
How to Clean Your Dyson Animal Vacuum Cleaner 2025 Easy
Welcome, fellow Dyson Animal owner! As we navigate 2025, keeping our homes pristine often involves battling pet hair and everyday grime. Your Dyson Animal vacuum cleaner is a powerful ally in this fight, designed specifically to tackle the toughest messes our beloved pets leave behind. But even the best warriors need a spa day! Regular cleaning isn’t just about making your Dyson look nice; it’s about maintaining its incredible suction power, extending its lifespan, and ensuring your home stays truly clean.
Think about it: your Dyson works hard, pulling in everything from fine dust to stubborn pet fur. Over time, these particles can build up in the bin, clog the filters, tangle around the brush bar, and even block internal pathways. When this happens, your Dyson starts to lose its edge. Suction diminishes, funny smells can appear, and its overall efficiency drops.
This comprehensive 2025 guide will walk you through every step of how to clean your Dyson Animal vacuum cleaner, transforming it from a tired workhorse into a gleaming, high-performance cleaning machine again. We’ll cover everything from emptying the dust bin to washing filters, untangling brush bars, and clearing potential blockages. No prior experience needed – just a little time and a desire to keep your Dyson in top condition. Let’s get started and make your Dyson Animal vacuum cleaner work like new!
Key Takeaways
- Regular Maintenance is Key: Consistent cleaning of your Dyson Animal vacuum prevents performance degradation and extends its operational life. Aim for a thorough clean every 1-3 months, depending on usage and pet hair volume.
- Safety First: Always ensure your Dyson Animal vacuum cleaner is unplugged or has its battery removed before attempting any cleaning or maintenance to prevent accidents.
- Filters Need Thorough Drying: Your Dyson’s washable filters (if applicable to your model) must be completely air-dried for a minimum of 24-48 hours before reinstallation to prevent mold growth and maintain suction.
- Tackle Pet Hair Aggressively: The brush bar is a common culprit for tangles. Use scissors or a seam ripper to carefully remove all matted hair and debris for optimal performance.
- Don’t Forget the Nooks and Crannies: Dust bins, wands, hoses, and attachment tools can harbor hidden dirt and blockages. Systematically inspect and clean each component to ensure peak efficiency.
- Troubleshooting is Part of the Process: If suction issues persist after cleaning, re-check for hidden clogs in the wand or head, and ensure the filter is dry and correctly seated.
Quick Answers to Common Questions
How often should I clean my Dyson Animal?
Aim to empty the dust bin after every use. A thorough deep clean, as described in this guide, should be performed every 1 to 3 months, depending on usage frequency and the amount of pet hair in your home.
Can I use water on the cyclone part of my Dyson?
Generally, no. While you can wipe down the exterior of the cyclone shroud inside the dust bin with a damp cloth, the main cyclone assembly (the colorful, intricate part) should not be submerged in water or have water directly applied to it, as it contains sensitive air channels and seals that can be damaged.
What if my Dyson filter still smells after washing?
If your filter still smells, it wasn’t completely dry, or there might be residual bacteria. Re-wash it thoroughly with cold water, squeeze out as much moisture as possible, and ensure it air-dries for a full 48 hours in a warm, airy spot. You can also try a very diluted white vinegar rinse during the wash, followed by clear water, but always ensure complete drying.
How do I know if my Dyson brush bar is clogged?
Signs of a clogged brush bar include it stopping spinning, poor pickup of debris, or the cleaner head making unusual noises. Visually inspect it; if you see hair, string, or fibers wrapped around it, it’s clogged and needs to be cleaned.
Can I lubricate any parts of my Dyson?
Dyson vacuums are designed not to require lubrication. Attempting to lubricate internal components can attract more dust and potentially damage the vacuum. Stick to cleaning, not oiling.
Step 1: Gather Your Cleaning Arsenal
Before you dive into cleaning your Dyson Animal vacuum cleaner, it’s wise to have all your tools ready. This makes the process smoother and more efficient.
What You’ll Need:
- A designated cleaning area (outdoors or in a garage is ideal, especially if dealing with a lot of dust and pet hair).
- A soft, damp microfiber cloth.
- A small, soft brush (an old toothbrush works wonders for tight spots).
- Scissors or a seam ripper (for cutting tangled hair).
- A mild, non-abrasive soap (optional, for exterior wiping).
- A bin or trash bag for disposing of debris.
- Optional: Compressed air for hard-to-reach crevices (use with caution and only on non-electrical parts).
Step 2: Safety First! Disconnect Power
This is the most critical step. Before touching any internal components, you *must* ensure your Dyson Animal vacuum cleaner is completely powered down.
For Cordless Models (e.g., V10 Animal, V11 Animal, V15 Detect Animal, Gen5Detect Animal):
Remove the battery pack from the main body. Most Dyson cordless models have a red button or clip that allows you to easily detach the battery. This completely cuts the power, making it safe to proceed.
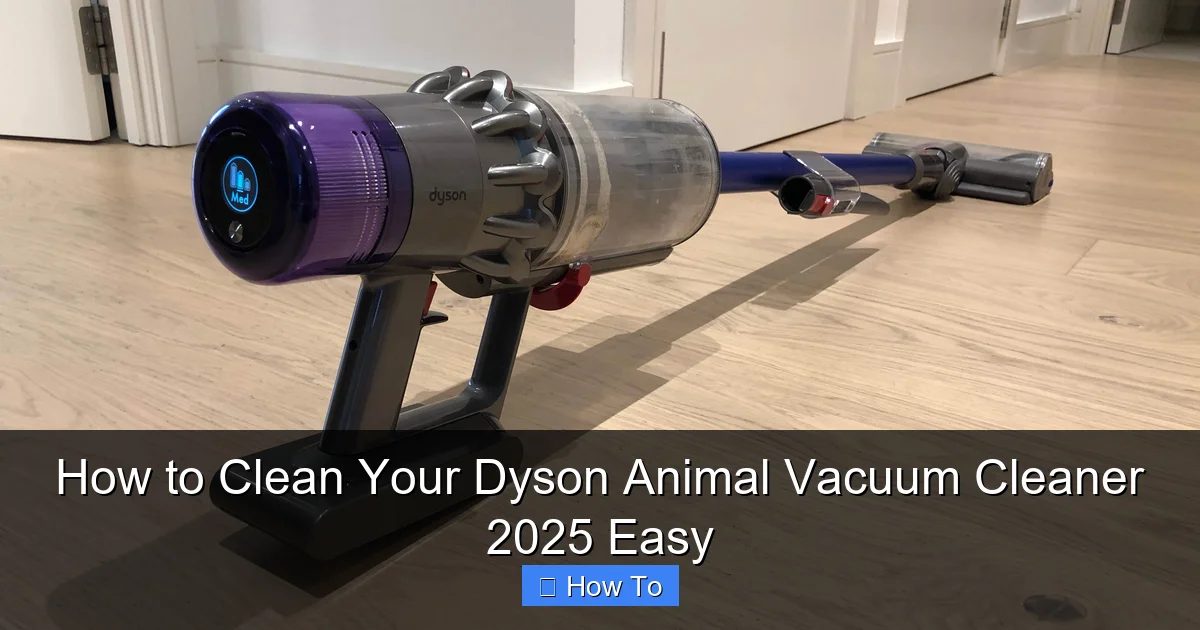
Visual guide about How to Clean Your Dyson Animal Vacuum Cleaner 2025 Easy
Image source: cdn.mos.cms.futurecdn.net
For Upright/Canister Models (e.g., Ball Animal, Cinetic Big Ball Animal):
Unplug the vacuum cleaner from the wall outlet. Double-check that the cord is completely disconnected.
Safety Tip: Never attempt to clean a Dyson with the power connected. This prevents accidental activation or electrical hazards.
Step 3: Empty and Clean the Dust Bin (Cyclone Assembly)
The dust bin is where all the dirt and pet hair collect, so it’s often the dirtiest part. Giving it a thorough clean is crucial for maintaining suction.
3.1. Removing the Bin
Locate the red lever or button on your Dyson Animal vacuum cleaner that releases the dust bin. For most cordless models, you push the red lever down to open the bin over a trash can. For upright models, you’ll typically find a release button near the handle or top of the cyclone assembly.
3.2. Emptying Completely
Over a trash can, fully open the bin and shake out all debris. If necessary, gently tap the side of the bin to dislodge stubborn clumps of dust and pet hair. Ensure the bin is as empty as possible.
3.3. Wiping Down the Bin
Using a damp (not soaking wet!) microfiber cloth, wipe down the inside and outside of the clear dust bin. Pay attention to any caked-on dust or residue. For particularly stubborn grime, you can use a very small amount of mild soap on the cloth, but ensure you wipe it clean with a fresh damp cloth afterward to remove any soap residue. Do NOT submerge the entire bin assembly in water, especially the parts connected to the motor or electronics.
3.4. Cleaning the Cyclone Shroud
Many Dyson models feature a perforated metal or plastic shroud inside the clear bin, part of the cyclone assembly. This can get coated in fine dust. Carefully use your small brush or an old toothbrush to gently dislodge any dust buildup. You can also carefully use a damp cloth to wipe it down. Again, avoid getting water into the electrical components. For some Dyson models, the entire cyclone assembly can be detached from the clear bin for a more thorough clean – consult your specific model’s manual for instructions.
3.5. Reattaching
Once clean and dry, carefully reattach the dust bin to the main body of your Dyson Animal vacuum cleaner, ensuring it clicks securely into place.
Step 4: Wash and Dry the Filter(s)
Dyson filters are vital for trapping microscopic particles and allergens, and they need regular cleaning to function effectively. Most Dyson Animal models have at least one washable filter.
4.1. Locating Your Filter(s)
Dyson filters are typically located in one of two places, depending on your model:
- Top of the main body: Often a cylindrical filter found at the very top of cordless models (e.g., V10, V11, V15 Detect, Gen5Detect).
- Behind the wheel or near the ball: For upright and canister models, filters might be located behind a cover near the ball or side wheel.
Consult your Dyson manual if you’re unsure where your filter is located or if it’s washable. Some Dyson filters are non-washable and require replacement.
4.2. Rinsing Under Cold Water
Remove the filter. Hold it under cold running tap water, gently squeezing and twisting it to allow the water to penetrate. You’ll see murky water coming out – keep rinsing until the water runs clear. Focus on both the pleated sections and any foam layers.
4.3. Squeezing and Drying Thoroughly
This is arguably the most crucial step for filter maintenance. Shake off excess water, then repeatedly squeeze and wring the filter to remove as much moisture as possible. Lay the filter flat in a warm, dry area with good airflow. It *must* air-dry completely for a minimum of 24-48 hours. Do NOT use a tumble dryer, microwave, or any heating appliance, as this can damage the filter material. Reinstalling a damp filter can lead to mold growth, bad odors, and severely reduced suction, potentially even damaging your Dyson Animal vacuum cleaner’s motor.
4.4. Reinstalling
Once you are absolutely certain the filter is bone dry, carefully reinsert it into its housing on your Dyson, ensuring it’s properly seated and secure.
Step 5: Clean the Brush Bar/Head (Motorized Head)
The motorized cleaner head, especially the brush bar, is ground zero for pet hair tangles. Cleaning it regularly is essential for efficient debris pickup.
5.1. Detaching the Brush Bar
First, detach the entire cleaner head from the wand. Then, most Dyson Animal cleaner heads have a side cap or a locking mechanism (often a coin-slot screw or a simple twist-lock) that allows you to remove the brush bar. Consult your manual if you’re unsure how to release it.
5.2. Removing Tangled Hair and Debris
This is where your scissors or seam ripper come in handy. Carefully cut along the length of the brush bar to snip through any tangled hair, string, or fibers. Be gentle and avoid cutting the bristles themselves. Once cut, pull away all the debris. Use your small brush to dislodge any finer dust or pet dander stuck between the bristles or inside the brush bar housing.
5.3. Wiping Down the Bar and Head Interior
Use your damp microfiber cloth to wipe down the brush bar itself, removing any remaining residue. Also, wipe the interior of the cleaner head, especially around the suction inlet and wheels, where dust and hair can accumulate. Ensure no moisture gets into the electrical connections within the head.
5.4. Checking for Blockages
Visually inspect the opening where the cleaner head connects to the wand. Sometimes larger debris can get stuck here. Clear any obstructions carefully.
5.5. Reassembling
Once clean and dry, reinsert the brush bar, ensuring it clicks or locks securely into place. Then reattach the cleaner head to the wand.
Step 6: Inspect and Clear the Wand and Hose
Blockages in the wand or hose can significantly reduce suction, often without visible signs from the outside.
6.1. Disconnecting Sections
Disconnect the wand from both the main body and the cleaner head. If your model has a flexible hose (common on uprights and canisters), detach it from both ends.
6.2. Visual Inspection for Clogs
Hold each section up to a light source and look through it. You’d be surprised what you find – socks, toy parts, large clumps of pet hair. For hoses, gently stretch and flex them to see if any blockages become apparent.
6.3. Using a Pole or Broom Handle to Push Through
If you see a blockage, use a broom handle or a long, slender pole to carefully push the obstruction through. Be gentle to avoid damaging the internal plastic. Never use sharp objects that could pierce the hose or wand.
Step 7: Clean Your Dyson Tools and Attachments
Don’t overlook the smaller attachments! They get just as dirty and are crucial for specialized cleaning tasks.
7.1. Wiping Down Surfaces
Use your damp microfiber cloth to wipe down all surfaces of your crevice tool, combination tool, pet grooming tool, and any other attachments. This removes dust and grime.
7.2. Removing Debris from Brushes
For any tools with brush bristles, use your small brush or old toothbrush to dislodge tangled hair and dust. You can also carefully use scissors to cut away stubborn tangles.
7.3. Checking Crevice Tool for Blockages
Hold the crevice tool up to the light to ensure its narrow opening isn’t blocked by debris.
Step 8: Wipe Down the Exterior
Now that the internal components are sparkling, give the outside of your Dyson Animal vacuum cleaner some love.
8.1. Using a Damp Microfiber Cloth
With your damp microfiber cloth (and a tiny bit of mild soap if desired), gently wipe down the entire exterior of the main body, handle, and any other external parts. This removes dust, fingerprints, and smudges. Pay attention to buttons and seams where dirt can accumulate.
8.2. Avoiding Electronic Components
Be careful around display screens, charging ports, and any exposed electrical connections. Keep them dry.
Step 9: Final Checks and Assembly
Before powering up your newly cleaned Dyson, take a moment for a final review.
Ensure all components are completely dry, especially the filter. Reattach the battery or plug the cord back in. Test your Dyson Animal vacuum cleaner to ensure it’s functioning properly. Listen for any unusual noises and check for full suction.
Troubleshooting Common Issues After Cleaning
Sometimes, even after a thorough cleaning, you might encounter a snag. Here are quick fixes for common issues:
Still No Suction?
If your Dyson Animal vacuum cleaner still lacks suction, double-check for any missed clogs. Re-inspect the wand, hose, and the inlet to the cleaner head. Ensure the dust bin is correctly seated and fully closed. Most importantly, verify that your filter is absolutely bone-dry and correctly reinstalled. A damp filter will significantly impede airflow.
Strange Smells Persist?
Persistent odors often indicate bacteria or mold. If your filter was damp when reinstalled, it’s likely the culprit – re-wash and ensure 48 hours of drying. For lingering smells from the dust bin, try wiping it with a mild disinfectant wipe after cleaning, or even placing a small amount of baking soda in the empty bin for a few hours to absorb odors before wiping it clean.
Brush Bar Not Spinning?
If the brush bar isn’t rotating, first ensure it’s completely free of tangled hair and debris. Check that it’s correctly reinstalled in the cleaner head and that the end cap or locking mechanism is secure. Also, ensure the cleaner head itself is firmly attached to the wand and the wand to the main body, as a loose connection can sometimes prevent power delivery to the head.
Conclusion
Congratulations! You’ve successfully performed a deep clean on your Dyson Animal vacuum cleaner. By following this 2025 guide, you’ve not only restored its peak performance but also significantly contributed to its longevity. Your Dyson is an investment, and regular maintenance is the best way to protect that investment.
Make it a habit to perform a quick empty after every use, and aim for a thorough clean like this one every 1-3 months, depending on how often you vacuum and how much pet hair your home generates. A well-maintained Dyson Animal means a cleaner home, healthier air, and a more efficient battle against dust and pet dander. Enjoy your freshly cleaned, powerful Dyson – ready to tackle whatever 2025 throws its way!
🎥 Related Video: Cleaning Your Dyson Air Filter | How to Clean the Dyson V8 Filter #diy #dyson #vacuum
📺 DIY for Home and Life
Here is a step-by-step break down of how to dismantle and fully clean your Dyson air filter. These steps are practically identical for …