
Regularly cleaning your Bissell vacuum cleaner is essential for maintaining its peak performance and extending its lifespan. This comprehensive 2025 guide provides detailed, step-by-step instructions for cleaning every crucial component, from the dustbin and filters to the brush roll and hoses. By following these easy steps, you’ll significantly improve your vacuum’s suction power and overall efficiency, making your home cleaning routine much more effective.
Sparkling Clean How to Clean Bissell Vacuum Cleaner 2025
Hello, fellow home heroes! In the hustle and bustle of keeping our homes clean, it’s easy to overlook one crucial detail: cleaning the very tool that helps us achieve that sparkle. Your trusty Bissell vacuum cleaner works hard, tirelessly sucking up dirt, dust, and pet hair. But what happens when your vacuum starts to lose its oomph, leaving behind debris, or just not feeling as powerful as it once did?
The answer is simple: it’s time for a deep clean! Just like any other hardworking appliance, your Bissell vacuum cleaner needs regular maintenance to perform at its best. Neglecting to clean your vacuum can lead to reduced suction, strange odors, and even a shorter lifespan for your machine. But don’t worry, giving your Bissell a thorough refresh is easier than you think, and in 2025, keeping your cleaning arsenal in top shape is more important than ever!
In this comprehensive guide, we’re going to walk you through everything you need to know about how to clean your Bissell vacuum cleaner, step by step. We’ll cover all the essential components, from the dirt bin and filters to the brush roll and hoses. By the end of this guide, you’ll have a sparkling clean Bissell vacuum cleaner that performs like new, ready to tackle any mess your home throws its way.
Let’s roll up our sleeves and get started on bringing that powerful suction back to your Bissell!
Key Takeaways
- Safety First: Always unplug your Bissell vacuum cleaner before beginning any cleaning or maintenance to prevent accidental activation and injury.
- Empty the Dirt Bin Regularly: Don’t wait until it’s overflowing. Emptying the dirt bin after each use prevents clogs and maintains consistent suction power.
- Filters are Crucial: Clean or replace your Bissell’s filters (pre-motor and post-motor) according to the manual. Clogged filters are the leading cause of reduced suction.
- Untangle the Brush Roll: Regularly remove hair, strings, and debris from the brush roll to ensure it spins freely and effectively agitates carpets.
- Check Hoses and Attachments: Periodically inspect hoses and attachments for blockages, as these can severely restrict airflow and diminish cleaning performance.
- Refer to Your Manual: While this guide is comprehensive, always consult your specific Bissell vacuum cleaner model’s user manual for detailed, model-specific instructions and warnings.
- Regular Maintenance Pays Off: Consistent cleaning not only keeps your Bissell running like new but also prevents costly repairs and extends the life of your appliance.
Quick Answers to Common Questions
How often should I clean my Bissell vacuum cleaner’s filters?
For optimal performance, clean your pre-motor filter (if washable) monthly or after every 4-6 uses. Non-washable filters and post-motor filters typically need to be replaced every 3-6 months, depending on usage and pet presence. Always check your specific model’s manual for exact recommendations.
Can I wash the dirt bin of my Bissell vacuum cleaner?
Yes, most bagless Bissell dirt bins can be rinsed with warm water and a mild dish soap. Just make sure it is completely dry—and we mean *bone dry*—before reattaching it to the vacuum to prevent mold growth or damage to the electrical components.
My Bissell vacuum cleaner smells bad after cleaning – what gives?
Persistent odors often mean something was missed or requires replacement. Check all filters again, especially if they are washable but weren’t fully dry. If the smell persists, consider replacing the filters, as odors can get deeply embedded over time. For pet owners, pet dander can also get trapped in less accessible areas.
How do I know if my Bissell vacuum cleaner’s brush roll belt is broken?
If your brush roll isn’t spinning but the motor is running, and you’ve removed all tangles, a broken belt is a likely culprit. You might see a loose rubber band or nothing at all where the belt should be. Consult your manual for belt replacement instructions or consider professional service.
Is it safe to use compressed air to clean Bissell filters?
While compressed air can dislodge some dust from *non-washable* filters, it’s generally not recommended for washable filters. For washable foam filters, water is best. For pleated filters, tapping them out is usually sufficient. Using compressed air too aggressively can damage delicate filter media or force particles deeper into the material.
Step 1: Safety First & Gather Your Tools
Before you even think about diving into the nitty-gritty of cleaning your Bissell vacuum cleaner, safety is paramount. Always, and we mean always, unplug your vacuum from the power outlet. This prevents any accidental power-ups that could lead to injury. Once it’s safely unplugged, you’re ready to gather your simple cleaning toolkit.
What You’ll Need:
- A pair of scissors or a seam ripper
- Microfiber cloths or old towels
- A small brush (an old toothbrush works great)
- Mild dish soap (optional, for some parts)
- A trash can or large plastic bag
- Safety gloves (optional, but good for messy tasks)
- A flathead screwdriver or coin (for some models)
Step 2: Empty the Dirt Bin or Replace the Bag
This might seem obvious, but it’s the very first step in deep cleaning your Bissell vacuum cleaner. A full dirt bin or bag can significantly reduce suction, even if the rest of your vacuum is spotless.
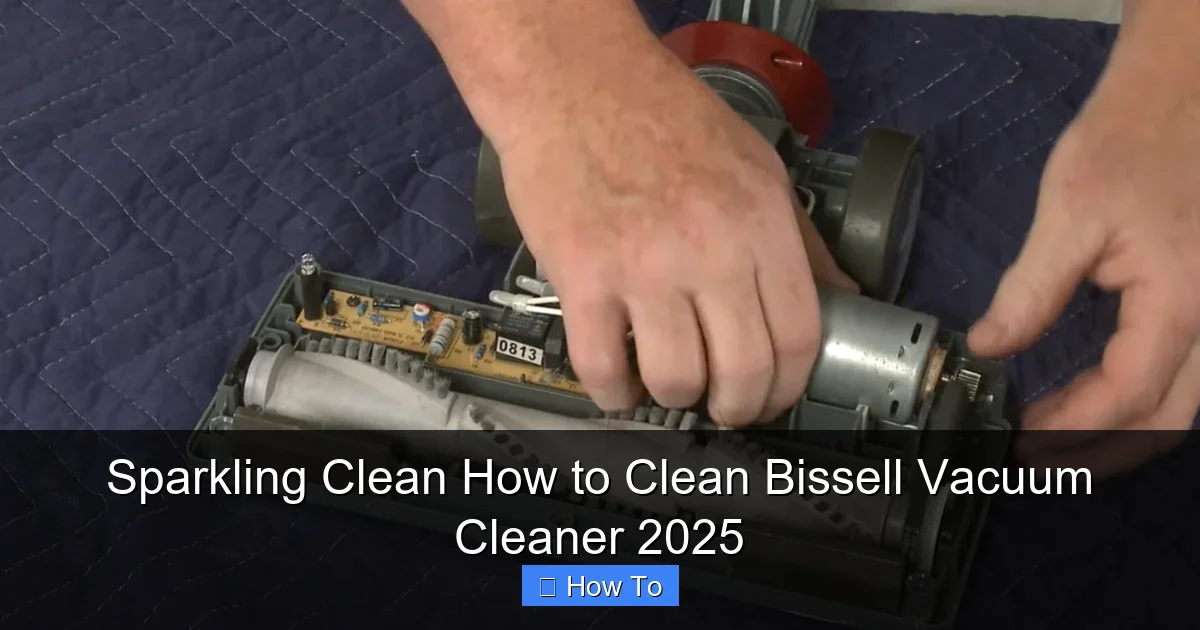
Visual guide about Sparkling Clean How to Clean Bissell Vacuum Cleaner 2025
Image source: cleanerprofy.nyc3.cdn.digitaloceanspaces.com
For Bagless Bissell Vacuums:
- Remove the Dirt Bin: Locate the release button or latch, usually near the top of the canister. Press it and carefully lift the dirt bin away from the main body of the Bissell vacuum cleaner.
- Empty Contents: Hold the bin over a trash can and press the bottom release button (if applicable) to open the flap and dump out all the accumulated dirt and debris.
- Wipe it Out: Use a dry microfiber cloth to wipe the inside of the dirt bin, removing any lingering dust or fine particles. For stubborn grime, you can rinse the bin with warm water and a tiny bit of mild dish soap. Ensure it’s completely dry before reattaching it to the Bissell vacuum cleaner.
For Bagged Bissell Vacuums:
- Locate the Bag Compartment: This is usually on the front or side of the main vacuum body.
- Remove the Full Bag: Open the compartment, carefully detach the full bag, and seal it if it has a sealing tab.
- Insert a New Bag: Place a fresh bag securely into position, ensuring it’s properly aligned with the hose connection. Close the compartment.
Step 3: Clean or Replace the Filters
Filters are the lungs of your Bissell vacuum cleaner. They trap fine dust, allergens, and other particles, preventing them from recirculating into your home’s air. Clogged filters are one of the most common reasons for reduced suction and can even cause your motor to overheat. Your Bissell vacuum cleaner likely has at least two types of filters: a pre-motor filter and a post-motor filter.
Pre-Motor Filter (Washable Foam/Pleated Filters):
This filter is usually located near or inside the dirt bin compartment. It protects the motor from larger debris.
- Locate and Remove: Carefully pull out the pre-motor filter. It might be a foam pad or a pleated filter.
- Rinse Thoroughly: If it’s washable (check your manual!), hold it under cool, running water until the water runs clear. Gently squeeze foam filters to help release dirt.
- Allow to Air Dry COMPLETELY: This is critical. A damp filter can damage your Bissell vacuum cleaner’s motor. Let it air dry for at least 24-48 hours, or until absolutely bone dry. Placing it near a fan can speed up the process.
- Replace if Not Washable or Too Worn: If your filter isn’t washable or looks torn, brittle, or permanently discolored, it’s time to replace it with a genuine Bissell replacement filter.
Post-Motor Filter (HEPA or Allergen Filters):
This filter is often located at the back or side of the Bissell vacuum cleaner and helps trap the finest particles before air is expelled from the machine.
- Locate and Remove: These filters often have a cover that needs to be unlatched or twisted open.
- Inspect and Tap: Most post-motor HEPA filters are *not* washable. Instead, gently tap them against the inside of a trash can to dislodge accumulated dust.
- Replace Regularly: Post-motor filters typically need to be replaced every 3-6 months, depending on usage, or more often if you have pets or allergies. Consult your Bissell vacuum cleaner manual for specific recommendations.
Step 4: Untangle and Clean the Brush Roll
The brush roll (also known as the beater bar) is essential for agitating carpets and picking up embedded dirt and hair. Over time, hair, string, and carpet fibers can get tangled around it, hindering its performance.
Removing Debris from the Brush Roll:
- Flip the Vacuum: Carefully lay your Bissell vacuum cleaner on its back or side, exposing the brush roll.
- Remove the Bottom Plate (if applicable): Some Bissell models have a bottom plate secured by screws or latches. You may need a flathead screwdriver or even a coin to open these. Refer to your manual if unsure.
- Remove the Brush Roll (Optional but Recommended): On many Bissell vacuum cleaner models, the brush roll can be easily removed by lifting it out of its housing once the bottom plate is off. This makes cleaning much easier.
- Cut Away Tangles: Using your scissors or seam ripper, carefully cut away all tangled hair, string, and fibers from the brush roll. Be gentle to avoid damaging the bristles or the roll itself.
- Clean Bearings and Ends: Use your small brush or an old toothbrush to clean any lint or debris from the ends of the brush roll and the areas where it sits in the vacuum head.
- Reinstall the Brush Roll and Bottom Plate: Once clean, securely place the brush roll back into its housing, ensuring it spins freely. Reattach the bottom plate and secure any screws or latches.
Step 5: Check and Clear Hoses and Attachments
A hidden blockage in the hose or attachments can drastically reduce suction. It’s a common culprit when your Bissell vacuum cleaner suddenly loses power.
Inspecting Hoses:
- Detach the Hose: Disconnect the main vacuum hose from both the body of the Bissell vacuum cleaner and the wand/attachments.
- Look Through the Hose: Hold the hose up to a light source and look through it. Can you see light all the way through? If not, there’s a blockage.
- Clear Blockages: Use a broom handle, a long stick, or another flexible but firm object (never your hand!) to gently push out any obstructions. Be careful not to puncture the hose.
- Rinse (If Applicable): Some hoses can be rinsed with water if they’re particularly dirty, but ensure they are completely dry before reattaching. Again, check your manual!
Cleaning Attachments:
- Inspect Each Attachment: Look inside the nozzles and brushes of your attachments.
- Remove Debris: Use your fingers, a small brush, or even a toothpick to clear out any dust, hair, or debris that has accumulated.
- Wash if Needed: Most plastic attachments can be washed with warm, soapy water. Rinse them well and let them air dry completely before storing them.
Step 6: Wipe Down the Exterior
Now that the internal components of your Bissell vacuum cleaner are clean, it’s time to give the outside a little love. This not only makes your vacuum look good but also prevents dust and grime from spreading around your home during use.
How to Clean the Exterior:
- Damp Cloth Wipe: Lightly dampen a microfiber cloth with water (or a very diluted, mild cleaning solution).
- Wipe Surfaces: Gently wipe down all exterior surfaces of your Bissell vacuum cleaner, including the handle, body, and wheels. Pay attention to crevices where dust likes to hide.
- Dry Thoroughly: Use a dry cloth to wipe away any excess moisture, leaving your vacuum shiny and spotless.
Step 7: Reassemble Your Bissell Vacuum Cleaner
Once all parts are dry and clean, it’s time to put your Bissell vacuum cleaner back together. Take your time and ensure each component is securely seated.
- Reattach the pre-motor filter.
- Slide the post-motor filter back into its compartment.
- Click the dirt bin securely back onto the main unit.
- Reattach the hose and any accessories.
Give it a quick visual check to ensure everything looks correct. Then, plug it back in and give it a test run! You should immediately notice a difference in suction power and overall performance.
Troubleshooting Common Issues After Cleaning
Even after a thorough cleaning, sometimes an issue might persist. Here are a few common problems and their quick fixes:
- Still Low Suction:
- Double-check all filters are completely dry and correctly installed.
- Ensure the dirt bin is fully seated and sealed.
- Re-examine the hose and brush roll for any missed blockages or tangles.
- Verify that all vacuum components (like the hose attachment points) are securely connected, with no gaps allowing air to escape.
- Strange Odor Persists:
- The smell might be embedded in the filters. Consider replacing them, especially the post-motor filter, even if you just cleaned them.
- For pet owners, sometimes pet hair gets trapped in unseen areas. A professional deep clean might be needed, or consider using vacuum fresheners.
- Brush Roll Not Spinning:
- Ensure all hair and debris are completely removed. Even a single strand can jam it.
- Check the belt. If your Bissell vacuum cleaner uses a belt-driven brush roll, it might be worn, stretched, or broken. This will require replacement.
- Confirm the brush roll is correctly seated in its housing.
Conclusion: The Reward of a Clean Bissell
Congratulations! You’ve successfully deep cleaned your Bissell vacuum cleaner. It’s a satisfying feeling, isn’t it? Not only have you potentially saved yourself money on repairs or replacements, but you’ve also restored your vacuum’s peak performance. Your floors will thank you, and your home will be cleaner and healthier.
Remember, regular maintenance is key. Aim to empty your dirt bin after every use, clean your pre-motor filter monthly, and check your brush roll every few uses. With this routine, your Bissell vacuum cleaner will continue to be a powerful ally in your fight against dirt and dust for years to come. Enjoy your sparkling clean home with your sparkling clean Bissell!
🎥 Related Video: BISSELL SpotClean easily removes most spots and stains from fibers in carpets, rugs, and upholstery.
📺 KHALID SPECTRUM
BISSELL SpotClean easily removes most spots and stains from fibers in carpets, rugs, and upholstery. SHOP NOW AT …