Learn the 2025 secrets to deeply clean your Livpristwash vacuum cleaner and unlock its full potential. This comprehensive guide provides step-by-step instructions to empty dustbins, wash filters, detangle brush rolls, and clear hoses, ensuring your Livpristwash performs like new. Regular cleaning not only boosts suction and eliminates odors but also significantly extends the lifespan of your beloved appliance, making your home cleaning more efficient and hygienic.
How to Clean a Vacuum Cleaner Livpristwash 2025 Secrets
In 2025, keeping your home spotless means having reliable tools, and for many, the Livpristwash vacuum cleaner is a trusted ally against dirt and dust. But even the best cleaning companion needs a little TLC to perform at its peak. Over time, your Livpristwash can accumulate hair, dust, and debris not just in its collection bin, but within its very mechanisms. This build-up leads to reduced suction, unpleasant odors, and can even shorten the lifespan of your valuable appliance.
Don’t fret! Cleaning your Livpristwash vacuum cleaner isn’t a daunting task. In fact, it’s a simple process that can restore its power and efficiency, making your cleaning routine more effective and enjoyable. This comprehensive guide will walk you through every step, sharing some insider 2025 secrets to ensure your Livpristwash operates like new. You’ll learn how to safely and thoroughly clean every critical component, from the dustbin to the brush roll, filters, and hoses. Get ready to revitalize your Livpristwash and rediscover the joy of a truly clean home!
Key Takeaways
- Safety First: Always unplug your Livpristwash vacuum cleaner before attempting any cleaning or maintenance to prevent accidents.
- Regular Dustbin/Bag Emptying: Don’t wait until it’s full. Empty your Livpristwash dustbin or replace the bag regularly to maintain optimal suction power and prevent motor strain.
- Filter Maintenance is Crucial: Wash or replace your Livpristwash filters according to the manufacturer’s guidelines. Clogged filters are a leading cause of reduced suction and poor air quality.
- Brush Roll Detangling: Periodically remove and clean your Livpristwash brush roll. Hair, threads, and debris wrapped around it can impair its effectiveness and damage the motor.
- Hose & Attachment Checks: Ensure all hoses and attachments of your Livpristwash are free from blockages. A simple blockage can drastically reduce performance.
- Thorough Drying: Any washable components, especially filters, must be completely dry before reassembling your Livpristwash. Moisture can damage the motor and promote mold growth.
- Consult Your Manual: For specific Livpristwash model instructions, always refer to your user manual. It contains tailored advice for your exact appliance.
Quick Answers to Common Questions
What’s the best way to get hair off my Livpristwash brush roll?
Use a small pair of sharp scissors or a seam ripper to carefully cut through tangled hair. Work your way around the brush roll, then pull the cut hair away. A specialized brush roll cleaning tool (some Livpristwash models include one) also works wonders!
How often should I clean my Livpristwash filters?
For washable filters, rinse them every 2-4 weeks, or when suction seems low. For non-washable HEPA filters, tap them clean monthly and replace them every 6-12 months. Always refer to your Livpristwash manual for specific recommendations.
Can I put Livpristwash parts in the dishwasher?
No, absolutely not. Unless your Livpristwash manual specifically states otherwise for a particular component (which is very rare for vacuum parts), avoid using a dishwasher. The high heat and harsh detergents can warp plastic, degrade rubber seals, and damage sensitive filter materials.
My Livpristwash smells bad even after emptying the dustbin. What should I do?
A persistent odor usually points to dirty filters or a lingering blockage in the hose or brush roll. Give all washable filters a thorough rinse (and ensure they dry completely). Check for any stuck debris in the hose or brush roll that might be decaying. A few drops of essential oil on a cotton ball placed in the dustbin can also help.
What if my Livpristwash loses suction even after I’ve cleaned everything?
If suction remains low, double-check for any hidden blockages in the hose, even small ones. Ensure all filters are clean and properly seated. Check the dustbin or bag for proper fit and if it’s full. Finally, inspect rubber seals for wear or cracks, as air leaks can cause significant suction loss.
Safety First: Prepare Your Livpristwash for Cleaning
Before you even think about unscrewing a panel or pulling out a filter, safety must be your top priority. Working with an electrical appliance requires careful attention to prevent injury or damage. Always follow these crucial first steps.
Unplug Your Livpristwash
This cannot be stressed enough. Before doing anything else, always unplug your Livpristwash vacuum cleaner from the wall socket. This eliminates any risk of accidental activation or electric shock while you’re working on it. Treat every vacuum cleaner, especially a powerful Livpristwash, as if it’s always ready to spring to life.
Consult Your Livpristwash User Manual
While this guide offers general best practices for cleaning a Livpristwash vacuum, your specific model might have unique features or recommended cleaning procedures. Take a moment to consult your Livpristwash user manual. It will provide precise instructions for removing components, cleaning specific filters, and any warnings specific to your Livpristwash model. Think of it as your Livpristwash’s personal instruction book, tailored for its best care.
Step 1: Emptying the Dustbin or Replacing the Bag
This is often the most frequently performed cleaning task, but doing it correctly makes a big difference in maintaining your Livpristwash’s performance. A full bin or bag means reduced suction and extra strain on the motor.
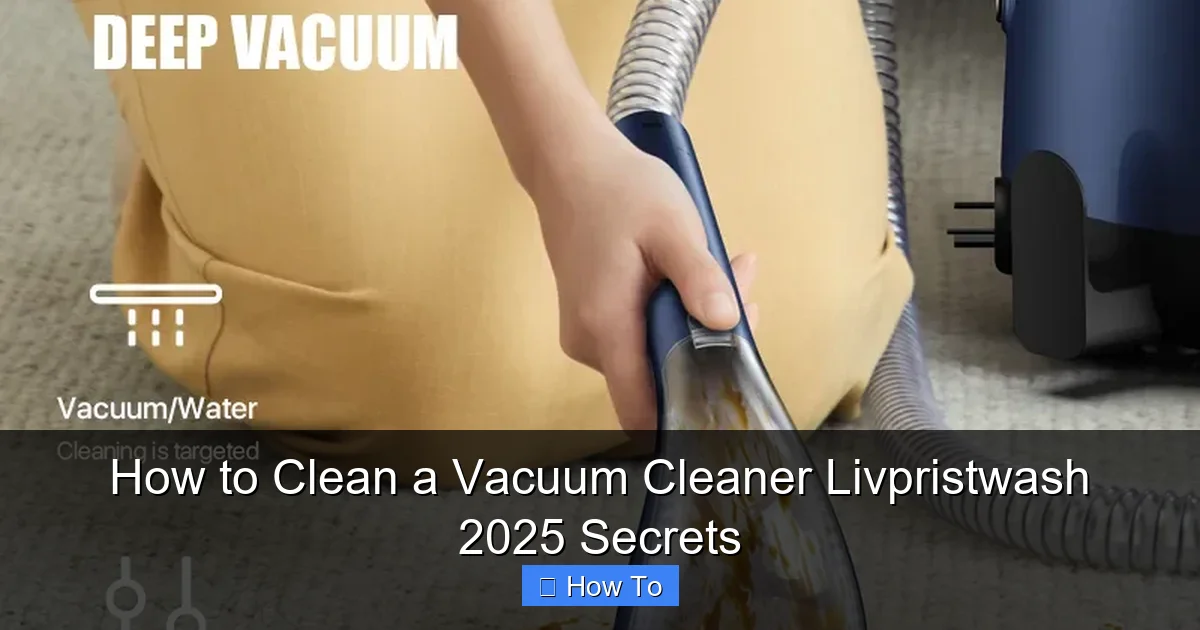
Visual guide about How to Clean a Vacuum Cleaner Livpristwash 2025 Secrets
Image source: lzd-img-global.slatic.net
For Bagless Livpristwash Models
If your Livpristwash is a bagless model, locating the dustbin release button is usually quite straightforward. It’s often clearly marked. Once released, carefully carry the bin to a trash can. For best results, empty the dustbin outdoors, if possible. This prevents dust and allergens from re-entering your home’s air. Give the inside of the bin a good tap to dislodge any stuck-on debris. You can also wipe the interior with a damp cloth if necessary, but make sure it’s completely dry before putting it back into your Livpristwash.
For Bagged Livpristwash Models
For bagged Livpristwash vacuum cleaners, the process is even simpler. Open the compartment where the bag is housed (again, consult your manual if unsure). Carefully remove the full bag, usually by pulling a tab that seals the opening. Place it directly into a trash can. Install a new, genuine Livpristwash replacement bag. Ensure it’s properly seated to prevent dust from leaking out. Always have spare Livpristwash bags on hand so you can replace them promptly when needed.
Step 2: Cleaning the Filters
Filters are the lungs of your Livpristwash. They capture fine dust and allergens, preventing them from being expelled back into your home. Clogged filters are the number one cause of poor suction and can even make your Livpristwash smell bad. This is a vital part of Livpristwash vacuum cleaner maintenance.
Locating Your Livpristwash Filters
Most Livpristwash models have at least two filters: a pre-motor filter (often washable) and a post-motor or HEPA filter (sometimes washable, sometimes replaceable). Your Livpristwash manual will clearly show you where these are located and how to remove them. Typically, the pre-motor filter is near the dustbin, and the post-motor filter is towards the back or bottom of the Livpristwash.
Washing Washable Livpristwash Filters
For washable filters (often foam or felt), remove them from your Livpristwash. Hold them under cool, running water until the water runs clear. Gently squeeze foam filters to help remove trapped dirt. Do NOT use soap or detergents unless specifically instructed by your Livpristwash manual, as these can damage the filter material. Rinse thoroughly.
Care for HEPA Filters
Many Livpristwash models boast advanced HEPA filtration. Some HEPA filters are washable, while others are designed for replacement only. If your Livpristwash HEPA filter is washable, follow the same rinsing process as above. If it’s a non-washable HEPA filter, gently tap it against a hard surface (like the inside of a trash can) to dislodge loose dust. If it’s heavily soiled, it’s time for a replacement. Livpristwash recommends using genuine Livpristwash replacement filters for optimal performance.
Drying Livpristwash Filters Thoroughly
This step is absolutely critical. After washing, filters MUST be allowed to air dry completely for at least 24 hours, or even longer depending on humidity. Place them in a well-ventilated area away from direct sunlight or heat sources. Putting damp filters back into your Livpristwash can lead to mold growth, foul odors, and can severely damage the motor. Test them with your finger to ensure they are bone dry before reassembly.
Step 3: Detangling the Brush Roll
The brush roll (or beater bar) is what agitates carpet fibers and sweeps debris into the vacuum’s suction path. It’s also a magnet for hair, threads, and pet fur, which can wrap around it and impede its spinning, reducing cleaning effectiveness and potentially burning out the motor of your Livpristwash.
Removing the Livpristwash Brush Roll
Most Livpristwash models allow for easy brush roll access. Lay your Livpristwash flat on its back. You’ll usually find screws or latches holding a bottom plate in place. Undo these (a screwdriver might be needed). Carefully lift out the brush roll. Take note of how it sits, as you’ll need to reassemble it correctly.
Cutting Away Hair and Debris
Using a small pair of scissors, a seam ripper, or even a specialized brush roll cleaning tool (some 2025 Livpristwash models come with one!), carefully cut through any tangled hair or threads. Be cautious not to cut the bristles of the brush itself. Once cut, pull away all the debris. You’ll be amazed how much comes off! A comb or stiff brush can help remove stubborn bits.
Cleaning the Livpristwash Brush Roll Housing
While the brush roll is out, take a moment to clean the housing where it sits. Use a damp cloth to wipe away dust and grime. Check the end caps of the brush roll and the bearings for any obstruction or wear. Ensure the belt that drives the brush roll is intact and properly tensioned. If it looks worn or stretched, consider replacing it (refer to your Livpristwash manual).
Step 4: Clearing Hoses and Attachments
Blockages in the hose or attachments are common culprits for sudden loss of suction. A thorough check can prevent frustration.
Checking for Blockages in Livpristwash Hoses
Detach all hoses from your Livpristwash. Visually inspect them for any obstructions. You can often see larger clogs. If you can’t see anything but suspect a blockage, try dropping a coin through the hose to see if it passes freely. Alternatively, use a broom handle (ensure it’s not too sharp) or a flexible long tool to gently push through any blockages. Never use anything that could puncture or damage the hose of your Livpristwash.
Washing Livpristwash Attachments
Your Livpristwash comes with various attachments – crevice tools, upholstery brushes, dusting brushes. These can get dirty and clogged too. Wash them in warm, soapy water. Use an old toothbrush or a small bottle brush to clean inside narrow openings. Rinse them thoroughly and allow them to air dry completely before reattaching them to your Livpristwash.
Step 5: Wiping Down the Exterior
Now that the internal components are sparkling, give the outside of your Livpristwash some attention. It’s often overlooked, but a clean exterior enhances the overall freshness of your vacuum.
Using a Damp Cloth
Wipe down the entire exterior of your Livpristwash with a slightly damp cloth. You can use a mild all-purpose cleaner if needed, but avoid harsh chemicals that might damage the plastic. Pay attention to buttons, handles, and areas where dirt tends to accumulate. This not only makes your Livpristwash look better but also prevents the transfer of dirt when you handle it.
Cleaning the Wheels
The wheels of your Livpristwash can collect hair and debris, making it harder to maneuver. Use a small screwdriver or a pick to carefully remove any tangled hair or lint from around the wheel axles. A quick wipe with a damp cloth will clean the wheel surfaces.
Step 6: Reassembly and Testing
You’re almost there! Once all components are clean and dry, it’s time to put your Livpristwash back together and enjoy its renewed power.
Ensuring Everything is Dry
Double-check that every washed component, especially your filters, is absolutely, completely dry. This step is non-negotiable for the longevity and safe operation of your Livpristwash.
Putting Your Livpristwash Back Together
Carefully reassemble your Livpristwash in the reverse order of disassembly. Ensure all parts click securely into place. Replace the brush roll, securing the bottom plate. Insert the filters correctly. If you have any doubt, refer back to your Livpristwash user manual.
Quick Test Run
Once reassembled, plug your Livpristwash back into the outlet. Turn it on for a quick test. Listen for any unusual noises. Feel the suction. If everything sounds and feels right, congratulations! You’ve successfully performed a deep clean on your Livpristwash vacuum cleaner.
2025 Livpristwash Maintenance Secrets & Pro Tips
Beyond the basic cleaning, these 2025-ready tips will keep your Livpristwash in top shape and perhaps even boost its performance.
Regularity is Key
Don’t wait until suction noticeably drops. Integrate a mini-cleaning routine for your Livpristwash. Empty the bin after every use, and do a quick filter check. A deep clean every 1-3 months, depending on usage and household pets, will extend the life of your Livpristwash dramatically.
Filter Replacement Schedules
Even washable filters don’t last forever. Livpristwash often recommends replacing non-washable HEPA filters every 6-12 months and washable filters every 12-24 months. Mark it on your calendar! Using fresh Livpristwash filters ensures optimal air quality and suction.
Odor Control
If your Livpristwash still smells musty after cleaning, try placing a few drops of essential oil (like lemon or tea tree) on a cotton ball and placing it inside the empty dustbin (bagless) or near the exhaust filter (bagged). Some 2025 Livpristwash models even have integrated fragrance diffusers. Baking soda sprinkled into the dustbin before vacuuming can also help absorb odors.
Cord Care
Don’t yank the cord from the wall. Always pull from the plug. For retractable cords on your Livpristwash, guide it back slowly rather than letting it snap. Inspect the cord regularly for fraying or damage, which can be a safety hazard.
Specialized Tools
Consider investing in a brush roll cleaning tool, which makes detangling much easier. A compressed air can is also fantastic for blowing dust out of hard-to-reach crevices on your Livpristwash, like around control buttons or small vents.
Troubleshooting Common Livpristwash Issues
Even after a good clean, sometimes issues persist. Here are quick solutions for common Livpristwash problems.
Loss of Suction
- Check for Blockages: Re-check the hose, brush roll, and all attachments for hidden clogs.
- Inspect Filters: Are they clean and completely dry? Or is it time for a replacement?
- Dustbin/Bag Status: Is the bin full, or is the bag overfilled? Ensure it’s properly seated.
- Seals and Gaskets: Over time, rubber seals around the dustbin or filter compartments can wear. Check for cracks or damage that might cause air leaks in your Livpristwash.
Unusual Noises (Whining, Grinding)
- Brush Roll Obstruction: A grinding noise often means something is caught in the brush roll or its bearings. Power off, unplug, and inspect thoroughly.
- Motor Strain: A high-pitched whine could indicate the motor is working too hard due to a major blockage or extremely clogged filters. Clean everything again.
- Loose Parts: Check if any screws or parts are loose on your Livpristwash.
Burning Smell
- Brush Roll Overload: A burning smell, especially like burning rubber, usually means the brush roll is jammed and not spinning. Turn off your Livpristwash immediately, unplug it, and clear the brush roll.
- Clogged Filters/Blockage: If the motor is straining excessively due to a significant blockage or severely clogged filters, it can overheat and emit a burning smell. Follow all cleaning steps, especially filter care.
- Motor Issue: If the smell persists after clearing all obstructions and cleaning, there might be an internal motor issue. In this case, contact Livpristwash customer service or a qualified technician.
Conclusion
Congratulations! You’ve mastered the 2025 secrets to cleaning your Livpristwash vacuum cleaner. Regular and thorough cleaning is the single best way to ensure your Livpristwash maintains its powerful suction, eliminates odors, and enjoys a long and productive life. A well-maintained Livpristwash not only cleans your home more effectively but also contributes to better indoor air quality. By following these steps, you’re not just cleaning an appliance; you’re investing in a cleaner, healthier, and happier home for years to come. So, roll up your sleeves, give your Livpristwash the care it deserves, and enjoy the satisfaction of a spotless clean!