Cleaning a Dyson vacuum cleaner involves regularly emptying its bin, washing the filter(s) with cold water, and removing hair and debris from the brush bar. This routine maintenance helps maintain optimal suction and prolongs the life of your machine, ensuring it continues to perform at its best.
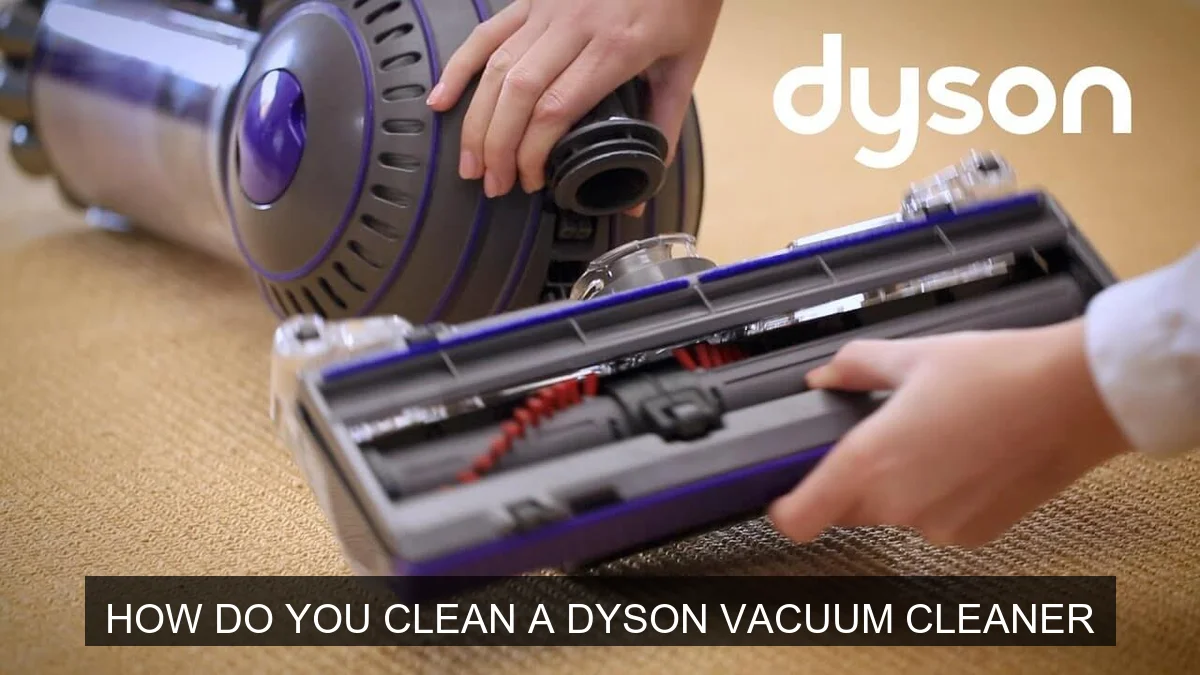
Image source: Cleanerstalk
📋 Table of Contents
- 🔹 Understanding How to Clean a Dyson Vacuum Cleaner
- 🔹 Why Cleaning Your Dyson Vacuum Matters So Much
- 🔹 How Do You Clean a Dyson Vacuum Cleaner? A Step-by-Step Guide
- 🔹 The Benefits of Regular Dyson Cleaning
- 🔹 Common Mistakes to Avoid When Cleaning Your Dyson
- 🔹 Practical Tips for Keeping Your Dyson Pristine
- 🔹 Real-Life Scenario: A Monthly Dyson Refresh
- 🔹 Frequently Asked Questions (FAQ) About Dyson Cleaning
- 🔹 Conclusion
Understanding How to Clean a Dyson Vacuum Cleaner
You rely on your Dyson vacuum to keep your home spotless, but like any hardworking appliance, it needs a little care to stay at its best. Learning how to clean a Dyson vacuum cleaner properly isn’t just about making it look nice; it’s about keeping it working efficiently, maintaining strong suction, and extending its life. Many people might not realize the impact a dirty filter or a tangled brush bar can have on performance.
This guide will walk you through everything you need to know about cleaning your Dyson vacuum. We’ll cover the “what,” “why,” and “how,” breaking down the process into simple, manageable steps. By the end, you’ll feel confident tackling your Dyson’s maintenance, ensuring it continues to pick up dirt and dust with ease.
Why Cleaning Your Dyson Vacuum Matters So Much
You might be thinking, “My vacuum cleans things, why do I need to clean the vacuum itself?” That’s a great question! Regular cleaning of your Dyson is crucial for several important reasons:
- Maintains Suction Power: Over time, dust, dirt, and hair can build up in the filter, cyclone, and brush bar. This buildup restricts airflow, making your vacuum work harder and significantly reducing its suction power. A clean Dyson picks up more.
- Prolongs Lifespan: When parts are clogged, the motor has to strain, leading to overheating and potential damage. Routine cleaning prevents this strain, helping your Dyson last longer. Think of it like changing the oil in your car – it’s preventative care.
- Improves Air Quality: Dyson vacuums are known for their advanced filtration systems. However, a dirty filter can re-release fine dust and allergens back into your home’s air. Cleaning the filter ensures it effectively traps these particles, leading to cleaner air.
- Eliminates Odors: If you’ve ever noticed a stale, musty smell coming from your vacuum, it’s likely due to trapped dirt, pet dander, and other debris decomposing inside the bin or filter. A thorough cleaning can get rid of these unpleasant odors.
- Ensures Hygienic Operation: Your vacuum picks up all sorts of things. Keeping it clean ensures you’re not spreading germs or bacteria around your home during your next cleaning session.
So, cleaning your Dyson isn’t just an optional chore; it’s a vital part of owning one and getting the most out of your investment.
How Do You Clean a Dyson Vacuum Cleaner? A Step-by-Step Guide
Cleaning your Dyson vacuum isn’t overly complicated, but it does require attention to detail. Let’s break down the process step-by-step.
Preparation: Safety First!
Before you start, safety is key. You’re dealing with an electrical appliance, after all.
- Unplug Your Dyson: Always, always unplug your vacuum cleaner from the wall outlet before you begin any cleaning or maintenance. This prevents accidental activation.
- Remove Any Attachments: Take off the main cleaning head and any other accessories so you can work on each part individually.
- Find a Good Workspace: Choose an area that’s easy to clean up afterward, like a utility sink, garage, or outside if possible, especially when dealing with dusty components.
Emptying and Cleaning the Clear Bin
This is probably the most frequent cleaning task you’ll do.
- Empty the Dust Bin: Most Dyson models have a release button to open the bottom of the clear dust bin. Position it over a trash can and press the button firmly to empty the contents. Some models require you to fully remove the bin first.
- Remove Excess Debris: If there’s stubborn dust or hair stuck inside the bin, especially around the central cone (cyclone shroud), gently tap the bin against the trash can or use a soft brush to dislodge it. Do not use water to rinse the bin unless your specific model’s manual states it’s safe to do so. For models like the Dyson V7, V8, V10, V11, V12, V15, and Outsize, you can usually wipe the exterior of the clear bin with a damp cloth, but avoid getting the cyclone assembly wet.
- Wipe if Possible: For the clear outer casing of the bin, you can often wipe it with a damp, lint-free cloth to remove dust and smudges. Make sure it’s completely dry before reattaching it.
Washing the Filter(s)
This is one of the most critical steps for maintaining suction.
- Locate and Remove the Filter(s): Dyson vacuums typically have one or two filters.
- Many upright and canister models have a filter located at the top of the cyclone assembly. Twist or pull to release it.
- Cordless models often have a filter at the back of the motor, usually marked with a filter symbol. Twist it counter-clockwise to remove.
- Some models have a second, post-motor filter, often at the base or side of the main body.
- Tap Out Loose Dust: Over a trash can, gently tap the filter to remove any loose dust and debris. You’ll be surprised how much comes out!
- Rinse with Cold Water: Place the filter under cold, running tap water. Hold it upright and let the water run through the pleated paper or foam. Squeeze it gently (if it’s a foam filter) or rotate it (if it’s pleated) until the water runs clear. Do not use soap, detergents, or put it in a dishwasher.
- Shake and Dry Thoroughly: Shake off excess water. This is the most important part: the filter must be completely dry before putting it back into the vacuum. Dyson recommends at least 24 hours of drying time in a warm, dry place. Avoid direct heat sources like radiators or direct sunlight, which can damage the filter material. You can place it near a fan to speed up the process.
- Reinstall: Once bone dry, put the filter(s) back into your Dyson.
Note: Not all Dyson filters are washable. Always check your specific model’s user manual to confirm if your filter is washable and for the correct washing instructions. Non-washable filters should only be tapped clean and eventually replaced.
Cleaning the Brush Bar (Motorized Head)
Hair and threads love to wrap around the brush bar, reducing its effectiveness.
- Remove the Brush Bar: On most Dyson cleaning heads, you’ll find a release mechanism (often a coin-slot screw or a clip) that allows you to remove the brush bar. Consult your manual if you’re unsure.
- Cut Away Tangles: Use scissors or a seam ripper to carefully cut through tangled hair, threads, and fibers. Be very careful not to cut the bristles themselves.
- Remove Debris: Pull away all the cut hair and debris. A small, stiff brush can help dislodge stubborn bits.
- Wipe Down: You can wipe the brush bar itself with a damp cloth if it’s dirty, but ensure it’s completely dry before reinserting. Also, wipe down the housing where the brush bar sits.
- Reinstall: Once clean and dry, reinsert the brush bar and secure it properly. Make sure it spins freely.
Checking and Cleaning the Hose and Attachments
Don’t forget these often-overlooked parts!
- Check for Blockages: Detach the hose (if applicable) and visually inspect it for any blockages. You can use a broom handle or a long, blunt object to gently push through any obstructions. Never use sharp objects.
- Wipe Attachments: Use a damp cloth to wipe down all your Dyson attachments (crevice tool, upholstery tool, etc.). Pay attention to any intake openings where dust can gather.
- Air Dry: Allow any damp parts to air dry completely.
Wiping Down the Exterior
A quick wipe can make a big difference.
- Use a damp, lint-free cloth to wipe down the exterior of the main body, wand, and handle. This removes surface dust and grime.
- Avoid getting water into any electrical components or openings.
Reassembly and Testing
Once everything is clean and completely dry, put your Dyson back together. Make sure all parts click securely into place. Then, plug it in and give it a quick test run to ensure it’s operating correctly and with renewed suction power.
The Benefits of Regular Dyson Vacuum Maintenance
Engaging in routine cleaning of your Dyson vacuum offers a wealth of advantages that go beyond just aesthetics. It’s an investment in your home’s cleanliness and your appliance’s longevity.
- Optimized Performance: A clean machine means powerful suction every time. You won’t have to go over the same spot multiple times, saving you effort and time.
- Extended Machine Life: By preventing blockages and strain on the motor, you significantly reduce wear and tear. This helps your Dyson last for many years, giving you excellent value.
- Healthier Home Environment: Effective filtration of allergens and dust particles means cleaner air for you and your family, which is especially beneficial for those with allergies or asthma.
- Cost Savings: Regular maintenance can help you avoid costly repairs or the need to replace your vacuum prematurely due to neglect. It’s always cheaper to clean than to repair or replace.
- Fresh-Smelling Home: Say goodbye to unpleasant odors emanating from your vacuum as you clean. A clean bin and filter mean a fresh smell every time you power it on.
Common Mistakes to Avoid When Cleaning Your Dyson
While cleaning your Dyson is straightforward, there are a few pitfalls to steer clear of that could damage your machine or reduce its effectiveness.
- Using Harsh Chemicals or Soap on Filters: This is a big one. Dyson filters are designed to capture microscopic particles. Using soap or detergents can leave a residue that clogs the filter material, making it ineffective and potentially damaging it. Stick to cold water only.
- Not Drying Filters Completely: Reinstalling a damp filter can lead to mold and mildew growth inside your vacuum, causing unpleasant odors and potentially damaging the motor. Always allow a full 24-48 hours for drying, or until you are absolutely certain it is bone dry.
- Washing Non-Washable Components: Some Dyson parts, especially the bin’s cyclone assembly, are not designed to get wet. Always check your specific model’s manual. Getting electrical components wet can cause permanent damage.
- Using Sharp Objects to Clear Blockages: Poking inside the hose or other parts with knives, screwdrivers, or other sharp objects can puncture the hose or scratch internal components, creating new problems. Use blunt objects like a broom handle or a dedicated blockage tool.
- Forgetting to Unplug: This is a safety hazard. Always disconnect the power before performing any maintenance or cleaning to prevent accidental startup and injury.
- Over-Cleaning or Under-Cleaning: While a general recommendation for filter cleaning is monthly, heavy users or homes with pets might need to clean more often. Conversely, cleaning washable parts too frequently or aggressively might wear them out. Pay attention to your machine’s performance and the manufacturer’s guidelines.
- Ignoring the Brush Bar: A brush bar tangled with hair can reduce its ability to agitate carpets and pick up debris, leading to poorer cleaning results. Don’t skip cleaning it.
Practical Tips for Keeping Your Dyson Pristine
Beyond the regular cleaning routine, a few extra tips can help you keep your Dyson in top condition and ensure it’s always ready for action.
- Regular Bin Emptying: Make it a habit to empty the dust bin after every use, or when it reaches the “MAX” fill line. This prevents accumulation and keeps suction strong.
- Monitor Filter Condition: Pay attention to your filter. If you notice a drop in suction even after emptying the bin, it’s probably time to wash (or replace) the filter. Some Dyson models have an indicator light for filter maintenance.
- Avoid Vacuuming Liquids or Fine Powders: Dyson vacuums are designed for dry dirt and dust. Vacuuming liquids can damage the motor, and very fine powders (like drywall dust or fireplace ash) can clog filters almost instantly and potentially damage the motor.
- Check for Blockages Proactively: If you hear a change in motor sound, a sudden loss of suction, or see the vacuum struggling, check for blockages in the hose, wand, and cleaning head before attempting anything else.
- Store Properly: Keep your Dyson in a clean, dry place. Avoid storing it in areas with extreme temperatures or high humidity.
- Gentle Cleaning: Always use a soft cloth for wiping down surfaces and gentle methods for dislodging debris. Avoid abrasive sponges or harsh scrubbing.
Real-Life Scenario: A Monthly Dyson Refresh
Let’s imagine you’re a busy person with a home that gets regular foot traffic and has a pet or two. Here’s what a monthly Dyson cleaning routine might look like:
On a Saturday morning, after your main vacuuming session, you decide to give your Dyson a thorough refresh.
- You unplug the vacuum from the wall, a crucial first step.
- You take it to your laundry room sink. First, you empty the clear bin into the trash, giving it a good shake to dislodge any sticky dust. You use a damp cloth to wipe the outside of the bin.
- Next, you remove the filter(s). You tap them over the trash can to release loose dust. Then, you hold them under cold running water, gently squeezing (if foam) or rotating (if pleated) until the water runs completely clear. You shake off the excess water and place them on a rack in a warm spot, ensuring they won’t be forgotten for at least 24 hours to dry.
- You then detach the main cleaning head. Using a coin, you unlock the end cap and slide out the brush bar. You carefully snip away all the tangled pet hair and human hair with a pair of scissors, then pull it all off. You also wipe down the inside of the cleaning head housing.
- Finally, you wipe down the exterior of the main vacuum body and any attachments with a slightly damp cloth. You visually check the hose for any blockages.
- The next day, once the filter(s) are absolutely dry, you reassemble your Dyson. The vacuum feels lighter, the brush bar spins smoothly, and when you turn it on for a quick test, the suction feels noticeably stronger. Your home will not only look cleaner, but your vacuum will be healthier too!
Frequently Asked Questions (FAQ) About Dyson Cleaning
How often should I clean my Dyson vacuum?
The frequency depends on usage. Generally, you should empty the bin after every use. Washable filters should be rinsed at least once a month, or more frequently if you vacuum often, have pets, or notice a drop in suction. The brush bar should be checked and cleaned monthly for tangled hair and debris.
Can I use soap or chemicals to clean my Dyson filter?
No, you should only use cold tap water to clean washable Dyson filters. Soaps, detergents, or chemicals can damage the filter material, clog its pores, and leave residues that may reduce its effectiveness or even damage your vacuum’s motor.
What if my Dyson still smells bad after cleaning?
If odors persist, double-check that your filter is completely dry, as dampness can cause mildew. Ensure the bin is thoroughly cleaned, and consider removing and checking the main cleaning head and hose for any hidden blockages or decomposing debris that might be causing the smell.
Is it okay to put Dyson parts in a dishwasher?
Absolutely not. Dyson parts are not designed for dishwasher cleaning. The high heat, harsh detergents, and powerful water jets in a dishwasher can warp plastic components, damage seals, or ruin delicate electronic parts, voiding any coverage.
How long does it take for a Dyson filter to dry?
Dyson recommends a minimum of 24 hours for filters to air dry completely. In humid environments or cooler temperatures, it might take up to 48 hours. It’s crucial that the filter is bone dry before reinstallation to prevent mold growth and motor damage.
Conclusion
Learning how to clean a Dyson vacuum cleaner is a simple yet incredibly impactful part of owning this powerful device. By regularly emptying the bin, washing the filter(s) with cold water, and clearing debris from the brush bar, you’re not just performing maintenance; you’re actively ensuring your vacuum maintains its legendary suction, operates hygienically, and serves your home for many years to come.
Embrace this routine care, and your Dyson will continue to deliver that satisfying clean, keeping your home environment fresh and dust-free. It’s a small investment of your time that yields big rewards in performance and longevity.