This comprehensive guide empowers you to easily change the belt on your Bissell vacuum cleaner in 2025, saving you time and money on professional repairs. Learn the essential tools, safety precautions, and detailed step-by-step instructions to restore your vacuum’s powerful cleaning performance and extend its lifespan. Get ready to tackle this common maintenance task with confidence and ease.
DIY 2025 How to Change The Belt on a Bissell Vacuum Cleaner
Welcome to your ultimate guide for changing the belt on your Bissell vacuum cleaner in 2025! If your vacuum isn’t picking up dirt like it used to, if the brush roll has stopped spinning, or if you’ve noticed a strange burning smell, chances are your drive belt is worn out or broken. Don’t worry, you don’t need to rush out and buy a new vacuum or pay for an expensive repair service. Changing a Bissell vacuum belt is a surprisingly straightforward DIY task that anyone can tackle with a little guidance.
This comprehensive guide will walk you through every step of the process, ensuring you have the confidence and knowledge to get your Bissell vacuum cleaner running like new again. We’ll cover everything from identifying the right replacement belt to troubleshooting common issues. By the end of this article, you’ll be a pro at vacuum belt replacement, saving you money and extending the life of your trusty cleaning companion. Let’s get started and bring that powerful suction back to your floors!
Key Takeaways
- Safety First: Always unplug your Bissell vacuum cleaner before starting any maintenance or repair work to prevent electric shock and accidental power-on.
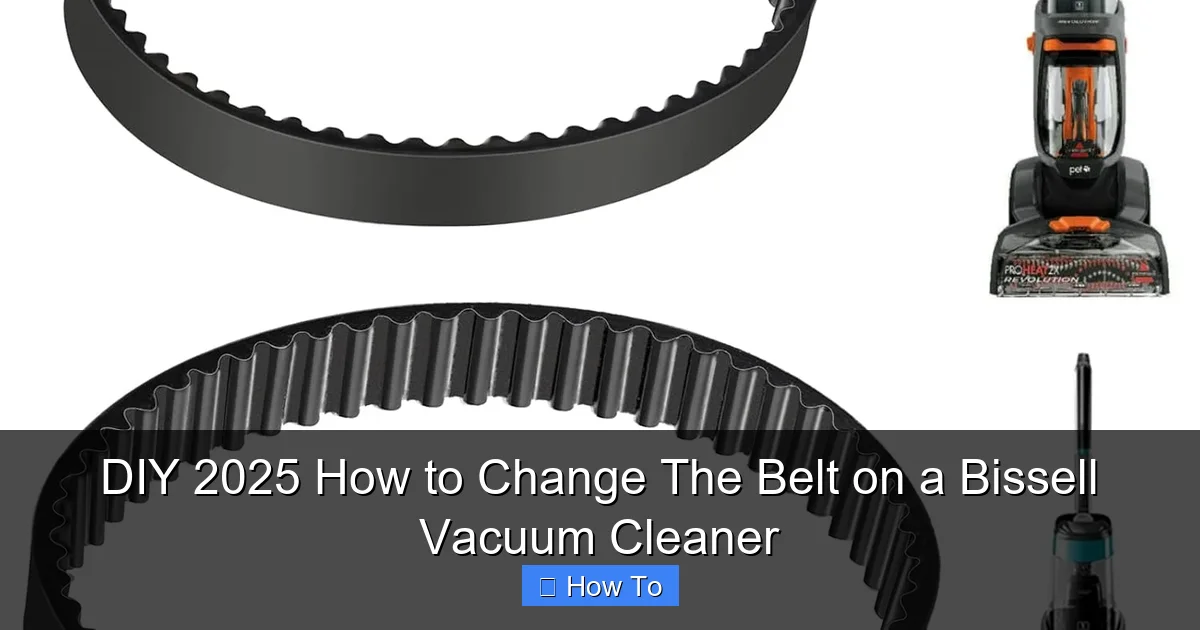
- Identify Your Belt Type: Bissell vacuums use various belt types (flat, V-belt, geared). Knowing your specific model and the correct belt number is crucial for a successful replacement.
- Signs of a Worn Belt: Look for a burning rubber smell, loss of brush roll spin, decreased suction, or visible cracks and fraying on the old belt as indicators for replacement.
- Gather the Right Tools: Most belt changes require only a few basic tools, such as screwdrivers (Phillips and flathead), perhaps a pry tool, and your new replacement belt.
- Document Your Steps: Taking photos or videos during disassembly can be incredibly helpful for reassembly, especially if you’re new to vacuum repair.
- Test Thoroughly: After installing the new belt and reassembling, always test the vacuum to ensure the brush roll spins correctly and suction is restored before full use.
- Regular Maintenance is Key: Incorporating belt checks into your routine vacuum maintenance can prevent unexpected breakdowns and extend the life of your appliance.
Quick Answers to Common Questions
What if I can’t find my Bissell model number?
Your Bissell vacuum model number is usually located on a sticker on the back or bottom of the main unit. Sometimes, it’s under the dirt cup or on the handle base. Look for a label that says “Model No.” or “Type.”
How often should I change my Bissell vacuum belt?
There’s no fixed schedule. It depends on usage. A good rule of thumb is to inspect it every 3-6 months. Change it immediately if you notice any signs of wear, stretching, or breaking.
Can I use a generic belt for my Bissell vacuum?
While some generic belts might fit, it’s always best to use an official Bissell replacement belt or a high-quality aftermarket belt specifically designed for your model. Incorrect belts can lead to poor performance or damage.
My brush roll is still full of hair even after cleaning. What do I do?
Persistent hair wrapping indicates worn brush roll bearings or bristles. If cleaning doesn’t help and the brush roll feels stiff, you might need to replace the entire brush roll assembly, not just the belt.
What’s the difference between a flat belt and a V-belt?
Flat belts are common and fit into a flat groove on the brush roll and motor. V-belts (or geared belts) have teeth or a V-shape to provide more grip, often found in heavy-duty or specific Bissell models. Ensure you match the belt type.
Understanding Your Bissell Vacuum Belt
Before diving into the repair, it’s helpful to understand what the belt does. The drive belt is a crucial component that connects your vacuum’s motor to the brush roll (also known as the agitator brush). When the motor runs, the belt transfers that power, causing the brush roll to spin rapidly. This spinning action is what agitates carpet fibers, loosening dirt, dust, and pet hair so your vacuum can suction it up effectively.
Over time, belts can stretch, fray, crack, or even snap due to wear and tear, heat, or foreign objects getting tangled in the brush roll. When the belt fails, the brush roll stops spinning, and your vacuum’s cleaning power significantly diminishes, making it feel like it’s lost suction even if the motor is still running.
Signs It’s Time to Change Your Bissell Vacuum Belt
Recognizing the signs of a failing belt can save you a lot of frustration. Here’s what to look for:
- Loss of Brush Roll Spin: The most obvious sign. If your vacuum is on, but the brush roll isn’t rotating, the belt is likely broken or severely stretched.
- Decreased Suction on Carpets: While the motor might still draw air, the lack of agitation means dirt isn’t being lifted effectively from carpet fibers.
- Burning Rubber Smell: A stretched or slipping belt can generate friction and heat, leading to a distinct burning rubber odor. If you smell this, turn off your vacuum immediately.
- Visible Damage: Sometimes, you can visually inspect the belt (once the brush roll cover is removed) and see cracks, fraying, or a complete break.
- Loud Noises: A belt that is about to break or is already broken can sometimes make unusual noises as parts grind against each other.
Safety First: Crucial Steps Before You Begin
Your safety is paramount. Always follow these essential precautions before you start working on your Bissell vacuum cleaner:
Unplug the Vacuum
This is the most critical step. Always ensure your vacuum cleaner is completely unplugged from the wall outlet. This prevents any risk of electric shock or accidental startup while you’re working on the internal components. Double-check to be absolutely sure.
Visual guide about DIY 2025 How to Change The Belt on a Bissell Vacuum Cleaner
Image source: i.ytimg.com
Work in a Well-Lit Area
Ensure you have plenty of light to see small parts and connections clearly. A headlamp or a bright work light can be very helpful.
Protect Your Hands
Consider wearing work gloves to protect your hands from sharp edges or small components.
Gather Your Tools and Supplies
Having everything ready before you start will make the process much smoother.
The Right Replacement Belt
This is crucial. You need the correct drive belt for your specific Bissell vacuum model. Check your vacuum’s user manual or the label on the vacuum itself for the model number. Then, search online (Bissell’s website, Amazon, appliance parts stores) for “Bissell [Your Model Number] vacuum belt.” Belts come in various sizes and types (flat, round, geared), so don’t try to force a belt that doesn’t fit. Often, Bissell uses specific belt numbers (e.g., Style 7, Style 9, Style 10) which makes identification easier.
- Tip: It’s a good idea to buy a pack of two or three belts. They are inexpensive, and you’ll have spares for future needs.
Basic Screwdrivers
Most Bissell vacuum cleaners use Phillips head screws. Some might have flathead screws, or occasionally Torx screws. Have a small set of screwdrivers handy.
Pry Tool or Flathead Screwdriver
A plastic pry tool or a thin flathead screwdriver can be useful for gently prying open covers without damaging the plastic.
Scissors or Knife (Optional)
These can help cut away any tangled hair or debris from the brush roll.
Cleaning Cloth and Rubbing Alcohol (Optional)
While you’re inside, it’s a great opportunity to clean dust and grime from the brush roll housing and brush roll itself.
Step-by-Step Guide to Changing Your Bissell Vacuum Belt
While specific steps might vary slightly depending on your Bissell model (e.g., upright, canister, stick vacuum), the general procedure for accessing and replacing the belt remains consistent. This guide focuses on common upright Bissell models like the PowerForce, CleanView, and Pet Hair Eraser series.
Step 1: Prepare Your Vacuum
Lay your unplugged Bissell vacuum cleaner down on its front side, exposing the underside where the brush roll is located. It’s best to do this on a clean, flat surface to prevent losing small screws.
Step 2: Access the Brush Roll Area
This is often the most varied step between models. You need to remove the plate that covers the brush roll and belt.
H3: For Models with a Removable Bottom Plate
Many Bissell uprights have a bottom plate secured by several Phillips head screws. Carefully locate and unscrew all of these screws. Keep them in a small container so they don’t get lost. Once all screws are removed, gently lift off the bottom plate.
- Example: Bissell PowerForce Helix models often have 6-8 screws holding the base plate.
- Tip: Take a photo with your phone before you start unscrewing. This gives you a visual reference for reassembly.
H3: For Models with a Brush Roll Cover/Door
Some Bissell models might have a hinged brush roll cover or a series of latches that need to be unclipped or rotated to open. Consult your user manual if you’re unsure.
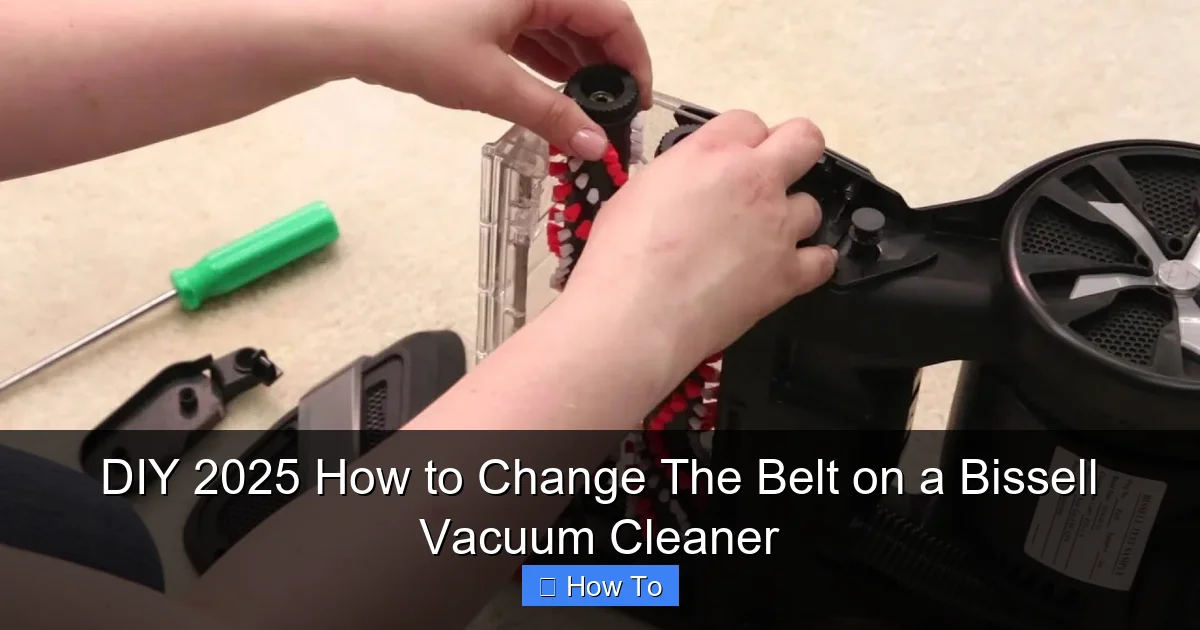
Step 3: Remove the Brush Roll
Once the bottom plate or cover is removed, you should see the brush roll. It will usually be held in place by end caps or slots. Gently lift the brush roll out of its housing. The old belt will likely be wrapped around one end of the brush roll and the motor shaft.
- Note: If the belt is broken, it might not be attached to anything and could simply fall out.
Step 4: Remove the Old Belt
If the old belt is still intact but stretched or cracked, carefully slide it off the motor shaft and then off the brush roll. If it’s broken, simply remove any remaining pieces. Take this opportunity to inspect the old belt and confirm you have the correct replacement.
- Important: If you notice a lot of hair, string, or debris wrapped around the brush roll or motor shaft, now is the perfect time to clean it thoroughly using scissors or a knife. This tangled debris can cause premature belt wear and reduce cleaning effectiveness. Use a cleaning cloth to wipe down the brush roll housing.
Step 5: Install the New Bissell Vacuum Belt
This step requires a little bit of tension and careful placement.
H3: Place the Belt on the Brush Roll
First, loop the new replacement belt around the groove on the brush roll. Ensure it sits snugly in the groove designed for it.
H3: Reinsert the Brush Roll into the Housing
Next, carefully place one end of the brush roll back into its slot in the vacuum’s base. Before seating the other end, stretch the new belt around the motor shaft. This can sometimes be a bit tricky, requiring you to stretch the belt while guiding the brush roll into place. The new belt will be tight, which is normal; it needs to be taut to create proper tension for the brush roll to spin.
- Tip: If the belt is very stiff, you can gently warm it slightly with your hands to make it more pliable, but avoid excessive heat.
- Ensure Proper Alignment: Make sure the belt is securely seated on both the brush roll groove and the motor shaft. The brush roll should spin freely by hand (even if a bit stiff with the new belt tension) when correctly installed.
Step 6: Reassemble Your Bissell Vacuum Cleaner
Now, it’s time to put everything back together in reverse order.
H3: Replace the Bottom Plate or Cover
Carefully align the bottom plate or brush roll cover over the brush roll housing. Make sure it sits flush. If you took a photo earlier, refer to it now.
H3: Secure the Screws or Latches
Insert and tighten all the screws you removed earlier. Do not overtighten, as this can strip the plastic. For latches, ensure they are securely clipped or rotated into place.
Step 7: Test Your Vacuum Cleaner
Once everything is reassembled, plug your Bissell vacuum cleaner back into an outlet. Turn it on. Listen and observe:
- Does the brush roll spin vigorously?
- Is there any unusual noise?
- Does it pick up debris effectively?
If everything looks and sounds normal, congratulations! You’ve successfully changed your Bissell vacuum belt.
Troubleshooting Common Issues
Sometimes, things don’t go perfectly the first time. Here are a few common problems and their solutions:
Brush Roll Not Spinning After Replacement
- Incorrect Belt Installation: The most common issue. Unplug the vacuum, reopen the brush roll area, and ensure the belt is correctly seated on both the brush roll and the motor shaft. It might have slipped off one or both.
- Wrong Belt Type: If the belt is too loose or too tight, it might be the wrong size or style for your Bissell model. Double-check your vacuum’s model number and the belt part number.
- Obstruction: Even with a new belt, hair or debris might still be lodged in the brush roll bearings or motor shaft, preventing spin. Clean thoroughly.
- Motor Issue: In rare cases, if the belt installation is perfect and there are no obstructions, the motor itself might be failing. This would typically present with other symptoms too, like the motor making no sound at all.
New Belt Breaks Quickly
- Underlying Obstruction: If your new belt snaps almost immediately, there might be a significant obstruction in the brush roll or a bearing that’s seized. Remove the brush roll and spin it by hand. If it doesn’t spin freely, there’s a blockage or a damaged bearing.
- Wrong Belt: A belt that is too small or thin for the model might experience excessive tension and break.
- Worn Motor Shaft: Less common, but a rough or damaged motor shaft can fray and snap belts.
Vacuum Still Has Poor Suction
- Not a Belt Issue: If the brush roll spins but suction is still poor, the problem might not have been the belt. Check for clogs in the hose, filters (are they clean?), the dirt cup (is it full or properly sealed?), or a cracked hose.
- Brush Roll Wear: Even with a new belt, if the bristles on your brush roll are severely worn down, they won’t agitate carpets effectively. Consider replacing the brush roll itself.
Conclusion: Empower Your DIY Skills
You’ve done it! By following this guide, you’ve not only replaced the belt on your Bissell vacuum cleaner but also gained valuable experience in appliance maintenance. This simple DIY repair saves you money, extends the life of your appliance, and gives you a great sense of accomplishment. Remember, regular maintenance, like checking your belt and cleaning filters, can keep your Bissell vacuum running efficiently for years to come. Enjoy your freshly rejuvenated vacuum and beautifully clean floors! Keep these skills in mind for other small household repairs in 2025 and beyond.
🎥 Related Video: Replacement Belts Bissell Review
📺 The Ancona Family
Amazon Link: https://urlgeni.us/amzn/XLyFI This is my review of Bissell Replacement Belts, 2 Count (Pack of 1), Model:32074.