Dreaming of a flexible, rewarding venture? This comprehensive guide shows you how to build a vacuum cleaner repair shop at home in 2025. You’ll learn essential steps from workspace setup and tool acquisition to mastering common repairs and attracting your first customers, transforming your passion into a profitable skill. Discover how to create a valuable service right from your own space.
Build Your Vacuum Cleaner Repair Shop at Home 2025
Welcome, aspiring entrepreneur and handy individual! Are you tired of throwing away perfectly good appliances just because a small part failed, or a minor issue made them stop working? Do you have a knack for fixing things and a desire to turn that skill into a profitable venture? If so, you’re in the right place! In 2025, building a vacuum cleaner repair shop at home is more accessible and potentially more rewarding than ever before.
This comprehensive guide will walk you through every essential step, from the initial planning stages and setting up your workspace to mastering complex repairs and attracting your first customers. You’ll learn about the tools you need, how to source parts, and the best practices for running your very own successful vacuum cleaner repair shop at home. Imagine the satisfaction of bringing a broken vacuum back to life, saving someone money, and earning a living doing something you enjoy, all from the comfort of your own home. Let’s get started on this exciting journey!
Key Takeaways
- Strategic Planning is Crucial: Before buying a single tool, assess your skills, research local demand, and define your niche to build a sustainable vacuum cleaner repair shop at home.
- Organized & Safe Workspace: Designate a specific area for your repairs, ensuring it’s well-lit, organized for efficiency, and adheres to strict safety protocols for electrical work and fire prevention.
- Invest in Essential Tools & Parts: Acquire both basic hand tools and specialized diagnostic equipment. Stocking common replacement parts like belts, filters, and bags is vital for quick turnarounds.
- Master Repair Techniques: Dedicate time to learning vacuum cleaner anatomy, common fault diagnostics, and hands-on repair methods through practice and reliable resources.
- Effective Sourcing & Inventory Management: Establish relationships with reputable parts suppliers and maintain a smart inventory to ensure you always have what you need without overstocking.
- Smart Marketing & Customer Service: Even for a home-based business, word-of-mouth, a simple online presence, clear pricing, and exceptional service are key to attracting and retaining clients.
- Legal & Professional Conduct: Understand any local regulations, set fair prices, offer warranties, and always maintain a professional demeanor to build trust and a good reputation for your vacuum cleaner repair shop at home.
Quick Answers to Common Questions
Start Small?
Absolutely! You don’t need a massive investment or a dedicated commercial space from day one. Begin with basic tools, repair your own items, then offer services to friends and family. This low-risk approach allows you to learn and grow your vacuum cleaner repair shop at home gradually.
Document Everything?
Yes, keep detailed notes on every repair, including the model, serial number, problem, parts used, and steps taken. This documentation is invaluable for future reference, warranty tracking, and improving your diagnostic skills for your vacuum cleaner repair shop at home.
Prioritize Safety?
Always! You’ll be working with electrical components and moving parts. Ensure your workspace is well-lit, clean, and always unplug machines before performing repairs. Invest in proper safety gear like gloves and safety glasses to protect yourself while operating your vacuum cleaner repair shop at home.
Network Locally?
Connecting with other local businesses, even non-competitors like cleaning services or small appliance stores, can lead to referrals and valuable insights. Building a local reputation is crucial for a successful home-based vacuum cleaner repair shop at home.
Specialize Early?
While not mandatory, choosing to specialize in certain brands (e.g., Dyson, Kirby, or robotic vacuums) or types of repairs can make you an expert in a niche market. This can simplify your tool and parts inventory and help you stand out as a premier vacuum cleaner repair shop at home.
Step 1: Laying the Foundation – Mindset & Planning
Before you even think about buying a wrench, it’s crucial to lay a solid foundation. This involves self-assessment, market research, and a basic business plan. Thinking through these steps will ensure your vacuum cleaner repair shop at home starts off on the right foot.
Assess Your Skills & Passion
Be honest with yourself: do you enjoy tinkering? Are you patient when faced with a stubborn problem? Fixing vacuum cleaners requires attention to detail, diagnostic skills, and a willingness to learn. If you already enjoy DIY projects or have fixed electronics before, you’re ahead of the game. Your passion will be your biggest motivator when challenges arise.
Research Your Local Market & Demand
Take a look around your community. Are there existing vacuum cleaner repair shops? Are they busy, or do people complain about lack of service? Websites like Nextdoor, local Facebook groups, or even a simple Google search for “vacuum repair near me” can give you insights. Consider talking to local appliance stores or cleaning services – they often know where people go for repairs. Understanding the demand will help you tailor your services for your future vacuum cleaner repair shop at home.
Define Your Niche
You don’t have to fix every vacuum cleaner under the sun. Perhaps you want to specialize in high-end brands like Dyson or Miele, or maybe you’ll focus on vintage models or commercial units. Specializing can make you the go-to expert and simplify your parts inventory. Defining your niche early will help shape your vacuum cleaner repair shop at home.
Create a Simple Business Plan
Even if it’s just a few bullet points, outline your goals. What services will you offer? How will you price them? Who are your ideal customers? How will you market your vacuum cleaner repair shop at home? This plan can evolve, but a starting point is invaluable.
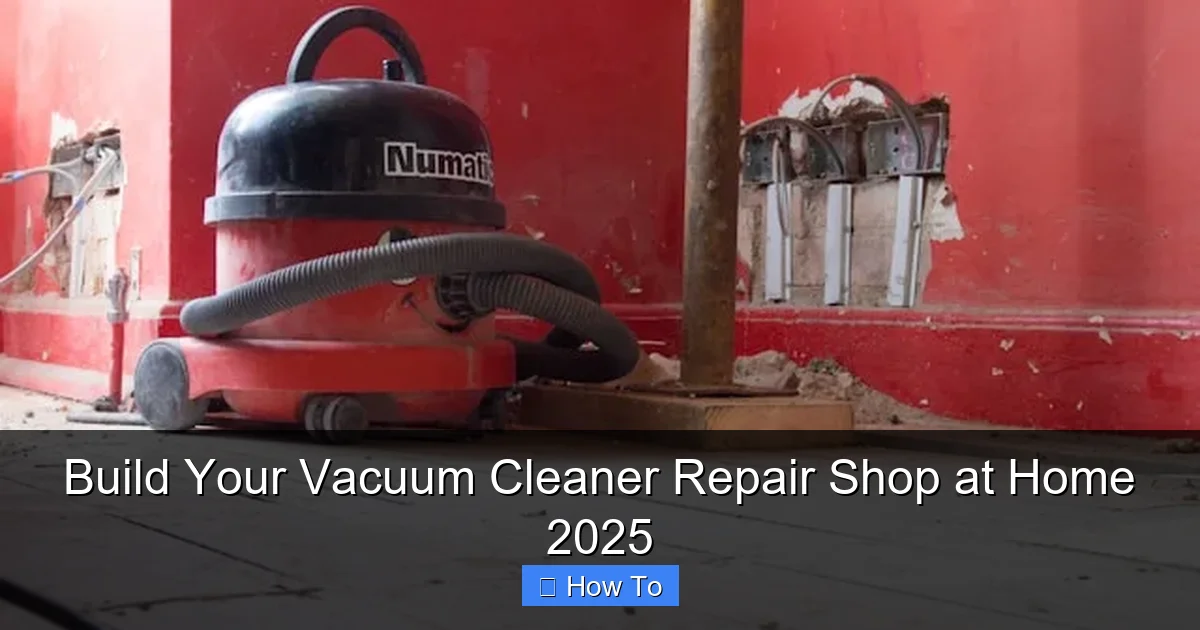
Step 2: Setting Up Your Workspace

Visual guide about Build Your Vacuum Cleaner Repair Shop at Home 2025
Image source: homenias.com
Your repair area is the heart of your vacuum cleaner repair shop at home. It needs to be functional, organized, and, most importantly, safe.
Choose the Right Location
A garage, basement, or even a dedicated corner of a spare room can work. The ideal spot should have good lighting, access to electrical outlets, and enough space for a workbench and storage. Consider noise levels – some vacuum repairs can be noisy, so choose a spot that won’t disturb your household or neighbors.
Organize for Efficiency
A cluttered workspace leads to lost tools and frustration. Invest in a sturdy workbench, shelving units, and storage bins. Pegboards are excellent for keeping frequently used tools visible and accessible. Label everything! Think about the workflow: where will you receive units, diagnose them, repair them, and store completed jobs? An efficient setup makes running your vacuum cleaner repair shop at home much smoother.
Ensure Safety First
You’ll be working with electricity, small parts, and sometimes powerful motors.
- Ventilation: Some cleaning solvents or motor dust can be irritating. Ensure good airflow.
- Lighting: Bright, shadow-free lighting is essential for intricate work. Consider a combination of overhead and task lighting.
- Power Safety: Use surge protectors, check electrical cords for damage, and always unplug units before working on them. Understand basic electrical safety.
- Fire Safety: Keep a fire extinguisher (rated for electrical fires) nearby.
- Personal Protective Equipment (PPE): Safety glasses and gloves are a must. A dust mask is also advisable when dealing with vacuum cleaner dust.
Step 3: Essential Tools & Equipment
You can’t build a successful vacuum cleaner repair shop at home without the right tools. Start with the basics and expand as your skills and services grow.
Basic Hand Tools
These are your bread and butter:
- Screwdriver Set: Phillips, flathead, Torx, and hex bits (many vacuums use specialty screws).
- Pliers: Needle-nose, slip-joint, and cutting pliers.
- Wire Strippers/Cutters: Essential for electrical repairs.
- Utility Knife: For cutting belts, opening packaging.
- Multimeter: Crucial for testing continuity, voltage, and resistance in electrical circuits.
- Allen Wrenches/Hex Key Set: For various fasteners.
- Small Hammer/Mallet: For gentle persuasion.
Specialized Vacuum Tools
Some tools are specific to vacuum repair:
- Belt Tension Tester: Ensures new belts are installed correctly.
- Motor Brush Extractor: Helps remove worn motor brushes.
- Hose/Tube Cleaning Brushes: For clearing clogs.
- Compressed Air Can/Air Compressor: Excellent for dusting out motors and internal components.
- Small Vacuum/Shop-Vac: To keep your workspace clean.
- Test Stand (Optional but helpful): A simple stand to hold a vacuum upright for testing and repair.
Cleaning & Maintenance Supplies
Don’t forget these:
- Degreaser/Cleaner: For stubborn grime.
- Lubricants: Silicone grease for gears, light oil for motor bearings (check manufacturer specs).
- Rubbing Alcohol/Contact Cleaner: For electrical contacts.
- Microfiber Cloths: For cleaning and polishing.
- Small Brushes: Toothbrushes or detailing brushes for intricate cleaning.
Diagnostic Equipment
Beyond the multimeter:
- Power Supply with Variable Voltage (Optional): For testing motors or components independently.
- Soldering Iron & Solder: For minor electrical repairs.
Inventory of Common Parts
Having common parts on hand speeds up repairs significantly. Start with:
- Vacuum Bags & Filters: For popular models.
- Belts: A range of common sizes/types.
- Fuses: Various amp ratings.
- Small Fasteners: Screws, clips, washers.
- Motor Brushes: For common motor types.
- Power Cords: Universal replacement cords.
This initial investment in tools and parts is key to a functioning vacuum cleaner repair shop at home.
Step 4: Mastering Repair Techniques
Knowledge is power, especially when it comes to diagnostics and repair. This is where your vacuum cleaner repair shop at home truly takes shape.
Understanding Vacuum Cleaner Anatomy
Learn the basic components: motor, brush roll, fan, filters, bags/canister, hose, and electrical system. Knowing how each part works individually and collectively is the first step to effective troubleshooting. Look for diagrams online or find old vacuums to disassemble and study.
Common Problems & Solutions
You’ll encounter these frequently:
- No Power: Check cord, fuse, power switch, motor brushes, thermal cutoff.
- Poor Suction: Inspect for clogs in hose/attachments, full bag/canister, dirty filters, loose hose connections, cracks in housing, worn fan, or motor issues.
- Strange Noises/Burning Smell: Often indicates a jammed brush roll, worn motor bearings, or a failing motor.
- Brush Roll Not Spinning: Check belt (broken/stretched), brush roll obstruction (hair/debris), motor issues, or switch problems.
Step-by-Step Disassembly & Reassembly
Practice taking vacuums apart and putting them back together. Document the process with photos or notes. Pay attention to screw types, clip locations, and wire routing. The ability to reverse engineer is crucial.
Electrical Diagnostics & Safety
Use your multimeter to test for continuity, voltage, and resistance. Always unplug the unit before opening it up. Understand how to safely discharge capacitors (though less common in older vacs, crucial for some newer electronics). Safety around electricity cannot be overstated in your vacuum cleaner repair shop at home.
Motor & Brush Roll Maintenance
These are often the culprits for major failures. Learn how to clean brush rolls, replace worn bearings, and change motor brushes. These repairs can significantly extend a vacuum’s life.
Practical Hands-On Practice
Start with your own old vacuum, or ask friends and family if they have broken ones you can practice on. YouTube tutorials, online forums, and service manuals (often found on manufacturers’ websites or third-party sites) are invaluable resources for your vacuum cleaner repair shop at home.
Step 5: Sourcing Parts & Suppliers
Reliable access to parts is essential for efficient repairs.
Online Retailers & Wholesalers
Websites like Amazon, eBay, and specialized appliance parts sites (e.g., searspartsdirect.com, app.com, encompassparts.com) are great resources. Look for wholesale accounts as your volume increases.
Local Appliance Parts Stores
Don’t underestimate local businesses. They often have hard-to-find parts or can order them quickly. Building relationships here can be very beneficial for your vacuum cleaner repair shop at home.
Salvaging Parts (Ethical Considerations)
Sometimes, a specific part is obsolete or too expensive new. Keeping a “graveyard” of non-repairable vacuums for salvageable parts can be cost-effective. However, only use functional parts, clean them thoroughly, and be transparent with your customers if you use recycled components.
Building Supplier Relationships
Good relationships can lead to better pricing, faster shipping, and expert advice. Always pay on time and be courteous.
Step 6: Marketing Your Home Repair Shop
Even if you start small, people need to know your vacuum cleaner repair shop at home exists!
Word-of-Mouth & Local Networking
Your best advertising is a happy customer. Ask satisfied clients to spread the word. Engage with local community groups, attend neighborhood events, and let friends and family know about your services.
Simple Online Presence
- Google Business Profile: Essential for local searches. List your services, hours, and contact info.
- Social Media: A simple Facebook or Instagram page can showcase your work (before/after photos are great!) and connect with the community.
- Local Listings: Sites like Yelp, Yellow Pages, and local directories can boost visibility.
Clear Pricing & Service Offerings
Be transparent about your repair costs (e.g., flat fee for diagnostics, hourly rate + parts). Clearly list what types of vacuums you service and what kinds of repairs you offer.
Excellent Customer Service
Be friendly, professional, and communicative. Provide realistic timelines and keep customers updated. A positive experience encourages repeat business and referrals, which is invaluable for a home-based vacuum cleaner repair shop at home.
Step 7: Legalities, Pricing & Professionalism
As your vacuum cleaner repair shop at home grows, these aspects become more important.
Understanding Local Regulations
Depending on your locality, you might need a home business permit or to register your business name. Check with your city or county clerk’s office. This ensures your vacuum cleaner repair shop at home operates legally.
Setting Fair & Competitive Prices
Research what other repair shops charge. Factor in your time, parts cost, overhead (even for a home business, there are electricity costs, tools depreciation, etc.), and your desired profit margin. Be confident in your pricing, reflecting the value you provide.
Warranties & Guarantees
Offer a reasonable warranty on your labor and the parts you install (e.g., 30-90 days). This builds customer trust and demonstrates confidence in your work.
Maintaining Professionalism
Even though it’s a home business, maintain professional communication, keep your workspace tidy (especially when customers visit for drop-offs/pick-ups), and deliver on your promises. A professional approach elevates your vacuum cleaner repair shop at home.
Troubleshooting Common Home Shop Hurdles
Even with the best planning, you might encounter challenges.
“My repair isn’t working as expected!”
- Double-Check: Go back through your steps. Did you miss a connection? Is a part installed backward?
- Diagnose Again: Re-test components. Could another issue have been masked by the first one?
- Consult Resources: Check online forums, service manuals, or YouTube videos for similar problems. Don’t be afraid to ask for help from experienced repair technicians online.
“I can’t find the right part for this obscure model.”
- Expand Your Search: Check more suppliers, both online and local.
- Cross-Reference: Sometimes parts are interchangeable between models or even brands. Use part numbers to search for alternatives.
- Salvage: If ethical and transparent, a salvaged part might be the only option.
- Inform Customer: Be honest if a part is unavailable or excessively expensive. Offer alternatives if possible.
“How do I deal with difficult customers?”
- Listen Actively: Let them voice their concerns without interruption.
- Empathize: Acknowledge their frustration.
- Stay Calm & Professional: Don’t get defensive. Stick to the facts.
- Offer Solutions: Propose a fair resolution, adhering to your warranty policy.
- Know When to Say No: Sometimes, declining service for an unreasonable customer is the best decision for your peace of mind and business reputation.
Conclusion
Building a vacuum cleaner repair shop at home in 2025 is an exciting and achievable goal. It offers the flexibility of working from home, the satisfaction of fixing things, and the potential for a steady income. By carefully planning your setup, acquiring the right tools, continuously honing your repair skills, and prioritizing excellent customer service, you can create a thriving home-based business. Remember, every expert started as a beginner. With dedication, patience, and a willingness to learn, you’ll be successfully repairing vacuums and serving your community in no time. Good luck on your journey to becoming a trusted vacuum cleaner repair specialist right from your own home!
🎥 Related Video: Life Hack for your Shop Vac
📺 The Danny Jewkes Piano Company