This 2025 easy repair guide empowers you to fix your vacuum cleaner yourself, saving time and money. Learn to diagnose and resolve common issues like lost suction, non-spinning brush rolls, and power problems with clear, step-by-step instructions. We’ll cover everything from simple clogs and filter changes to belt replacements, ensuring you can get your vacuum working like new again efficiently and safely.
How Do You Fix a Vacuum Cleaner 2025 Easy Repair Guide
Is your vacuum cleaner losing suction? Is the brush roll no longer spinning? Or worse, is it refusing to turn on at all? Don’t rush out to buy a new one just yet! In 2025, with a little know-how and some basic tools, you can often fix a vacuum cleaner yourself. This comprehensive guide will walk you through the most common vacuum cleaner problems and provide easy, step-by-step solutions. You’ll save money, reduce waste, and gain a satisfying sense of accomplishment.
Learning how to fix a vacuum cleaner is a valuable skill. Many issues that seem daunting are actually quite simple to resolve. From clearing stubborn clogs to replacing a worn-out belt, we’ll show you exactly what to do. Let’s get your vacuum working like new again!
Key Takeaways
- Safety First: Always unplug your vacuum cleaner before attempting any inspection or repair to prevent electric shock or injury.
- Common Problems, Simple Solutions: Many vacuum issues like poor suction, strange noises, or a non-spinning brush roll are often caused by easily fixable clogs, dirty filters, or a worn belt.
- Systematic Troubleshooting: Start with the simplest checks – power supply, dustbin/bag, filters, and hose – before moving to more complex areas like the brush roll or belt.
- Regular Maintenance is Key: Cleaning filters, clearing brush rolls, and checking the hose regularly can prevent most problems and extend your vacuum’s lifespan.
- Empowerment and Savings: Learning to diagnose and fix common vacuum issues yourself saves money on professional repairs or buying a new unit, giving you confidence and practical skills.
- Know Your Limits: While many repairs are DIY-friendly, some motor or electrical problems might require a professional. Don’t hesitate to seek expert help if you’re unsure or uncomfortable.
Quick Answers to Common Questions
Unplug Before Anything Else?
Absolutely! Always unplug your vacuum cleaner from the electrical outlet before attempting any inspection, cleaning, or repair. This is the most crucial safety step to prevent electric shock or accidental startup.
What’s the #1 Cause of Poor Suction?
The most common culprit for lost suction is a full dustbin/bag or clogged filters. Always check these first, as they are often the easiest and quickest fixes to restore your vacuum’s performance.
How Do I Clear Hair from the Brush Roll Effectively?
Turn the vacuum over (unplugged!), and use a pair of small scissors or a seam ripper to carefully cut through tangled hair and fibers. Be gentle to avoid damaging the bristles or the belt.
When Should I Replace the Vacuum Belt?
Replace your vacuum’s drive belt if it’s broken, appears stretched or loose, or shows signs of cracking or fraying. A worn belt can cause the brush roll to spin inefficiently or not at all, leading to poor cleaning.
Can a Small Obstruction Cause Big Problems?
Yes! Even a small coin, paper clip, or piece of plastic can create a significant clog in the hose, wand, or brush roll housing, leading to a dramatic loss of suction or strange rattling noises. Always check all potential pathways.
Safety First: Always Unplug Your Vacuum!
Before you begin any inspection or repair, the absolute most important step is to ensure your vacuum cleaner is unplugged from the wall outlet. This prevents electric shock and accidental starts, keeping you safe throughout the process. It’s a non-negotiable rule when you set out to repair your vacuum cleaner.
Diagnosing the Problem: What’s Your Vacuum Doing (or Not Doing)?
Understanding the symptom is the first step to a successful repair. What exactly is going wrong? Identifying the specific issue will help you target your troubleshooting efforts. Here are the most common complaints:
Visual guide about How Do You Fix a Vacuum Cleaner 2025 Easy Repair Guide
Image source: i.ytimg.com
- No Power: The vacuum doesn’t turn on at all.
- Poor Suction: It’s picking up dirt, but not very well, or leaving debris behind.
- Brush Roll Not Spinning: The rotating brush on the bottom isn’t moving, even though the motor is running.
- Strange Noises: Grinding, whining, rattling, or unusually loud operation.
- Burning Smell: A distinct odor like burning rubber or plastic.
- Overheating: The vacuum gets unusually hot during use.
Once you’ve identified the main symptom, you can follow our targeted steps below to fix your vacuum cleaner.
Step-by-Step Repair Guide for Common Issues
Let’s dive into fixing those common vacuum cleaner problems. Remember, take your time and follow each step carefully.
No Power? Start Here!
If your vacuum won’t turn on, it’s usually an electrical issue, but often a simple one.
Check the Power Outlet and Circuit Breaker
First, make sure the outlet itself is working. Plug another appliance into the same outlet. If that appliance doesn’t work either, check your home’s circuit breaker panel. A tripped breaker is a common cause of no power.
Inspect the Power Cord and Plug
Carefully examine the entire length of the power cord for any cuts, frays, or damage. Check the plug for bent prongs or signs of scorching. A damaged cord or plug can prevent power from reaching the motor. If you find damage, it’s best to have a qualified electrician replace the cord or, in some cases, consider replacing the vacuum if the repair cost is high.
Test the On/Off Switch
Sometimes, the switch itself can fail. While harder to test without specialized tools, if you’ve ruled out all other power issues, a faulty switch might be the culprit. This usually requires disassembly and a multimeter, so if you’re not comfortable, this might be a point to call a professional.
Lost Suction? Let’s Find It!
Poor suction is one of the most frequent complaints. Most times, it’s a clog or a filter issue.
Empty the Dustbin or Replace the Bag
This might seem obvious, but a full dustbin or bag is the number one cause of lost suction. Even if it’s not completely full, a densely packed bag can restrict airflow. Empty your bagless canister or replace your full bag.
Clean or Replace Filters
Vacuum cleaners rely on clean filters to maintain proper airflow. Clogged filters are a very common reason for poor suction and can even cause your vacuum to overheat. Most modern vacuums have multiple filters: a pre-motor filter (often foam or felt, sometimes washable) and a post-motor/HEPA filter (usually not washable, requires replacement).
- Washable Filters: Remove them according to your manual. Rinse them under cool water until the water runs clear. IMPORTANT: Let them air dry completely for at least 24-48 hours before putting them back in. Using a damp filter can damage the motor.
- Non-Washable Filters: Tap them gently over a trash can to dislodge dust. If they are heavily soiled or discolored, it’s time to replace them. Check your vacuum’s manual for the correct replacement part number.
Inspect the Hose for Clogs
A blockage in the hose is another prime suspect for poor suction. Detach the hose from both ends of the vacuum.
- Visual Check: Look through the hose to see if you can spot any obstructions.
- Physical Check: Carefully push a broom handle or a long, blunt object through the hose to dislodge any debris. Be gentle to avoid puncturing the hose. You can also try using a shop-vac to suction out the clog from the opposite end.
Check the Wand and Attachments
Just like the main hose, clogs can form in extension wands or smaller attachments. Disconnect them and check for blockages. Use the same broom handle trick or a thin wire to clear them.
Examine the Inlet Opening and Brush Roll Housing
Large pieces of debris can get stuck where the hose connects to the vacuum body or in the pathway leading to the dustbin. Turn the vacuum over (after unplugging it!) and look into the opening where dirt enters from the brush roll area. Clear any visible blockages. Also, remove the bottom plate of the brush roll housing (often held by a few screws) and check for clogs there.
Brush Roll Not Spinning? Get It Moving!
A non-spinning brush roll means your vacuum isn’t agitating carpet fibers, severely impacting cleaning effectiveness. This is a common issue you can often fix yourself.
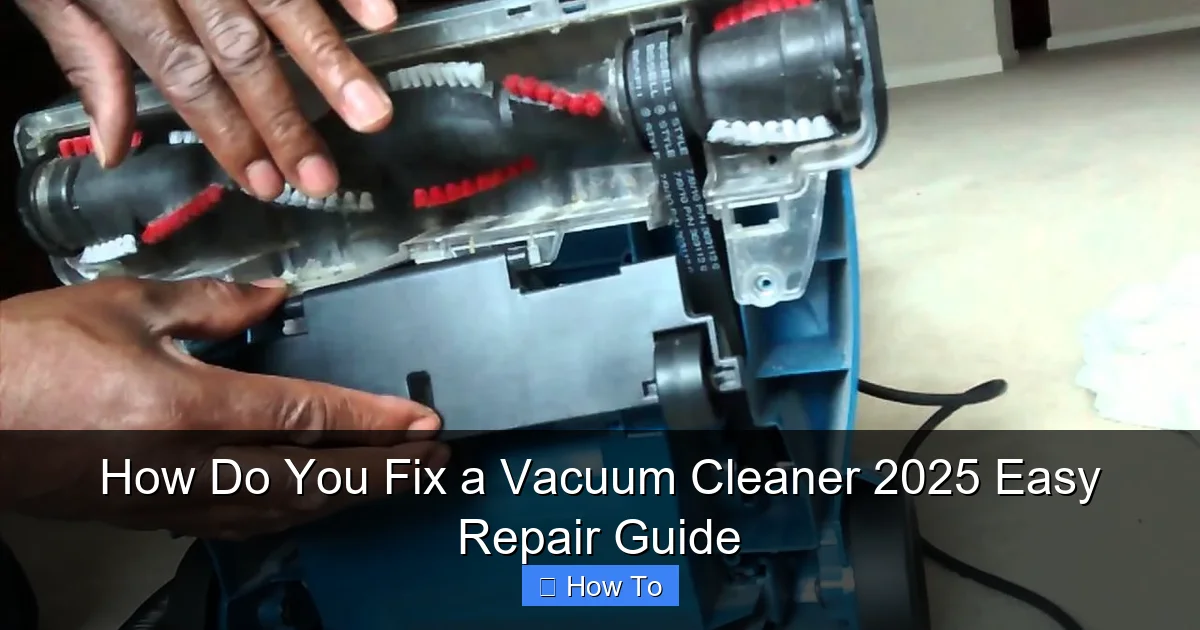
Clear Hair and Debris from the Brush Roll
Hair, thread, and carpet fibers frequently wrap around the brush roll, preventing it from turning. Turn the vacuum over and carefully cut away any tangled material using scissors or a seam ripper. Be careful not to cut the bristles or the belt. Once cleared, manually spin the brush roll to ensure it moves freely.
Inspect and Replace the Drive Belt
Many upright and some canister vacuums use a rubber belt to transfer power from the motor to the brush roll. Over time, these belts can stretch, slip, or break. To check the belt:
- Access the Belt: You’ll usually need to remove the bottom plate of the brush roll housing (often secured by screws).
- Examine the Belt: Look for a broken, stretched, or loose belt. If it’s broken, you’ll see two pieces. If it’s stretched, it might just slip off the motor shaft or brush roll pulley easily.
- Replace the Belt: Note how the old belt was routed. Remove it. Take the old belt to a vacuum store or look up your vacuum model online to find the correct replacement. Loop the new belt around the motor shaft first, then around the brush roll, and stretch it into place. Ensure it’s centered and snug. Replace the bottom plate.
Check for Brush Roll Obstructions or Damage
After clearing the hair and checking the belt, try spinning the brush roll by hand. Does it turn freely? If it feels stiff, there might be internal damage to the brush roll bearings, or something small could be wedged deep inside the housing. If the brush roll itself is bent or severely damaged, it may need to be replaced.
Strange Noises or Smells? Investigate!
Unusual noises or smells are warning signs that something isn’t right inside your vacuum cleaner.
Rattling or Clicking Noises
These sounds often indicate that something small has been sucked up and is rattling around inside the hose, brush roll housing, or even the fan chamber. Disassemble and check all pathways for small objects like coins, paper clips, or small toys. These can also cause clogs and reduce suction.
Whining or Grinding Noises
A high-pitched whine can sometimes be caused by a partially blocked airway, forcing the motor to work harder. Check for clogs again. A grinding noise, however, could indicate a problem with the motor bearings or fan. If the motor is making a significant grinding sound, it’s often a sign of impending motor failure, and professional repair or replacement might be necessary.
Burning Smell (Rubber)
This almost always points to a problem with the brush roll belt.
- The belt is slipping because it’s stretched or loose (causes friction and heat).
- The brush roll is jammed, causing the motor to try and spin the belt, burning the rubber.
Check the brush roll for tangles and inspect the belt for damage, slippage, or if it has come off. Replace the belt if it’s worn or broken. Clear any obstructions that might be preventing the brush roll from turning.
Burning Smell (Electrical/Plastic)
An electrical burning smell is more serious. This could indicate an overheating motor, a wiring issue, or a component failure. If you smell this, immediately unplug the vacuum. Do NOT continue to use it. This often requires professional diagnosis or indicates that the vacuum is beyond economical repair. Safety first!
Overheating
If your vacuum gets unusually hot, it’s usually due to reduced airflow, forcing the motor to work harder.
- Clogged Filters: Clean or replace all filters.
- Blocked Hose or Airway: Check for clogs in the hose, wand, and brush roll housing.
- Full Bag/Dustbin: Ensure it’s empty or replaced.
- Motor Issues: If all airways are clear and filters are clean, and it still overheats, the motor might be failing. This is a job for a professional.
Preventative Maintenance: Keep Your Vacuum Running Smoothly
The best way to fix a vacuum cleaner is to prevent it from breaking in the first place! Regular maintenance significantly extends the life of your appliance.
- Empty Dustbin/Replace Bag Regularly: Don’t wait until it’s overflowing. Aim to do this after every few uses, or when about two-thirds full.
- Clean or Change Filters Periodically: Check your manual for recommendations, but generally, washable filters should be rinsed every 1-3 months, and non-washable ones replaced every 6-12 months, depending on usage.
- Clear Brush Roll Frequently: After every few uses, turn your vacuum over and snip away hair and debris from the brush roll. This prevents clogs and belt strain.
- Inspect Hose and Attachments: Periodically check for hidden clogs, especially if you’ve been vacuuming up larger debris.
- Check the Belt: If your vacuum has a belt, inspect it annually for signs of wear, stretching, or cracks. Replace it proactively if it looks worn.
- Wipe Down Exterior: Keep the outside clean to prevent dust from entering vents and affecting cooling.
When to Call a Professional
While many vacuum cleaner repairs are DIY-friendly, some situations warrant professional help. Don’t hesitate to call an expert if:
- You suspect a major electrical fault (e.g., strong burning smell, sparks).
- The motor sounds severely damaged (grinding, loud screeching) and you’ve ruled out clogs.
- You need to replace internal components that require advanced disassembly or soldering.
- You’re uncomfortable performing a specific repair, or you lack the necessary tools.
- Your vacuum is still under warranty – attempting DIY repairs might void it.
A professional can safely diagnose and repair complex issues, ensuring your vacuum cleaner is fixed correctly and safely.
Conclusion: Empower Yourself to Fix Your Vacuum Cleaner
Congratulations! By following this 2025 easy repair guide, you’re now equipped to diagnose and fix many common vacuum cleaner problems. You’ve learned how to tackle issues from no power and lost suction to a non-spinning brush roll and strange noises. Remember the importance of safety, systematic troubleshooting, and regular maintenance.
Taking the time to repair your vacuum cleaner not only saves you money but also empowers you with practical skills and contributes to a more sustainable lifestyle by extending the life of your appliances. So, the next time your vacuum acts up, don’t despair – grab your tools and get ready to fix it yourself!
🎥 Related Video: EUREKA FORBES Vacuum Cleaner ✅ Only at 3499/-💥Top Quality Cleaner👍 #vacuumcleaner #eurekaforbes
📺 Unikk Nazz
EUREKA FORBES Vacuum Cleaner ✓ Only at 3499/- Top Quality Cleaner #vacuumcleaner #eurekaforbes.