Charging a cordless vacuum cleaner properly is key to its performance and lifespan. Always use the manufacturer’s charger and follow instructions for your specific model. Most modern cordless vacuum cleaners use lithium-ion batteries and charge via a wall-mounted dock, freestanding station, or direct plug-in. Understanding indicator lights and best practices like avoiding extreme temperatures can significantly extend battery health.
Ah, the cordless vacuum cleaner! It’s one of those modern conveniences that just makes life easier, isn’t it? No more tripping over cords, no more searching for an outlet in every room. You just grab it, clean, and go. But like any superhero with amazing powers, your cordless vacuum cleaner needs a reliable power source to perform its best. And that brings us to a crucial question: “How do you charge a cordless vacuum cleaner?”
It might seem like a simple plug-and-play task, but there’s a bit more to it if you want to ensure optimal performance, extend the lifespan of your battery, and avoid common pitfalls. Understanding the ins and outs of charging isn’t just about getting power; it’s about smart maintenance. In this comprehensive guide, we’ll dive deep into everything you need to know about charging your beloved cordless vacuum cleaner, from the basic steps to advanced battery care and troubleshooting tips. Let’s make sure your cleaning buddy is always ready for action!
Key Takeaways
- Use the Correct Charger: Always use the charger supplied by the manufacturer or a certified replacement specific to your cordless vacuum cleaner model to prevent damage and ensure safety.
- Understand Charging Indicators: Familiarize yourself with your vacuum’s LED lights or display, which communicate charging status, battery level, and completion.
- Initial Full Charge is Crucial: For the first use or after a long storage, give your new cordless vacuum cleaner a full, uninterrupted charge as recommended by the manufacturer.
- Optimize Battery Health: While modern lithium-ion batteries are robust, avoid storing your cordless vacuum cleaner in extreme temperatures and try not to let it fully discharge before recharging if possible.
- Troubleshoot Common Issues: If your cordless vacuum cleaner isn’t charging, check the power outlet, connections, and the charger itself. Sometimes a simple reset or cleaning contacts can resolve the problem.
- Know When to Replace: When battery runtime significantly diminishes despite proper charging, it might be time to replace the battery. Look for compatible, genuine replacement parts.
- Store Safely: If storing your cordless vacuum cleaner for an extended period, charge it to about 40-60% capacity and keep it in a cool, dry place away from direct sunlight.
Quick Answers to Common Questions
How often should I charge my cordless vacuum cleaner?
You should charge your cordless vacuum cleaner whenever its battery is low or after each use, especially if you anticipate needing it again soon. Modern lithium-ion batteries benefit from frequent, short charges rather than deep discharges.
Can I leave my cordless vacuum cleaner on the charger all the time?
Most modern cordless vacuum cleaners with lithium-ion batteries have smart charging systems that prevent overcharging, so it’s generally safe to leave them on the charger. However, for long-term storage (weeks or months), it’s best to charge to 40-60% and remove it from the charger.
What is the ideal temperature for charging a cordless vacuum cleaner battery?
The ideal temperature range for charging a cordless vacuum cleaner battery is typically between 50°F and 86°F (10°C and 30°C). Avoid charging in very hot or very cold environments, as this can stress the battery.
My cordless vacuum cleaner isn’t charging, what’s the first thing I should check?
First, ensure the wall outlet is working by plugging in another appliance. Then, check that the charging cable is securely plugged into both the wall adapter and the cordless vacuum cleaner or its charging dock.
How long does it take to fully charge a cordless vacuum cleaner?
The charging time for a cordless vacuum cleaner can vary significantly by model and battery capacity, typically ranging from 2 to 5 hours for a full charge. Always refer to your specific model’s user manual for exact charging times.
📑 Table of Contents
Understanding Your Cordless Vacuum’s Power Source
Before we even plug anything in, it’s a good idea to understand what makes your cordless vacuum cleaner tick. Most modern cordless models rely on advanced battery technology to deliver powerful suction without the need for a tether.
Types of Batteries Used in Cordless Vacuum Cleaners
The vast majority of contemporary cordless vacuum cleaners, especially those from popular brands like Dyson, Shark, Tineco, and Eufy, use lithium-ion (Li-ion) batteries. These batteries are superstars for a reason:
- High Energy Density: They pack a lot of power into a small, lightweight package.
- No “Memory Effect”: Unlike older nickel-cadmium (NiCd) batteries, Li-ion batteries don’t need to be fully discharged before recharging to maintain their capacity. You can top them up whenever you want.
- Slow Self-Discharge: They hold their charge well when not in use.
While some older or more budget-friendly models might still use Nickel-Metal Hydride (NiMH) batteries, Li-ion is the dominant and preferred technology today for cordless vacuum cleaners.
Battery Life and Runtime Expectations
The runtime of a cordless vacuum cleaner varies greatly depending on the model, power setting, and specific task. A full charge might give you anywhere from 15 minutes on max power to 60 minutes on an eco setting. It’s important to remember that battery capacity naturally degrades over time and with hundreds of charge cycles. What was once a 40-minute run might become 25 minutes after a couple of years of heavy use. Knowing this helps set realistic expectations for when it might be time for a battery replacement.
Identifying Your Charger Type
Every cordless vacuum cleaner comes with its own specific charging setup. You’ll typically encounter one of three main types:
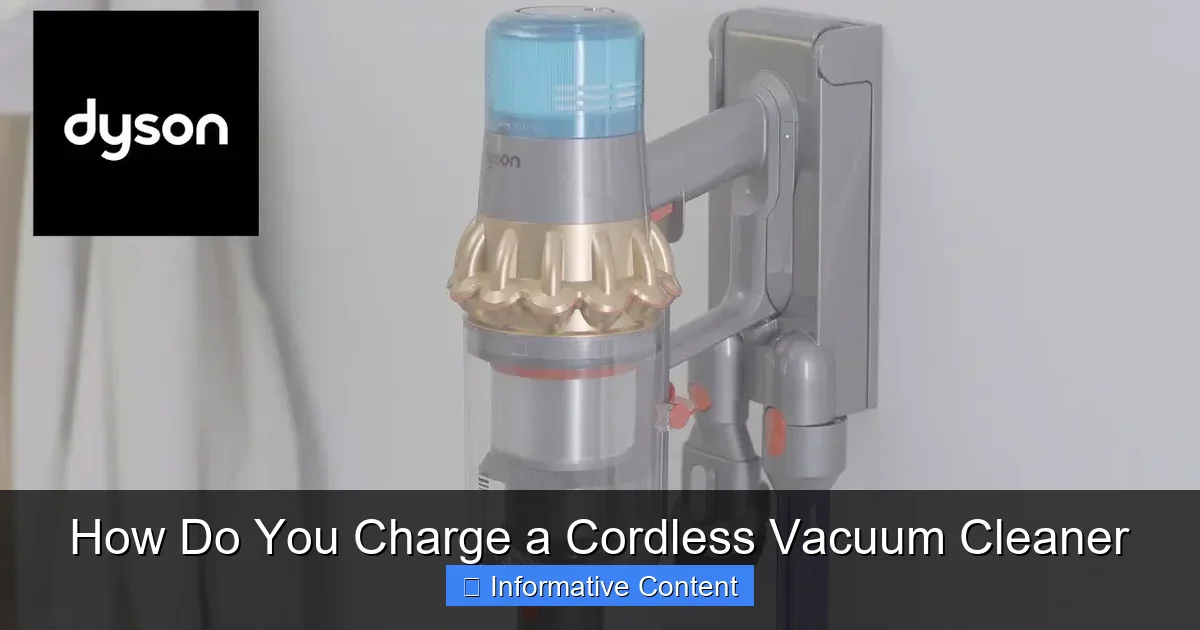
- Wall-Mounted Dock: Many stick vacuums come with a dock that screws into your wall. You simply hang your cordless vacuum cleaner on it, and it automatically connects to the charging pins. This is neat for storage and charging in one spot.
- Freestanding Charging Station: Some models use a base that sits on the floor. You place the vacuum cleaner into this station, and it charges. This offers more flexibility if you don’t want to drill into walls.
- Direct Plug-In Charger: With this method, you directly plug the charger’s barrel connector into a port on the vacuum cleaner itself, often near the handle or battery pack. This is common for handheld cordless vacuum cleaners or models with removable batteries.
Always check your user manual to confirm which type of charger your specific cordless vacuum cleaner uses.
The Step-by-Step Charging Process

Visual guide about How Do You Charge a Cordless Vacuum Cleaner
Image source: i.ytimg.com
Now that we know the basics, let’s get down to the actual charging. It’s usually straightforward, but a quick refresh never hurts!
Locating the Charging Port or Dock
First things first, find where your cordless vacuum cleaner connects to its power source.
- If you have a wall-mounted or freestanding dock, simply align your vacuum cleaner with the charging contacts on the dock. It should click securely into place.
- If it’s a direct plug-in, look for a small circular port on the battery pack or main body of your cordless vacuum cleaner. It’s usually covered by a small rubber flap or is easily visible.
Connecting the Charger
Once you’ve located the port or dock, here’s how to connect everything:
- Plug the Adapter into the Wall: Take the power adapter that came with your cordless vacuum cleaner and plug it into a functioning wall outlet. Avoid using extension cords if possible, and ensure the outlet isn’t controlled by a light switch that might accidentally be turned off.
- Connect to the Vacuum/Dock:
- For docks: Place your cordless vacuum cleaner onto the dock firmly until you feel or hear it click into position. The charging indicator should light up.
- For direct plug-in: Insert the small end of the power adapter cord into the charging port on your vacuum cleaner. Make sure it’s snug.
It’s always a good idea to double-check that the connection is secure. A loose connection can prevent your cordless vacuum cleaner from charging properly.
Understanding Charging Indicators
Your cordless vacuum cleaner isn’t shy about telling you its charging status. Most models feature LED indicator lights, which can tell you:
- Charging: Often a blinking light, a progressing bar, or a specific color (e.g., amber).
- Fully Charged: Usually a solid green light, all bars illuminated, or the light turning off entirely.
- Low Battery: A red or rapidly blinking light, often accompanied by a reduction in power.
- Error: Sometimes a distinct blinking pattern or color might indicate an error (e.g., battery too hot/cold).
Refer to your user manual for the exact meaning of your specific cordless vacuum cleaner’s indicator lights. This is vital for knowing when your device is ready to go or if there’s an issue.
First Use Charging: The Initial Boost
When you unbox a brand-new cordless vacuum cleaner, it’s often recommended to give it a full, uninterrupted charge before its first use. This initial charge typically takes longer than subsequent charges (sometimes 3-5 hours or even more) and helps to condition the battery for optimal performance right from the start. Don’t skip this step!
Best Practices for Battery Health and Longevity
Proper charging goes beyond just plugging it in. Here are some pro tips to keep your cordless vacuum cleaner’s battery healthy and extend its life.
Avoid Overcharging (Generally Speaking)
Modern lithium-ion batteries, like those in your cordless vacuum cleaner, have smart circuitry that prevents true “overcharging.” Once the battery reaches 100%, the charger typically stops sending current, or switches to a trickle charge to maintain it. So, leaving your cordless vacuum cleaner on its charger overnight or for days shouldn’t significantly harm it. However, continuous exposure to high temperatures while charging can accelerate degradation.
Don’t Fully Deplete Every Time (Optional but Recommended)
While Li-ion batteries don’t suffer from memory effect, consistently running them down to zero can put more strain on the battery over its lifetime. It’s generally better for Li-ion batteries to operate between 20% and 80% charge. So, if you can, recharge your cordless vacuum cleaner when you notice power diminishing, rather than waiting for it to completely die.
Optimal Storage Conditions
Where you store your cordless vacuum cleaner matters.
- Temperature: Keep your vacuum cleaner and its charger in a cool, dry place. Extreme heat (like in a hot garage or direct sunlight) and extreme cold can both damage the battery and reduce its capacity over time. Room temperature is ideal.
- Long-Term Storage: If you plan to store your cordless vacuum cleaner for several weeks or months, it’s best to charge the battery to about 40-60% capacity before putting it away. Storing a battery at 0% or 100% for extended periods can accelerate degradation.
Using the Correct Charger is Paramount
This cannot be stressed enough: ONLY use the charger that came with your cordless vacuum cleaner or a genuine, manufacturer-approved replacement. Using an aftermarket or incorrect charger can:
- Damage the battery or the vacuum cleaner itself.
- Lead to inefficient charging.
- Pose a fire hazard due to incompatible voltage or current.
Always check the voltage and current ratings if you ever need to replace a charger.
Cleaning Battery Contacts
Over time, dust, dirt, or even slight corrosion can build up on the charging contacts of your cordless vacuum cleaner or its dock. This can interfere with the electrical connection and prevent proper charging. Periodically, gently wipe these contacts with a clean, dry cloth or a cotton swab. Make sure the vacuum cleaner is unplugged and turned off before you do this.
Troubleshooting Common Charging Issues
Even with the best intentions, sometimes your cordless vacuum cleaner might act up. Here are some common charging problems and how to tackle them.
Cordless Vacuum Cleaner Not Charging
This is probably the most frustrating issue. Here’s what to check:
- Power Outlet: Is the wall outlet working? Test it with another appliance. Sometimes an outlet is controlled by a wall switch.
- Loose Connection: Is the charger firmly plugged into both the wall and the vacuum cleaner/dock? Wiggle the connections gently to see if the indicator light flickers on.
- Charger Damage: Inspect the charging cable and adapter for any visible cuts, bends, or damage. A frayed cable is a definite culprit and a safety hazard.
- Battery Temperature: Is the battery too hot or too cold? Some smart vacuums won’t charge if the battery is outside a safe temperature range. Let it return to room temperature.
- Internal Fuse/Circuit Breaker: In rare cases, the charger itself might have an internal fuse or the vacuum might have a safety cut-off. Consult your manual.
Slow Charging or Reduced Runtime
If your cordless vacuum cleaner charges very slowly or its runtime has significantly decreased, consider these points:
- Aging Battery: This is the most common reason. All rechargeable batteries have a finite number of charge cycles. If your vacuum is several years old, its battery is likely nearing the end of its life.
- Extreme Temperatures: Charging in very hot or very cold environments can slow down the charging process and reduce overall efficiency.
- Partial Charges: While Li-ion batteries don’t have a memory effect, consistently only charging for a few minutes might not allow the battery management system to accurately calibrate. Try a full discharge and recharge cycle once in a while.
Indicator Lights Not Working
If your cordless vacuum cleaner isn’t showing any lights when plugged in:
- Go through the “not charging” checklist above (outlet, connections, charger damage).
- If the vacuum cleaner still works but just doesn’t show lights, it could be a minor internal fault with the indicator system, or simply a dirty contact preventing the signal.
Battery Overheating During Charge
A slight warmth during charging is normal. However, if the battery or charger becomes excessively hot to the touch, unplug it immediately. This could indicate:
- Faulty Battery: The battery might be failing and developing an internal short.
- Faulty Charger: The charger might be sending an incorrect voltage or current.
- Blocked Vents: Ensure any vents on the vacuum or charger aren’t blocked, as this can trap heat.
If overheating occurs, do not attempt to use or recharge the unit until it has been inspected or replaced. Contact customer support for your cordless vacuum cleaner.
When to Replace Your Battery (and How)
No battery lasts forever. Knowing when it’s time for a replacement can save you a lot of cleaning frustration.
Signs of a Dying Battery
You’ll know your cordless vacuum cleaner battery is on its last legs if you notice:
- Drastically Reduced Runtime: Your vacuum used to run for 30 minutes, now it only lasts 5-10 minutes, even after a full charge.
- Won’t Hold a Charge: It charges, but quickly loses power, or doesn’t even complete a short cleaning task.
- Charges Inconsistently: Sometimes it charges, sometimes it doesn’t, or the charging process is unusually long.
- Physical Swelling or Damage: *Immediately stop using* if you see any bulging, leakage, or unusual odors from the battery pack. This is a safety hazard.
Checking for Replaceable Batteries
Many modern cordless vacuum cleaners have user-replaceable batteries. Look for a release button or latch on the battery pack, often located near the handle or at the base of the main body. If it’s designed to be removed, you’ll see clear instructions in your manual. Some models, however, have integrated batteries that require professional service for replacement.
Sourcing a New Battery
If your battery is replaceable, always opt for a genuine, manufacturer-approved replacement battery. These are designed specifically for your cordless vacuum cleaner model and meet safety and performance standards. Avoid generic, unbranded batteries from unknown sources, as they might not be compatible, could perform poorly, or even pose a safety risk. Check the manufacturer’s website or authorized retailers.
Safe Battery Disposal
Never throw old Li-ion batteries into your regular household trash. They contain hazardous materials and can be a fire risk. Many communities have specific drop-off points for electronic waste (e-waste) or battery recycling programs. Retailers that sell batteries often have collection bins. Be responsible and recycle your old cordless vacuum cleaner battery properly.
Conclusion
Charging your cordless vacuum cleaner properly is more than just plugging it in; it’s about giving your powerful cleaning tool the care it deserves. By understanding the type of battery your vacuum uses, following the correct charging procedures, and adopting best practices for battery health, you can significantly extend its lifespan and ensure it’s always ready to tackle dirt and dust.
From deciphering those flashing indicator lights to troubleshooting a finicky connection, you now have the knowledge to keep your cordless vacuum cleaner running at its peak. Remember, a little attention to charging habits goes a long way in keeping your home spotless and your cordless companion happy. So go forth, charge smartly, and enjoy the unparalleled convenience of a fully powered cordless vacuum cleaner!
Frequently Asked Questions
How do I know if my cordless vacuum cleaner is fully charged?
Most cordless vacuum cleaners have LED indicator lights or a digital display that shows the charging status. When fully charged, these lights typically turn solid green, stop blinking, or turn off entirely, depending on the model. Check your user manual for specific indicator meanings.
Is it okay to use a generic charger for my cordless vacuum cleaner?
No, it is strongly advised to only use the charger that came with your cordless vacuum cleaner or a genuine, manufacturer-approved replacement. Generic chargers may have incorrect voltage or current, which can damage the battery, cause inefficient charging, or even pose a safety risk like overheating or fire.
What should I do if my cordless vacuum cleaner battery gets hot while charging?
A slight warmth during charging is normal. However, if the battery becomes excessively hot to the touch, unplug it immediately. This could indicate a faulty battery or charger. Do not use or attempt to recharge the unit until it has been inspected by a professional or the faulty component has been replaced.
Can a cold environment affect my cordless vacuum cleaner’s charging?
Yes, extreme cold can negatively affect charging. Most lithium-ion batteries will charge very slowly or may not charge at all in temperatures below freezing. It’s best to allow your cordless vacuum cleaner to warm up to room temperature before attempting to charge it.
How often should I clean the charging contacts on my cordless vacuum cleaner?
It’s a good practice to periodically check and clean the charging contacts on your cordless vacuum cleaner and its dock every few months, or whenever you notice inconsistent charging. Use a clean, dry cloth or cotton swab, ensuring the vacuum is unplugged and turned off beforehand, to remove any dust or grime.
When is it time to replace the battery in my cordless vacuum cleaner?
You should consider replacing the battery in your cordless vacuum cleaner when its runtime significantly decreases despite proper charging, or if it no longer holds a charge for a reasonable amount of time. If you notice any physical swelling or damage to the battery pack, it should be replaced immediately for safety reasons.
For more tips on maintaining your device, check out our guide on how to clean your vacuum cleaner and learn how to fix a vacuum cleaner not charging. If you’re experiencing other issues, our ultimate guide to fixing your vacuum cleaner covers common problems and solutions.