Facing a dead vacuum cleaner because it won’t charge? Don’t despair! This guide walks you through simple troubleshooting steps, from checking power connections and the charger itself to inspecting the battery and internal components. Most charging issues are easily fixable at home, saving you time and money and getting your vacuum back to work.
How Do I Fix My Vacuum Cleaner Not Charging
There’s nothing quite as frustrating as grabbing your trusty vacuum cleaner, ready to tackle a mess, only to find it utterly dead. You plug it in, wait patiently, and… nothing. No indicator light, no hum of charging, just a silent, unmoving appliance. If you’re currently asking yourself, “how do I fix my vacuum cleaner not charging?”, you’re in the right place. This common household dilemma can bring your cleaning routine to a screeching halt, leaving you with dusty floors and a sense of helplessness.
But before you resign yourself to buying a new vacuum or lugging your current one to a repair shop, take a deep breath. Many issues that cause a vacuum cleaner not to charge are surprisingly simple to diagnose and fix right at home. Often, the problem isn’t as severe as it seems, and with a few straightforward troubleshooting steps, you can get your cleaning companion powered up and ready for action once again. This comprehensive guide will walk you through everything you need to know, empowering you to identify the culprit and restore your vacuum’s charging capabilities.
We’ll cover everything from the simplest checks, like your power outlet, to more involved steps like inspecting the battery and internal components. Our goal is to demystify the process and help you confidently answer the question, “how do I fix my vacuum cleaner not charging?” with practical, actionable advice. Let’s dive in and bring your vacuum back to life!
Key Takeaways
- Check the power source first: Often, the problem isn’t the vacuum, but the outlet or charging dock connection.
- Inspect the charger and cord: Look for visible damage, kinks, or bent pins on the power adapter and cable.
- Battery health is crucial: Older or frequently used batteries can degrade, losing their ability to hold a charge and requiring replacement.
- Clean charging contacts: Dust, dirt, and debris can obstruct the electrical connection between the vacuum and its charger, preventing power transfer.
- Perform a soft reset: Some vacuums benefit from a quick reset (often by removing and reinserting the battery) to clear minor electronic glitches.
- Safety first: Always unplug the vacuum and remove its battery (if possible) before performing any internal inspections or repairs to avoid electrical shock.
- Know when to seek professional help: For complex internal issues, suspected wiring problems, or if you’re unsure about a repair, a qualified technician is the safest and most reliable option.
Quick Answers to Common Questions
My vacuum cleaner isn’t charging, but the charger indicator light is on. What could be wrong?
If the charger light is on, it typically means the charger itself is receiving power and likely functioning. The issue then probably lies with the battery itself, the charging contacts on the vacuum or charger being dirty/damaged, or an internal vacuum fault preventing the power from reaching the battery.
Can I use any charger for my vacuum cleaner?
No, you should only use the charger specifically designed for your vacuum cleaner model, or a compatible replacement with identical voltage and amperage specifications. Using an incorrect charger can damage the battery or vacuum, and even pose a fire hazard.
How long do vacuum cleaner batteries typically last before needing replacement?
Most modern Lithium-ion vacuum cleaner batteries last between 2 to 5 years, depending on the frequency of use, charging habits, and overall care. Signs of degradation include significantly reduced run time and difficulty holding a charge.
Is it safe to replace my vacuum cleaner’s battery myself?
If your vacuum has an easily accessible, removable battery pack, replacing it yourself is generally safe if you follow the manufacturer’s instructions and take precautions. For integrated batteries that require disassembling the vacuum, it’s more complex and might be best left to a professional, or done with extreme caution.
My vacuum charges for a bit, then stops, and still won’t run for long. Is this a charging problem?
While it seems like a charging problem, this often indicates a failing battery that can no longer hold a full charge, even if it accepts some power. The battery cells might be degraded, leading to a short runtime despite the charging process appearing to initiate.
📑 Table of Contents
- Understanding Your Vacuum’s Charging System
- The Easiest Fixes: Initial Power Checks
- Delving Deeper: Inspecting Your Vacuum Cleaner
- Troubleshooting Specific Components and Advanced Steps
- Preventative Maintenance: Keeping Your Vacuum Charged
- When to Call a Professional
- Conclusion
Understanding Your Vacuum’s Charging System
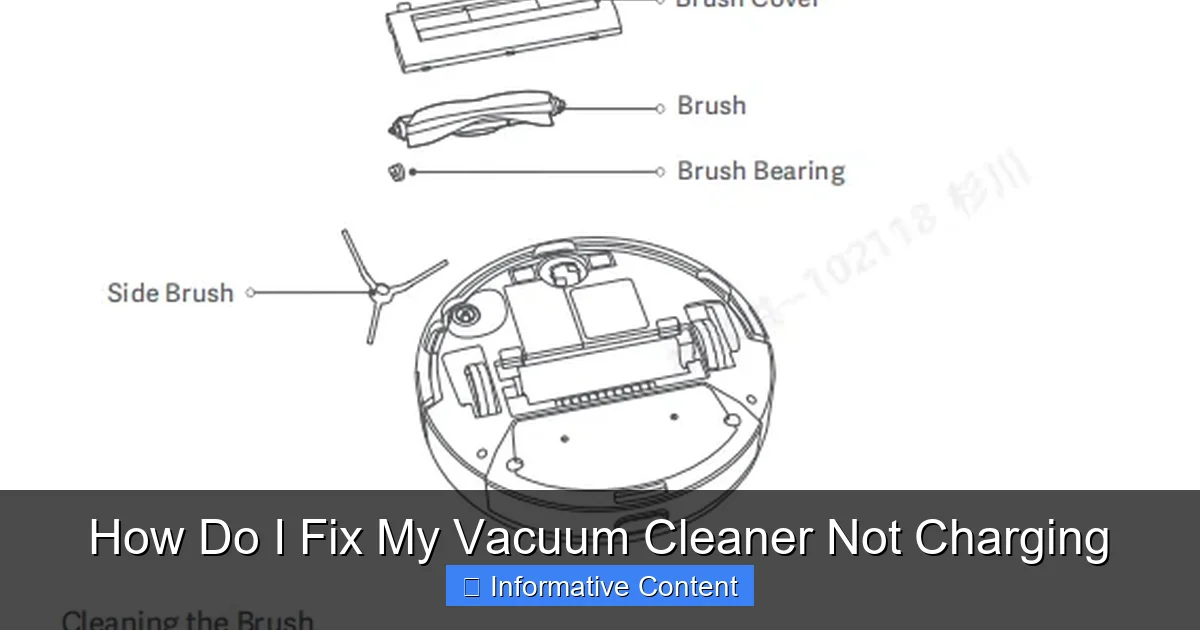
Before we start fixing things, it helps to understand how your vacuum cleaner gets its juice. Most cordless vacuums rely on a few key components to charge:
- The Charger/Adapter: This is the power brick and cable that plugs into your wall outlet. It converts your household AC power into the DC power your vacuum needs.
- The Battery: The heart of your cordless vacuum, storing the energy. Most modern vacuums use Lithium-ion batteries.
- Charging Port/Contacts: These are the physical points where the charger connects to the vacuum, either directly via a cable or through a docking station.
- Internal Charging Circuitry: Inside the vacuum, there are electronic components that manage the flow of power to the battery, prevent overcharging, and monitor battery health.
For your vacuum to charge successfully, every part of this chain must be functional. If any link breaks, you’ll find yourself wondering, “how do I fix my vacuum cleaner not charging?”. Knowing these parts helps us systematically diagnose the problem.
The Easiest Fixes: Initial Power Checks
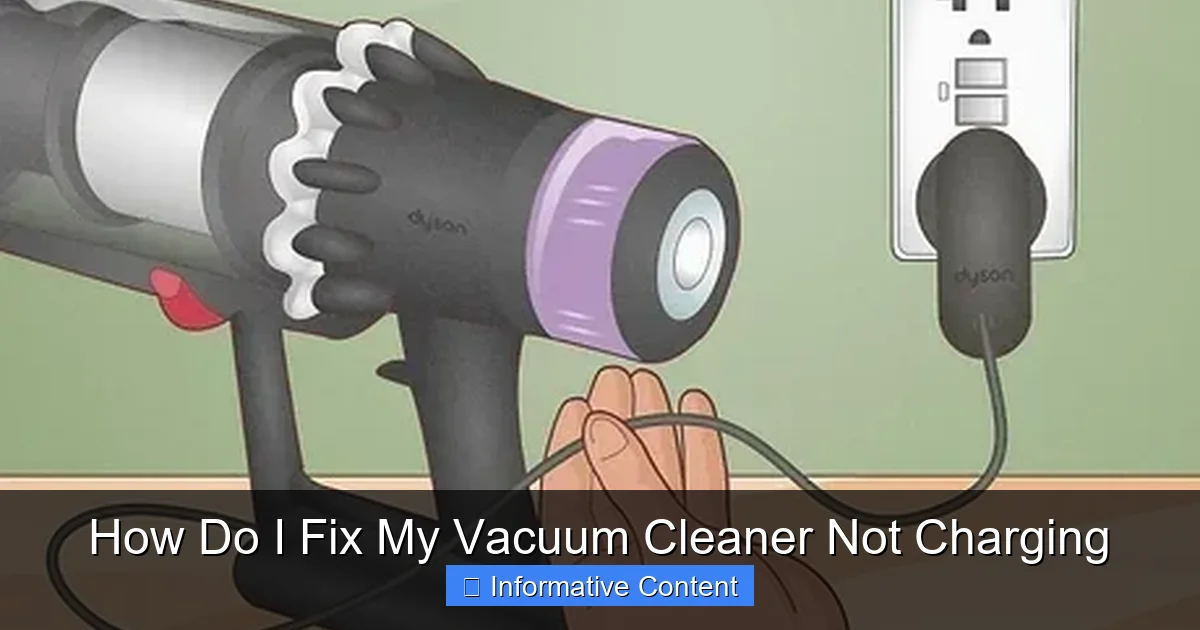
Visual guide about How Do I Fix My Vacuum Cleaner Not Charging
Image source: wikihow.com
Often, the solution to “how do I fix my vacuum cleaner not charging?” is surprisingly simple. Start with these basic, yet crucial, checks.
Confirming Power at the Outlet
It sounds obvious, but a faulty wall outlet is a frequent culprit.
- Test with another device: Plug something else into the same outlet (like a lamp or phone charger) to confirm it’s working. If the other device doesn’t work, the problem is with your outlet, not the vacuum.
- Check the circuit breaker: If the outlet is dead, check your home’s electrical panel. A tripped breaker can cut power to an entire circuit.
- Avoid overloaded circuits: Ensure the outlet isn’t on a circuit with too many high-power appliances, which can also prevent proper charging.
Inspecting the Charging Cable and Adapter
The charger itself is a common point of failure.
- Examine for visible damage: Look closely at the entire length of the cable. Are there any cuts, kinks, fraying, or exposed wires? Even minor damage can interrupt the electrical current.
- Check the adapter brick: Is the adapter brick unusually hot? Does it smell like burning plastic? These are signs of internal damage.
- Inspect the connector: Look at the plug that goes into the vacuum or charging dock. Are the pins bent, broken, or corroded? Bent pins can prevent proper contact.
- Loose connections: Ensure the cable is firmly seated into the adapter brick (if it’s detachable) and into the wall outlet.
If you suspect the charger is the problem, often the easiest solution is to test with a known working charger if you have access to one for the same model.
Proper Docking and Connection
Many cordless vacuums charge via a docking station or direct plug-in.
- Ensure full contact: For dock-based chargers, make sure the vacuum is seated correctly and firmly in the dock. Sometimes it just needs a little jiggle to make good contact.
- Clean charging contacts: Both the vacuum and the charging dock/cable have metal contacts that transfer power. These can accumulate dust, dirt, pet hair, or even corrosion over time. Use a dry cloth or a cotton swab with a small amount of rubbing alcohol to gently clean these contacts on both the vacuum and the charger. Let them dry completely before attempting to charge again. This is a very common fix for “how do I fix my vacuum cleaner not charging.”
Delving Deeper: Inspecting Your Vacuum Cleaner
If the initial checks didn’t solve the issue, it’s time to look more closely at the vacuum cleaner itself.
The Battery: Heart of the Power System
The battery is arguably the most common reason for a vacuum cleaner not charging or not holding a charge.
- Battery age and lifespan: Rechargeable batteries, especially Lithium-ion ones, have a finite lifespan. Typically, they last between 2-5 years depending on usage. If your vacuum is several years old and has seen heavy use, a worn-out battery is a strong possibility.
- Removable versus integrated batteries: Some vacuums have easily removable battery packs, while others have batteries integrated into the main unit, making replacement more complex.
- Signs of a failing battery: Besides not charging, other indicators include:
- Significantly reduced run time, even after a full charge.
- Vacuum struggles to maintain power during use.
- The battery pack appears swollen, bulging, or leaking (immediately stop using and dispose of safely if this occurs!).
- The charging indicator light behaves unusually (e.g., flashes an error code or never indicates a full charge).
- Perform a battery test (if possible): Some advanced vacuums have diagnostic modes. Consult your user manual. For many, a simple test is to try and power on the vacuum while it’s connected to the charger. If it powers on then but not when disconnected, the battery is likely the issue. This helps you narrow down “how do I fix my vacuum cleaner not charging” to the battery component.
Vacuum’s Charging Port and Contacts
Just like the charger, the part of the vacuum that receives the power can also be problematic.
- Inspect for debris: Use a flashlight to look inside the charging port or at the charging contacts on the vacuum itself. Lint, dust bunnies, or even small pieces of debris can block the connection. Use tweezers, compressed air, or a dry, soft brush to carefully remove any obstructions.
- Bent or corroded contacts: Look for any bent metal pins inside the port or corroded spots on the contacts. Gentle straightening of slightly bent pins might be possible with tweezers, but be extremely careful not to break them. Corrosion can sometimes be gently cleaned with fine-grit sandpaper or a pencil eraser, but again, proceed with caution.
- Physical damage: Has the vacuum been dropped? Is the charging port loose or wobbly? Physical damage to the port assembly can prevent charging. This might require professional repair.
Overheating Protection
Some vacuums are designed to stop charging if they (or their batteries) become too hot, as a safety measure.
- Allow to cool down: If you’ve just used the vacuum intensely, or if it’s been sitting in direct sunlight, it might need to cool down before it will accept a charge. Give it 30 minutes to an hour in a cooler spot before trying again.
Troubleshooting Specific Components and Advanced Steps
If the basic checks haven’t resolved “how do I fix my vacuum cleaner not charging?”, let’s explore more targeted solutions.
Performing a Hard Reset (If Applicable)
Like any electronic device, a vacuum cleaner can sometimes benefit from a simple reset to clear minor software glitches.
- For vacuums with removable batteries: Disconnect the vacuum from the charger. Remove the battery pack. Press and hold the power button on the vacuum for 10-15 seconds to drain any residual power. Reinsert the battery pack firmly. Then, reconnect to the charger and see if charging resumes.
- For vacuums with integrated batteries: Check your user manual. Some models have a specific button combination for a hard reset, or require you to leave it unplugged for an extended period.
Replacing the Battery
If you’ve identified the battery as the likely culprit, replacement is often the next step.
- When it’s necessary: If your battery is old, swollen, or consistently fails to hold a charge despite other troubleshooting efforts, it’s time for a new one.
- Finding the right replacement: Always purchase a battery specifically designed for your vacuum cleaner model. Using an incorrect battery can damage the vacuum, pose a fire hazard, or simply not work. Opt for OEM (Original Equipment Manufacturer) batteries if possible, or reputable third-party brands.
- Replacement steps:
- Safety first: Ensure the vacuum is unplugged and powered off.
- Locate the battery: Consult your manual to find where the battery is located and how it’s secured.
- Remove fasteners: This usually involves unscrewing a cover or pressing release tabs.
- Disconnect: Carefully disconnect the old battery’s wire harness.
- Insert new battery: Connect the new battery’s harness and secure it in place.
- Reassemble: Screw covers back on.
- Charge fully: Give the new battery a full initial charge as per manufacturer instructions.
- Disposal: Never throw old batteries in household trash. Take them to a specialized electronics recycling center. For guidance on proper disposal methods, see our guide on how to dispose of a vacuum cleaner.
Testing the Charger (Advanced)
For the more technically inclined, you can test the charger’s output with a multimeter.
- Using a multimeter: Set your multimeter to measure DC voltage. Touch the probes to the output pins/contacts of the charger (or the barrel connector). Compare the reading to the voltage output specified on the charger itself. A significant discrepancy (e.g., no voltage or very low voltage) indicates a faulty charger.
- Safety note: If you’re not comfortable using a multimeter, it’s safer to either replace the charger or consult a professional.
Internal Wiring and Fuse (Caution)
While less common for the average user to fix, internal wiring issues or a blown fuse can certainly cause a vacuum cleaner not to charge.
- Existence: Vacuums contain internal wiring connecting the charging port to the battery and other components. Some may also have an internal fuse.
- Recommendation: Unless you are experienced with electronics repair and understand electrical safety, it’s strongly recommended *not* to open your vacuum cleaner to inspect internal wiring or fuses. This can void warranties, damage the unit further, and poses an electrical shock risk.
- When to consider professional help: If you’ve exhausted all other options and still ask “how do I fix my vacuum cleaner not charging?” and suspect internal component failure, it’s time to call a qualified repair technician. For a broader range of fixes, check out our easy vacuum repair guide.
Preventative Maintenance: Keeping Your Vacuum Charged
A little proactive care can prevent future charging woes.
Regular Cleaning of Charging Contacts
Make it a habit to wipe down the charging contacts on both the vacuum and the dock/charger with a dry cloth periodically. This prevents dust and grime buildup that can interrupt connections.
Proper Battery Care
Treat your battery well to extend its life.
- Avoid extreme temperatures: Don’t charge or store your vacuum in very hot or very cold environments. Room temperature is ideal.
- Don’t always fully discharge: While it’s good to periodically run the battery down, constantly draining it to 0% can stress Lithium-ion batteries. Try to recharge before it’s completely empty.
- Don’t overcharge (for older models): Modern smart chargers will stop charging once the battery is full. However, for older models, leaving them plugged in indefinitely might not be ideal for battery longevity. Consult your manual.
Handle Cables with Care
Avoid bending, kinking, or pulling charging cables roughly. Store them neatly to prevent internal wire damage.
Timely Battery Replacement
If you notice a significant decline in run time, consider replacing the battery sooner rather than later. Don’t wait until it completely fails, as this can sometimes put extra strain on the charging system. By recognizing these signs, you can avoid having to ask “how do I fix my vacuum cleaner not charging?” in the future.
When to Call a Professional
Sometimes, despite your best efforts, the problem persists. Here’s when it’s best to call in the experts:
- Internal wiring suspected: If you believe the issue is deep within the vacuum’s electronics or wiring and you’re not comfortable opening it up.
- Still dead after all steps: You’ve tried everything in this guide, and your vacuum cleaner still isn’t charging.
- Under warranty: If your vacuum is still under warranty, attempting DIY repairs might void it. Contact the manufacturer’s service center first.
- Safety concerns: If you ever feel unsafe or unsure about any step, stop and seek professional help. Electrical work can be dangerous.
Conclusion
Discovering your vacuum cleaner not charging can certainly be a nuisance, but as you’ve seen, many common issues have straightforward solutions. By systematically checking your power source, inspecting the charger and cable, cleaning contacts, and evaluating your battery’s health, you can often pinpoint and resolve the problem yourself. This guide aimed to equip you with the knowledge to confidently tackle the question, “how do I fix my vacuum cleaner not charging?”
Remember to always prioritize safety by unplugging your vacuum before any detailed inspections or repairs. With a bit of patience and methodical troubleshooting, you’ll likely have your vacuum cleaner powered up and ready to tackle those dust bunnies in no time, saving yourself time, money, and the frustration of a silent, lifeless cleaning tool. Happy cleaning!
Frequently Asked Questions
What’s the most common reason a vacuum cleaner stops charging?
The most common reasons a vacuum cleaner stops charging often include a faulty power outlet, a damaged charger cable or adapter, or dirty charging contacts on either the vacuum or the dock. Less frequently, it’s a worn-out battery that has reached the end of its lifespan and can no longer hold a charge effectively.
How can I test if my vacuum cleaner’s charger is working?
You can test a charger’s functionality by plugging another device into the same outlet to confirm the outlet works. For a more direct test, if you have a multimeter, you can check the charger’s voltage output against its specifications. Alternatively, if available, try the charger on a known working vacuum of the same model, or try a known working charger on your vacuum.
My vacuum battery is swollen, what should I do immediately?
A swollen battery is a serious safety hazard and indicates internal cell damage that can lead to overheating or fire. You should immediately stop using and charging the vacuum, carefully remove the swollen battery if possible, and dispose of it at a specialized electronics recycling facility. Do not puncture or attempt to use it further.
Can cold weather affect my vacuum’s charging ability or battery life?
Yes, extreme cold temperatures can negatively impact battery performance and charging efficiency. Batteries, especially Lithium-ion, prefer to charge and operate at room temperature. Storing or charging your vacuum in very cold conditions can reduce its ability to accept a charge and may shorten the overall lifespan of the battery.
My vacuum charges but only runs for a few minutes before dying. Is this considered a charging issue?
While the vacuum appears to charge, a significantly reduced run time indicates that the battery itself is failing and can no longer hold a sufficient charge, rather than a problem with the charging mechanism. This is a classic symptom of a battery that needs to be replaced, as its capacity has degraded over time.
Is it okay to leave my vacuum on its charger all the time?
For most modern vacuum cleaners equipped with smart charging systems, it’s generally safe to leave them on the charger continuously, as they’re designed to stop charging once the battery is full. However, for older models or those without advanced battery management, continuous charging might potentially reduce the battery’s lifespan over many years. Always check your specific vacuum’s user manual for the manufacturer’s recommendations. For tips on proper charging practices, visit our guide on how to charge a cordless vacuum cleaner.