Discover how to effortlessly use your Eureka vacuum cleaner with this comprehensive guide. From initial setup and understanding its features to effective cleaning techniques for various surfaces, we’ll walk you through every step. Learn essential maintenance tips to keep your Eureka performing at its best, ensuring a cleaner, healthier home with ease.
Eureka Vacuum Cleaner How to Use
There’s nothing quite like the satisfaction of a freshly vacuumed home, and for many households, a Eureka vacuum cleaner is the trusty companion that makes it happen. Known for their reliability and diverse range of models, Eureka vacuums have been a staple in cleaning arsenals for generations. But whether you’ve just unboxed your very first Eureka or you’re a seasoned owner looking to refresh your cleaning routine, understanding how to get the most out of your machine is essential.
Vacuuming isn’t just about pushing a machine around; it’s an art that combines knowing your appliance, understanding different surfaces, and mastering efficient techniques. A well-used Eureka vacuum cleaner can tackle everything from stubborn pet hair on carpets to fine dust on hard floors, making your home not just look clean, but truly feel clean. This comprehensive guide is designed to walk you through every step, from initial setup to advanced cleaning tips and crucial maintenance, ensuring your Eureka delivers peak performance every time.
So, grab a cup of coffee, and let’s dive into transforming your cleaning routine. We’ll explore how to use your Eureka vacuum cleaner effectively, troubleshoot common issues, and keep it running smoothly for years to come. Get ready to unlock the full potential of your cleaning champion and enjoy a sparkling home!
Key Takeaways
- Proper Assembly is Key: Ensure your Eureka vacuum cleaner is correctly assembled out of the box to avoid operational issues and maximize performance from the start.
- Understand Your Model’s Features: Familiarize yourself with your specific Eureka’s power controls, brush roll settings, suction adjustment, and height settings to optimize cleaning for different floor types.
- Preparation Enhances Efficiency: Always clear large debris and obstructions from your cleaning path before vacuuming to prevent clogs and damage to your Eureka vacuum.
- Master Cleaning Techniques: Use slow, overlapping passes on carpets and consider turning off the brush roll on hard floors for best results. Utilize attachments for crevices, upholstery, and stairs.
- Regular Maintenance is Crucial: Empty the dust cup or replace the bag frequently, clean or replace filters, and check the brush roll for tangles to maintain strong suction and prolong your Eureka’s lifespan.
- Troubleshoot Common Issues: Be prepared to address minor problems like clogs, loss of suction, or overheating by performing simple checks before seeking professional help.
- Safe Storage Practices: Store your Eureka vacuum cleaner in a dry, safe place with the cord properly wrapped to prevent damage and ensure it’s ready for its next use.
Quick Answers to Common Questions
How often should I empty my Eureka vacuum’s dust cup?
You should empty your Eureka vacuum’s dust cup after every use, or as soon as the dirt reaches the “max fill” line. This ensures consistent suction power and prevents strain on the motor.
Can I wash the filters in my Eureka vacuum cleaner?
It depends on your specific Eureka model. Many foam or pleated filters are washable under cool running water and need to air dry completely. HEPA filters are usually not washable and require replacement. Always check your owner’s manual.
Why is my Eureka vacuum losing suction?
Loss of suction is often due to a full dust cup or bag, clogged filters, a blockage in the hose or nozzle, or tangled debris around the brush roll. Perform these checks first to restore suction.
How do I know which height setting to use on my upright Eureka vacuum?
Adjust the height setting so the brush roll lightly skims the surface of your carpet without getting bogged down or feeling too easy to push. For hard floors, use the lowest setting or a dedicated hard floor mode.
Is it okay to vacuum hard floors with the brush roll on?
For delicate hard floors like hardwood or laminate, it’s generally best to turn the brush roll off to prevent scattering debris or scratching the surface. Some Eureka models have a hard floor setting that automatically disengages the brush roll.
📑 Table of Contents
- 1. Getting Started: Unboxing and Initial Assembly
- 2. Understanding Your Eureka Vacuum: Features and Controls
- 3. Pre-Vacuuming Preparations: Setting the Stage for a Sparkling Clean
- 4. Mastering the Art of Vacuuming: Techniques for Different Surfaces
- 5. Post-Vacuuming Care: Emptying and Maintaining Your Eureka
- 6. Troubleshooting Common Issues: Quick Fixes for a Smooth Operation
- Conclusion: Your Path to a Perfectly Clean Home
1. Getting Started: Unboxing and Initial Assembly
The journey to a cleaner home begins the moment your Eureka vacuum cleaner arrives. Proper unboxing and assembly are crucial first steps to ensure everything functions correctly and safely. Don’t rush this part!
Unpacking Your New Eureka
- Handle with Care: Carefully open the box and remove all components. Lay them out on a clean, flat surface to ensure nothing is missed.
- Check the Manual: Every Eureka vacuum cleaner comes with an owner’s manual. It’s your best friend! Read through it to familiarize yourself with your specific model’s parts and assembly instructions. While this guide covers general principles, your manual will have exact details.
- Remove All Packaging: Make sure to remove any protective plastics, cardboard inserts, or twist ties from the vacuum itself and its attachments. Sometimes, small pieces of packaging can be overlooked and interfere with operation.
Basic Assembly Steps
Most Eureka upright vacuum cleaners follow a similar assembly pattern, usually involving just a few clicks and screws.
- Attach the Handle: For upright models, the handle often needs to be clicked or screwed into the main body of the vacuum. Ensure it’s firmly secured.
- Connect the Hose: The suction hose typically connects to a port on the main body. Make sure it’s snug and locked in place to prevent suction loss.
- Install Dust Cup/Bag: If your Eureka is a bagless model, ensure the dust cup is properly seated. For bagged models, confirm the bag is correctly installed in its compartment.
- Store Attachments: Many Eureka vacuums have onboard storage for tools like the crevice tool, dusting brush, and upholstery tool. Attach them securely so they are always within reach.
Power Cord Management
Once assembled, unravel the power cord completely before plugging it in. Never vacuum with a partially coiled cord, as it can cause overheating. Most Eureka models have cord hooks for neat storage after use.
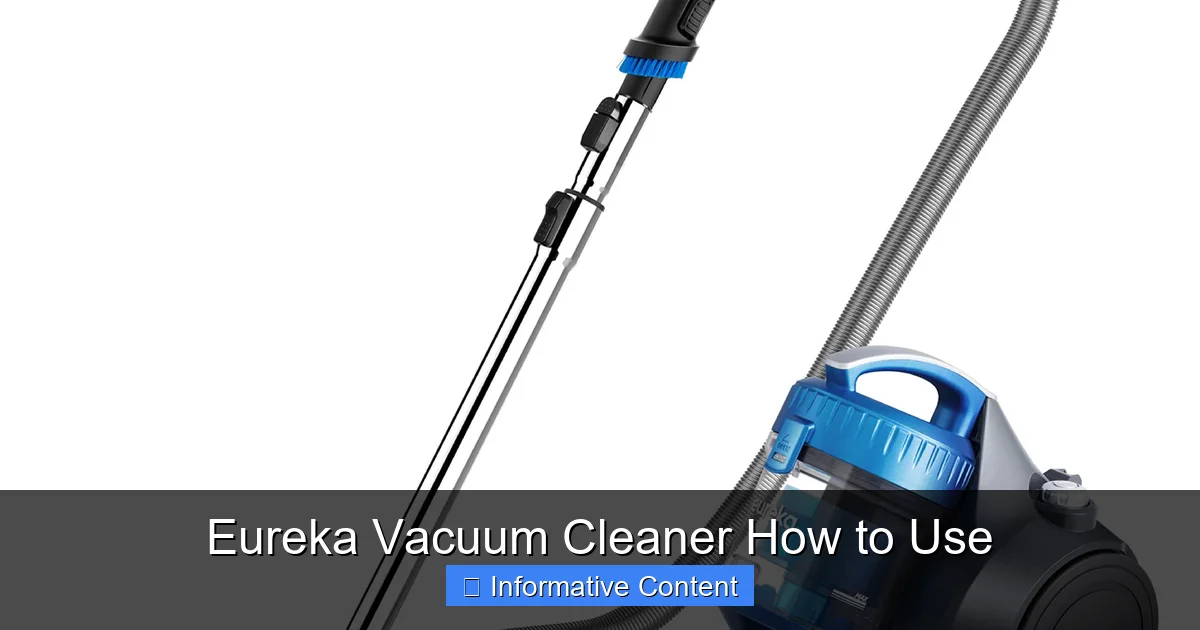
2. Understanding Your Eureka Vacuum: Features and Controls
Before you power on, take a moment to get acquainted with the different parts and controls of your Eureka vacuum cleaner. Knowing what each button and dial does will empower you to clean more effectively.

Visual guide about Eureka Vacuum Cleaner How to Use
Image source: dygtyjqp7pi0m.cloudfront.net
Power On/Off Button
This is straightforward! Located on the handle or main body, it turns your Eureka vacuum cleaner on and off. Always ensure your vacuum is plugged into a functional power outlet before pressing the button.
Brush Roll On/Off Control
Many Eureka upright and stick vacuums feature a brush roll (also called a beater bar). This rotating brush agitates carpet fibers to lift embedded dirt. However, it’s not always ideal for all surfaces.
- Carpets: Keep the brush roll ON for deep cleaning carpets and rugs.
- Hard Floors: For delicate hard floors (hardwood, laminate, tile), it’s often best to turn the brush roll OFF to prevent scattering debris or scratching the surface. Some Eureka models have a separate setting or automatically disengage the brush roll on hard floor mode.
Suction Control Settings
Some advanced Eureka models offer variable suction control, allowing you to adjust the power. This is particularly useful for:
- Delicate Items: Reduce suction when cleaning drapes or lightweight rugs to avoid pulling them into the vacuum.
- Heavy Duty Cleaning: Maximize suction for heavily soiled areas or for deep carpet cleaning.
Height Adjustment (for Upright Vacuums)
If you have an upright Eureka vacuum cleaner, it likely has a height adjustment dial or lever, typically located near the brush head. This setting is crucial for optimal cleaning and preventing damage.
- Low Pile Carpet: Use a lower setting.
- Medium to High Pile Carpet: Use a medium to higher setting. You want the brush roll to just barely make contact and agitate the carpet, not get bogged down or struggle.
- Hard Floors: Use the lowest setting for hard floors, or switch to a hard floor mode if available, which often raises the brush head slightly and turns off the brush roll.
Bagged vs. Bagless Indicators
Your Eureka vacuum cleaner will either be bagless (with a removable dust cup) or bagged (with disposable bags). Bagless models often have a “max fill” line on the dust cup, and some even have an indicator light that tells you when it’s full. Bagged models might have an indicator that shows when the bag needs replacing.
3. Pre-Vacuuming Preparations: Setting the Stage for a Sparkling Clean
Before you even plug in your Eureka vacuum, a little preparation goes a long way. This ensures both an efficient clean and protects your vacuum from damage.
Clear the Path
- Pick Up Large Debris: Remove toys, coins, paper clips, socks, or anything else that could clog your Eureka vacuum cleaner or damage its internal components.
- Move Small Furniture: If possible, shift lightweight furniture like chairs or small tables to get to hidden dust bunnies.
- Lift Cords and Wires: Ensure power cords, charging cables, and lamp wires are out of the vacuum’s path to prevent tangles, damage to the cords, or tripping hazards.
Check for Obstructions
Quickly inspect the vacuum’s nozzle area and hose opening for any visible blockages from previous cleaning sessions. A clear path means maximum suction.
Safety First
- Inspect the Cord: Before plugging in, quickly check the power cord for any frayed wires or damage. Never use a vacuum with a damaged cord.
- Check Filters: While you don’t need to clean them every time, a quick glance at your filters (if accessible) can remind you if they’re due for a wash or replacement. Dirty filters significantly reduce suction.
4. Mastering the Art of Vacuuming: Techniques for Different Surfaces
Now that your Eureka vacuum cleaner is ready and your space is prepped, let’s talk about the best ways to actually clean.
Vacuuming Carpets and Rugs
- Choose the Right Height Setting: Adjust the height so the brush roll lightly skims the carpet surface. If it’s too low, the vacuum will be hard to push; too high, and it won’t clean effectively.
- Slow, Overlapping Passes: Don’t rush! Push your Eureka vacuum cleaner slowly forward and pull it back in overlapping rows. The back-and-forth motion and slower pace allow the brush roll and suction to properly agitate and lift dirt.
- Change Directions: Occasionally vacuum in a perpendicular direction to your usual pattern. This helps lift embedded dirt and can even make your carpet pile stand up better, giving it a fuller look.
- Target Stains (Pre-treatment): For tough carpet stains, pre-treat them with a carpet cleaner before vacuuming.
Vacuuming Hard Floors
- Turn Off the Brush Roll: As mentioned, for delicate hard floors, it’s often best to turn off the brush roll. If your Eureka vacuum cleaner has a “hard floor” setting, use it.
- Gentle Suction: If your model has adjustable suction, use a lower setting for fine dust on hard surfaces to prevent scattering it.
- Use the Right Attachment: For large areas, the main nozzle on the hard floor setting works well. For corners and edges, switch to the crevice tool or dusting brush.
Utilizing Attachments for a Detailed Clean
Eureka vacuum cleaners typically come with a versatile set of tools that extend their cleaning capabilities beyond just floors.
- Crevice Tool: This narrow nozzle is perfect for tight spaces, like between couch cushions, along baseboards, in car interiors, and around appliance edges.
- Dusting Brush: With soft bristles, this tool is ideal for dusting delicate surfaces such as lamp shades, bookshelves, window sills, and even computer keyboards without scratching.
- Upholstery Tool: Often wider and with a flat edge, this attachment is designed for cleaning furniture, curtains, and car seats. It helps lift pet hair and dust without damaging fabrics.
- Extension Wand: Many models include an extension wand to give you extra reach, making it easier to clean ceilings, high shelves, or under low furniture without bending over.
Targeting Pet Hair
Pet hair can be a challenge, but your Eureka vacuum cleaner is up to the task. Use an upholstery tool with a strong brush (if available) for furniture. For carpets, ensure your brush roll is on and consider going over areas multiple times in different directions to pick up stubborn fur.
5. Post-Vacuuming Care: Emptying and Maintaining Your Eureka
To keep your Eureka vacuum cleaner performing at its best, regular maintenance is non-negotiable. This prevents loss of suction, extends the lifespan of your machine, and ensures hygienic cleaning.
Emptying the Dust Cup / Replacing the Bag
This is arguably the most important regular maintenance task.
- Bagless Models (Dust Cup): Empty the dust cup after every use, or when the dirt reaches the “max fill” line. Most dust cups detach with a simple button press. Empty directly into a trash can, preferably outdoors to avoid re-releasing dust into your home. Periodically, wash the dust cup with mild soap and water, ensuring it’s completely dry before reattaching.
- Bagged Models: Replace the vacuum bag when it’s about two-thirds full or when the indicator light/gauge tells you it’s time. Don’t wait until it’s completely bursting, as this reduces suction. Always use genuine Eureka replacement bags for optimal fit and filtration.
Filter Cleaning and Replacement
Filters are your vacuum’s lungs, trapping dust and allergens. Dirty filters restrict airflow, causing loss of suction and making your motor work harder.
- Washable Filters: Many Eureka vacuum cleaners have washable foam or pleated filters. Rinse them under cool, running water until the water runs clear. Squeeze out excess water and let them air dry completely (usually 24-48 hours) before putting them back. Never put a damp filter into your vacuum!
- HEPA Filters: Some Eureka models feature HEPA filters, which are excellent for trapping microscopic particles. These are often not washable and need to be replaced periodically, as recommended in your manual (e.g., every 6-12 months).
- Frequency: Check and clean/replace filters every 1-3 months, depending on usage and household conditions (pets, allergies).
Brush Roll Cleaning
Hair, thread, and carpet fibers can get tangled around the brush roll, reducing its effectiveness and potentially straining the motor.
- Unplug First: ALWAYS unplug your Eureka vacuum cleaner before attempting to clean the brush roll.
- Access the Brush Roll: Most models allow you to easily remove the brush roll cover (often with a few screws or clips).
- Remove Debris: Use scissors or a seam ripper to carefully cut and remove any tangled hair or fibers. Be gentle to avoid damaging the bristles.
- Inspect the Belt: While you’re there, check the drive belt for wear and tear. If it’s stretched, cracked, or broken, it will need to be replaced.
Hose and Attachment Checks
Periodically detach the hose and check for blockages. Use a broom handle or similar blunt object to gently push through any clogs. Also, ensure all attachments are clean and free of debris.
Cord Storage
After each use, wrap the power cord neatly around the designated cord hooks on your Eureka vacuum cleaner. Avoid tightly winding or crimping the cord, as this can damage the internal wiring over time.
6. Troubleshooting Common Issues: Quick Fixes for a Smooth Operation
Even the most reliable Eureka vacuum cleaner can encounter minor hiccups. Don’t panic! Many common issues have simple solutions you can try at home.
Loss of Suction
This is the most common complaint and usually the easiest to fix.
- Check the Dust Cup/Bag: Is it full? Empty it!
- Inspect Filters: Are they clogged? Clean or replace them.
- Look for Clogs: Check the hose, nozzle, and brush roll area for blockages.
- Brush Roll Function: Is the brush roll spinning? If not, check for tangles or a broken belt.
- Height Setting: Is the vacuum height set too high for the surface? Adjust it lower.
Vacuum Not Turning On
- Power Source: Is it securely plugged into a working outlet? Try a different outlet.
- Circuit Breaker: Has a circuit breaker tripped?
- Thermal Cut-off: Some Eureka vacuum cleaners have a thermal cut-off switch that activates if the motor overheats. Unplug the vacuum, let it cool down for 30-60 minutes, then try again. Ensure filters are clean to prevent future overheating.
Strange Noises or Burning Smell
- Clog: A sudden change in noise or a struggling sound often indicates a clog.
- Brush Roll: A loud grinding noise can mean something is stuck in the brush roll, or the belt is worn.
- Burning Smell: This usually indicates the motor is overheating (check thermal cut-off) or something is wrapped tightly around the brush roll, causing friction. Immediately turn off and unplug the vacuum.
Attachments Not Working Effectively
Ensure the attachment is securely connected to the hose or wand. Check the attachment itself for any clogs or damage.
Most minor issues with your Eureka vacuum cleaner can be resolved with a quick check and clean. If problems persist after troubleshooting, consult your owner’s manual for specific repair guidelines or contact Eureka customer support.
Conclusion: Your Path to a Perfectly Clean Home
Congratulations! You’re now equipped with the knowledge to not only use your Eureka vacuum cleaner effectively but also to maintain it for years of reliable service. Remember, a vacuum cleaner is an investment in your home’s cleanliness and health, and taking the time to understand its functions and care for it properly will pay dividends.
From the initial unboxing to mastering floor-specific techniques and tackling routine maintenance, we’ve covered the full spectrum of how to use your Eureka vacuum cleaner. By following these tips, you’ll ensure maximum suction, extend the life of your machine, and make your cleaning chores more efficient and satisfying. So, go forth and vacuum with confidence, knowing you’re getting the absolute best out of your trusted Eureka companion!
Frequently Asked Questions
How do I assemble my new Eureka vacuum cleaner?
Start by carefully unboxing all components and referring to your owner’s manual for model-specific instructions. Typically, assembly involves attaching the handle, connecting the hose securely, and ensuring the dust cup or bag is properly seated. Don’t forget to remove all protective packaging materials.
What does the brush roll do on my Eureka vacuum, and when should I use it?
The brush roll is a rotating brush that agitates carpet fibers to lift embedded dirt and debris. It should generally be turned ON for carpets and rugs for deep cleaning. For hard floors, it’s usually best to turn the brush roll OFF to prevent scattering debris or potential scratching.
My Eureka vacuum smells like it’s burning. What should I do?
Immediately turn off and unplug your Eureka vacuum cleaner. A burning smell often indicates that the motor is overheating or that something is tightly wrapped around the brush roll, causing excessive friction. Check for and clear any blockages, clean the brush roll, and allow the vacuum to cool down completely before attempting to use it again.
How often should I clean the brush roll on my Eureka vacuum?
You should inspect and clean the brush roll regularly, especially if you have pets or long hair in your household. Tangled hair and fibers can reduce cleaning effectiveness and strain the motor. Aim to check it every few uses and clean as needed by carefully cutting away any wrapped debris.
Can I use my Eureka vacuum cleaner to pick up wet spills?
No, standard Eureka vacuum cleaners (dry vacuums) are not designed to pick up liquids or wet spills. Doing so can severely damage the motor, electrical components, and filters, and poses a risk of electric shock. If you have a wet spill, use a suitable wet/dry vacuum or clean it up manually.
What should I do if my Eureka vacuum is making a strange noise?
Unplug the vacuum and check for any obvious blockages in the hose, nozzle, or brush roll area. A strange noise could indicate something is caught, or that the brush roll belt is worn or broken. Clear any obstructions, and if the noise persists, consult your owner’s manual or Eureka customer support.