DIY Vacuum Cleaner Repair How To Fix It in 2025 Quickly
Don’t let a faulty vacuum cleaner disrupt your cleaning routine! This comprehensive guide empowers you to tackle common vacuum cleaner repair tasks yourself, saving you both time and money in 2025. You’ll learn how to diagnose problems, perform simple fixes, and conduct preventative maintenance, ensuring your appliance runs smoothly for years to come. DIY vacuum cleaner repair is easier than you think and can extend the life of your valuable cleaning companion.
DIY Vacuum Cleaner Repair How To Fix It in 2025 Quickly
In 2025, our homes are smarter, our devices more integrated, but some things remain reliably mechanical – like our trusty vacuum cleaners. A broken vacuum can bring your cleaning routine to a screeching halt, leaving you with dusty floors and a growing frustration. But before you rush to buy a new one or spend a fortune on professional vacuum cleaner repair, consider this: many common vacuum problems are surprisingly simple to fix yourself!
This comprehensive guide will walk you through the essential steps for DIY vacuum cleaner repair. You’ll learn how to diagnose issues, perform quick fixes, and keep your appliance running efficiently for years to come. Not only will you save money, but you’ll also gain a satisfying sense of accomplishment. Let’s get that vacuum cleaner back in top shape!
Key Takeaways
- Safety First: Always unplug your vacuum cleaner before attempting any inspection or repair to prevent electrical shock or injury.
- Common Problems, Simple Fixes: Many vacuum cleaner issues, such as loss of suction or a non-spinning brush roll, are often due to clogs, full bags, or worn belts that are easy to fix.
- Essential Tools: Most DIY vacuum cleaner repair tasks only require basic household tools like screwdrivers, scissors, and a flashlight.
- Preventative Maintenance is Key: Regular cleaning of filters, clearing brush rolls, and emptying dustbins significantly extend your vacuum’s lifespan and prevent future breakdowns.
- Save Money and Reduce Waste: Repairing your vacuum cleaner yourself is a cost-effective and environmentally friendly alternative to buying a new unit or paying for professional service.
- Diagnose Before You Repair: Understanding the specific symptoms your vacuum is exhibiting will guide you directly to the most probable cause and solution.
Quick Answers to Common Questions
What’s the most common vacuum cleaner repair issue?
Loss of suction due to a full dustbin/bag, clogged filters, or a blocked hose/brush roll is by far the most frequent problem homeowners encounter. It’s usually a very straightforward DIY fix.
Can I use compressed air to clean my vacuum’s motor?
While compressed air is great for filters and surface dust, avoid directly spraying it into the motor housing. It can push dust and debris further into sensitive components, potentially causing more harm than good.
How often should I change my vacuum cleaner belt?
For most vacuums, the drive belt should be inspected every 3-6 months and replaced annually, or sooner if you notice a burning smell, reduced brush roll performance, or visible cracking/stretching.
My vacuum smells burnt, but the brush roll is spinning fine. What could it be?
A burning smell even with a spinning brush roll often indicates a severely clogged filter or hose, forcing the motor to overwork. It could also point to an issue with the motor itself overheating due to internal strain.
Is it safe to repair a frayed power cord with electrical tape?
Absolutely NOT. A frayed power cord is a serious electrical hazard. Electrical tape is a temporary patch and does not safely repair the damage. The cord must be replaced by a professional or the vacuum retired for safety reasons.
Safety First: Always Unplug Before You Start!
Before you even think about touching a single component of your vacuum cleaner, the absolute first and most crucial step is to **unplug it from the power outlet**. This isn’t just a suggestion; it’s a non-negotiable safety rule. Dealing with electricity can be dangerous, and you want to eliminate any risk of electric shock or accidental startup while your hands are inside the machine. Make it a habit – unplug, then proceed.
Essential Tools & Supplies for Vacuum Cleaner Repair
Good news! You won’t need a professional workshop for most DIY vacuum cleaner repair jobs. Many of the necessary tools are likely already in your home.
Here’s what you’ll typically need:
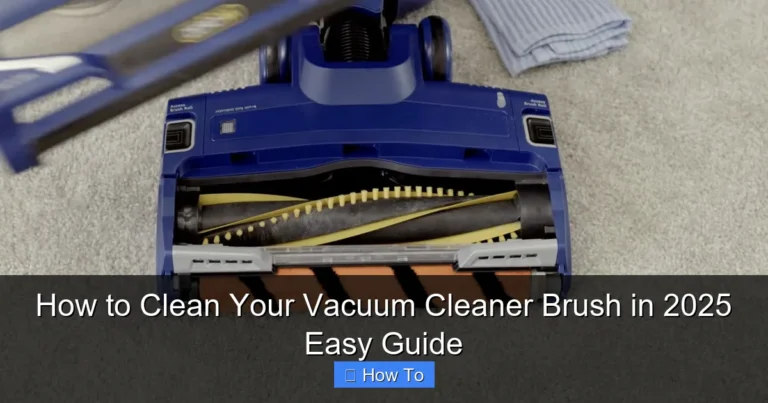
Visual guide about DIY Vacuum Cleaner Repair How To Fix It in 2025 Quickly
Image source: usercontent.one
- Screwdriver Set: Phillips and flathead screwdrivers in various sizes are crucial for opening compartments.
- Scissors or Utility Knife: Perfect for cutting tangled hair, string, or debris from the brush roll.
- Pliers: Helpful for gripping stubborn objects or removing small parts.
- Flashlight: Essential for peering into dark hoses, nozzles, and internal components.
- Gloves: Protect your hands from dirt, dust, and sharp edges.
- Old Towel or Newspaper: To protect your work surface from dust and debris.
- Compressed Air Can (Optional): Great for blowing dust out of hard-to-reach areas, especially filters.
- New Vacuum Bags/Filters (if applicable): Having replacements on hand can often solve common suction issues.
- New Drive Belt (if applicable): A common wear item that’s easy to replace.
Diagnosing the Problem: Common Symptoms & Causes
Understanding what’s wrong is half the battle. Listen to your vacuum, observe its behavior, and pinpoint the specific symptom. This will guide your vacuum cleaner repair efforts.
My Vacuum Has No Power
This is a common and often simple problem. Don’t panic!
- Check the Outlet: First, plug another appliance into the same outlet to ensure it’s working. Sometimes, it’s just a tripped circuit breaker or a faulty wall outlet.
- Examine the Power Cord and Plug: Look for any visible cuts, frayed wires, or bent prongs on the plug. A damaged cord is a serious safety hazard and requires immediate attention.
- Internal Thermal Cut-off: Many modern vacuums have a thermal cut-off switch that activates when the motor overheats (often due to a clog or full bag). Unplug the vacuum, let it cool for 30-60 minutes, then try again.
- Blown Fuse (Less Common in newer models): Some older models or certain high-end vacuums might have an internal fuse. This usually requires opening the vacuum and can be more complex.
Loss of Suction
This is arguably the most common complaint and usually the easiest to fix.
- Full Dustbin or Bag: The simplest explanation! Empty the dustbin or replace the vacuum bag.
- Clogged Filters: Dirty filters severely restrict airflow. Check your pre-motor and post-motor (HEPA) filters.
- Blocked Hose or Attachments: Something large can get stuck in the hose, wand, or an attachment.
- Clogged Brush Roll Nozzle: The area where the brush roll meets the floor head can become packed with debris.
- Leaks in the System: Cracks in the hose, loose seals, or a poorly seated dustbin can cause suction loss.
Strange Noises or Burning Smell
These symptoms indicate something is definitely wrong and need prompt attention.
- Burning Smell: Often signifies an overheating motor (due to clogs or prolonged use) or a failing/slipping drive belt.
- Grinding/Whining Noise: Could be debris stuck in the brush roll motor, a damaged bearing, or an issue with the main motor itself.
- Rattling Noise: Something small might be loose inside the vacuum or trapped in the fan assembly.
Brush Roll Not Spinning
A non-spinning brush roll means your vacuum isn’t effectively picking up debris from carpets.
- Tangled Hair/Debris: This is the number one culprit. Hair, string, and fibers get wrapped around the brush roll, preventing it from turning.
- Broken or Stretched Belt: The drive belt connects the motor to the brush roll. If it’s snapped or too stretched, the brush roll won’t spin.
- Obstruction in the Nozzle: Something might be jamming the brush roll housing itself.
- Brush Roll Motor Failure (on some models): Some models have a separate motor for the brush roll. This is less common for DIY vacuum cleaner repair.
Power Cord Issues
If your vacuum only works at certain angles or intermittently, the cord might be the problem.
- Internal Wire Break: Often occurs where the cord enters the vacuum body or the plug. This is a fire hazard.
- Damaged Plug: Bent or corroded prongs can cause intermittent power.
Step-by-Step Repair Guide for Common Issues
Now that you’ve diagnosed the problem, let’s get into the vacuum cleaner repair process. Remember to always have your vacuum unplugged!
Fixing No Power
If your vacuum isn’t turning on, follow these steps:
-
Check the Power Source:
- Plug another device into the same outlet. If it doesn’t work, reset your home’s circuit breaker or try a different outlet.
-
Inspect the Power Cord and Plug:
- Visually inspect the entire length of the cord for cuts, kinks, or exposed wires.
- Check the plug for bent or corroded prongs. If the cord or plug is damaged, it needs to be replaced by a qualified technician or the vacuum should be safely retired. **Do NOT attempt to repair a damaged power cord yourself.**
-
Allow for Cooling:
- If the vacuum suddenly stopped working during use, it might have overheated. Unplug it and let it sit for at least an hour. Clear any obvious clogs in the meantime.
Restoring Lost Suction
Most suction issues are airflow-related. This is a prime area for DIY vacuum cleaner repair.
-
Empty the Dustbin or Change the Bag:
- This seems obvious, but it’s often overlooked. A full bag or bin drastically reduces suction.
-
Clean or Replace Filters:
- Locate Filters: Consult your vacuum’s manual for filter locations. Most have a pre-motor filter (often washable) and a post-motor/HEPA filter (sometimes replaceable, sometimes washable).
- Clean Washable Filters: Rinse under cold water until the water runs clear. Let them air dry completely for at least 24 hours before reinserting. Never put a wet filter back into your vacuum.
- Replace Non-Washable Filters: If your filters are disposable, replace them according to the manufacturer’s recommendations (usually every 3-6 months).
-
Clear Clogs from the Hose, Wand, and Attachments:
- Detach the Hose: Disconnect the hose from the vacuum body and the wand.
- Inspect for Blockages: Shine a flashlight through the hose. If you see an obstruction, try to dislodge it with a broom handle, coat hanger (with a taped end to avoid scratching), or a plumbing snake.
- Check Attachments: Ensure vacuum cleaner attachments are clear of debris.
-
Inspect the Nozzle and Air Path:
- Turn the vacuum over and remove any bottom plates or covers to access the air path leading to the brush roll. Clear any visible debris.
-
Check Seals and Gaskets:
- Ensure the dustbin or bag compartment is sealed properly. Any cracks or gaps can cause suction loss.
Addressing Brush Roll Problems
If your brush roll isn’t spinning, follow these steps:
-
Clear Tangled Debris:
- Turn the vacuum over. Using scissors or a utility knife, carefully cut away any hair, string, or fibers wrapped around the brush roll. Be gentle to avoid damaging the bristles or the brush roll itself.
- Remove the brush roll if possible (often by unscrewing a few fasteners or clips) for easier cleaning.
-
Inspect and Replace the Drive Belt:
- Locate the Belt: Once the brush roll is exposed, you’ll see a rubber belt connecting it to the motor shaft or drive pulley.
- Check for Damage: Is the belt broken, stretched, or loose? A stretched belt won’t provide enough tension to spin the brush roll.
- Replace the Belt: If damaged, carefully remove the old belt. Stretch the new belt over the motor shaft and then over the brush roll, ensuring it’s seated correctly. This is one of the most common and effective vacuum cleaner repair tasks.
-
Check Brush Roll Bearings:
- With the brush roll removed, try spinning it by hand. It should spin freely. If it grinds or resists, the bearings might be worn. Replacing bearings can be tricky and may require specialized parts.
Dealing with Strange Noises & Smells
These issues often signal a need for prompt vacuum cleaner repair.
-
Investigate Clogs:
- A clogged hose, brush roll, or filter can make the motor work harder, leading to overheating and burning smells. Follow the suction repair steps above.
-
Check the Drive Belt:
- A slipping or worn drive belt can create a burning rubber smell. Replace it if it looks degraded.
-
Inspect for Loose Parts:
- Rattling noises might mean a loose screw, a foreign object in the fan, or a broken internal component. Open accessible areas and gently shake the vacuum to try and locate the source.
-
Motor Issues:
- If you hear grinding noises from the motor itself, especially after clearing all clogs and checking the belt, it might indicate a more serious motor problem. This usually requires professional vacuum cleaner repair or a replacement unit, as motor repair is complex and costly.
Preventative Maintenance: Keeping Your Vacuum Running Smoothly
Regular maintenance is your best friend when it comes to extending the life of your vacuum cleaner and avoiding future repairs.
- Empty the Dustbin/Change Bags Regularly: Don’t wait until it’s overflowing.
- Clean/Replace Filters: Follow manufacturer guidelines. This is vital for suction and motor health.
- Clear Brush Roll: After every few uses, turn the vacuum over and cut away any tangled hair or string.
- Check the Belt: Periodically inspect the drive belt for wear, stretching, or cracks.
- Inspect Hoses: Look for cracks or holes in the hose that could lead to suction loss.
- Clean the Exterior: Wipe down the body of the vacuum to prevent dust buildup in vents.
- Store Properly: Avoid storing your vacuum in extreme temperatures or damp environments.
When to Call a Pro (or Buy New)
While many vacuum cleaner repair tasks are DIY-friendly, there are times when it’s best to call in the experts or consider a replacement.
- Motor Failure: If you’ve ruled out clogs and belt issues and the motor is still making grinding noises or simply isn’t working, it might be time for a professional. Motor replacement can be expensive, often approaching the cost of a new mid-range vacuum.
- Electrical Issues (Beyond the Cord): If you suspect wiring problems inside the vacuum, or if sparks are flying, do not attempt to fix it yourself. This is a serious safety risk.
- Major Structural Damage: If the plastic housing is severely cracked, wheels are broken off, or critical parts are shattered, repair might be impractical or impossible.
- Older Models with Unavailable Parts: For vintage vacuums, finding replacement parts (like specific belts or filters) can be a challenge.
By following these DIY vacuum cleaner repair tips, you’ll be well-equipped to tackle most common issues in 2025 and keep your home spotlessly clean. Remember, a little troubleshooting and elbow grease can go a long way in extending the life of your appliance!
🎥 Related Video: vacuum cleaner repair 🔥 #shortsvedio #electrical#youtube
📺 Faisal Electrical
vacuum cleaner repair #shortsvedio #electrical#youtube vacuum cleaner.