Your 2025 Guide How to Change a Vacuum Cleaner Belt Fast
Is your vacuum’s brush roll refusing to spin, or are you noticing a burning smell? It’s likely time to change a vacuum cleaner belt! This 2025 guide provides clear, step-by-step instructions for replacing your vacuum’s belt quickly and efficiently. You’ll learn how to identify the right belt, gather essential tools, and confidently perform the replacement, saving you time and money on professional repairs and ensuring your home stays spotless.
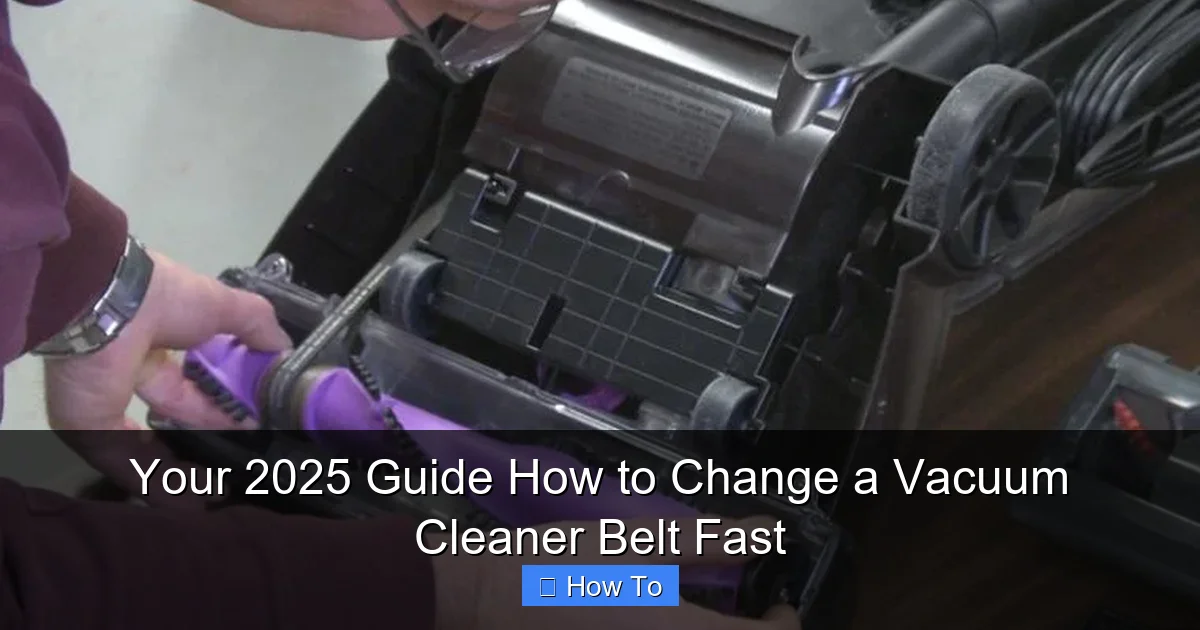
Your 2025 Guide How to Change a Vacuum Cleaner Belt Fast
Hey there, modern homeowner! In the year 2025, we’ve got smart homes, AI assistants, and self-driving cars, but some things remain timeless—like the need for a good, old-fashioned clean floor. And nothing stops a good floor clean faster than a broken vacuum cleaner belt. If your vacuum’s brush roll has stopped spinning, or you’re noticing a strange burning smell, chances are it’s time to change a vacuum cleaner belt.
Don’t fret! While it might sound like a daunting task, replacing a vacuum belt is actually one of the simplest and most common DIY vacuum repairs. Not only is it quick, but learning how to change a vacuum cleaner belt yourself can save you a significant amount of money on professional repairs, keeping your hard-earned cash in your pocket. This comprehensive 2025 guide will walk you through every step, from identifying the problem to testing your newly repaired machine, ensuring your vacuum is back to peak performance in no time.
By the end of this guide, you’ll be confident in your ability to:
- Identify the signs of a worn or broken vacuum belt.
- Gather the right tools and the correct replacement belt for your specific vacuum model.
- Safely open your vacuum cleaner and access the brush roll assembly.
- Remove the old belt and thoroughly clean the area.
- Install a new vacuum cleaner belt with proper tension.
- Reassemble and test your vacuum to ensure optimal performance.
Let’s dive in and get your vacuum cleaner ready to tackle those dust bunnies once more!
Key Takeaways
- Safety First: Always unplug your vacuum cleaner before attempting any maintenance or repair to prevent electrical shock or accidental activation.
- Right Belt is Crucial: Using the correct replacement belt for your specific vacuum model is essential for proper function and longevity. Check your vacuum’s manual or label for the part number.
- Gather Your Tools: Before starting, collect necessary tools like screwdrivers, a new belt, and a cleaning brush to make the process smooth and efficient.
- Observe and Clean: Pay attention to how the old belt is routed before removing it. Use this opportunity to thoroughly clean the brush roll and belt housing from tangled hair and debris.
- Proper Installation: Ensure the new belt is correctly seated around both the motor shaft and the brush roll, with appropriate tension, to prevent immediate breakage or poor performance.
- Test Thoroughly: After reassembly, always test your vacuum’s brush roll and overall performance to confirm the belt was installed correctly and is functioning as expected.
Quick Answers to Common Questions
What if my new belt seems too tight?
New belts are designed to be snug. If it feels extremely tight, double-check you have the correct size and type for your specific vacuum model. Sometimes, gently warming the belt in your hands for a minute can make it slightly more flexible for installation.
Can I use any rubber band as a vacuum belt?
No, absolutely not. Vacuum belts are made of specific rubber compounds designed to withstand high friction and tension, and they come in precise sizes (length, width, thickness, and profile like flat, V-belt, or geared). Using a generic rubber band will likely cause it to snap immediately, melt, or damage your vacuum’s motor.
How often should I change a vacuum cleaner belt?
There’s no fixed schedule; it depends on usage. A good rule of thumb is to inspect your belt every 3-6 months. If you notice signs of wear (cracks, stretching, fraying) or a drop in brush roll performance, it’s time to replace it. Heavy use or cleaning pet hair might require more frequent changes.
My vacuum smells like burning rubber after changing the belt. What’s wrong?
A very slight smell can sometimes occur as a new belt “beds in.” However, a strong or persistent burning smell usually indicates excessive friction. Check for any remaining hair or debris wrapped around the brush roll, ensure the brush roll spins freely, and verify the belt is correctly seated and not rubbing against anything it shouldn’t be. An incorrect belt size can also cause this.
What’s the easiest way to remove stubborn tangled hair from the brush roll?
After removing the brush roll, use a pair of scissors or a utility knife to carefully cut along the length of the tangled hair. Be gentle to avoid damaging the brush bristles. Once cut, the hair should unwrap easily. An old toothbrush can help dislodge smaller bits.
Why Your Vacuum Cleaner Belt Matters (and When to Change It)
Think of your vacuum cleaner belt as the unsung hero of your cleaning routine. This simple rubber band connects your vacuum’s motor to the brush roll (also known as the agitator bar). When the motor spins, the belt transfers that power, making the brush roll rapidly rotate. This spinning action is crucial for agitating carpet fibers, lifting dirt, pet hair, and debris so your vacuum can effectively suction it up. Without a functioning belt, your brush roll is just an idle cylinder, rendering your vacuum largely ineffective on carpets and rugs.
Common Signs It’s Time to Change Your Vacuum Cleaner Belt:
- Brush Roll Not Spinning: This is the most obvious sign. If your vacuum is on, but the brush roll isn’t rotating when it should, the belt is almost certainly broken or severely stretched.
- Burning Rubber Smell: A stretched or worn belt can slip on the motor shaft or brush roll, creating friction and heat. This often results in a distinct smell of burning rubber. If you smell this, turn your vacuum off immediately to prevent further damage.
- Poor Cleaning Performance: If your vacuum isn’t picking up dirt and debris on carpets as effectively as it used to, even with good suction, a failing belt could be the culprit. The brush roll might be spinning too slowly or intermittently.
- Visible Damage: Sometimes, you can simply see the problem. A belt might be visibly stretched, cracked, frayed, or completely snapped.
- Excessive Vibrations: A severely stretched or unbalanced belt can sometimes cause unusual vibrations or noises while the vacuum is running.
Safety First: Essential Precautions Before You Start
Before you even think about touching your vacuum’s internal components, safety must be your absolute top priority. These simple steps will protect you from potential hazards.
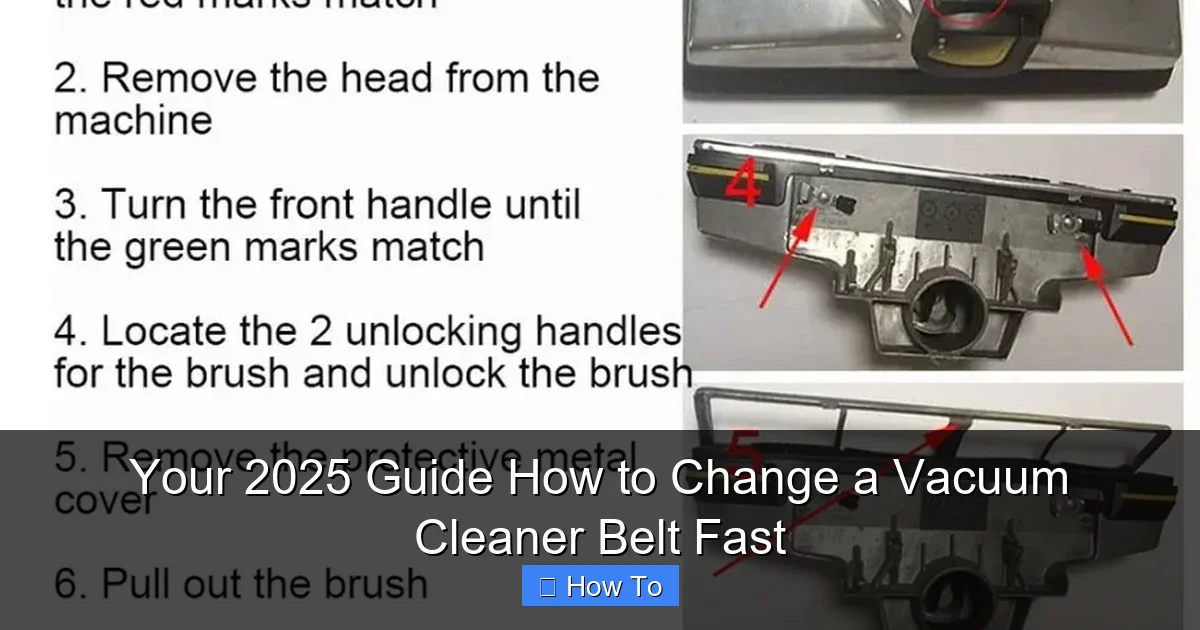
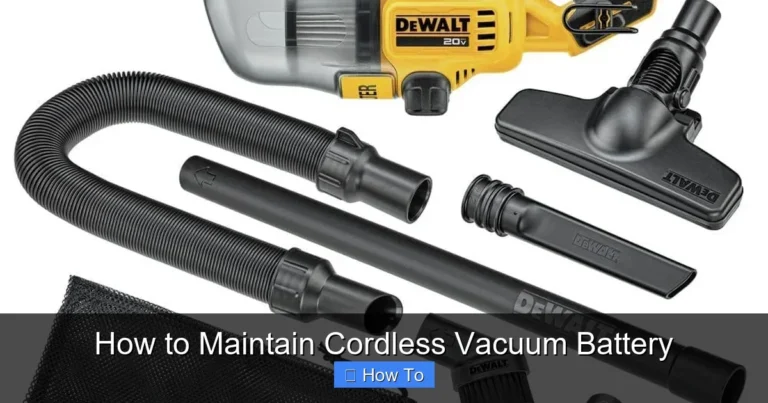
Visual guide about Your 2025 Guide How to Change a Vacuum Cleaner Belt Fast
Image source: acevacuums.com
-
Unplug the Vacuum Cleaner
This cannot be stressed enough. Always, always, always unplug your vacuum cleaner from the wall outlet before you start any repair or maintenance. This eliminates any risk of electrical shock or accidental activation of the brush roll.
-
Let It Cool Down
If you’ve just been using your vacuum, allow it to cool down for about 10-15 minutes. Components like the motor and even the belt can get warm during operation.
-
Clear a Work Area
Find a clean, well-lit, and flat surface to work on. A kitchen table or workbench is ideal. Lay down an old towel or newspaper to protect your surface from dirt and to easily catch any small screws.
-
Consider Gloves
While not strictly necessary, wearing a pair of work gloves can keep your hands clean from dust, dirt, and pet hair that often accumulates around the brush roll area.
Gather Your Tools and Supplies
Having everything you need within reach will make the process of how to change a vacuum cleaner belt much smoother. Here’s a checklist:
-
New Vacuum Belt (The Right One!)
This is the most critical item. We’ll discuss how to find the correct belt in the next section.
-
Screwdrivers
Most vacuum cleaners use Phillips head screws, but some might require a flathead or even Torx bits. Have a small set available to cover your bases.
-
Pliers or Needle-Nose Pliers (Optional)
These can be helpful for gripping stubborn brush rolls or for prying off tight covers.
-
Scissors or Utility Knife (Optional)
Useful for cutting a severely tangled or broken old belt that’s hard to remove.
-
Old Toothbrush or Small Brush
Absolutely essential for cleaning out the brush roll housing and removing accumulated hair and debris.
-
Rag or Cloth
For wiping down dusty or dirty surfaces.
-
Work Light or Headlamp (Optional)
A little extra illumination can make it easier to see inside tight spaces.
Finding the Right Replacement Belt for Your 2025 Vacuum
This is arguably the most important step before you even start disassembly. Using the wrong belt can lead to poor performance, excessive wear, or even damage to your vacuum’s motor. Belts vary significantly in size, type (flat, V-belt, geared), and tension.
How to Identify the Correct Belt:
-
Check Your Vacuum’s Manual: The user manual for your 2025 vacuum model is the best place to start. It will often list the specific part number for replacement belts.
-
Look for the Model Number: On most vacuums, you’ll find a sticker or plate with the model number and serial number. It’s usually on the back, bottom, or side of the vacuum. With this number, you can search online for “replacement belt for [Your Vacuum Brand] [Your Model Number]”.
-
Inspect the Old Belt: If the old belt isn’t completely shredded, it might have a part number printed on it. Even if it’s broken, you can often gauge its approximate length and width to help with identification.
-
Brand-Specific Parts: Many major vacuum brands (e.g., Dyson, Shark, Bissell, Hoover, Kenmore) sell replacement belts directly on their websites or through authorized dealers. Online retailers like Amazon or appliance parts stores also carry a wide selection.
Pro Tip: If you have trouble finding a specific part number, a good-quality generic replacement belt designed for your vacuum’s brand and model can often work just as well, but always double-check compatibility.
Step-by-Step Guide: How to Change a Vacuum Cleaner Belt
Now that you’re prepared, let’s get your vacuum back in action. These steps are generally applicable to most upright vacuum cleaners, which are the most common type requiring a belt change.
Step 1: Prepare Your Vacuum Cleaner for Service
Unplug and Power Down
As mentioned, ensure the vacuum is unplugged from any power source. This is non-negotiable for your safety.
Find a Clean, Well-Lit Workspace
Lay your vacuum down on its front on your prepared surface. The brush roll and bottom plate should be facing upwards, making it easy to access. A good light source is essential here.
Flip the Vacuum Over
Carefully lay your vacuum on its back or side so that the underside, where the brush roll is located, is easily accessible. You’ll be working primarily on this area.
Step 2: Access the Brush Roll and Belt Housing
This is where you’ll start disassembling the vacuum’s base.
Locate the Base Plate Screws
Look for screws around the perimeter of the base plate (the flat cover on the bottom of your vacuum). Most vacuums have 2-7 screws. They are usually Phillips head, but keep an eye out for others.
Remove the Base Plate/Cover
Using the appropriate screwdriver, carefully remove all screws from the base plate. Keep them in a small container or on your towel to avoid losing them. Once all screws are out, gently lift the base plate. It might be slightly snug or clip into place, but it should come off without excessive force.
Lift Out the Brush Roll
With the base plate removed, you should now see the brush roll. It’s usually held in place by two end caps that fit into grooves in the vacuum’s housing. Gently lift the brush roll out. It might still have the old belt attached, or the belt might be snapped and loose.
Step 3: Remove the Old, Worn-Out Belt
With the brush roll exposed, removing the old belt is straightforward.
Observe the Belt’s Routing
Before you completely remove the old belt (especially if it’s still intact), take a moment to observe how it’s routed. Note which side of the brush roll it goes on and how it loops around the motor shaft. This will be crucial for installing the new belt correctly.
Carefully Cut or Pull Off the Old Belt
If the old belt is still in one piece and stretched, simply pull it off the motor shaft and then off the brush roll. If it’s tangled or broken into multiple pieces, you might need to use scissors or a utility knife to cut away stubborn sections. Remove all remnants of the old belt.
Clean the Brush Roll and Belt Area
This is a fantastic opportunity for some essential vacuum maintenance! Use your old toothbrush, small brush, or even your fingers to remove any tangled hair, string, carpet fibers, and other debris from the brush roll itself. Pay special attention to the bearings at the ends of the brush roll. Also, clean out the belt housing area, removing any accumulated grime from around the motor shaft. A clean brush roll spins more freely, improving performance and prolonging the life of your new belt.
Step 4: Install Your New Vacuum Cleaner Belt
Now for the main event – putting the new belt in place. This can sometimes be a bit tricky due to the belt’s tension, but with a little technique, it’s manageable.
Position the New Belt
There are generally two common methods for positioning the new belt:
- Method A (Brush Roll First): Loop one end of the new belt around the designated groove on the brush roll. Then, reinsert the brush roll into its housing, ensuring the end caps are seated correctly. Once the brush roll is in place, stretch the other end of the belt over the motor shaft.
- Method B (Motor Shaft First): Loop the new belt around the motor shaft first. Then, place the brush roll into its housing. Once the brush roll is seated, carefully stretch the belt from the motor shaft and loop it around the designated groove on the brush roll.
Most people find Method A slightly easier. Regardless of the method, make sure the belt is sitting snugly in the grooves on both the brush roll and the motor shaft. It should feel taut and have a good amount of tension.
Reattach the Brush Roll
Once the belt is on both the motor shaft and the brush roll, ensure the brush roll is perfectly seated in its bearings or grooves within the vacuum housing. Spin the brush roll by hand a few times to check that the belt moves smoothly and doesn’t slip off.
Stretch and Align the Belt
The new belt will be tight, which is good! This tension is what makes it work. If you’re having trouble stretching it, sometimes gently warming the belt slightly (e.g., holding it in your hands for a minute) can make it a little more pliable. Double-check that the belt is not twisted and is perfectly aligned in its grooves.
Step 5: Reassemble and Test Your Vacuum
You’re almost there! Now it’s time to put everything back together and see your hard work pay off.
Replace the Base Plate and Screws
Carefully align the base plate over the brush roll and vacuum housing. Make sure it sits flush and doesn’t pinch the belt or any wires. Reinsert all the screws you removed earlier. Tighten them securely, but don’t overtighten, as this can strip the plastic. Ensure no tools or foreign objects are left inside the vacuum.
Plug In and Power On
Once everything is securely reassembled, plug your vacuum cleaner back into an electrical outlet.
Test the Brush Roll
Turn on your vacuum cleaner. If your model has a “bare floor” and “carpet” setting, select “carpet” or the setting that engages the brush roll. Observe the brush roll. It should be spinning vigorously and smoothly. Listen for any unusual noises or grinding sounds. If it’s spinning correctly, congratulations!
Check Cleaning Performance
Do a quick test run on a carpeted area. Your vacuum should now be picking up dirt and debris with renewed vigor, just like a brand-new machine. If the cleaning performance is back to normal, you’ve successfully learned how to change a vacuum cleaner belt!
Troubleshooting Common Belt Replacement Issues
Sometimes, things don’t go perfectly on the first try. Here are a few common issues and their solutions:
-
Brush Roll Still Not Spinning
- Check Belt Seating: Is the belt properly seated in the grooves on both the motor shaft and the brush roll? Sometimes it can slip off.
- Wrong Belt: Double-check that you purchased the correct belt for your specific vacuum model. A belt that’s too loose won’t transmit power; one that’s too tight can put excessive strain on the motor.
- Obstruction: Is there still hair or debris wrapped around the brush roll or caught in the bearings that’s preventing it from spinning freely?
- Motor Issue: In rare cases, the problem might be with the motor itself, not the belt. If the motor sounds like it’s running but the belt is correctly installed and the brush roll isn’t moving, you might have a more serious internal issue.
-
New Belt Breaks Quickly
- Wrong Size/Type: An incorrect belt (especially one that’s too small or of poor quality) can snap quickly due to excessive tension or material fatigue.
- Obstruction: Continuous obstructions (like toys, large debris, or tangled hair) can put undue strain on the belt, causing it to break prematurely. Regularly check and clean the brush roll.
- Misalignment: If the belt isn’t perfectly aligned in its grooves, it can rub against other parts and wear out faster.
-
Burning Smell After Replacement
- New Belt Settling In: A very slight burning smell can sometimes occur initially with a brand-new belt as it “beds in.” This should dissipate quickly.
- Obstruction: More commonly, a burning smell indicates that something is still causing friction. This could be residual hair, a hidden obstruction in the brush roll, or the belt rubbing against an unintended surface.
- Belt Too Tight: An excessively tight belt can cause friction and overheating. Ensure you have the correct belt for your model.
When to Call a Professional
While learning how to change a vacuum cleaner belt is a fantastic skill, there are times when it’s best to call in the experts. If, after changing the belt, your vacuum still isn’t working, or if you suspect issues with the motor, wiring, or other complex internal components, it might be time to visit a professional vacuum repair shop. They have the specialized tools and expertise to diagnose and fix more intricate problems safely. Don’t risk further damage to your vacuum or yourself by attempting repairs beyond your comfort level.
Conclusion
Congratulations! You’ve successfully navigated the process of how to change a vacuum cleaner belt. By tackling this common repair yourself, you’ve not only saved money but also gained valuable confidence in your DIY skills. Keeping your vacuum cleaner in top shape with regular maintenance, like changing the belt when needed, ensures it will continue to be a reliable workhorse for years to come, keeping your home clean and fresh.
Remember, a little preventive maintenance goes a long way. Regularly check your vacuum’s belt for wear and tear, clear the brush roll of tangled hair, and empty the dirt bin or bag. These simple habits will extend the life of your vacuum and ensure it’s always ready for action. Happy cleaning, and enjoy your perfectly functioning vacuum cleaner!
🎥 Related Video: Fix your vacuum belt!! Easy!! DIY Repair Tutorial
📺 Fixing Stuff / JM Builders And Roofing
Is your vacuum cleaner not picking up like it used to? The problem might be a broken or slipped belt. In this video, I’ll walk you …