Ultimate Guide How to Clean Vacuum Cleaner Hose 2025
Is your vacuum losing suction or emitting odors? It’s likely time to give your vacuum cleaner hose a deep clean. This ultimate 2025 guide provides comprehensive, step-by-step instructions to clear clogs, eliminate grime, and restore your hose to peak performance, ensuring your vacuum operates efficiently and hygienically. Learn everything from basic rinsing to tackling stubborn blockages and proper drying techniques.
Ultimate Guide How to Clean Vacuum Cleaner Hose 2025
Welcome to the ultimate guide for keeping your vacuum cleaner hose in pristine condition in 2025! Over time, your vacuum cleaner hose becomes a magnet for dust, dirt, pet hair, and even unexpected debris. This build-up doesn’t just look unsightly; it can severely impact your vacuum’s suction power, create unpleasant odors, and even lead to complete blockages. A dirty hose can also harbor allergens and bacteria, diminishing the air quality in your home.
But don’t worry! Cleaning your vacuum cleaner hose is a straightforward process that anyone can do with a little guidance. This comprehensive guide will walk you through every step, from disconnecting the hose to deep cleaning stubborn clogs and ensuring it’s perfectly dry and ready for action. By following these instructions, you’ll restore your vacuum’s efficiency, prolong its lifespan, and enjoy a cleaner, fresher home. Let’s get started and make that hose sparkle!
Key Takeaways
- Safety First: Always disconnect your vacuum cleaner from power before attempting any cleaning or maintenance on the hose to prevent accidents.
- Start with Visible Obstructions: Before wet cleaning, thoroughly check both ends and the length of the hose for large debris and attempt to remove it manually or with a long, blunt tool.
- Choose the Right Method: Select a cleaning technique (water and soap, brush, vinegar/baking soda) based on the type and severity of the dirt or clog in your vacuum cleaner hose.
- Thorough Rinsing is Crucial: After cleaning, rinse the hose extensively with clean water to remove all soap residues, cleaning agents, and dislodged grime.
- Complete Drying Prevents Problems: Ensure the vacuum cleaner hose is absolutely dry inside and out before reattaching it to prevent mold growth, mildew, and unpleasant odors.
- Preventative Maintenance Pays Off: Regularly inspect and lightly clean your hose, and avoid vacuuming large items, to extend its lifespan and maintain optimal vacuum performance.
Quick Answers to Common Questions
What if my vacuum cleaner hose is not detachable?
If your hose is permanently attached, you can still clean it! You’ll need to clean it in place. Use the “long tool” methods (coat hanger, snake cleaner) to clear clogs. For wet cleaning, try pouring a baking soda and vinegar solution in, letting it fizz, then following with warm water using a funnel. Ensure your vacuum is tilted so the water drains out safely, and let it air dry completely by running air through it or using a fan.
How often should I clean my vacuum cleaner hose?
The frequency depends on usage. For average households, a deep clean every 3-6 months is generally sufficient, or whenever you notice reduced suction, unusual noises, or odors. A quick visual check and shake-out after each use is good preventative maintenance.
Can I use chemical drain cleaners for stubborn clogs?
Absolutely NOT! Chemical drain cleaners are highly corrosive and can severely damage the plastic or rubber of your vacuum cleaner hose, making it brittle, leaky, or completely unusable. Stick to mild dish soap, vinegar, baking soda, or physical tools.
My hose is ripped or has a hole, can I still clean it?
A ripped or punctured hose will significantly reduce your vacuum’s suction, making cleaning efforts futile. While you can clean it, the hole needs to be repaired or the hose replaced for optimal performance. Small tears might be temporarily patched with electrical tape, but replacement is the best long-term solution.
What if I find mold inside the hose after cleaning?
If you find mold, it means the hose wasn’t dried properly. You’ll need to repeat the cleaning process, focusing on a diluted bleach solution (if compatible with your hose) or a strong vinegar solution to kill the mold. Most importantly, ensure an absolutely thorough drying process, potentially using a fan for several hours, to prevent recurrence.
Before You Begin: Safety and Preparation
Before you dive into cleaning your vacuum cleaner hose, it’s essential to prepare properly and prioritize safety. This will ensure a smooth, effective, and accident-free cleaning experience.
Safety First: Disconnect Power
This is the most critical step. Always, always, disconnect your vacuum cleaner from the power outlet before you start any maintenance or cleaning. This prevents accidental starts and potential injury. For cordless vacuums, remove the battery pack.
Gather Your Supplies
Having everything you need within reach will make the process much more efficient. Here’s a list of common tools and cleaning agents you might require:
- Rubber gloves (optional, but recommended for hygiene)
- Large bucket or access to a sink/bathtub
- Dish soap (mild, degreasing)
- Long, flexible brush (like a bottle brush or drain brush)
- Coat hanger (straightened, with a small hook at the end, or a flexible plumber’s snake)
- Baking soda
- White vinegar
- Old towels or rags
- Access to an outdoor hose or shower (for rinsing)
- Warm water
Find a Suitable Workspace
Cleaning a vacuum cleaner hose can be a bit messy, especially if you’re dealing with a lot of grime. Choose a workspace that can handle water and dirt. A bathtub, a large utility sink, or an outdoor area (like a patio or driveway) are ideal locations.
Step 1: Disconnect the Vacuum Cleaner Hose
The first practical step is to safely remove the hose from your vacuum cleaner unit. Most vacuum cleaner hoses are designed for easy detachment, but the method can vary slightly depending on your specific vacuum model.
Locate Connection Points
Your vacuum cleaner hose will typically have two main connection points: one to the main vacuum body and one to the wand or floorhead attachment. Identify how each end is secured.
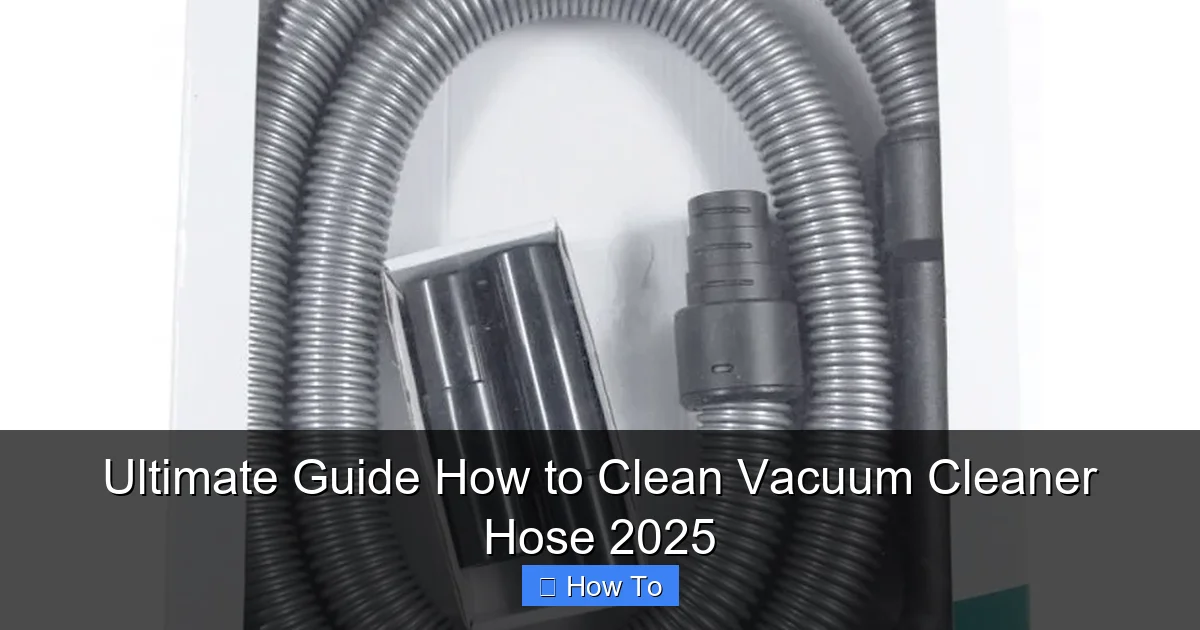
Visual guide about Ultimate Guide How to Clean Vacuum Cleaner Hose 2025
Image source: huoltopalvelu.com
Release Mechanisms
- Push-Button Latches: Many hoses have a button you press to release the hose from its socket. Press the button and gently pull the hose away.
- Twist-Lock Mechanisms: Some hoses require a slight twist (clockwise or counter-clockwise) to unlock them from the main unit. Look for arrows or indicators.
- Friction Fit: Simpler models might just have the hose pushed onto a nozzle. In this case, a firm but gentle pull should detach it.
If you’re unsure, consult your vacuum cleaner’s user manual. Forcing the hose can damage it or the vacuum cleaner itself.
Step 2: Remove Visible Obstructions
Before introducing any liquids, it’s crucial to remove any large, visible blockages from your vacuum cleaner hose. This prevents pushing debris further in and makes the wet cleaning process much easier.
Check Both Ends of the Hose
Hold the hose up to a light source and look through both ends. You might be surprised by what you find! Often, clogs are right near the opening.
Use a Long, Blunt Tool
For obstructions you can see and reach:
- Straightened Coat Hanger: Carefully unfold a wire coat hanger, leaving a small hook at one end. Gently push it through the hose, wiggling and twisting to dislodge the blockage. Be cautious not to puncture the hose.
- Broom Handle or Dowel: For larger, more rigid hoses, a broom handle or a piece of dowel might be stiff enough to push through a clog. Again, use gentle force.
- Vacuum Cleaner Snake Tool: Some specialty cleaning kits come with a long, flexible brush or snake specifically designed for cleaning vacuum cleaner hoses. These are excellent for grabbing hair and other fibrous materials.
Once the blockage is dislodged, try to pull it out rather than pushing it deeper. If it falls out, great! If not, the subsequent wet cleaning steps will help.
Step 3: Pre-Soak (Optional, But Recommended for Heavy Grime)
For hoses that are particularly dirty, greasy, or smelly, a pre-soak can work wonders in loosening stubborn grime before scrubbing.
Prepare the Soaking Solution
Fill a large tub or sink with warm water. Add a generous amount of mild dish soap (e.g., 1/4 to 1/2 cup for a standard bathtub). Swirl the water to create suds.
Submerge the Hose
Place the entire vacuum cleaner hose into the soapy water, ensuring it is fully submerged. You might need to gently manipulate it to allow water to fill the inside. Let it soak for at least 30 minutes, or even a few hours for very stubborn dirt or strong odors. The warm, soapy water will start to break down grease and lift dirt.
Step 4: Deep Cleaning Methods
Now that you’ve addressed visible clogs and possibly pre-soaked the hose, it’s time for a thorough deep clean. You can choose one or combine several methods based on the state of your vacuum cleaner hose.
Method 1: Water & Soap Rinse (For Basic Dirt and Maintenance)
This method is ideal for general dirt, dust, and mild odors.
- Run Water Through: Position one end of the vacuum cleaner hose under a faucet or use a garden hose to run warm, soapy water (if not pre-soaked) through the entire length of the hose. Let the water flow until it comes out clear at the other end.
- Add Soap: If you didn’t pre-soak, pour a small amount of dish soap into one end of the hose.
- Agitate: Gently flex and bend the hose to help the soapy water move around and scrub the interior. You can also block one end with your hand and shake the hose vigorously (if dealing with a shorter hose) to create internal turbulence.
- Rinse Again: Rinse thoroughly with clean, warm water until all suds and debris are gone.
Method 2: Bottle Brush or Snake Cleaner (For Internal Scrubbing)
When dirt is caked on or you have stubborn hair buildup, a physical scrub is often necessary.
- Apply Soap: Pour some soapy water into the vacuum cleaner hose.
- Insert Brush: Take your long, flexible bottle brush or vacuum cleaner snake cleaner. Carefully insert it into one end of the hose and push it through, scrubbing the internal walls as you go.
- Work Through: Gradually work the brush all the way to the other end. You might need to push and pull it several times. For very long hoses, you might need to clean from both ends.
- Rinse: Rinse the hose thoroughly with clean water until the water runs clear and all soap residue is gone.
Method 3: Vinegar and Baking Soda (For Odors and Mild Clogs)
This natural cleaning duo is excellent for neutralizing odors and dislodging minor, non-greasy clogs.
- Baking Soda First: Pour about 1/2 cup of baking soda into one end of the dry or damp vacuum cleaner hose.
- Add Vinegar: Follow with 1 cup of white vinegar. You’ll notice fizzing and foaming – this reaction helps break down grime and eliminate odors.
- Let It Sit: Allow the mixture to work for 15-30 minutes. You can cap both ends loosely to keep the reaction contained within the hose, or hold them to prevent immediate overflow.
- Rinse Thoroughly: Rinse the hose extensively with hot water until all traces of the baking soda and vinegar, along with any dislodged debris, are gone.
Method 4: High-Pressure Water (Use with Caution for Stubborn Clogs)
Use this method only if other options have failed and you are certain your hose is durable enough to withstand pressure. Avoid this for delicate or older hoses.
- Attach to Hose/Shower: Connect one end of your vacuum cleaner hose tightly to a garden hose with a sprayer nozzle or use a strong showerhead.
- Gradual Pressure: Start with low water pressure and gradually increase it. The high-pressure stream can effectively push out stubborn clogs.
- Observe: Watch the other end for the clog to eject. If it doesn’t come out, avoid excessive pressure, as this could damage the hose.
- Rinse & Dry: Once clear, rinse with regular pressure to flush out remaining debris and proceed to drying.
Step 5: Rinse Thoroughly
This step is critical, regardless of the cleaning method you used. Any leftover soap, cleaning solutions, or dislodged debris can cause issues later, including residue buildup, odors, or even damage to your vacuum.
Flush with Clean Water
Run plenty of clean, warm water through the entire length of the vacuum cleaner hose. Keep flushing until the water coming out of the other end is completely clear, free of suds, and any visible particles.
Flex and bend the hose during rinsing to ensure water reaches all internal surfaces and helps to dislodge any last bits of grime. You can even run water from both ends to ensure a complete flush.
Step 6: Dry Completely
One of the most overlooked, yet vital, steps in cleaning your vacuum cleaner hose is proper drying. Failing to dry the hose completely can lead to unpleasant mildew smells, mold growth, and potential damage to your vacuum if moisture gets into electrical components.
Air Drying
- Shake Out Excess Water: Vigorously shake the hose to expel as much water as possible.
- Hang Vertically: Hang the vacuum cleaner hose vertically from a sturdy hook or clothesline. If possible, hang it with both ends facing downwards in a “U” shape to allow for optimal drainage and air circulation.
- Choose a Well-Ventilated Area: Place it in a warm, dry, and well-ventilated area. Outdoors on a sunny day is perfect. If indoors, near an open window or a fan is ideal.
- Allow Ample Time: Depending on humidity and temperature, this could take several hours, or even overnight. It’s better to be safe than sorry – ensure it’s bone dry.
Using a Fan for Faster Drying
If you’re in a hurry or live in a humid environment, a fan can significantly speed up the drying process.
- Position Fan: Direct a fan to blow air into one end of the hanging hose. This forces air circulation through the entire length.
- Check for Dryness: Periodically feel inside the hose with your finger (if possible) and smell for any lingering dampness or mildew. It should feel completely dry to the touch and have no residual odor.
Step 7: Reassemble and Test
Once you are absolutely certain that your vacuum cleaner hose is completely dry inside and out, it’s time to put everything back together and test your hard work.
Reattach the Hose
Carefully reattach the hose to your vacuum cleaner unit and any attachments, following the reverse steps you used to disconnect it. Ensure all connections are secure and properly latched.
Test Your Vacuum
Plug your vacuum cleaner back into the power outlet (or reinsert the battery). Turn it on and listen for any unusual noises. Test the suction power – you should notice a significant improvement!
Vacuum a small, dirty area to ensure everything is functioning correctly and there are no new issues. Enjoy your refreshed, powerful vacuum!
Preventative Maintenance Tips
Keeping your vacuum cleaner hose clean doesn’t have to be a major chore if you incorporate a few simple preventative habits into your routine.
- Regular Inspection: Briefly check the hose for obvious clogs before and after each vacuuming session.
- Avoid Large Debris: Try not to vacuum up large objects, paper, plastic bags, or excessive amounts of string/ribbon, which are common culprits for blockages.
- Shake It Out: After vacuuming, especially if you picked up a lot of pet hair, give the hose a good shake over a trash can to dislodge loose material.
- Annual Deep Clean: Even if you don’t notice major issues, consider giving your vacuum cleaner hose a full deep clean at least once a year to prevent buildup.
- Check Filters: A clogged filter can also reduce suction and push more dirt back towards the hose. Ensure your vacuum’s filters are clean.
Troubleshooting Common Hose Cleaning Issues
Sometimes, even with the best efforts, you might encounter a few snags. Here’s how to troubleshoot common problems.
Issue: Hose Still Feels Clogged After Cleaning
If suction hasn’t improved or you still suspect a blockage:
- Re-examine with Light: Hold the hose up to a strong light source again. Sometimes a partial clog can be missed.
- Use a Stiffer Tool: If you used a brush, try a straightened coat hanger or a plumbing snake to physically break up and extract the blockage.
- Repeat Wet Cleaning: Give it another go with a strong soapy solution or the baking soda/vinegar method, allowing it to soak longer.
- Consider Professional Help: In rare cases, if the clog is extremely dense and won’t budge, you might need to take your vacuum to a professional repair service.
Issue: Hose Has a Lingering Odor
This usually indicates that odor-causing bacteria or mold spores were not fully removed or dried properly.
- Repeat Vinegar/Baking Soda: Perform another baking soda and vinegar treatment, letting it sit for an extended period (1-2 hours).
- Sanitize: After cleaning, you can rinse the hose with a very diluted bleach solution (1 part bleach to 10 parts water) if your hose material can withstand it (check manufacturer guidelines first!), followed by a very thorough rinse with plain water.
- Ensure Complete Drying: Double-check that the hose is absolutely, 100% dry. Any residual moisture will lead to mildew. Use a fan for extended periods.
- Deodorizing Spray: Once completely dry, you can lightly spray the inside of the hose with an odor-neutralizing fabric spray (like Febreze) and let it air dry again.
Issue: Hose Won’t Dry Completely
Humidity and lack of airflow are common culprits.
- Maximize Airflow: Hang the hose in an area with direct airflow, preferably outdoors on a sunny, breezy day.
- Use a Powerful Fan: Position a strong fan to blow air directly into one end of the hose for several hours.
- Consider a Dehumidifier: If drying indoors, use a dehumidifier in the room to pull moisture from the air.
Conclusion
Congratulations! You’ve successfully navigated the ultimate guide to cleaning your vacuum cleaner hose in 2025. By following these detailed steps, you’ve not only cleared out dirt and debris but also restored your vacuum’s suction power, eliminated unpleasant odors, and contributed to a healthier home environment. Regular maintenance of your vacuum cleaner hose is a small effort that yields significant rewards, extending the life of your appliance and keeping your cleaning routine efficient. Remember, a clean hose equals a happy vacuum and a truly clean home. Keep up the great work!
🎥 Related Video: Amr TVC Car Vacuum Cleaner Unboxing 🔥
📺 The Box Opening
Amr TVC Car Vacuum Cleaner Unboxing Hello Everyone ! Here, we bring you the coolest and most exciting remote control …