Why Vacuum Cleaner Stopped Working
If your vacuum cleaner stopped working, don’t panic! Most issues are surprisingly simple to fix yourself. Common culprits include electrical problems like a tripped breaker or a loose cord, severe clogs in the hose or brush roll, dirty filters, or an overfilled dust bag/canister. Troubleshooting these basic areas can often bring your trusty cleaning companion back to life without a professional repair.
Oh no! You’re all set to tackle that dusty floor, you plug in your trusty vacuum cleaner, and… nothing. Or maybe it makes a strange noise and then gives up the ghost. It’s frustrating, right? A vacuum cleaner that suddenly stopped working can throw a wrench into your cleaning plans and leave you wondering if you need to buy a whole new machine.
But hold on a second before you despair! The good news is that in many cases, when a vacuum cleaner stopped working, the problem is often something quite common, simple, and fixable right at home. You don’t always need an expensive repair or a trip to the store for a new model. Most vacuum issues stem from a few key areas that are easy to diagnose and, with a little know-how, even easier to fix.
In this comprehensive guide, we’re going to walk through all the common reasons why a vacuum cleaner stopped working. We’ll break down how to troubleshoot each potential issue, offering practical tips and easy-to-follow steps to get your cleaning companion back in action. So, grab a flashlight and maybe an old pair of scissors, and let’s get your vacuum sucking up dirt like a champion again!
Key Takeaways
- Start with Power: Always check the power cord, outlet, and circuit breaker first if your vacuum has no power at all.
- Hunt for Clogs: Loss of suction or unusual noises often point to blockages in the hose, brush roll, or internal airways.
- Filter Maintenance is Key: Dirty or clogged filters severely impact performance and can lead to overheating or complete shutdown.
- Empty and Secure: An overfilled dust bag/canister or an improperly seated container can prevent your vacuum from working or sucking effectively.
- Brush Roll Inspection: A non-spinning brush roll is usually due to hair tangles or a broken drive belt, both of which are often user-fixable.
- Don’t Overlook Overheating: Many vacuums have a thermal cut-off; if it stops suddenly, check for clogs or full bags and let it cool down.
- Know When to Call a Pro: For complex electrical issues, motor problems, or if DIY fixes don’t work, professional repair might be necessary.
Quick Answers to Common Questions
My vacuum stopped suddenly and won’t turn back on. What’s the first thing I should check?
First, unplug the vacuum. Then, check for any visible clogs in the hose or brush roll and make sure the dust bag/canister isn’t completely full. Allow the vacuum to cool down for at least 30-60 minutes, as it might have a tripped thermal cut-off switch due to overheating.
Why is my vacuum turning on but not picking up dirt?
If your vacuum has power but no suction, the most common culprits are clogs in the hose, a non-spinning brush roll due to tangles or a broken belt, or severely dirty/clogged filters. Check all these areas thoroughly.
Can a full vacuum bag really cause a vacuum to stop working?
Yes, absolutely. An overfilled dust bag or canister restricts airflow to such an extent that the vacuum’s suction power drops dramatically, and in some cases, it can cause the motor to overheat and shut off as a safety measure.
How often should I clean my vacuum filters?
The frequency depends on usage and filter type. Washable filters often need cleaning every 1-3 months, while non-washable filters might need tapping out more frequently. HEPA filters typically require replacement every 6-12 months. Always consult your vacuum’s user manual for specific recommendations.
Is it safe to cut hair off my vacuum’s brush roll with scissors?
Yes, it’s generally safe to use scissors or a seam ripper to carefully cut hair and string off the brush roll, but always ensure the vacuum is unplugged first. Be careful not to cut the brush roll bristles or the drive belt.
📑 Table of Contents
No Power? Start Here! (Electrical Issues)
It sounds basic, but electrical problems are often the first thing to check when your vacuum cleaner stopped working completely. If it’s dead silent and shows no signs of life, electricity is usually the culprit.
Power Cord and Plug Inspection
The very first thing to look at is the power cord and plug itself. Over time, cords can get frayed, twisted, or even cut, especially if they’ve been run over by the vacuum or snagged on furniture.
- Visual Check: Carefully examine the entire length of the cord for any cuts, nicks, exposed wires, or kinks. If you see any damage, stop immediately and do not plug it in. This is a safety hazard and likely requires professional repair or replacement of the cord.
- Plug Integrity: Check the prongs on the plug. Are they bent or loose? Is there any discoloration that might indicate overheating? A damaged plug can prevent power from reaching the vacuum.
- Loose Connections: Sometimes, the cord simply isn’t fully plugged into the wall outlet. Give it a firm push to ensure it’s seated properly.
Checking the Power Outlet and Circuit Breaker
It might not be the vacuum at all! Sometimes the issue lies with your home’s electrical system.
- Test the Outlet: Plug another small appliance (like a lamp or phone charger) into the same outlet the vacuum was using. If the other appliance also doesn’t work, then the problem is with the outlet itself.
- Check Your Breaker Box: If the outlet is dead, head to your home’s electrical panel (usually in a basement, garage, or utility closet). Look for any tripped circuit breakers. A tripped breaker will often be in an “off” or middle position. Flip it firmly to the “off” position first, and then back to “on.” If it trips again immediately, you might have an overload or a short circuit in your home wiring, which requires an electrician.
- GFCI Outlets: If your vacuum was plugged into a GFCI (Ground Fault Circuit Interrupter) outlet (often found in kitchens, bathrooms, or outdoors), press the “Reset” button on the outlet. These outlets trip to prevent electrical shock.
Internal Wiring and Switches
While less common for the average DIYer to fix, internal wiring issues or a faulty power switch can also cause your vacuum to stop working. If you’ve checked everything external and the vacuum still has no power, the problem might be inside. This is usually where you’d consider professional repair, as opening up the vacuum can be complex and void warranties.
Loss of Suction? It’s Likely a Clog!
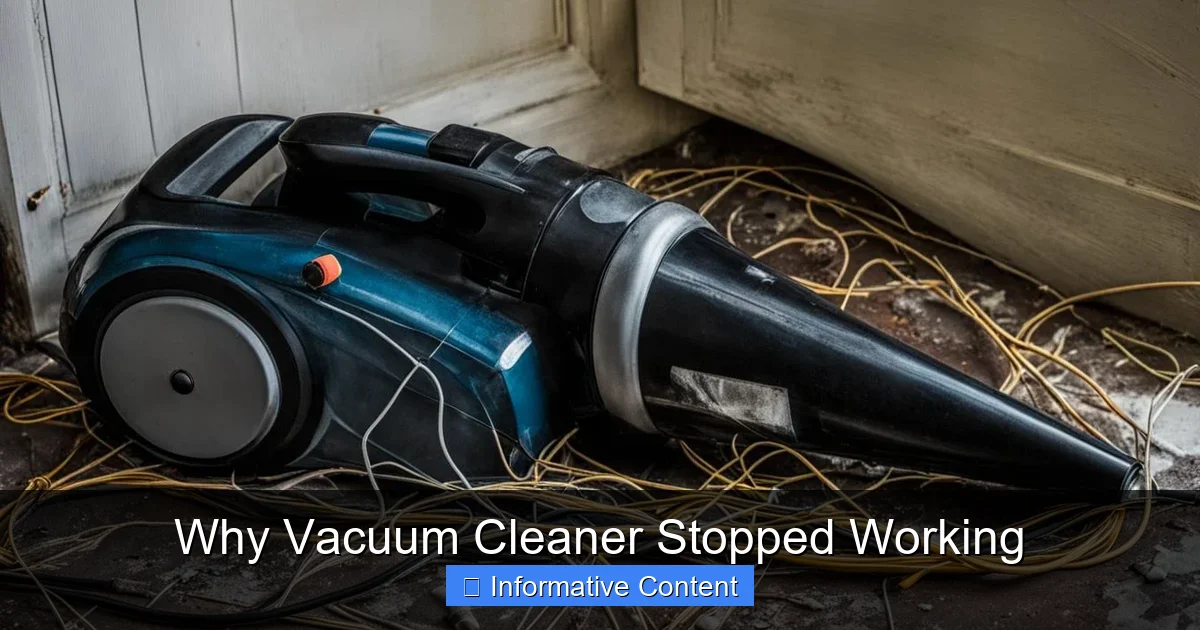
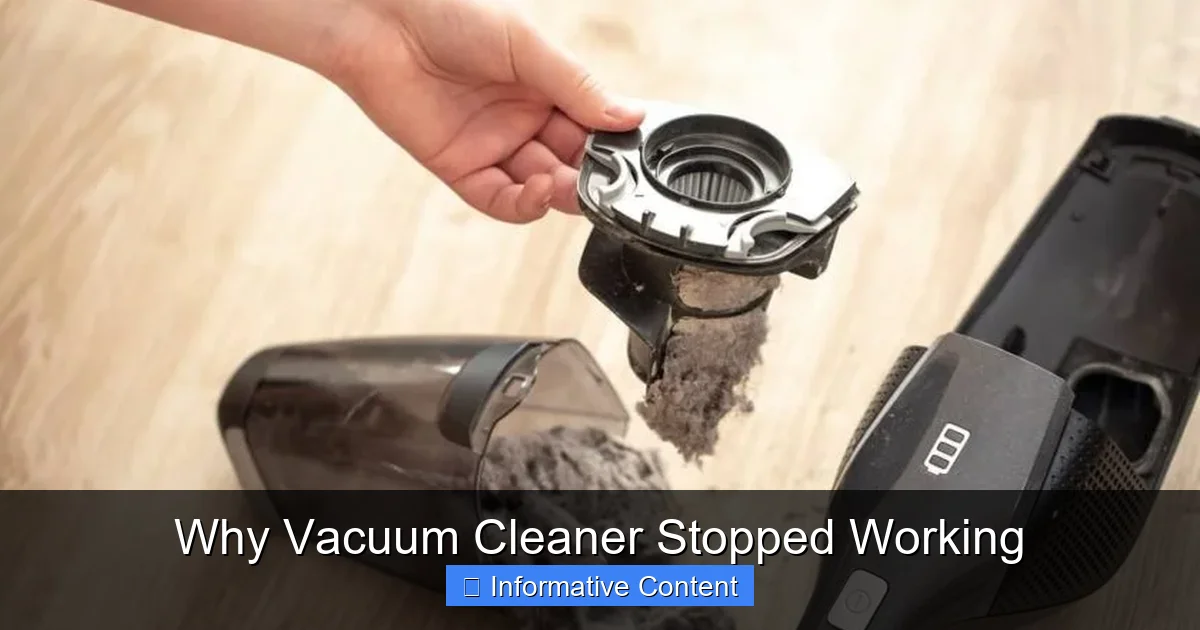
Visual guide about Why Vacuum Cleaner Stopped Working
Image source: vacmasterguide.com
One of the most frequent reasons why a vacuum cleaner stopped working efficiently, or seems to have lost its “oomph,” is a blockage. Vacuums rely on airflow to generate suction, and anything obstructing that path will drastically reduce performance.
Blocked Hose and Attachments
This is a prime spot for clogs! Hair, dust bunnies, socks, small toys – you name it, it can get stuck in your vacuum hose.
- Remove Attachments: First, detach any wands, hoses, or specialty tools. Check each piece individually for blockages.
- Inspect the Main Hose: For the main vacuum hose, disconnect it from both the body of the vacuum and the cleaning head. Straighten it out as much as possible. Look through it. If you can’t see through, something is stuck.
- The “Broom Handle” Trick: Carefully use a broom handle or a long, blunt object to push through any visible clogs. Be gentle and avoid anything sharp that could puncture the hose.
- Hose Suction Test: With the hose disconnected from the main cleaning head but still attached to the vacuum body, turn the vacuum on (if it powers up). You should feel strong suction directly from the hose opening. If not, the clog is higher up or within the vacuum body.
Clogged Brush Roll Area
The brush roll (or beater bar) is designed to agitate carpets and sweep debris into the suction path. It’s also a magnet for hair, string, and carpet fibers.
- Flip and Inspect: Unplug the vacuum, then carefully flip the cleaning head over. You’ll see the brush roll.
- Remove Obstructions: Use scissors or a seam ripper to carefully cut away any tangled hair, string, or carpet fibers wrapped around the brush roll. Be careful not to cut the bristles or the drive belt.
- Check for Stuck Debris: Look for larger items like fabric scraps or paper that might be jammed around the brush roll or in the housing that connects it to the suction inlet.
- Clear Air Pathway: Ensure the opening leading from the brush roll housing into the main vacuum body is clear.
Internal Airway Obstructions
Beyond the hose and brush roll, clogs can occur within the vacuum’s internal airways, especially where the dirty air travels from the cleaning head to the dust bag or canister.
- Access Ports: Many upright and canister vacuums have access ports or covers that can be opened to inspect internal pathways. Consult your vacuum’s manual for specific instructions on how to access these areas safely.
- Look for Choke Points: Pay close attention to narrow bends or junctions where debris is likely to accumulate.
Filter Frustrations: The Unsung Heroes
Filters are crucial for trapping dust and allergens, but they can also be a major reason why a vacuum cleaner stopped working effectively or even overheated and shut off. A clogged filter restricts airflow, putting strain on the motor and reducing suction.
Dirty Pre-Motor Filters
These filters protect the motor from incoming dust and debris. They are typically located between the dust bag/canister and the motor.
- Locate and Inspect: Most vacuums have at least one pre-motor filter. Check your manual for its exact location. It’s often near the dust cup or bag compartment.
- Check for Dust Buildup: If it’s visibly caked with dust and grime, it needs attention.
- Cleaning Instructions: Many pre-motor filters are washable (foam or felt) or require tapping out dust. Always follow your manufacturer’s instructions for cleaning. Allow washable filters to air dry completely (24-48 hours) before reinstalling them. Running a damp filter can severely damage the motor.
Clogged Post-Motor (HEPA) Filters
These filters clean the air *after* it passes through the motor, ensuring that clean air is exhausted back into your home. HEPA filters are particularly important for allergy sufferers.
- Locate and Inspect: Post-motor filters are usually found near the exhaust vent of the vacuum.
- Replacement Only: Most HEPA filters are not washable and need to be replaced periodically, typically every 6-12 months, depending on usage. Check your vacuum’s manual for the recommended replacement schedule.
- Impact of Clog: A severely clogged post-motor filter can restrict airflow so much that the vacuum overheats and shuts down, or it might just produce a weak exhaust flow and terrible suction.
When to Clean vs. Replace Filters
Knowing the difference is key to proper maintenance.
- Washable Filters: These are designed to be rinsed under cold water until the water runs clear. Ensure they are bone dry before reinstallation.
- Non-Washable Filters: These should be tapped out over a trash can to remove loose dust. Never wash a non-washable filter.
- Replacement Schedule: Even washable filters eventually wear out and lose their effectiveness. Stick to your vacuum’s recommended replacement schedule for optimal performance and air filtration.
Bag/Canister Woes: Full or Misaligned
It might seem obvious, but sometimes the simplest things are overlooked when you’re troubleshooting why vacuum cleaner stopped working. The dust collection system is a common culprit.
Overfilled Dust Bag or Canister
A full dust bag or canister dramatically reduces suction. There’s simply no more room for air to flow or debris to collect.
- Bagged Vacuums: If your vacuum uses bags, check the indicator light (if it has one) or visually inspect the bag. If it’s bulging or feels heavy, it’s time to replace it. Don’t try to reuse disposable bags.
- Bagless Canisters: Most bagless canisters have a “max fill” line. If the debris has reached or exceeded this line, empty it immediately. Rinse out the canister if recommended by the manufacturer and ensure it’s dry before reattaching.
- Impact on Suction: A full bag or canister acts as a major blockage, causing a significant drop in suction power.
Improperly Seated Canister or Bag
If the dust collection system isn’t installed correctly, it can create air leaks or prevent the vacuum from operating at all.
- Bag Installation: Ensure the disposable bag is properly seated in its holder and that any seals or tabs are securely fastened. A loose bag can lead to dust escaping into the motor compartment or prevent proper airflow.
- Canister Alignment: For bagless vacuums, check that the dust canister is clicked firmly into place. Listen for a positive “click” or ensure all latches are engaged. If it’s not sealed correctly, air can escape, leading to poor suction or even preventing the motor from engaging in some models.
- Gasket Check: Inspect the rubber gaskets around the canister or bag housing. These seals prevent air leakage. If they are cracked, torn, or missing, air can escape, reducing suction.
Brush Roll Problems: No Spin, No Clean
If your vacuum cleaner turns on but isn’t picking up dirt effectively, especially on carpets, the brush roll is a prime suspect. A stationary or poorly spinning brush roll is a common reason for underperformance.
Tangled Brush Roll
As mentioned before, hair, string, and carpet fibers love to wrap around the brush roll, but if it gets severe enough, it can stop the brush from spinning altogether.
- Unplug and Flip: Always unplug your vacuum before performing any maintenance. Flip the powerhead over.
- Clear Obstructions: Use scissors or a seam ripper to carefully cut away all tangled materials. Be patient and thorough. Make sure the bristles are free to move.
- Remove End Caps: Sometimes, debris gets trapped under the brush roll’s end caps. Many models allow you to remove these caps (often by unscrewing a few screws) for a more thorough cleaning.
Worn or Broken Drive Belt
Most brush rolls are powered by a drive belt connected to the motor. If this belt breaks or stretches, the brush roll won’t spin.
- Visual Inspection: After clearing tangles, check the rubber drive belt that connects the brush roll to the motor shaft. Is it stretched, cracked, or completely broken?
- Replacement: If the belt is broken or appears worn out, it needs to be replaced. Drive belts are usually inexpensive and specific to your vacuum model. You can often find them at appliance stores or online. Replacing one typically involves removing the bottom plate of the cleaning head, looping the new belt around the motor shaft and brush roll, and then reassembling. Your vacuum manual will have specific instructions.
Brush Roll Motor Issues
Some high-end or cordless vacuums have a separate motor dedicated to the brush roll. If you’ve checked for tangles and replaced the drive belt (if applicable) and the brush roll still isn’t spinning, there might be an issue with this secondary motor or its wiring. This is generally a job for a professional technician.
Beyond the Basics: Advanced Troubleshooting & When to Call a Pro
Sometimes the issue goes deeper than a simple clog or a full bag. When your vacuum cleaner stopped working after all the basic checks, it might be time to consider more complex issues or seek expert help.
Motor Overheating Protection
Many modern vacuum cleaners are equipped with a thermal cut-off switch. This safety feature automatically shuts off the motor if it starts to overheat, protecting it from damage.
- Common Causes: Overheating is usually caused by restricted airflow – a severely clogged filter, a major blockage in the hose or main airway, or an overfilled dust bag/canister. Running the vacuum for too long without emptying it can also contribute.
- Resetting: If your vacuum suddenly stops mid-use, unplug it immediately. Check for and clear any clogs, empty the dust bin/replace the bag, and clean or replace filters. Then, let the vacuum cool down completely for at least 30-60 minutes. After it has cooled, plug it back in and try turning it on again. It should reset. If it keeps overheating, there’s likely an ongoing airflow issue you haven’t found or a deeper motor problem.
Electronic Control Board Malfunctions
Modern vacuums, especially cordless and smart models, often have complex electronic control boards. A faulty circuit board can lead to a variety of symptoms, from intermittent power to complete failure.
- Diagnosis: This is difficult to diagnose without specialized tools. Symptoms might include erratic behavior, lights not working, or the vacuum simply not responding to commands.
- Repair: Replacing an electronic control board is usually an expensive repair, often requiring a professional technician. In many cases, it might be more cost-effective to replace the vacuum altogether, especially if it’s an older model.
Signs It’s Time for Professional Help or Replacement
While many vacuum problems are DIY-friendly, some issues warrant professional intervention or even signal the end of your vacuum’s life.
- Persistent Electrical Issues: If you see sparks, smell burning plastic, or the circuit breaker keeps tripping after you’ve checked the outlet, stop using the vacuum immediately. These are serious safety concerns.
- Motor Noise/Failure: Unusual grinding, whining, or rattling noises from the motor, or if the motor simply won’t spin even after clearing all clogs and checking filters, suggest internal motor damage. Motor repairs are often costly.
- Beyond Your Comfort Zone: If you’re not comfortable opening up the vacuum, dealing with internal components, or if your attempts at troubleshooting haven’t worked, a professional can offer a diagnosis.
- Cost of Repair vs. Replacement: Get an estimate for major repairs. If the repair cost is more than 50% of the price of a new, comparable vacuum, it’s usually wiser to invest in a new model. Consider the age of your vacuum; older models might be prone to other issues soon.
Dealing with a vacuum cleaner that stopped working can be annoying, but with a little patience and systematic troubleshooting, you can often pinpoint and fix the problem yourself. Remember to always unplug your vacuum before performing any inspection or maintenance to ensure your safety. Most vacuum cleaner woes boil down to a lack of airflow, so focusing on clogs and dirty filters is almost always a good starting point. Good luck, and happy cleaning!
🎥 Related Video: Vacuum NOT SUCKING? Here's How To FIX IT!!
📺 Clean With Confidence
MORE CLEANING VIDEOS ☆ – How to Clean a Dishwasher Properly: https://youtu.be/_-TRcRya-dA – How to Professionally …
Frequently Asked Questions
What causes a vacuum cleaner to lose suction over time?
A vacuum cleaner typically loses suction over time due to gradual accumulation of dirt in filters, minor clogs that build up in the hose or brush roll, or an aging motor that isn’t as efficient as it once was. Regular cleaning of filters and emptying the dust bin can mitigate this.
Can I replace my vacuum’s drive belt myself?
Yes, replacing a vacuum drive belt is a common DIY repair for many models. You’ll usually need to unscrew the bottom plate of the cleaning head, remove the old belt, and loop a new one in place. Consult your vacuum’s manual for specific instructions and the correct belt size.
Why does my vacuum cleaner smell like burning when it runs?
A burning smell from your vacuum cleaner is often a sign of a severe blockage, a struggling motor, or a worn-out drive belt slipping on the brush roll. Unplug it immediately, check for clogs, inspect the belt, and allow the motor to cool down. If the smell persists, seek professional help.
My cordless vacuum isn’t charging. What could be wrong?
If your cordless vacuum isn’t charging, check the power adapter to ensure it’s plugged in correctly and the outlet is working. Also, inspect the charging contacts on both the vacuum and the charger for dirt or damage. A faulty battery pack or charger itself could also be the issue, sometimes requiring replacement.
When should I consider buying a new vacuum instead of repairing my old one?
Consider buying a new vacuum if the repair cost exceeds 50% of the price of a new unit, especially for an older model. Major motor issues, extensive internal electrical problems, or frequent breakdowns after repairs often make replacement a more economical choice in the long run.
Are all vacuum filters washable?
No, not all vacuum filters are washable. Some are designed to be rinsed under cold water (often foam or felt filters), while others (like most HEPA filters and paper-based filters) are meant to be tapped clean or replaced entirely. Always check your vacuum’s user manual to determine the correct maintenance for your specific filter types.