Why Is My Vacuum Cleaner Not Working
It’s incredibly frustrating when your vacuum cleaner decides to quit on you, but don’t panic! Most common vacuum issues, like a lack of suction or a complete power failure, are surprisingly simple to diagnose and fix yourself. Often, the problem boils down to a clogged hose, a full dustbin, or a tangled brush roll. Learning a few basic troubleshooting steps can save you time, money, and the hassle of buying a new machine.
Hey there! Is your vacuum cleaner just sitting there, stubbornly refusing to suck up that pet hair or those crumbs? It’s a truly frustrating experience, isn’t it? You’re all set to tackle the mess, only for your trusty cleaning companion to let you down. Before you throw in the towel and start browsing for a new model, take a deep breath. The good news is that many common issues that make a vacuum cleaner stop working are surprisingly simple to diagnose and fix yourself.
You might be thinking, “But I’m not a repair person!” And that’s totally fine. This guide is designed for anyone who wants to understand why their vacuum cleaner isn’t working and how to get it back in action without needing special tools or advanced technical skills. We’ll walk through the most common culprits, from power problems to pesky clogs, and give you actionable steps to troubleshoot your machine. Let’s roll up our sleeves and get that vacuum cleaner working its magic again!
Ready to become a vacuum detective? We’ll cover everything from the simplest checks to more involved, but still manageable, fixes. By the end of this article, you’ll have a much better understanding of your vacuum cleaner and hopefully, a fully functional one too. So, let’s dive into why your vacuum cleaner might not be working and what you can do about it.
Key Takeaways
- No Power? Check the Basics First: Before anything else, ensure your vacuum is plugged in correctly, the outlet works, and the circuit breaker hasn’t tripped. A simple power issue is often the culprit when your vacuum cleaner isn’t working at all.
- Clogs are the Enemy of Suction: The most frequent reason for poor suction or a completely stopped vacuum is a blockage. Systematically check the hose, brush roll, and internal pathways for debris.
- Filters and Dustbins Need Attention: Dirty filters severely restrict airflow, reducing suction. A full bag or canister also prevents proper air movement. Regular cleaning and emptying are crucial for performance.
- Brush Roll and Belt Maintenance: A tangled brush roll can prevent effective cleaning, while a worn or broken belt means the brush roll won’t spin at all. Inspect and clear the brush roll, and replace the belt if it’s stretched or snapped.
- Thermal Cutout for Overheating: If your vacuum suddenly stops mid-clean, it might have overheated. Allow it to cool down for 30-60 minutes before checking for clogs or full bags that might have caused the strain.
- Regular Maintenance Prevents Problems: Proactive cleaning of filters, clearing the brush roll, and checking hoses periodically can prevent most common vacuum cleaner issues before they start, extending your machine’s life.
Quick Answers to Common Questions
My vacuum suddenly stopped and won’t turn back on. What’s the first thing to check?
First, unplug the vacuum and let it cool down for 30-60 minutes. It likely engaged its thermal cutout due to overheating, often caused by a clog or full dustbin. While it cools, check for and clear any obstructions.
Why is my vacuum cleaner not picking up dirt, but the motor sounds fine?
If the motor sounds normal but there’s no suction, the most common culprits are a severe clog in the hose, nozzle, or internal pathways, or a completely full dust bag/canister. It could also be extremely dirty filters.
How often should I clean my vacuum filters?
For washable filters, aim for once a month, ensuring they are completely dry before reinserting. Non-washable filters should typically be replaced every 6-12 months, depending on usage and manufacturer recommendations.
My vacuum’s brush roll isn’t spinning, even after clearing hair. What next?
If the brush roll is free of tangles but still not spinning, the drive belt is likely worn, stretched, or broken. You’ll need to access the belt (usually under the brush roll) to inspect and replace it if necessary.
Is it safe to use a vacuum with a damaged power cord?
No, absolutely not. A damaged power cord with frayed wires or cuts is a serious electrical hazard and could cause a fire or electric shock. Stop using the vacuum immediately and have the cord replaced by a qualified technician.
📑 Table of Contents
- 1. No Power? Let’s Check the Basics First!
- 2. Clogs and Obstructions: The Arch-Nemesis of Suction
- 3. Filtration System Follies: Dirty Filters & Full Bags
- 4. Brush Roll and Belt Woes: Getting to the Core of Cleaning
- 5. Motor or Suction Loss: When Deeper Issues Arise
- Conclusion: Get Your Vacuum Cleaner Back in Action!
1. No Power? Let’s Check the Basics First!
This might seem obvious, but it’s often the first place to start when your vacuum cleaner isn’t working at all. Sometimes, the simplest solution is the right one!
Is It Plugged In Properly?
It sounds silly, but a loose plug is more common than you’d think. Give the cord a firm push into the wall outlet. Sometimes, even a slight wiggle can be enough to interrupt the power supply.
Test the Outlet
Try plugging another appliance (like a lamp or phone charger) into the same outlet. If that appliance doesn’t work either, the problem isn’t with your vacuum cleaner; it’s with the outlet itself. In this case, check your home’s circuit breaker box. A tripped breaker can cut power to an entire room or specific outlets. Simply flip the tripped breaker back to the “on” position. If it keeps tripping, you might have an electrical issue, and it’s best to call an electrician.
Inspect the Power Cord
Carefully examine the vacuum cleaner’s power cord for any visible damage. Frayed wires, cuts, or pinched spots can prevent power from reaching the motor. If you spot any damage, *do not* use the vacuum. A damaged power cord is a serious safety hazard and needs to be replaced by a professional.
The On/Off Switch
While less common, a faulty on/off switch can also be why your vacuum cleaner isn’t working. If the switch feels loose, sticky, or doesn’t click satisfyingly, it might be the issue. This usually requires professional repair.
Thermal Cutout Protection
Many modern vacuums have a thermal cutout feature. If the motor gets too hot (often due to a clog or full dustbin causing it to work harder), it will automatically shut off to prevent damage. If your vacuum suddenly stops mid-use, switch it off, unplug it, and let it cool down for at least 30-60 minutes. While it’s cooling, check for any clogs or full bags/canisters that might have caused the overheating.
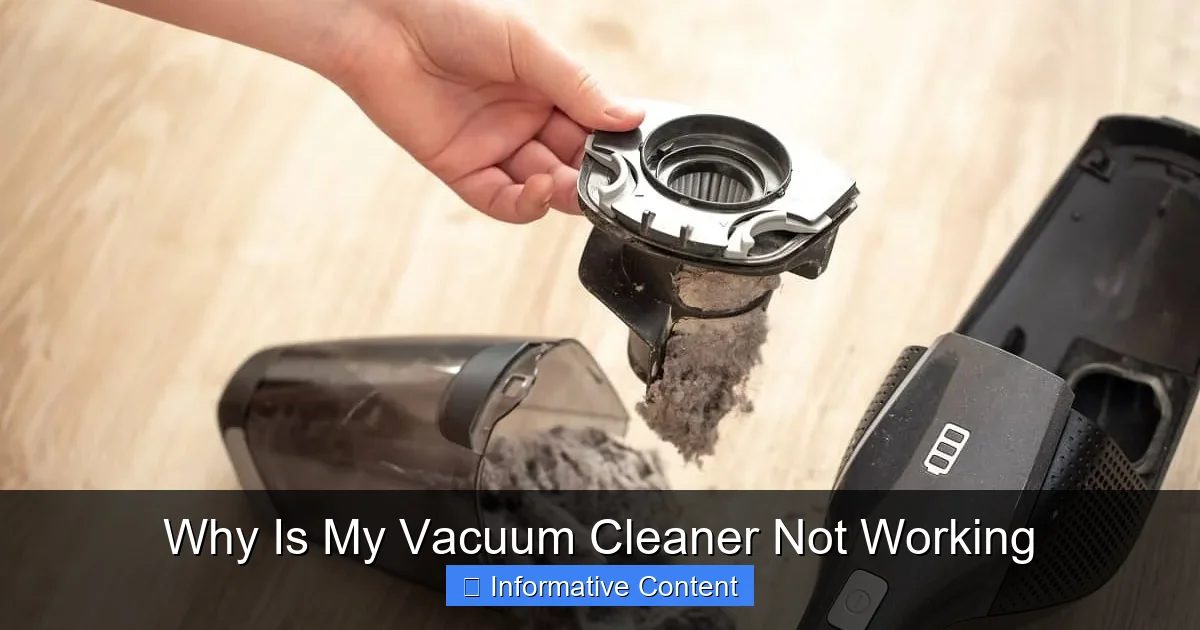
2. Clogs and Obstructions: The Arch-Nemesis of Suction
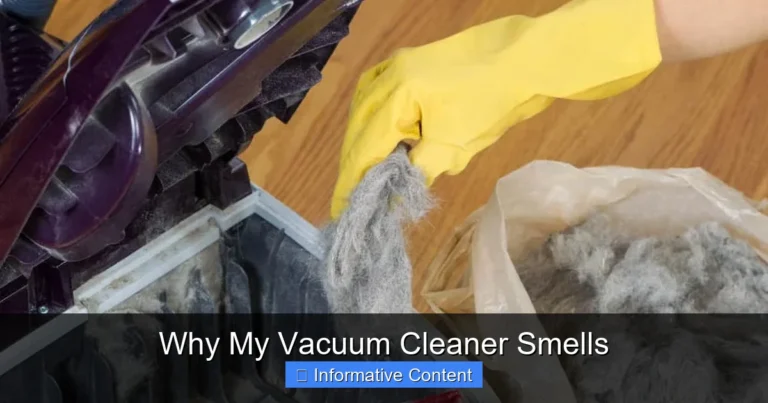
Visual guide about Why Is My Vacuum Cleaner Not Working
Image source: techasur.com
This is, hands down, the most common reason why a vacuum cleaner isn’t working efficiently or why you’re experiencing a dramatic loss of suction. Things get sucked up that shouldn’t, and they cause blockages.
Check the Hose
The main hose is a prime spot for clogs. Long hair, socks, small toys, or even large clumps of dust can get stuck here.
- Detachment: Disconnect the hose from both the main body of the vacuum and the floor attachment.
- Visual Inspection: Look through both ends of the hose. Can you see light? If not, there’s a blockage.
- Physical Check: Gently push a broom handle (or a similar long, blunt object) through the hose. Be careful not to puncture it. A plumber’s snake can also work wonders here.
- Squeeze and Shake: Sometimes, you can dislodge a soft clog by gently squeezing the hose and shaking it.
Inspect the Nozzle and Floor Head
The opening where air and debris enter the vacuum can also get blocked.
- Entry Point: Flip the floor head over and look at the opening where it meets the floor. Is there anything visibly stuck?
- Inside the Neck: Check the neck or elbow connecting the floor head to the main body or wand. This curved section is another common choke point.
Check the Wand and Attachments
If your vacuum has an extendable wand or uses various attachments, remove them and check for obstructions. Just like the main hose, these can easily become clogged.
Internal Pathways
Some vacuums have internal air pathways leading from the hose connection to the dustbin or bag. If you’ve cleared the hose and attachments but still have no suction, consult your vacuum’s manual to locate and check these internal paths. This might involve removing a few screws or panels.
3. Filtration System Follies: Dirty Filters & Full Bags
A clean vacuum relies on a clear path for air. The filtration system is crucial for trapping dust and allergens, but if it’s neglected, it can severely impact performance. When your vacuum cleaner isn’t working with its usual power, these are often the culprits.
Dirty or Clogged Filters
Filters are designed to catch dirt and fine particles. Over time, they become coated with this debris, restricting airflow and causing a significant drop in suction.
- Locate Filters: Refer to your manual to find all your vacuum’s filters. Most have at least one pre-motor filter (often washable or replaceable) and a post-motor HEPA filter (usually replaceable).
- Clean/Replace:
- Washable Filters: If your filters are washable, rinse them under cool water until the water runs clear. *Crucially*, let them air dry completely for at least 24 hours before putting them back in. Putting a damp filter back in can damage the motor and cause mold.
- Replaceable Filters: If your filters are not washable or are severely degraded, it’s time to replace them. Check your vacuum’s brand and model for the correct replacement parts.
- Frequency: Aim to clean washable filters monthly and replace non-washable filters every 6-12 months, or more often if you vacuum frequently or have pets.
Full Dust Bag or Canister
This one is incredibly simple, yet often overlooked when a vacuum cleaner isn’t working as it should.
- Bagged Vacuums: If your vacuum uses bags, replace the bag when it’s about two-thirds full, not just when it’s bursting at the seams. A nearly full bag drastically reduces suction.
- Bagless Vacuums: Empty the dust canister after every use or when the dirt level reaches the “max fill” line. Rinse the canister if it gets particularly dirty, ensuring it’s completely dry before reassembling.
A vacuum that’s constantly running with a full bag or dirty filter has to work much harder, leading to overheating and potential motor damage over time.
4. Brush Roll and Belt Woes: Getting to the Core of Cleaning
The brush roll (also called the beater bar) is what agitates carpet fibers and sweeps debris into the suction path. If it’s not spinning or is clogged, your vacuum cleaner isn’t working effectively on carpets.
Tangled Brush Roll
Long hair, carpet fibers, and string are notorious for getting wrapped around the brush roll, preventing it from spinning freely or at all.
- Turn Off & Unplug: *Always* unplug the vacuum before working on the brush roll.
- Flip Over: Lay the vacuum on its side or back to access the underside of the floor head.
- Clear Debris: Use scissors or a seam ripper to carefully cut away any tangled hair, string, or debris. Be gentle not to cut the brush bristles or the belt. Many brush rolls can be removed with a coin or screwdriver for easier cleaning.
- Spin Test: Once cleared, try to spin the brush roll manually. It should spin freely without resistance.
Worn or Broken Belt
The brush roll is usually powered by a belt connected to the motor. Over time, these belts can stretch, fray, or snap. If your brush roll isn’t spinning even after clearing tangles, a faulty belt is a highly likely culprit.
- Locate the Belt: It’s usually found underneath the brush roll, connecting it to a motor shaft. You might need to remove a bottom plate to access it.
- Inspect the Belt: Is it loose, stretched, cracked, or completely snapped?
- Replacement: If the belt is damaged, you’ll need a replacement. These are usually inexpensive and specific to your vacuum model. Installation typically involves looping the new belt around the motor shaft and then around the brush roll before securing the brush roll back in place.
A properly functioning brush roll and belt are essential for deep cleaning, especially on carpets. If these components are faulty, you’ll find your vacuum cleaner isn’t working nearly as well.
5. Motor or Suction Loss: When Deeper Issues Arise
If you’ve gone through all the previous steps and your vacuum cleaner still isn’t working, or you’re experiencing persistent suction loss, it might be a more internal issue.
Motor Problems
While less common for DIY fixes, the motor itself can fail. Signs include unusual grinding noises, a burning smell, sparks, or a complete lack of power even after checking the cord and outlet. If you suspect a motor issue, it’s generally best to take it to a professional repair shop. Trying to fix a motor yourself can be complex and potentially dangerous.
Air Leaks
Sometimes, the problem isn’t a clog but rather air escaping where it shouldn’t.
- Cracked Housing: Check the vacuum’s body for any visible cracks or damage, especially around seals and connections.
- Loose Connections: Ensure all hoses, attachments, and dustbin components are securely fitted. A poor seal can lead to significant suction loss.
Even a small crack or a loose connection can cause a noticeable decrease in suction, making it seem like your vacuum cleaner isn’t working properly.
Dirty Motor Filter (If Applicable)
Some vacuums have a motor filter that protects the motor from fine dust. If this filter gets completely clogged, it can restrict airflow to the motor, causing it to overheat or lose power. Check your manual to see if your model has one and how to clean or replace it.
Advanced Troubleshooting and Professional Help
If you’ve systematically checked everything above and your vacuum cleaner is still not working, it might be time to consider professional repair. Some issues, like a complete circuit board failure or a complex internal blockage, are best left to experts. However, for most common problems, these troubleshooting steps should have you covered!
Conclusion: Get Your Vacuum Cleaner Back in Action!
It’s easy to feel overwhelmed when your vacuum cleaner isn’t working, but as we’ve seen, the fix is often simpler than you think. From a basic power check to clearing stubborn clogs, replacing a belt, or cleaning a filter, most issues are within your ability to resolve. Taking the time to understand your vacuum cleaner and perform regular maintenance not only saves you money on repairs but also extends the life of your appliance.
Remember, a little proactive care goes a long way. Regularly emptying the dustbin, cleaning filters, and clearing hair from the brush roll can prevent many of these frustrating problems from ever occurring. So, the next time your vacuum seems to be on strike, don’t despair! Grab your tools, follow these steps, and get ready to enjoy a clean home once again. You’ve got this!
🎥 Related Video: Vacuum NOT SUCKING? Here's How To FIX IT!!
📺 Clean With Confidence
MORE CLEANING VIDEOS ☆ – How to Clean a Dishwasher Properly: https://youtu.be/_-TRcRya-dA – How to Professionally …
Frequently Asked Questions
What causes a burning smell from my vacuum cleaner?
A burning smell from your vacuum cleaner often indicates the motor is overheating or the drive belt for the brush roll is slipping or broken. Stop using it immediately, check for clogs, and inspect the belt for damage. If the smell persists, seek professional help.
Can a dirty filter really make my vacuum cleaner not work well?
Yes, absolutely! A dirty or clogged filter severely restricts airflow through the vacuum. This reduces suction power, makes the motor work harder, and can eventually lead to overheating or complete failure of the vacuum cleaner.
My vacuum only works on hard floors, but not carpets. Why?
This usually points to an issue with the brush roll. On hard floors, suction alone is often enough, but on carpets, the brush roll is essential for agitating and sweeping debris. Check for tangled hair, a broken belt, or a faulty brush roll motor (if applicable).
How do I know if my vacuum belt is broken without taking it apart?
You can often tell if your vacuum belt is broken by flipping the vacuum over (unplugged!) and trying to spin the brush roll manually. If it spins very freely with no resistance, or if you can see it’s completely detached, the belt is likely broken or stretched.
Is it worth repairing an old vacuum, or should I just buy a new one?
For common issues like clogs, dirty filters, or a broken belt, DIY repairs are usually inexpensive and worth it. If the motor is failing or there’s major internal damage, compare the cost of professional repair against a new vacuum to decide if it’s economically viable.
My robot vacuum cleaner isn’t working – are the fixes different?
While some principles are similar (clogs, full dustbin), robot vacuums have specific issues like tangled side brushes, dirty wheel sensors, or software glitches. Check its app for error codes, clean all brushes and sensors, and ensure its charging contacts are clean. A soft reset can also often resolve minor issues.