Why Is My Vacuum Cleaner Not Picking Up
When your vacuum cleaner isn’t picking up, it’s often a simple fix, not a broken machine. Most issues stem from common problems like a full dirt bin, clogged hoses, or a tangled brush roll. Identifying the root cause quickly can restore your vacuum’s powerful suction, saving you time and the cost of a new appliance. Don’t rush to replace it; many common problems that lead to a vacuum cleaner not picking up are easily resolved with basic maintenance.
Why Is My Vacuum Cleaner Not Picking Up
There’s little that’s more frustrating than settling in to clean your home, only to find your vacuum cleaner is not picking up dirt, pet hair, or debris as it should. Instead of that satisfying whir of powerful suction, you get a weak hum, and the mess remains stubbornly on the floor. Before you toss your trusty cleaning companion to the curb or rush out to buy a new one, take a deep breath.
Most of the time, when a vacuum cleaner isn’t picking up properly, it’s not due to a catastrophic failure. Instead, it’s often a common, easily fixable issue that just requires a bit of detective work and some simple maintenance. Think of your vacuum as a system of interconnected parts; if one part isn’t working right, the whole system suffers. Understanding these common culprits can save you money, time, and the hassle of replacing a perfectly good machine.
In this guide, we’ll walk you through the most frequent reasons why your vacuum cleaner might be losing its suction power. We’ll explore everything from the obvious suspects to the more hidden problems, providing practical steps to troubleshoot and fix them. So, grab your screwdriver (and maybe a pair of gloves), and let’s get your vacuum cleaner back to its peak performance!
Key Takeaways
- Start with the Basics: Always check if the dirt bin or bag is full and if the power cord is securely plugged in before assuming a major fault.
- Inspect for Clogs: Hoses, attachments, and internal air paths are prime spots for blockages that dramatically reduce suction.
- Brush Roll is Crucial: A tangled, worn, or non-spinning brush roll significantly impacts cleaning effectiveness, especially on carpets.
- Filters Demand Attention: Clogged or dirty filters restrict airflow, directly leading to your vacuum cleaner not picking up dirt effectively.
- Look for Air Leaks: Cracks in hoses, loose connections, or improperly sealed components can compromise suction power.
- Prioritize Safety: Always unplug your vacuum cleaner before performing any inspection, cleaning, or maintenance to prevent injury.
Quick Answers to Common Questions
How often should I clean my vacuum filter?
Most washable pre-motor filters should be cleaned at least once a month, or more frequently if you vacuum often or have pets. Non-washable filters and HEPA filters typically need to be replaced every 6-12 months, depending on usage and manufacturer recommendations.
What’s the first thing to check if my vacuum loses suction?
Always start by checking if the dirt bin or bag is full. This is the most common and easiest fix. If it’s not full, then check the main hose for any visible clogs.
Can I fix a broken brush roll belt myself?
Yes, replacing a broken brush roll belt is often a DIY task. You’ll need to purchase the correct replacement belt for your specific vacuum model and follow the instructions in your owner’s manual for safe access and installation.
Why does my vacuum smell bad when I use it?
A bad smell usually indicates that something unpleasant is trapped inside your vacuum. Common culprits include rotting food debris, pet accidents, or mold/mildew in a damp filter or bag. Thoroughly clean out the dirt bin/bag, hose, brush roll, and all filters.
How do I un-clog a vacuum hose?
First, unplug the vacuum. Detach the hose from both ends. You can then use a broom handle or a straightened wire hanger to gently push the obstruction out. Avoid using sharp objects that could puncture the hose.
📑 Table of Contents
- 1. The Obvious Offenders: Full Dirt Bins and Pesky Clogs
- 2. Brush Roll Blues: When It Doesn’t Spin Right
- 3. The Unsung Heroes: Filters that Need Attention
- 4. Air Leaks and Structural Compromises
- 5. Deeper Mechanical Issues: Belts, Motors, and More
- 6. General Maintenance for Peak Performance
- Conclusion
1. The Obvious Offenders: Full Dirt Bins and Pesky Clogs
When your vacuum cleaner is not picking up, the very first place to start your investigation is with the most common and often overlooked issues: dirt accumulation and blockages. These are usually the easiest to identify and fix, requiring minimal tools or technical know-how.
Is Your Dirt Bin or Bag Overflowing?
It sounds almost too simple, doesn’t it? But you’d be surprised how often a full dirt bag or a packed dirt canister is the primary reason why a vacuum cleaner isn’t picking up effectively. Bagged vacuums have a finite capacity, and once the bag is full, airflow is severely restricted. This means less suction at the nozzle. For bagless models, the canister can become so crammed that dirt can’t circulate or reach the filter, causing a similar loss of suction.
- The Fix: For bagged vacuums, simply replace the bag with a new one. For bagless models, empty the dirt canister completely. Make sure to tap out any residual dust from the sides and bottom. You should hear a noticeable difference in suction almost immediately.
The Hidden Menace: Hose Clogs
Vacuum cleaner hoses are incredibly effective at transporting dirt, but they’re also a prime location for blockages. Larger debris, socks, toys, or even clumps of pet hair can get lodged inside the hose, creating a barrier that prevents proper airflow. When the hose is clogged, your vacuum cleaner definitely won’t be picking up anything.
- How to Check: First, always unplug your vacuum cleaner before doing any inspection or maintenance. Remove the hose from both ends (if possible). Hold one end up to a light source and look through the other. If you can’t see light, you’ve got a clog. Alternatively, you can drop a small, light coin or marble through the hose; if it doesn’t come out the other side, there’s a blockage.
- The Fix: Use a broom handle, a straightened wire hanger, or a long, thin stick to gently push the obstruction through the hose. Be careful not to puncture the hose. Some people use a shop-vac on reverse (blower function) or even another powerful vacuum to try and suck out the clog, but pushing it through is often safer and more effective for solid items.
Blocked Attachments and Tools
Just like the main hose, your vacuum’s attachments – crevice tools, upholstery brushes, and extension wands – can also become clogged. Small items can easily get stuck in their narrow openings, reducing their effectiveness and impacting overall suction, especially when that specific tool is in use.
- The Fix: Detach all tools and inspect them individually for blockages. Clear any debris you find.
2. Brush Roll Blues: When It Doesn’t Spin Right
For most upright and some canister vacuums, the brush roll (or beater bar) is essential for effective cleaning, especially on carpets. It agitates the carpet fibers, loosening dirt and hair so the vacuum can suck it up. If your vacuum cleaner is not picking up on carpets, a malfunctioning brush roll is a very likely culprit.
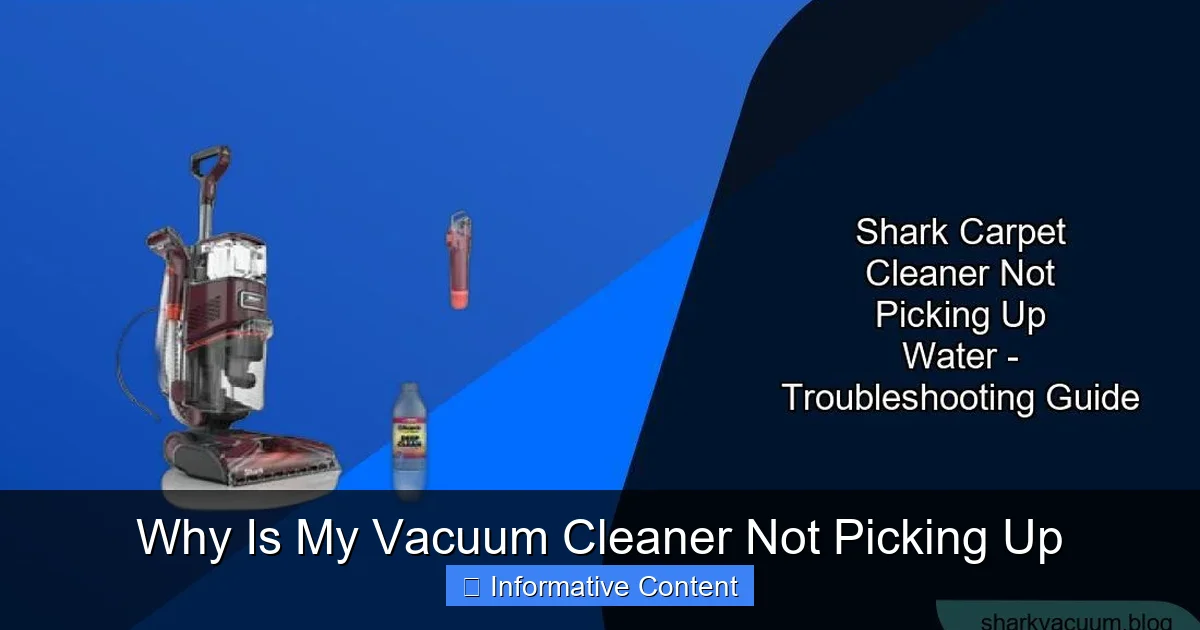
Visual guide about Why Is My Vacuum Cleaner Not Picking Up
Image source: sharkvacuum.blog
Hair, String, and Debris: The Brush Roll’s Worst Enemies
The brush roll is constantly in contact with the floor, which means it’s highly susceptible to getting tangled with hair (human and pet), string, carpet fibers, and other debris. When this happens, the brush roll can slow down, stop spinning entirely, or even damage the drive belt.
- How to Check: Flip your unplugged vacuum cleaner over. Look at the brush roll. Is it heavily matted with hair or string? Try to spin it manually. Does it turn freely, or is it stiff?
- The Fix: With scissors or a seam ripper, carefully cut away all the tangled hair and debris from the brush roll. Be gentle not to cut the bristles or the belt. Many brush rolls are removable for easier cleaning – check your vacuum’s manual for instructions.
Worn-Out or Broken Drive Belt
The brush roll doesn’t spin on its own; it’s powered by the vacuum’s motor via a drive belt. Over time, these belts can stretch, slip, or even snap. If the belt is broken, the brush roll won’t spin at all. If it’s stretched, it might spin weakly, resulting in a vacuum cleaner that’s not picking up effectively.
- How to Check: After cleaning the brush roll, try to spin it again. If it’s still not spinning with the vacuum on (and safe to briefly observe, though generally, you should keep it unplugged until the belt is fixed), or if it feels too loose, the belt might be the issue. Most belts are visible once you’ve removed the brush roll housing.
- The Fix: If the belt is broken or stretched, it needs to be replaced. Drive belts are relatively inexpensive and can often be replaced at home with a bit of patience. You’ll need to purchase the correct replacement belt for your specific vacuum model. Your vacuum’s manual will have instructions on how to access and replace it.
Height Adjustment Woes
Many vacuums have a height adjustment setting for different floor types (e.g., bare floor, low pile carpet, high pile carpet). If the setting is too high for your carpet, the brush roll won’t make enough contact with the surface to agitate and lift dirt. If it’s too low, it can push the brush roll too deep into the carpet, making it hard to move and potentially reducing suction by creating too tight a seal.
- The Fix: Adjust the vacuum cleaner’s height setting to the appropriate level for your flooring. Experiment to find the sweet spot where it moves easily but still picks up effectively.
3. The Unsung Heroes: Filters that Need Attention
Filters are crucial components in your vacuum cleaner’s ability to maintain strong suction and prevent dust from recirculating back into your home. They trap fine particles, but when they become too dirty or clogged, they become a major reason why your vacuum cleaner isn’t picking up anything.
Clogged Filters Steal Suction
Imagine trying to breathe through a thick, dirty cloth. That’s what your vacuum’s motor is doing when its filters are clogged. Restricted airflow means the motor has to work harder, and suction power drops dramatically. This is a common and often overlooked cause for a vacuum cleaner not picking up.
- How to Check: Locate all the filters in your vacuum. Common places include near the dirt bin/bag, before the motor (pre-motor filter), and sometimes after the motor (post-motor or HEPA filter). Are they coated in a thick layer of dust and grime?
- The Fix: Most pre-motor filters are washable or can be tapped clean. Remove the filter and vigorously tap it against a trash can to dislodge dust. If it’s washable, rinse it under cool water until the water runs clear. Crucially, let it air dry completely for at least 24-48 hours before putting it back in the vacuum. Using a damp filter can severely damage the motor. Post-motor/HEPA filters are often not washable and need to be replaced periodically according to your manufacturer’s recommendations.
Understanding Different Filter Types
Different vacuums use different types of filters, and knowing yours helps with maintenance:
- Foam/Felt Filters: Often found in bagless vacuums, these are typically washable and reusable.
- Pleated/Cartridge Filters: Can be washable or disposable. Check your manual.
- HEPA Filters: Designed to trap microscopic particles, these are usually non-washable and need to be replaced every 6-12 months, depending on usage.
Ignoring your filters is a sure way to end up with a vacuum cleaner that’s not picking up efficiently and can even lead to premature motor wear.
4. Air Leaks and Structural Compromises
Your vacuum cleaner relies on a sealed system to create and maintain suction. Any crack, loose connection, or faulty seal can allow air to escape (or enter where it shouldn’t), significantly reducing the pressure differential needed for effective cleaning. This means your vacuum cleaner won’t be picking up as it should, even if the motor is roaring.
Cracked Hoses and Loose Connections
Over time, hoses can develop small cracks or tears, especially at the points where they connect to the vacuum body or attachments. These small openings act like leaks in a pipe, allowing air to escape before it reaches the cleaning head.
- How to Check: Inspect the entire length of your vacuum hose, bending it gently to look for small cracks. Also, check all connection points where the hose attaches to the vacuum body and where attachments clip on. Is anything loose or ill-fitting? You might even hear a hissing sound when the vacuum is running if there’s a significant leak (but remember to unplug first for detailed inspection).
- The Fix: Small cracks in the hose can sometimes be temporarily repaired with strong electrical tape or duct tape, but a replacement hose is the best long-term solution. Ensure all attachments and connections are securely fastened.
Damaged Gaskets and Seals
Many parts of your vacuum, particularly around the dirt canister, filter housing, and motor, rely on rubber gaskets or seals to maintain an airtight connection. If these seals are worn, cracked, or missing, air can escape, leading to a noticeable loss of suction.
- How to Check: Carefully examine any rubber or foam seals around removable parts. Are they intact and pliable? Do they seat correctly when assembled?
- The Fix: If a gasket is damaged, you might be able to find a replacement part from the manufacturer or a third-party supplier. In some cases, a very thin bead of silicone sealant might provide a temporary fix, but only if you’re confident it won’t interfere with future disassembly or airflow.
Bin and Lid Not Sealing Properly
For bagless vacuums, the dirt canister needs to form an airtight seal with the main vacuum body. If the lid isn’t clicked on correctly, if there’s debris preventing a full seal, or if a latch is broken, air will leak, and your vacuum cleaner won’t be picking up efficiently.
- The Fix: Ensure the dirt bin is correctly aligned and fully clicked into place. Check for any debris caught between the bin and the vacuum body that might be preventing a good seal. Clear it away. If latches are broken, you might need replacement parts or a new canister.
5. Deeper Mechanical Issues: Belts, Motors, and More
While less common than clogs or dirty filters, sometimes the reason your vacuum cleaner isn’t picking up stems from internal mechanical problems. These can be more challenging to fix for the average user but are still worth understanding.
The Drive Belt: More Than Just the Brush Roll
As mentioned, the drive belt powers the brush roll. However, some advanced vacuums might have multiple belts or more complex drive systems. A broken or slipping belt for any powered attachment can lead to that specific attachment not working, which can be interpreted as the vacuum cleaner not picking up.
- The Fix: Inspect and replace any faulty belts. Always consult your specific vacuum’s manual for instructions on accessing these internal components.
Motor Problems: A Costly Concern
The motor is the heart of your vacuum, generating the suction power. If you hear unusual noises (grinding, high-pitched whining), smell burning, or the motor simply won’t start, it could indicate a problem. A failing motor will cause a significant drop in performance, meaning your vacuum cleaner will not be picking up at all or will have extremely weak suction.
- How to Check: If the vacuum turns on but has very little suction, and you’ve ruled out all other issues, a weakening motor could be the cause.
- The Fix: Motor replacement is generally expensive and often requires professional service. Unless your vacuum is a very high-end model, replacing the motor might cost as much as a new vacuum cleaner. It’s often the point where you decide whether to repair or replace the entire unit.
Internal Blockages or Obstructions
Beyond the hose, there are internal air paths and ducts within the vacuum body that can also become clogged, especially in bagless models where dirt travels through various chambers before reaching the filter. This can sometimes involve removing panels to access.
- The Fix: This usually requires a more in-depth disassembly of the vacuum. If you’re comfortable with tools and following instructions from your manual or online repair guides, you might be able to locate and clear these. If not, professional help might be needed.
6. General Maintenance for Peak Performance
Preventative maintenance is your best friend when it comes to keeping your vacuum cleaner picking up effectively. A little care goes a long way in avoiding future frustration.
Regular Cleaning is Key
Don’t wait for your vacuum cleaner to stop picking up before you think about cleaning it. Empty the dirt bin after every use or when it’s two-thirds full. Check the brush roll for tangles regularly, perhaps once a month or more often if you have pets or long hair in your household. Inspect hoses and attachments periodically.
Don’t Overfill
This goes hand-in-hand with regular emptying. An overfilled bag or bin not only reduces suction but also puts unnecessary strain on your vacuum’s motor and components, leading to premature wear.
Proper Storage and Care
Store your vacuum in a place where it won’t be easily damaged. Avoid running over power cords, which can damage both the cord and the vacuum. If your vacuum is making strange noises or smelling unusual, stop using it and investigate immediately. Ignoring these warning signs can lead to more significant, costlier repairs.
Conclusion
It’s incredibly frustrating when your vacuum cleaner is not picking up the way it should, but remember, the solution is often simpler than you think. From a clogged hose to a tangled brush roll or a dirty filter, most issues can be resolved with a bit of troubleshooting and elbow grease. Before you rush to replace your machine, take the time to go through these common problems. You’ll likely discover that your vacuum just needed a little TLC to get back to its powerful best.
By regularly performing basic maintenance – emptying the bin, cleaning the brush roll, and washing/replacing filters – you can significantly extend the life and effectiveness of your vacuum cleaner. Keep these tips in mind, and you’ll be well-equipped to tackle any suction issues that come your way, ensuring your home stays clean and your vacuum stays strong.
🎥 Related Video: Vacuum NOT SUCKING? Here's How To FIX IT!!
📺 Clean With Confidence
MORE CLEANING VIDEOS ☆ – How to Clean a Dishwasher Properly: https://youtu.be/_-TRcRya-dA – How to Professionally …
Frequently Asked Questions
Is it normal for a vacuum to lose suction over time?
While some minor degradation in performance might occur with age, a significant loss of suction is usually not “normal.” It almost always indicates a specific problem like a clog, dirty filter, or a mechanical issue that can often be resolved with maintenance.
Can pet hair really clog a vacuum?
Absolutely! Pet hair is one of the most common culprits for vacuum clogs. It can tangle around the brush roll, pack densely in hoses, and quickly clog filters, leading to your vacuum cleaner not picking up efficiently.
How do I know if my vacuum motor is burnt out?
Signs of a burnt-out motor include the vacuum not turning on at all, a burning smell (like burnt rubber or electrical wires), or loud grinding noises followed by the motor seizing up. In some cases, it might turn on but produce very weak, inconsistent suction.
Should I use water to clean vacuum parts?
Only use water on parts specifically labeled as “washable,” such as certain foam or felt filters. Never use water on electrical components, non-washable filters (like most HEPA filters), or inside the motor housing. Always ensure washable parts are completely dry before reassembling.
What’s the difference between bagless and bagged vacuum maintenance?
Bagless vacuums require frequent emptying of the dirt canister and regular cleaning of washable filters. Bagged vacuums require replacing the bag when full and generally have fewer filters that need cleaning, but those filters still need periodic attention.
When should I consider replacing my vacuum instead of fixing it?
Consider replacing your vacuum if the cost of repairs (especially for major components like the motor or main circuit board) approaches or exceeds the cost of a new, comparable model. Also, if you’re frequently encountering issues despite regular maintenance, it might be time for an upgrade.