How to Clean Vacuum Cleaner Brush
Keeping your vacuum cleaner brush roll clean is essential for effective vacuuming and extending your machine’s life. This guide will walk you through the simple steps to thoroughly clean your vacuum brush, tackling tangled hair, dirt, and debris to restore its optimal performance. Learn practical tips and common mistakes to avoid so you can enjoy a cleaner home with less effort.

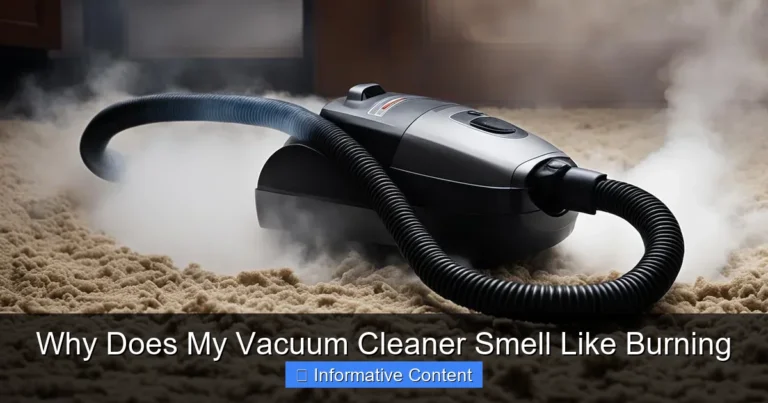
Image source: Bing
📋 Table of Contents
- 🔹 Getting Started: Why a Clean Brush Matters
- 🔹 What is a Vacuum Cleaner Brush Roll?
- 🔹 Why is Cleaning Your Vacuum Brush Roll Important?
- 🔹 When Should You Clean Your Vacuum Cleaner Brush?
- 🔹 How to Clean Vacuum Cleaner Brush: A Step-by-Step Guide
- 🔹 Common Mistakes to Avoid
- 🔹 Tips for Maintaining a Clean Brush Roll
- 🔹 Benefits of a Regularly Cleaned Brush
- 🔹 Real-Life Examples and Scenarios
- 🔹 Frequently Asked Questions (FAQ)
- 🔹 Conclusion
Getting Started: Why a Clean Brush Matters
To clean your vacuum cleaner brush, first unplug the vacuum. Then, remove the brush roll (consult your manual if needed). Carefully cut away tangled hair and debris using scissors or a seam ripper. Wipe down the brush and its housing with a damp cloth, ensure everything is dry, and reassemble. This keeps your vacuum performing its best.
Every household with a vacuum cleaner eventually faces a common adversary: the tangled, gunked-up brush roll. It’s often out of sight, out of mind, until your vacuum starts struggling, leaving dirt behind, or making strange noises. Knowing how to clean your vacuum cleaner brush isn’t just about maintenance; it’s about making sure your home stays truly clean and your appliance lasts longer.
Think of your vacuum’s brush roll as the workhorse of your machine. It agitates carpets, sweeps debris into the suction path, and generally does the heavy lifting. But over time, hair, pet fur, strings, and fibers can wrap around it, forming a dense, stubborn mess. This build-up significantly reduces its effectiveness and can even damage your vacuum.
In this guide, we’ll walk you through everything you need to know about cleaning this vital component. We’ll cover the why, the when, and most importantly, the simple, practical steps to get it sparkling clean. You’ll learn how to keep your vacuum running like new and achieve a deeper clean for your floors.
What is a Vacuum Cleaner Brush Roll?
A vacuum cleaner brush roll, also often called a beater bar or agitator, is a rotating cylinder located at the bottom of your vacuum’s head. It typically has rows of stiff bristles, and sometimes rubberized flaps, that spin rapidly when the vacuum is on.
Its main job is to agitate and dislodge dirt, dust, pet hair, and other debris from carpet fibers and hard floors. As it spins, it helps lift particles up, making it easier for the vacuum’s suction to pull them into the dirt bin or bag. Without a functioning brush roll, a vacuum would mostly rely on suction alone, which isn’t nearly as effective, especially on carpets.
Different vacuum types might have variations in their brush rolls. Some are designed specifically for pet hair, others for delicate hard floors, and many are general-purpose. Regardless of the specific design, they all share the fundamental purpose of actively engaging with the floor surface to improve cleaning.
Why is Cleaning Your Vacuum Brush Roll Important?
Regularly cleaning your vacuum cleaner brush roll is more crucial than you might think. It’s not just a minor chore; it directly impacts your vacuum’s performance, lifespan, and even the cleanliness of your home. Let’s break down why this simple task holds so much importance:
- Restored Cleaning Power: When hair and debris wrap around the brush, the bristles can’t effectively agitate and lift dirt from your carpets. It’s like trying to sweep with a broom that has all its bristles matted down. A clean brush means better dirt pickup.
- Prevents Overheating and Damage: A brush roll choked with tangled hair creates resistance. Your vacuum’s motor has to work much harder to spin it, leading to overheating. This increased strain can cause premature wear and tear on the motor, belts, and other internal components, potentially leading to costly repairs or even a complete breakdown.
- Improved Suction: Blockages around the brush roll can also restrict airflow to the suction path. This means your vacuum won’t be able to pull dirt and dust into the collection bin as efficiently, leaving more debris on your floors.
- Reduces Odors: Over time, dust, dirt, pet hair, and even microscopic food particles can accumulate on the brush roll. This can start to develop unpleasant odors, especially if the vacuum gets damp. Cleaning the brush helps eliminate these smell sources.
- Extends Vacuum Lifespan: By reducing strain on the motor and other parts, regular cleaning contributes significantly to the overall longevity of your vacuum cleaner. It’s a small effort that can save you from needing a replacement sooner.
- Better Air Quality: When a vacuum isn’t cleaning effectively, it leaves more dust and allergens behind. A well-maintained brush roll ensures more particles are captured, leading to better air quality in your home.
In essence, cleaning your vacuum brush roll is an investment in your vacuum’s efficiency and your home’s cleanliness. It’s a foundational step in proper vacuum maintenance.
When Should You Clean Your Vacuum Cleaner Brush?
Knowing when to clean your vacuum brush roll can make a big difference in maintaining your vacuum’s performance. There’s no single perfect schedule, as it depends a lot on your specific usage, but here are some common indicators and guidelines:
- Visually Check After Every Few Uses: Make it a habit to flip your vacuum over and take a quick look at the brush roll every 3-4 uses, or after vacuuming a particularly hairy area. If you see visible tangles of hair, string, or large debris, it’s time for a cleaning.
- Notice a Drop in Performance: This is a key indicator. If your vacuum isn’t picking up dirt as effectively, leaving behind pet hair, or struggling on certain surfaces, a clogged brush roll is often the culprit.
- Strange Noises or Burning Smell: If you hear unusual grinding, squealing, or whining noises, or if you smell something burning (which could indicate an overheating motor or friction from a tangled brush), stop immediately and check the brush roll.
- Increased Effort to Push: A heavily tangled brush roll creates more resistance against the floor, making your vacuum harder to push. If you notice yourself exerting more effort, check the brush.
- General Maintenance Schedule: Even if you don’t notice specific issues, a thorough cleaning every 1-3 months is a good general practice for most households. If you have pets that shed a lot or long-haired individuals in your home, you might need to clean it more frequently, perhaps every 2-4 weeks.
Ultimately, a proactive approach is best. A quick check and clean when needed is much easier than dealing with a completely jammed brush roll or a damaged motor.
How to Clean Vacuum Cleaner Brush: A Step-by-Step Guide
Cleaning your vacuum cleaner brush might seem daunting, but it’s a straightforward process that anyone can do. Follow these steps carefully to restore your brush roll to its former glory.
Step 1: Safety First – Unplug Your Vacuum!
Before you do anything else, the most critical step is to unplug your vacuum cleaner from the wall outlet. This prevents any accidental activation of the machine while your hands are near moving parts. Safety is paramount!
Step 2: Clear the Area and Gather Your Tools
Find a well-lit, clean workspace, preferably on a hard floor or newspaper to catch debris. You’ll need a few simple tools:
- A pair of scissors (small, sharp ones like sewing scissors are ideal)
- A seam ripper or a small utility knife (optional, but very helpful for cutting hair)
- A stiff brush (like an old toothbrush or a small cleaning brush)
- A damp cloth or paper towels
- A screwdriver (if your brush roll needs to be unscrewed for removal)
- A small garbage can or bag for debris
Step 3: Access and Remove the Brush Roll
This step varies slightly depending on your vacuum’s make and model:
- Flip Your Vacuum: Lay your vacuum cleaner on its side or back so you can easily access the brush head.
- Locate the Brush Roll Cover: Many vacuums have a removable plate on the bottom that covers the brush roll. You might see screws (often Phillips head) that need to be removed. Some models have latches or clips.
- Consult Your Manual: If you’re unsure how to access or remove the brush roll, check your vacuum cleaner’s user manual. It will have specific instructions for your model.
- Gently Lift Out the Brush Roll: Once the cover is off, the brush roll usually lifts right out. Sometimes it’s held in place by a belt, which you might need to carefully slip off. Take note of how the belt is positioned for easier reassembly.
Step 4: Cut Away Tangled Hair and Debris
This is where the magic happens:
- Use Scissors or a Seam Ripper: Carefully insert the tip of your scissors or seam ripper under the tangled hair and string. Glide it along the length of the brush roll, cutting through the knots.
- Be Gentle: Take care not to cut or damage the bristles themselves, the vacuum belt, or the brush roll itself. Work slowly and methodically.
- Pull Off Debris: Once you’ve cut through the tangles, you should be able to easily pull away the hair, threads, and other debris by hand. You’ll be surprised how much comes off!
- Repeat: Continue cutting and pulling until the brush roll is as free of tangles as possible. Pay attention to the ends of the brush roll, as hair often gets tightly wound around the axles.
Step 5: Clean the Brush and Housing
Now that the major tangles are gone, it’s time for a deeper clean:
- Brush the Bristles: Use your stiff brush (like an old toothbrush) to scrub away any stuck-on dirt, dust, or fine debris from the bristles themselves. This helps restore their stiffness and effectiveness.
- Wipe the Brush Roll: Take a damp cloth (not soaking wet) and wipe down the entire brush roll, focusing on any remaining grime on the plastic or metal parts.
- Clean the Brush Housing: While the brush roll is out, take your damp cloth or paper towel and wipe out the housing area where the brush sits. Dust, pet dander, and small debris often accumulate here. Remove any dust bunnies or larger particles.
- Check the Belt: Inspect the vacuum belt (if visible) for any wear, cracks, or stretching. If it looks damaged, it might be a good time to consider replacing it.
Step 6: Ensure Everything is Dry
Before reassembling, it’s crucial that all parts, especially the brush roll and its housing, are completely dry. Moisture can lead to mold, mildew, or even damage electrical components if present. Let them air dry for a bit, or wipe thoroughly with a dry cloth.
Step 7: Reassemble Your Vacuum Cleaner
- Reinsert the Brush Roll: Carefully place the cleaned brush roll back into its housing. If there’s a belt, ensure it’s correctly looped around the brush roll and the motor spindle, just as you found it. It might require a gentle stretch.
- Secure the Cover: Replace the bottom plate or cover, making sure it snaps or screws securely into place. You don’t want it coming loose during operation.
- Test: Plug your vacuum back in and briefly turn it on to ensure the brush roll spins freely and correctly. If it makes unusual noises or doesn’t spin, unplug it immediately and recheck your reassembly.
That’s it! Your vacuum cleaner brush is now clean, and your vacuum should perform much better.
Common Mistakes to Avoid When Cleaning Your Vacuum Brush
While cleaning your vacuum brush roll is relatively simple, there are a few common pitfalls that can lead to frustration or even damage your vacuum. Knowing these can help you avoid them:
- Forgetting to Unplug: This is the absolute biggest mistake. Attempting to clean the brush roll while the vacuum is still plugged in is incredibly dangerous and can lead to serious injury if the brush accidentally activates. Always unplug first!
- Using Too Much Water: While a damp cloth is fine, soaking the brush roll in water, especially if it has metal components or bearings, can cause rust or damage. Ensure any parts you wipe are thoroughly dried before reassembly.
- Cutting the Vacuum Belt: When using scissors or a utility knife to cut away tangled hair, be very careful not to accidentally snip the vacuum’s drive belt. A cut belt will mean your brush roll won’t spin at all.
- Forcing Components: If a part doesn’t easily come off or go back on, don’t force it. You could break plastic clips, strip screws, or bend metal components. Consult your user manual for specific instructions for your model.
- Not Cleaning the Brush Housing: Often, people focus only on the brush roll itself and forget to wipe out the area where the brush sits. This housing can accumulate a lot of dust, pet hair, and debris that can quickly re-clog the newly cleaned brush.
- Ignoring the Ends of the Brush Roll: Hair often gets wound tightly around the axles at the very ends of the brush roll. If these aren’t cleaned, they can cause friction, wear down bearings, and prevent the brush from spinning freely.
- Reassembling Incorrectly: Ensure the brush roll is seated correctly and the belt (if applicable) is properly tensioned and in place. If it’s not, the brush might not spin, or it could cause wear.
By being mindful of these common mistakes, you can ensure a safe and effective cleaning process for your vacuum’s brush roll.
Tips for Maintaining a Clean Brush Roll
Keeping your vacuum cleaner brush roll clean is an ongoing process, not just a one-time fix. Here are some practical tips to help you maintain its cleanliness and performance over time:
- Regular Quick Checks: After every few vacuuming sessions, quickly flip your vacuum over and visually inspect the brush roll. This takes seconds and can catch tangles before they become major problems.
- Immediate Removal of Large Debris: If you accidentally vacuum up a shoelace, a large piece of string, or anything clearly inappropriate, stop the vacuum immediately, unplug it, and manually remove the item from the brush roll. Don’t let it get deeply tangled.
- Use a Seam Ripper: A seam ripper (available at any sewing store) is often much more effective and safer than scissors for cutting tangled hair. Its tiny blade can slip under the hair without risking damage to the bristles or belt.
- Clean Hair Before Vacuuming: If you have long-haired individuals or pets in the home, consider doing a quick sweep with a broom or a manual pick-up of large clumps of hair before vacuuming. Less hair on the floor means less hair to tangle in the brush.
- Clean in a Well-Lit Area: Good lighting helps you spot all the hidden tangles and grime, ensuring a more thorough clean.
- Consider a Brush Roll Designed for Pet Hair: Some vacuums come with or offer optional brush rolls specifically designed to resist tangles from pet hair, often featuring wider gaps between bristles or different materials.
- Avoid Vacuuming Wet Messes: Vacuuming wet spills or damp areas can cause dirt and debris to stick stubbornly to the brush roll, making it much harder to clean later and potentially leading to mold or mildew.
- Be Gentle with Bristles: When cleaning, avoid harsh scrubbing that could damage or deform the bristles. Gentle brushing and wiping are usually sufficient.
Incorporating these habits into your cleaning routine will significantly reduce the frequency of deep cleaning your vacuum cleaner brush and ensure your vacuum always performs at its best.
Benefits of a Regularly Cleaned Brush
A well-maintained vacuum cleaner brush roll offers a cascade of benefits that go beyond just a cleaner brush. Understanding these advantages can motivate you to keep up with this simple yet impactful maintenance task.
- Superior Cleaning Performance: This is the most immediate and noticeable benefit. A brush with clean, stiff bristles can effectively agitate carpet fibers, lifting embedded dirt and debris, leading to significantly cleaner floors.
- Extended Vacuum Lifespan: When the brush roll is free of tangles, the vacuum’s motor doesn’t have to work as hard. This reduces strain, wear, and tear on critical components like the motor and belt, ultimately extending the life of your entire vacuum cleaner.
- Reduced Energy Consumption: A vacuum that’s struggling with a clogged brush roll uses more energy to achieve the same (or worse) cleaning results. A clean brush allows the vacuum to operate more efficiently, potentially saving a small amount on your electricity bill over time.
- Prevents Overheating: Less resistance on the brush roll means less heat generated by the motor. This prevents overheating, which is a common cause of vacuum motor failure.
- Eliminates Unpleasant Odors: Trapped hair, dust, and food particles on a dirty brush roll can start to smell over time, especially in humid conditions. A clean brush keeps your vacuum smelling fresh, preventing it from spreading stale odors around your home.
- Improved Air Quality: An efficient vacuum picks up more dust, pet dander, and allergens from your floors. By ensuring your brush roll is doing its job, you contribute to better indoor air quality for everyone in your household.
- Quieter Operation: A brush roll free of snags and friction points often runs more smoothly and quietly. You’ll likely notice less grinding, whining, or squealing noises.
- Saves Money: By extending the life of your vacuum and preventing costly repairs due to motor strain or belt damage, regular cleaning saves you money in the long run. It’s much cheaper than buying a new vacuum or replacement parts.
Clearly, the benefits of keeping your vacuum cleaner brush clean are substantial, making it an essential part of responsible home maintenance.
Real-Life Examples and Scenarios
Let’s look at how cleaning your vacuum cleaner brush makes a tangible difference in everyday situations:
-
The Pet Owner’s Predicament: Sarah has two long-haired dogs. She notices her vacuum isn’t picking up pet fur from the carpet like it used to, and it seems harder to push. After checking the brush roll, she finds it’s completely matted with dog hair. Following the cleaning steps, her vacuum once again effortlessly glides across the carpet, sucking up every last stray hair. The difference is night and day.
-
The Long Hair Blues: Mark’s partner has very long hair. He’s been noticing a faint burning smell when he vacuums, and the vacuum seems to overheat quickly. A quick inspection reveals that hair is tightly wound around the brush roll’s ends, causing friction and straining the motor. After carefully cutting and removing the hair, the burning smell is gone, and the vacuum runs cooler and smoother.
-
The Mysterious Residue: Emily lives in an old house with dusty floors. Her vacuum seems to just push dust around instead of picking it up, and the hard floor attachment isn’t doing its job. She realizes the bristles on her brush roll are matted with fine dust and grime, making them ineffective. A thorough cleaning, including brushing the bristles with an old toothbrush, restores their stiffness, allowing the vacuum to finally capture the dust properly.
-
The Loud Vacuum: David’s vacuum has become increasingly noisy, making a harsh grinding sound. He assumes it’s broken. Upon inspecting the brush roll, he discovers a small piece of plastic packaging tightly jammed between the brush and its housing, creating the terrible noise. Removing this debris immediately quiets the machine and prevents further damage.
These examples highlight that a dirty vacuum brush roll isn’t just an aesthetic issue; it’s a functional problem that impacts performance, safety, and the lifespan of your appliance. A little preventive maintenance goes a long way.
Frequently Asked Questions (FAQ)
How often should I clean my vacuum cleaner brush?
It depends on usage, but a good rule of thumb is to visually check it every 3-4 uses and perform a thorough cleaning every 1-3 months. If you have pets or long hair in your household, you might need to clean it every 2-4 weeks.
Can I use water to clean my vacuum brush roll?
You can use a damp cloth to wipe down the brush roll and its housing. However, avoid soaking the brush roll in water, especially if it has metal parts or bearings, as this can lead to rust or damage the internal components. Always ensure all parts are completely dry before reassembling.
What tools do I need to clean a vacuum brush?
You’ll typically need a pair of sharp scissors (small ones work best), a seam ripper or small utility knife for cutting tangled hair, a stiff brush (like an old toothbrush) for scrubbing bristles, a damp cloth, and potentially a screwdriver if your brush roll requires unscrewing to remove.
What if my vacuum cleaner brush is not spinning after cleaning?
If your brush isn’t spinning, first unplug the vacuum. Recheck if the brush roll is properly reinstalled and seated. Ensure the vacuum belt (if applicable) is correctly looped around both the brush roll and the motor spindle and is not broken. Also, check for any residual debris that might be jamming the brush. If all looks correct and it still doesn’t spin, consult your vacuum’s manual or a professional.
Are all vacuum cleaner brushes removable?
Most modern upright and stick vacuums have brush rolls designed to be removable for cleaning and maintenance. However, the method of removal can vary greatly between models. Some handheld vacuums or very basic models might have integrated brush rolls that are harder to remove. Always check your vacuum’s user manual for specific instructions.
Conclusion
Learning how to clean your vacuum cleaner brush is a simple yet incredibly impactful skill for any homeowner. This often-overlooked maintenance task is fundamental to ensuring your vacuum performs at its peak, cleans your home effectively, and lasts for years to come.
By regularly removing tangled hair, dirt, and debris, you’re not just getting rid of a messy problem; you’re actively preserving your vacuum’s suction power, preventing motor strain and overheating, eliminating odors, and contributing to a healthier living environment. The small amount of time and effort you invest in cleaning your brush roll pays off immensely in the form of a more efficient vacuum and a cleaner home.
So, the next time you finish vacuuming, take a moment to flip your machine over and give that brush roll a quick inspection. A little proactive care goes a long way in keeping your trusty cleaning companion in top shape.