How to Clean Out a Dyson Vacuum Cleaner: A Complete Guide
Learning how to clean out a Dyson vacuum cleaner is key to maintaining its powerful suction and extending its lifespan. This guide will walk you through easy, step-by-step instructions for emptying the bin, washing filters, clearing blockages, and cleaning the brush bar, ensuring your Dyson performs at its best. Regular cleaning prevents common issues like reduced suction and unpleasant odors, keeping your home spotless.

Image source: Bing
📋 Table of Contents
- 🔹 Introduction: The Importance of a Clean Dyson
- 🔹 Why Cleaning Your Dyson Matters
- 🔹 Essential Tools You’ll Need
- 🔹 How to Clean Out Your Dyson Vacuum Cleaner: A Step-by-Step Guide
- 🔹 Understanding Dyson Filters: Washable vs. Non-Washable
- 🔹 Common Mistakes to Avoid When Cleaning Your Dyson
- 🔹 Tips for Maintaining Your Dyson’s Performance
- 🔹 People Also Ask (PAA)
- 🔹 Conclusion: Keeping Your Dyson in Top Shape
Introduction: The Importance of a Clean Dyson
Dyson vacuum cleaners are known for their powerful suction and innovative design, helping keep our homes sparkling clean. But even the best vacuums need a little TLC to keep performing at their peak. Learning how to clean out a Dyson vacuum cleaner isn’t just about keeping it looking nice; it’s about maintaining its efficiency, preventing common issues, and making sure it lasts for years to come.
Over time, dust, dirt, hair, and other debris can build up in various parts of your Dyson. This buildup can lead to a noticeable drop in suction, strange noises, and even unpleasant odors. If you’ve noticed your Dyson isn’t quite as mighty as it once was, a thorough cleaning is likely the solution. This guide will walk you through each step, making the process simple and straightforward.
Why Cleaning Your Dyson Matters
You might wonder, “Why is cleaning my vacuum so important if it’s designed to clean things itself?” That’s a great question! Here’s why regular cleaning of your Dyson makes a big difference:
- Maintains Suction Power: The most common reason for a drop in suction is a dirty filter or a blockage. Cleaning these parts restores your vacuum’s ability to pick up dirt effectively.
- Extends Lifespan: A clogged filter or a brush bar tangled with hair forces the motor to work harder, which can lead to premature wear and tear. Regular maintenance helps your Dyson last longer.
- Prevents Odors: If you’ve ever noticed a musty or unpleasant smell coming from your vacuum, it’s often due to trapped dirt, pet dander, or even damp debris. Cleaning out the bin, cyclone, and filters can eliminate these smells.
- Improves Air Quality: Dyson filters are designed to capture microscopic particles. When they’re clean, they do a better job of trapping allergens and dust, releasing cleaner air back into your home.
- Saves Time and Effort: A well-maintained vacuum works more efficiently, meaning you don’t have to go over the same spot multiple times, saving you time and energy during your cleaning routine.
Essential Tools You’ll Need
Before you dive into cleaning your Dyson, it’s a good idea to gather a few simple tools. You likely have most of these lying around your home:
- Scissors or a Seam Ripper: Perfect for cutting away tangled hair and threads from the brush bar.
- A Stiff Brush (like an old toothbrush): Useful for dislodging stubborn dust from the cyclone and other crevices.
- A Damp Cloth: For wiping down exterior surfaces and some internal components.
- A Long, Blunt Object (like a broom handle or a ruler): Handy for pushing out blockages from the hose or wand.
- A Lint-Free Towel: To dry washed filters.
- A Bin or Trash Bag: For disposing of all the collected dust and debris.
Remember to always unplug your Dyson vacuum cleaner from the power outlet before you start any cleaning or maintenance. Safety first!
How to Clean Out Your Dyson Vacuum Cleaner: A Step-by-Step Guide
Cleaning out your Dyson is a straightforward process, but it’s important to follow each step carefully. While specific models might have slight variations, these general instructions apply to most Dyson upright, canister, and stick vacuums.
Step 1: Emptying the Dust Bin
This might seem obvious, but emptying the bin correctly is the first crucial step to ensure your Dyson breathes properly.
- Locate the Release Catch: Every Dyson has a clear dust bin with a release mechanism, usually a red or grey button or lever.
- Position Over a Bin: Hold the vacuum (or just the bin if detachable) over a trash can.
- Release and Empty: Press the release catch. The base of the bin will open, allowing debris to fall out. You might need to gently shake it or tap the side to dislodge stubborn dust.
- Close Securely: Once empty, firmly push the bin base back into place until it clicks shut.
Pro Tip: Empty the bin after every use or when debris reaches the “MAX” line to prevent a buildup that can reduce suction.
Step 2: Cleaning the Cyclone Assembly
The cyclone assembly is the conical part above the bin that separates dust from the air. It’s vital for maintaining suction, but it can get quite dusty.
- Remove the Bin: Depending on your model, you might need to completely detach the clear bin and cyclone assembly from the main body of the vacuum. Refer to your Dyson manual for exact instructions.
- Tap Out Dust: Hold the cyclone assembly over a bin and gently tap its sides. You’ll be surprised how much fine dust can fall out.
- Brush Away Debris: Use a stiff brush (like an old toothbrush or a dry paint brush) to carefully brush away any caked-on dust or debris from inside the cone-shaped filters and the mesh shroud.
- Wipe Down: Use a slightly damp cloth to wipe the exterior of the cyclone, but never rinse the cyclone assembly under water, as this can damage sensitive components. Ensure it’s completely dry before reattaching.
Step 3: Washing the Filter(s)
Dyson vacuums typically have one or more filters, which are key to trapping fine dust and allergens. Most modern Dyson filters are washable, but always check your specific model’s manual.
- Locate the Filter(s): Filters are usually found in the top of the cyclone assembly or near the motor housing. They often have a blue or purple color.
- Remove the Filter: Twist or pull the filter out according to your model’s design.
- Rinse with Cold Water: Hold the filter under a cold water tap. Keep rinsing and gently squeezing (for softer filters) until the water runs clear. Do not use detergent or put it in a dishwasher.
- Shake Off Excess Water: Give the filter a good shake to remove as much water as possible.
- Allow to Air Dry Completely: This is the most crucial step. Place the filter in a warm, dry place for at least 24 to 48 hours. It must be absolutely bone dry before you put it back into the vacuum. A damp filter can damage the motor and cause a foul smell.
- Reinstall: Once completely dry, place the filter back into its housing and secure it.
Step 4: Clearing Blockages in the Hose and Wand
Blockages are a common cause of reduced suction. They can occur anywhere from the cleaner head to the dust bin inlet.
- Disconnect Attachments: Remove the wand, hose, and cleaner head from the main vacuum body.
- Inspect Each Section: Look through the openings of the wand, hose, and the main inlet where the bin attaches. Shine a flashlight if needed.
- Dislodge Blockages: If you spot a blockage, use a long, blunt object (like a broom handle, sturdy ruler, or similar item) to gently push it through. Never use your fingers or sharp objects, as you could injure yourself or damage the vacuum.
- Check the Cleaner Head Inlet: The opening where air enters the cleaner head can also get blocked. Clear any visible debris.
- Reassemble: Once all pathways are clear, reattach the components securely.
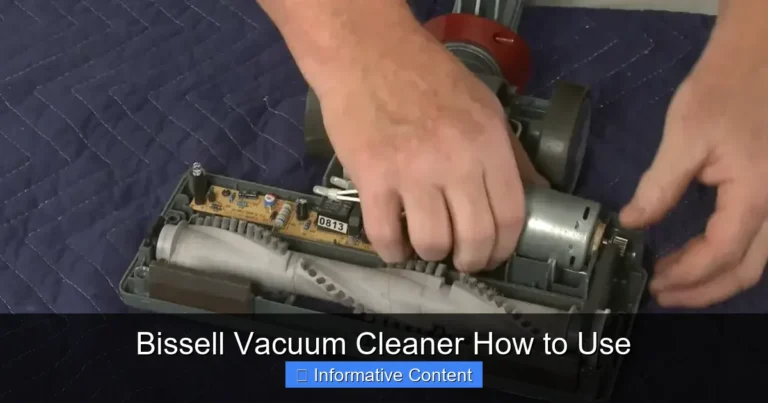
Step 5: Cleaning the Brush Bar (Cleaner Head)
The brush bar, or roller brush, in the cleaner head is notorious for collecting hair, threads, and fibers, which can prevent it from spinning effectively.
- Remove the Cleaner Head: Detach the cleaner head from the main wand or body of the vacuum.
- Access the Brush Bar: On many Dyson models, you can remove the brush bar. Look for release mechanisms (usually screws that can be undone with a coin or clips). Consult your manual for exact removal instructions.
- Cut Away Tangles: Using scissors or a seam ripper, carefully cut away any tangled hair, string, or fibers wrapped around the brush bar. Be gentle to avoid damaging the bristles.
- Wipe Down: Use a damp cloth to wipe away any dust or grime from the brush bar and the inside of the cleaner head casing. Ensure all parts are dry.
- Reinstall: Once clean, reinsert the brush bar and secure it back into the cleaner head.
Step 6: Wiping Down the Exterior
Finally, give your Dyson a clean finish!
- Damp Cloth: Use a soft, damp, lint-free cloth to wipe down all exterior surfaces of your vacuum, including the handle, body, and attachments.
- Avoid Harsh Cleaners: Do not use abrasive cleaners, polishes, or air fresheners, as these can damage the plastic and internal components. Plain water is usually sufficient.
- Dry Thoroughly: Ensure all external parts are dry before plugging the vacuum back in.
Understanding Dyson Filters: Washable vs. Non-Washable
It’s crucial to know what kind of filters your specific Dyson model uses, as not all filters are designed to be washed.
| Filter Type | Description | Care Instructions | Signs of a Clogged Filter |
|---|---|---|---|
| Washable Filters (most common) | Often brightly colored (blue, purple, yellow), made of pleated material. Designed to be rinsed. | Rinse with cold water only. Squeeze gently. Air dry for 24-48 hours. DO NOT use detergent. | Reduced suction, vacuum overheating, bad smell, “filter” warning light. |
| Non-Washable Filters | Less common in newer models, but some older models may have them. Usually made of carbon or a finer paper-like material. | These cannot be washed. They must be replaced periodically, typically every 6-12 months, depending on usage. | Same as washable filters, but washing will destroy them. |
Always consult your Dyson user manual if you are unsure about your filter type or location. Using a non-washable filter in water will likely render it unusable and can impact your vacuum’s performance.
Common Mistakes to Avoid When Cleaning Your Dyson
While cleaning your Dyson is generally straightforward, there are a few pitfalls to steer clear of that could inadvertently harm your machine or reduce its effectiveness:
- Not Unplugging the Vacuum: Always disconnect the power before starting any cleaning. This is a crucial safety step to prevent accidental activation.
- Using Hot Water or Detergents on Filters: Hot water can warp filter materials, and detergents can leave residues that clog the filter or cause foaming inside the vacuum. Stick to cold water.
- Not Drying Filters Completely: This is perhaps the biggest mistake. A damp filter can lead to mold and mildew growth, produce foul odors, and can seriously damage the vacuum’s motor when reinserted. Always allow 24-48 hours for complete air drying.
- Washing the Cyclone Assembly: The cyclone often contains sensitive components and should only be wiped clean with a dry or slightly damp cloth. Never submerge it in water.
- Using Sharp Objects to Clear Blockages: Poking inside the hose or wand with knives, screwdrivers, or other sharp items can puncture the hose or scratch internal components, creating more problems. Use a blunt object instead.
- Forgetting to Clean the Brush Bar: A tangled brush bar can’t agitate carpets effectively, leading to poor cleaning performance. Don’t skip this step!
- Ignoring Manufacturer Instructions: While this guide covers general steps, your specific Dyson model may have unique features or cleaning requirements. Always refer to your user manual for precise instructions.
Tips for Maintaining Your Dyson’s Performance
Beyond a thorough deep clean, here are some practical tips to keep your Dyson running smoothly day-to-day and extend the time between major cleaning sessions:
- Empty the Bin Regularly: Make it a habit to empty the dust bin after every vacuuming session, or at least when the debris reaches the “MAX” line.
- Check for Blockages Periodically: If you notice a sudden drop in suction, always check for blockages in the wand, hose, and cleaner head first.
- Tap Out Filters Between Washes: If your filters are washable, you can gently tap them over a bin a few times between full washes to dislodge some loose dust.
- Be Mindful of What You Vacuum: Try to avoid vacuuming large objects, excessive amounts of liquid, or fine powders like drywall dust, as these can easily clog your machine or damage the motor.
- Store Properly: Keep your Dyson in a dry, clean place. Avoid storing it in dusty environments where it might collect dust while not in use.
- Inspect Attachments: Periodically clean your smaller attachments, as they can also accumulate dust and hair, reducing their effectiveness.
People Also Ask (PAA)
What is the best way to clean a Dyson vacuum?
The best way to clean a Dyson vacuum is a comprehensive process that includes emptying the dust bin, carefully cleaning the cyclone assembly, washing and thoroughly drying the filters, clearing any blockages in the hose and wand, and removing tangled hair from the brush bar. Always unplug the vacuum first and refer to your specific model’s manual for detailed instructions on component removal and filter types.
How often should I clean my Dyson vacuum?
The frequency of cleaning your Dyson depends on its usage. Generally, you should empty the dust bin after every use or when it reaches the max fill line. Washable filters should be rinsed at least once a month, or more frequently if you have pets or use the vacuum often. Blockages and the brush bar should be checked and cleaned as needed, typically every few uses or when you notice a drop in performance.
Can I use water to clean all parts of my Dyson?
No, you should not use water to clean all parts of your Dyson. Water should only be used for rinsing washable filters and for lightly damp wiping the exterior surfaces. Crucially, the cyclone assembly, motor housing, and any electrical components should never be submerged in water or rinsed. Getting these parts wet can cause serious damage to your vacuum and even pose an electrical hazard.
What are the signs my Dyson needs cleaning?
Several clear signs indicate your Dyson needs a good cleaning. The most common is a noticeable loss of suction power, making vacuuming less effective. Other signs include unusual noises, often from a struggling motor due to blockages or a dirty filter. You might also notice an unpleasant odor emanating from the vacuum, which is usually caused by trapped dirt, pet dander, or damp debris. Visible dirt or tangled hair on the brush bar are also clear indicators.
How do I clean a smelly Dyson?
A smelly Dyson is typically caused by trapped organic matter (like pet hair, food crumbs, or damp debris) or a dirty, damp filter. To clean a smelly Dyson, thoroughly empty the dust bin and clean the cyclone assembly as described in the steps above. Most importantly, wash your washable filters with cold water and ensure they are completely dry for 24-48 hours before reinserting them. Also, check for and clear any blockages in the hose or brush bar where odor-causing debris might be trapped. For stubborn odors, a gentle wipe down of internal non-electrical surfaces with a baking soda paste (rinsed and dried thoroughly) can help, but always exercise caution and ensure complete dryness.
Conclusion: Keeping Your Dyson in Top Shape
Cleaning out your Dyson vacuum cleaner doesn’t have to be a chore. By following these simple, step-by-step instructions and incorporating regular maintenance into your routine, you can ensure your Dyson continues to deliver that powerful suction it’s famous for. Remember, a well-cared-for vacuum is a happy vacuum, and it will repay your efforts by keeping your home cleaner and fresher for many years to come.
Don’t wait until you notice a significant drop in performance. Proactive cleaning of the bin, filters, cyclone, and brush bar is the key to longevity and optimal efficiency. So, grab your tools, unplug your Dyson, and give it the refresh it deserves!