How to Fix a Vacuum Cleaner with No Suction: A Comprehensive Guide
If your vacuum cleaner has lost its suction, don’t fret; many common issues are simple to diagnose and fix at home. This guide will walk you through systematic steps to identify the problem, whether it’s a clog, a full dustbin, or dirty filters, helping you restore your vacuum’s cleaning power quickly and efficiently.

Image source: Themvacuums
📋 Table of Contents
- 🔹 Introduction
- 🔹 What Does “No Suction” Mean for Your Vacuum Cleaner?
- 🔹 Why is Your Vacuum Cleaner Losing Suction?
- 🔹 Steps to Diagnose and Fix a Vacuum Cleaner with No Suction
- 🔹 The Importance of Regular Vacuum Maintenance
- 🔹 Common Mistakes When Troubleshooting Vacuum Suction Issues
- 🔹 Tips for Keeping Your Vacuum Running Strong
- 🔹 Real-Life Scenario: When Your Vacuum Suddenly Stops Sucking
- 🔹 Frequently Asked Questions (FAQ)
- 🔹 Conclusion
To fix a vacuum cleaner with no suction, you’ll typically need to systematically check for and resolve common issues like clogs in the hose or brush roll, a full dust bag or canister, or dirty and clogged filters. These are the most frequent culprits, and addressing them usually restores the vacuum’s power.
Introduction
There’s nothing quite as frustrating as firing up your vacuum cleaner, ready to tackle a messy floor, only to find it’s just pushing dirt around. A vacuum with no suction feels utterly useless, right? It can be a real headache, making you wonder if it’s time for a costly replacement.
But here’s the good news: in most cases, a loss of suction isn’t a sign of a dying machine. Instead, it often points to a simple, fixable problem. Things like clogs, full dustbins, or dirty filters are incredibly common and usually quite easy to sort out yourself. You don’t need to be a repair expert to bring your vacuum back to life.
In this comprehensive guide, we’ll walk you through exactly how to fix a vacuum cleaner with no suction. We’ll explore the common reasons why your trusty cleaner might be struggling and provide clear, step-by-step instructions to get it working like new again. Let’s get that suction power restored!
What Does “No Suction” Mean for Your Vacuum Cleaner?
When we say a vacuum has “no suction,” it means the air isn’t flowing through the machine effectively enough to pick up dirt and debris. Instead of creating a strong vacuum effect, the machine might just make noise or push air around without actually grabbing anything from the floor or carpet.
Essentially, the air pathway, which is crucial for carrying dirt from the floor into the dustbin, is compromised. This can manifest in a few ways:
- No pickup at all: The vacuum seems to run, but nothing gets lifted.
- Weak pickup: It might pick up light dust but leaves behind crumbs or larger debris.
- Blowback: Sometimes, instead of sucking, air and dust might blow out from unexpected places.
Understanding this fundamental issue helps you approach troubleshooting with the right mindset: you’re looking for what’s blocking that vital airflow.
Why is Your Vacuum Cleaner Losing Suction?
A vacuum cleaner’s suction relies on a steady, unobstructed flow of air. When anything disrupts this flow, suction power drops significantly. Here are the main reasons why your vacuum might be losing its ability to clean effectively:
- Clogs: This is by far the most common culprit. Hair, large debris, socks, or even small toys can get stuck in the hose, wand, or internal air passages, creating a blockage.
- Full Dust Bag or Canister: If the collection bin is full, there’s no more space for air or dirt to enter. For bagged vacuums, a full bag stops airflow. For bagless models, a packed canister can restrict the cyclone’s ability to separate dirt, leading to blockages.
- Dirty or Clogged Filters: Filters are designed to trap dust and allergens, protecting the motor and keeping the air clean. Over time, these filters become coated with fine dust, making it hard for air to pass through them.
- Hose or Seal Leaks: Any crack or loose connection in the hose or other parts of the vacuum’s body can allow air to escape, reducing the vacuum pressure needed for strong suction.
- Brush Roll Issues: While not directly causing suction loss, a brush roll tangled with hair or not spinning correctly can prevent dirt from being agitated and lifted into the suction path, making it seem like there’s no suction.
- Motor Problems: Less common, but a failing motor can lead to reduced suction. This is usually accompanied by unusual noises or a complete failure to turn on.
Most of these issues are straightforward to identify and resolve, letting you get back to a clean home without much hassle.
Steps to Diagnose and Fix a Vacuum Cleaner with No Suction
When your vacuum cleaner loses suction, a systematic approach is your best friend. Always make sure the vacuum is unplugged before you start poking around inside! Safety first, always.
1. Check the Bag or Canister
This is the easiest fix, so it’s always the first place to look.
- Bagged Vacuums: If the dust bag is full, air can’t pass through it, effectively choking the vacuum. Replace the bag with a new one, even if it doesn’t look completely stuffed. Sometimes, fine dust can block the pores of the bag material before it’s visually full. Also, ensure the bag is installed correctly and sealed properly within its compartment.
- Bagless Vacuums: Empty the dirt canister completely. Many bagless vacuums have a “Max Fill” line. If dirt is past this line, it can obstruct the cyclone mechanism and reduce airflow. Give the canister a good wipe down to remove any clinging dust or debris that might be impeding flow. Check that the canister is correctly seated and locked into place.
2. Inspect and Clean Filters
Filters are critical for your vacuum’s performance and the air quality in your home. Clogged filters are a major cause of suction loss.
- Locate Filters: Most vacuums have at least one pre-motor filter (often washable or replaceable) and sometimes a post-motor or HEPA filter (usually replaceable). Consult your vacuum’s manual if you’re unsure where they are.
- Remove and Inspect: Take out the filters. Are they covered in a thick layer of dust and dirt? They should be relatively clean and allow light to pass through.
- Clean or Replace:
- Washable Filters: If your filters are washable, rinse them under cool water until the water runs clear. Gently squeeze out excess water and let them air dry completely for at least 24 hours before putting them back in. Reinstalling a damp filter can damage the motor.
- Non-Washable Filters: Tap them against a trash can to dislodge loose dirt. If they’re heavily soiled and cannot be washed, it’s time to replace them.
- HEPA Filters: These are typically not washable and need to be replaced periodically according to the manufacturer’s recommendations.
3. Clear Out Clogs
Clogs can occur anywhere along the air path. You’ll need to work systematically to find and remove them.
- Remove Attachments: Take off any hoses, wands, or accessory tools. Test the suction directly at the main intake of the vacuum (where the hose connects). If you have suction there, the clog is in an attachment.
- Check the Hose: Disconnect the main hose from both ends of the vacuum. Hold one end up to a light source; can you see through it? If not, there’s a clog.
- Carefully use a broom handle (without the broom head), a stiff wire, or a long, slender object to push the blockage through. Be gentle to avoid puncturing the hose.
- Alternatively, try using another vacuum on its “blow” setting to force air through the clogged hose, or use a shop vac to try and suck the clog out.
- Inspect the Intake Opening: Look into the opening where the hose connects to the vacuum body. Sometimes large debris gets stuck right there.
- Check the Brush Roll Area (Nozzle): Turn the vacuum upside down. Remove any access panels (you might need a screwdriver) to get to the main suction channel leading from the floor nozzle to the hose connection. This area often gets blocked by packed dirt, lint, or debris. Clear it out by hand or with a small tool.
- Look for Clogs in the Wand and Attachments: Just like the main hose, wands and smaller attachments can get blocked. Disassemble them and check for obstructions.
Safety Tip: When clearing clogs, wear gloves if you’re dealing with sharp objects or potentially unsanitary debris.
4. Examine the Brush Roll
While not a direct cause of suction loss, a malfunctioning brush roll severely impacts cleaning performance. A brush roll that’s tangled or not spinning correctly can make it seem like your vacuum has no suction because it’s not effectively lifting debris into the air stream.
- Turn the Vacuum Over: Unplug the vacuum, then flip it over to access the brush roll at the bottom of the power nozzle.
- Remove Hair and Debris: Use scissors or a seam ripper to carefully cut away any tangled hair, string, or carpet fibers wrapped around the brush roll. Be careful not to cut the bristles themselves.
- Check for Obstructions: Look for any large objects that might be jammed in the brush roll housing, preventing it from spinning freely.
- Verify Spin: Once clean, reassemble if necessary and manually spin the brush roll to ensure it moves smoothly. For some vacuums, you can briefly plug it in (carefully, not on the floor) to see if the brush roll spins as expected.
5. Look for Cracks or Leaks
Even a small crack or loose connection can dramatically reduce suction power by allowing air to escape.
- Inspect Hoses: Carefully run your hand along the entire length of all hoses while the vacuum is running (if safe to do so, and not checking for clogs). You might feel air escaping or hear a hissing sound. Look for visible cracks, tears, or holes.
- Check Seals and Gaskets: Examine all connections where parts join – the dustbin, hose attachments, filter housing. Ensure rubber gaskets or seals are intact and not dried out or cracked. Make sure all parts are securely fastened.
- Body Cracks: Rarely, a crack in the plastic body of the vacuum can occur. Check the main housing, especially around connections or stress points.
If you find a small crack in a hose, sometimes strong tape can provide a temporary fix, but often a replacement hose is the best solution for restoring full suction.
6. Test for Motor Issues
Motor issues are less common for simple suction loss and are generally beyond typical DIY repair for most users. However, it’s good to understand the signs.
- Listen for Unusual Noises: A failing motor might make grinding, screeching, or unusually loud noises.
- Lack of Power: If the motor seems to be struggling, spinning slowly, or overheating rapidly, these could be signs of a motor problem.
- No Power at All: If the vacuum doesn’t turn on or cuts out frequently, it could be an electrical or motor issue.
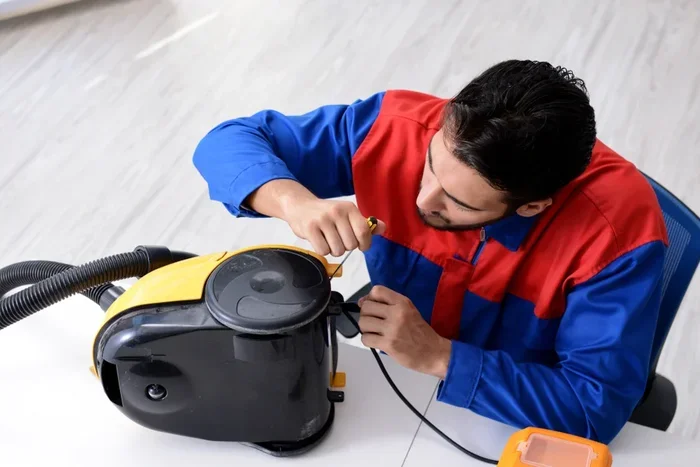
If you’ve checked everything else and suspect a motor issue, it’s usually best to consult with a professional appliance repair service. Attempting motor repairs without proper knowledge and tools can be unsafe and might cause further damage.
The Importance of Regular Vacuum Maintenance
Understanding how to fix a vacuum cleaner with no suction is valuable, but even better is preventing the problem in the first place! Regular maintenance is key to keeping your vacuum running efficiently and prolonging its lifespan.
Think of it like taking care of your car; small, consistent efforts prevent bigger, more annoying problems down the road. By regularly emptying the dustbin, cleaning filters, and clearing the brush roll, you ensure optimal airflow and suction power. This proactive approach saves you time and frustration and helps your vacuum do its job effectively, maintaining a cleaner home environment.
Consistent maintenance also ensures that dust and allergens are captured efficiently, rather than being recirculated into the air, which is a significant health benefit for everyone in the household.
Common Mistakes When Troubleshooting Vacuum Suction Issues
When you’re trying to figure out why your vacuum isn’t working, it’s easy to overlook simple things or make common errors. Avoiding these pitfalls can save you time and prevent unnecessary frustration.
- Forgetting to Unplug: This is the most crucial mistake. Always, always unplug your vacuum before performing any checks or maintenance. This prevents accidental starts and potential injury.
- Not Checking All Filters: Some vacuums have multiple filters. Checking just one and assuming the others are fine is a common oversight. Make sure to locate and inspect every filter.
- Incomplete Drying of Washable Filters: Reinstalling a damp filter can lead to mold growth, bad odors, and potentially damage the motor. Always ensure washable filters are completely dry (at least 24 hours, sometimes longer) before putting them back.
- Ignoring the Brush Roll: Even if you suspect a suction issue, a clogged brush roll can contribute to the feeling of “no suction” by not agitating dirt effectively.
- Giving Up Too Soon on Clogs: Clogs can be stubborn and tricky to locate. Don’t assume there isn’t a clog if you can’t immediately see it. Sometimes, you need to bend hoses or use a probe to really find the blockage.
- Assuming the Worst: Many people immediately think the motor is broken. As we’ve discussed, motor issues are far less common than simple clogs or dirty filters. Always start with the easiest and most common problems first.
Tips for Keeping Your Vacuum Running Strong
Prevention is always better than cure. Here are some practical tips to help maintain strong suction and keep your vacuum cleaner performing its best:
- Empty the Dustbin Regularly: Don’t wait until it’s overflowing. For bagless vacuums, empty the canister after every use, or when it reaches the “Max Fill” line. For bagged vacuums, replace the bag when it’s about two-thirds full, or if you notice a drop in suction.
- Clean Filters Consistently: Follow your manufacturer’s recommendations for filter cleaning schedules. This might be monthly for washable filters or every 3-6 months for replaceable ones.
- Clear the Brush Roll Often: Routinely check the brush roll for tangled hair, string, and debris, especially if you have pets or long hair in your household. A quick trim with scissors can make a big difference.
- Avoid Vacuuming Large Objects: Try not to suck up coins, paper clips, small toys, or excessive amounts of large debris. These are prime candidates for creating clogs.
- Inspect Hoses and Attachments: Periodically check all hoses and attachments for signs of wear, cracks, or potential blockages.
- Check the Belt: For vacuums with a rotating brush, ensure the drive belt is intact and not stretched or broken. A broken belt will prevent the brush from spinning.
By following these simple practices, you can significantly extend the life of your vacuum and enjoy consistent, powerful cleaning.
Real-Life Scenario: When Your Vacuum Suddenly Stops Sucking
Imagine this: You’re cleaning up after a bustling family dinner. Crumbs are everywhere. You grab your trusty vacuum, switch it on, and it makes all the right noises, but when you run it over the mess, nothing happens. It just pushes the crumbs around, or maybe picks up a tiny bit of dust but leaves the larger bits behind. That “whoosh” sound of powerful suction is noticeably absent.
Your first thought might be, “Oh no, it’s broken!” But before you panic, you remember this guide. You unplug the machine, then:
- You check the dust canister. Aha! It’s packed solid with pet hair and general grime. You empty it, give it a quick rinse, and let it dry.
- Next, you pull out the pre-motor filter. It’s gray with fine dust. You tap it out, then rinse it under the faucet and set it aside to air dry.
- While the filter is drying, you disconnect the main hose. You can’t see all the way through, so you gently push a broom handle through. Out pops a forgotten toy car and a clump of hair!
- You also flip the vacuum over and carefully cut away a massive tangle of hair from the brush roll.
Once everything is clean, dry, and reassembled, you plug it back in. The moment you switch it on, that satisfying, powerful “whoosh” is back, and the vacuum tackles the crumbs with ease. This common scenario highlights just how often a little attention to clogs and cleanliness can solve seemingly major problems.
Frequently Asked Questions (FAQ)
Can I fix a vacuum with no suction myself?
Yes, absolutely! Most common reasons for a vacuum losing suction, such as clogs, full dustbins, or dirty filters, are straightforward to diagnose and fix with basic tools and a bit of patience. This guide provides the necessary steps to help you do it yourself.
How often should I clean my vacuum filters?
The frequency depends on your vacuum’s model, how often you use it, and if you have pets or allergies. As a general rule, washable filters should be cleaned every 1-3 months, and non-washable filters (like some HEPA filters) should be replaced every 6-12 months. Always check your vacuum’s user manual for specific recommendations.
What tools do I need to clear a clog?
Often, you can clear clogs with household items. A broom handle (without the head), a stiff piece of wire (like a coat hanger bent straight), or even a specialized vacuum hose cleaning tool can be effective. Gloves and a pair of scissors are also handy for cutting away tangled hair.
Is it normal for vacuums to lose suction over time?
It’s normal for suction to gradually decrease if maintenance isn’t performed. Filters get dirty, and hoses can accumulate small blockages over time. However, a sudden, dramatic loss of suction usually points to a specific issue like a major clog or a completely full dustbin, which can often be quickly remedied.
When should I consider professional repair or replacement?
If you’ve systematically gone through all the troubleshooting steps (checking for clogs, cleaning filters, inspecting for leaks) and the vacuum still has no suction, it might indicate a more serious issue like a motor malfunction or a broken internal component. At this point, you could consider seeking professional repair, especially if it’s a high-end model, or weighing the cost of repair against the cost of a new machine.
Conclusion
Losing suction on your vacuum cleaner can feel like a major setback, but as we’ve seen, it’s often a very solvable problem. By systematically checking for common culprits like full dustbins, clogged filters, and blockages in the hose or brush roll, you can usually restore your vacuum’s powerful suction right from your home.
Remember to always prioritize safety by unplugging your vacuum before any inspection or cleaning. Regular, proactive maintenance—emptying the bin, cleaning filters, and clearing the brush roll—is truly the best way to prevent these issues from happening in the first place, ensuring your vacuum remains a reliable cleaning tool for years to come. Don’t let a little lost suction get you down; empower yourself with these steps and get back to sparkling clean floors!