How Do You Open a Dyson Vacuum Cleaner
Opening a Dyson vacuum cleaner isn’t about cracking open the main casing, but rather accessing specific parts for routine maintenance, such as emptying the dustbin, cleaning filters, or clearing blockages. This guide will walk you through safely accessing these key components across various Dyson models, empowering you to keep your machine running efficiently and prolong its lifespan. Always prioritize safety by unplugging your vacuum before attempting any procedure.
There comes a point in every Dyson owner’s journey when the question inevitably arises: “How do you open a Dyson vacuum cleaner?” It’s not about cracking open the entire machine like a mechanic disassembling an engine. Instead, it’s about accessing the specific parts that need regular attention – think dustbins, filters, hoses, and cleaner heads – to ensure your beloved vacuum continues to perform at its peak.
Dyson vacuum cleaners are renowned for their powerful suction and innovative design. However, even the best machines require a little TLC to maintain their efficiency. Over time, dustbins get full, filters get clogged, and blockages can form, all of which diminish performance. Knowing how to safely and correctly open these key components for cleaning and maintenance isn’t just a good skill to have; it’s essential for prolonging the life of your Dyson and keeping your home spotless.
This comprehensive guide will walk you through the process, covering various Dyson models and the most common reasons you’ll need to “open” them up. We’ll demystify the process, from emptying the dustbin to tackling stubborn blockages and cleaning those all-important filters. Get ready to empower yourself with the knowledge to keep your Dyson running like new!
Key Takeaways
- Safety First: Always unplug your Dyson vacuum cleaner before attempting to open any part or perform maintenance to prevent electric shock or accidental activation.
- Model-Specific Differences: How you open a Dyson vacuum cleaner varies significantly between cordless stick, upright, and canister models. Always consult your specific model’s manual for precise instructions.
- Dustbin Access is Key: Emptying the dustbin is the most frequent “opening” you’ll do. Cordless models typically have a red lever, while uprights often have a button near the handle to release the bin.
- Filter Maintenance is Crucial: Dyson vacuums have washable filters (pre-motor and sometimes post-motor/HEPA). Knowing how to access and properly clean these filters is vital for maintaining suction power and air quality.
- Clearing Blockages: You’ll often need to open various sections like the wand, hose, or cleaner head to remove stubborn blockages that reduce performance. Look for quick-release buttons or coin-slot fasteners.
- Minimal Tools Required: Most basic Dyson maintenance can be done with your hands, a coin, or occasionally a flathead screwdriver. Avoid forcing parts, as Dyson components are designed for intuitive disassembly.
- When to Seek Professional Help: If your Dyson requires deep internal repair beyond routine maintenance, or if you’re unsure about advanced disassembly, it’s best to contact Dyson support or a certified technician to avoid damage or voiding your warranty.
Quick Answers to Common Questions
Can I put Dyson parts in the dishwasher?
No, you should never put Dyson dustbins or filter components in a dishwasher. The high heat and harsh detergents can damage the plastic and seals. Always follow the manual’s instructions, typically hand-washing with cold water.
How often should I clean my Dyson’s filters?
Dyson generally recommends cleaning washable filters at least once a month for optimal performance. If you use your vacuum frequently or have pets, you might need to clean them more often. Check your manual for specific guidance.
What if my Dyson vacuum cleaner won’t open easily?
If a part isn’t opening easily, double-check your manual to ensure you’re pressing the correct release buttons or twisting in the right direction. Avoid forcing it, as Dyson parts are designed for intuitive disassembly. There might be a hidden latch or a different procedure for your specific model.
Is it safe to use water to clean the dustbin?
Yes, the clear dustbin can typically be wiped with a damp cloth or rinsed with cold water. However, ensure it is completely dry before reattaching it to the main vacuum unit to prevent moisture from damaging the motor or electrical components.
Can I open the motor housing of my Dyson?
No, you should never attempt to open the sealed motor housing of your Dyson vacuum cleaner. This is a complex component, and opening it can void your warranty, lead to irreparable damage, or expose you to electrical hazards. If you suspect a motor issue, contact Dyson support.
📑 Table of Contents
General Safety First: Before You Open Anything
Before you even think about how to open a Dyson vacuum cleaner, safety must be your absolute top priority. These aren’t just household appliances; they’re powerful electrical devices. Taking a moment for safety precautions can prevent accidents, injuries, or damage to your machine.
Unplugging is Non-Negotiable
Seriously, this is the first and most critical step. If you have a corded Dyson, unplug it from the wall socket. For cordless models, ensure it’s not charging and, if possible, consider removing the battery (we’ll cover how to open that section later) for complete peace of mind, especially for more involved tasks. An unplugged vacuum cannot accidentally start, giving you a safe working environment.
Consult Your Manual (Model-Specific Instructions)
While this guide covers general principles, Dyson manufactures a wide array of models – from cordless stick vacuums (V-series, Outsize, Gen5detect) to uprights (Ball, Animal) and canister vacuums (Cinetic Big Ball). Each model can have slight variations in how parts are accessed or secured. Your user manual is your best friend for precise, model-specific instructions. Keep it handy, or look up the digital version on the Dyson website.
Gather Your Tools (Usually Minimal)
Good news! Most routine Dyson maintenance requires very few, if any, specialized tools. You’ll primarily be using your hands. Sometimes, you might need:
- A coin (for twist-lock mechanisms on brush bars).
- A flathead or Phillips-head screwdriver (rarely, for battery removal or specific cleaner head access).
- A pair of scissors or a seam ripper (for cutting tangled hair from brush bars).
- A soft cloth (for wiping down parts).
Avoid using excessive force. Dyson components are generally designed for intuitive disassembly with clips, buttons, or twists. If something isn’t budging, you might be missing a hidden release or applying the wrong method.
Work in a Clear, Well-Lit Area
A well-lit space with a clean, flat surface (like a table or workbench) is ideal. This helps you clearly see all the small components, prevent parts from rolling away, and makes it easier to spot blockages or dirt. Lay down a towel or old newspaper if you’re working with dusty components to keep your workspace tidy.
Opening the Dustbin (The Most Common “Opening”)
When someone asks “how do you open a Dyson vacuum cleaner,” they’re most often referring to emptying the dustbin. This is a task you’ll perform frequently, and thankfully, Dyson has designed this process to be straightforward across its various models.
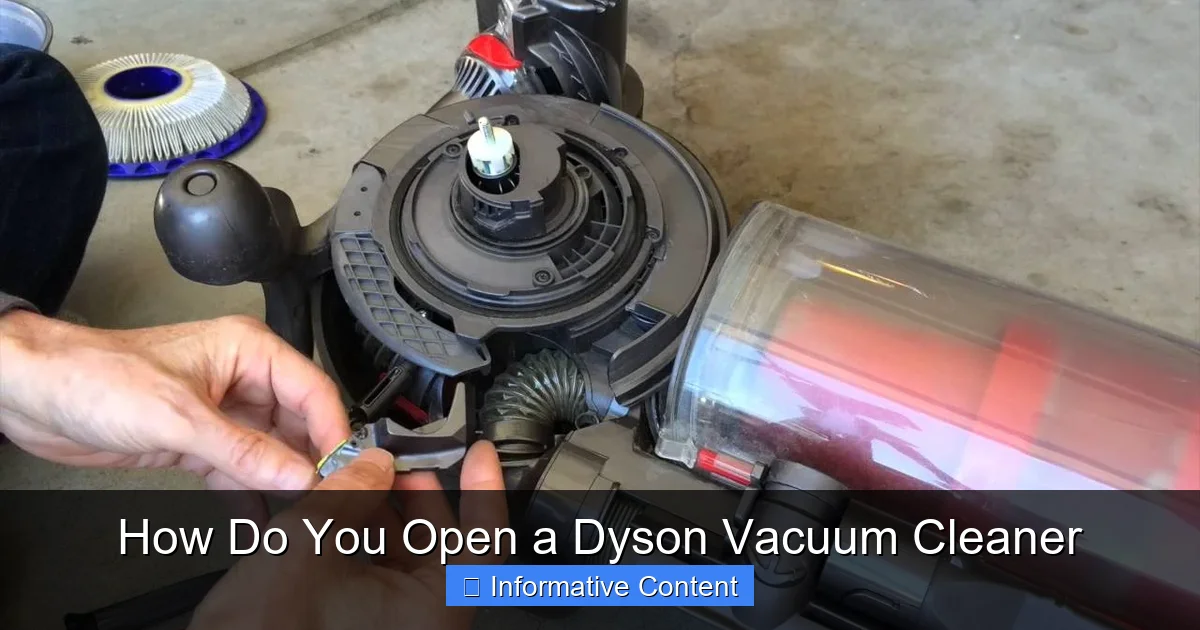
Visual guide about How Do You Open a Dyson Vacuum Cleaner
Image source: i.ytimg.com
Cordless V-Series (V6, V7, V8, V10, V11, V15, Gen5detect, Outsize)
These are perhaps the most popular Dyson models, and their dustbin emptying mechanism is quite ingenious.
- Remove Attachments: First, detach any attached wand or cleaner head. This usually involves pressing a red quick-release button on the connection point.
- Locate the Red Lever/Catch: On most V-series models, you’ll find a prominent red lever or slider on top of the cyclone assembly, near the handle.
- Emptying Action:
- For V6, V7, V8: Pull the red lever upwards. The cyclone assembly will lift, and the bin base will automatically swing open, ejecting the dirt. Hold it over a trash can!
- For V10, V11, V15, Outsize, Gen5detect: Push the red lever forward/down. This action slides the entire bin assembly forward, and the bin base opens, pushing out the debris.
- Closing the Bin: Once empty, simply push the bin base closed until it clicks securely. For V10/V11/V15, slide the bin back into its original position until it locks.
- Removing the Bin for Deeper Cleaning: For a more thorough clean, you can often detach the entire clear bin from the cyclone unit. Look for a small red button or clip, usually on the side or near the base of the cyclone that connects to the clear bin. Press this, and the clear bin will separate, allowing you to wipe it down. Ensure it’s completely dry before reattaching.
Upright Models (Dyson Ball, Animal, Multi Floor)
Dyson uprights have a different, but equally simple, method for emptying the bin.
- Locate the Bin Release Button: This is typically a prominent red button, often found on the top of the bin itself, near where it meets the main body of the vacuum, or on the handle.
- Lift Off the Bin: Press the release button and carefully lift the entire clear bin assembly straight up and off the main unit.
- Open the Bin Base: Hold the bin over a trash can. You’ll see another red button or catch, usually on the bottom side of the bin. Press this, and the base of the bin will swing open, releasing the dirt.
- Closing the Bin: Push the bin base firmly until it clicks shut. Then, align the bin with the main vacuum body and push it down until it locks securely into place. You should hear a distinct click.
Canister/Cylinder Models (Dyson Cinetic Big Ball, Small Ball)
Canister models also offer a straightforward bin removal and emptying process.
- Detach the Bin: Look for a button or lever, often red, located where the clear bin attaches to the main canister body. Press this, and the bin assembly will detach.
- Open the Bin Base: Over a waste bin, locate another red button or catch on the underside of the clear bin. Press this, and the bin’s bottom flap will open, releasing the contents.
- Reassemble: Close the bin base securely, ensuring it clicks. Then, align the bin with the canister’s body and push it firmly until it clicks back into place.
Accessing and Cleaning Filters
Your Dyson’s filters are vital for trapping microscopic dust and allergens, preventing them from being expelled back into your home. Neglecting filter cleaning is a common reason for reduced suction power. Knowing how to open these sections of your Dyson vacuum cleaner for filter access is crucial.
Cordless Models (Pre-Motor and Post-Motor Filters)
Most cordless Dysons have at least two filters:
- Pre-Motor Filter: This is usually located at the very top of the cyclone assembly, above the dustbin. It often has a twist-lock design.
- Remove: Twist the filter counter-clockwise and lift it out. It’s typically a cylindrical, sometimes conical, washable filter.
- Wash: Rinse under cold running water until the water runs clear. Gently squeeze to remove excess water. Do NOT use detergents.
- Dry: This is critical. Allow the filter to air dry completely for at least 24 hours (or longer in humid conditions) before reinstalling. A wet filter can damage the motor.
- Reinstall: Once bone dry, insert it back into its housing and twist clockwise until secure.
- Post-Motor/HEPA Filter: Found at the very back of the motor unit, often requiring a twist to release.
- Remove: Twist the filter housing (often blue or purple) counter-clockwise and pull it out.
- Wash: Similar to the pre-motor filter, rinse under cold water until clear.
- Dry: Again, a minimum of 24 hours of complete air drying is essential.
- Reinstall: Push it back in and twist clockwise until it clicks into place.
Upright/Canister Models (Multiple Filters)
Upright and canister models can have varying filter locations and types, but the cleaning principle remains the same.
- Pre-Motor Filter (Washable): Often located under the dustbin or within the bin assembly itself.
- Access: Remove the dustbin. On uprights, you might find a cover or compartment (sometimes labeled “Filter”) that opens with a latch or twist. For canisters, it might be integrated with the bin or accessible via a panel on the main unit.
- Remove, Wash, Dry, Reinstall: Follow the same washing and drying instructions as for cordless filters. Ensure complete dryness.
- Post-Motor Filter (Sometimes Washable, Sometimes Lifetime HEPA): This filter is often located on the side or back of the main vacuum body, sometimes behind a small panel.
- Access: Look for a small cover or door that might pop open with a latch or tab. Some models have a lifetime HEPA filter that doesn’t require washing but should be checked for debris.
- Clean/Replace: If washable, follow the washing and drying process. If it’s a non-washable HEPA filter, it generally doesn’t need attention unless the manual specifies replacement intervals (rare for Dysons).
Clearing Blockages in Hoses, Wands, and Cleaner Heads
A sudden drop in suction often points to a blockage. Knowing how to open up the various pathways of your Dyson vacuum cleaner to clear these obstructions is a vital skill for restoring performance.
Detaching the Wand and Tools
Most Dyson tools and wands attach with quick-release red buttons. Simply press the button and pull to separate the component. This allows you to inspect each section individually.
- Main Wand/Tube: Separate it from the main body and the cleaner head. Look through it. If you see an obstruction, try using a broom handle (not sharp!) or a thick blunt object to push it through.
- Hose (on Uprights/Canisters): The main hose usually has quick-release points where it attaches to the vacuum body and to the wand. Disconnect both ends. Stretch the hose and look through it for any blockages. You might need to gently manipulate it or use a long, blunt object to dislodge debris.
Opening the Cleaner Head (Brush Bar Access)
The cleaner head, especially the brush bar, is a common spot for hair, strings, and debris to get tangled, hindering performance. How to open a Dyson vacuum cleaner head to clean the brush bar depends on the model:
- Cordless Models (e.g., Fluffy, Torque Drive, Digital Motorbar):
- Remove from Wand: Press the red button to detach the cleaner head from the wand.
- Access Brush Bar: Flip the cleaner head over. You’ll typically find a latch or a coin-slot screw on the side.
- Newer Models (V10, V11, V15, Gen5detect): Often have a red clip or slider. Push/slide this, and one end of the brush bar will pop out, allowing you to slide the whole bar out.
- Older Models (V6, V7, V8): May have a gray/silver latch or a coin-slot screw that needs a quarter turn to release the end cap, then the brush bar slides out.
- Clean: Use scissors or a seam ripper to cut away tangled hair and fibers. Wipe down the brush bar and the inside of the cleaner head.
- Reassemble: Slide the brush bar back in, ensuring it’s correctly seated, and secure the end cap/latch until it clicks.
- Upright/Canister Models:
- Lay Flat: Lay the vacuum down on its back so the cleaner head is facing up.
- Access Plate: Many upright cleaner heads have a base plate that can be removed. Look for release tabs (often red or gray) or screws (usually Phillips head) on the underside. Release these.
- Remove Brush Bar: Once the plate is off, the brush bar should be accessible. It might lift straight out or have a small end cap to remove first.
- Clean and Reinstall: Clear all debris, then reassemble in reverse order, ensuring everything clicks and screws are tightened.
Checking the Cyclone Assembly
After you remove the dustbin, you have access to the cyclone assembly (the part with all the cones). While you can’t easily disassemble the cyclones themselves, you can visually inspect them for large obstructions. Use a flashlight to peer down the intake opening. If you see something, try to dislodge it with a long, blunt tool (like a ruler or a wooden spoon handle), but be very careful not to damage the delicate plastic cones.
Specific Model Considerations: Battery and Advanced Disassembly
Sometimes, how you open a Dyson vacuum cleaner involves more than just routine cleaning. Battery replacement in cordless models or deeper repairs might necessitate a bit more disassembly. However, it’s crucial to know your limits.
Battery Removal (Cordless Models)
For most newer cordless Dysons (V10, V11, V15, Outsize, Gen5detect), the battery is designed to be user-replaceable. This is incredibly helpful for prolonging the life of your vacuum.
- Locate the Battery: On most models, the battery pack is located on the underside of the main body, often integrated into the handle or just below it. It’s usually a distinct, rectangular block.
- Identify Screws: You’ll typically see two Phillips head screws (sometimes three) securing the battery in place.
- Unscrew: Use the correct size Phillips head screwdriver to carefully remove these screws. Keep them safe!
- Remove Battery: Once the screws are out, the battery pack should slide out or detach with a gentle pull. There might be a small clip or catch you need to press.
- Install New Battery: Align the new battery, slide it into place, and secure it with the screws. Do not overtighten.
Important Note: Older models (V6, V7, V8) might have batteries secured differently, sometimes requiring more extensive disassembly or being less “user-replaceable.” Always check your manual.
Advanced Disassembly (When to Call a Professional)
While we’ve covered how to open a Dyson vacuum cleaner for most user-serviceable tasks, there’s a point where you should stop. If you’re looking to access internal motors, wiring, or intricate circuit boards, you’ve gone beyond basic maintenance. Attempting to disassemble these components without proper training can:
- Damage the Vacuum: You could break delicate parts, rendering the machine irreparable.
- Void Your Warranty: Unauthorized repairs almost always void your Dyson warranty.
- Cause Injury: Internal components can still pose electrical hazards even when unplugged, and sharp edges exist.
If your Dyson is experiencing issues like motor failure, electrical problems, or persistent noise that isn’t related to a blockage, it’s best to:
- Contact Dyson Support: They can offer troubleshooting, send replacement parts under warranty, or advise on repair centers.
- Visit a Certified Repair Center: If out of warranty, a professional Dyson repair technician has the specialized tools and knowledge to safely diagnose and fix complex issues.
Knowing when to stop and seek professional help is just as important as knowing how to perform basic maintenance.
Conclusion
Understanding how to open a Dyson vacuum cleaner – whether it’s to empty the dustbin, clean the filters, or clear a stubborn blockage – is an empowering skill for any Dyson owner. By regularly performing these simple maintenance tasks, you’re not just ensuring your home stays clean; you’re also significantly extending the life and optimizing the performance of your investment.
Remember, safety is paramount. Always unplug your machine and consult your user manual for model-specific instructions. Dyson’s ingenious design usually means components are intuitive to open and reassemble, requiring minimal tools and no brute force. With a little practice, these “openings” will become second nature, allowing you to quickly diagnose and fix common issues.
So, the next time your Dyson’s suction dips or a light flickers, you’ll know exactly how to open the relevant sections to get it back into tip-top shape. Enjoy the satisfaction of a well-maintained machine and a sparkling clean home!
Frequently Asked Questions
How do I know if my Dyson has a blockage?
You’ll typically notice a significant drop in suction power, unusual noises (like the motor struggling), or the vacuum might stop picking up debris effectively. Some cordless models also have indicator lights that illuminate when a blockage is detected.
Can I wash the brush bar from my Dyson cleaner head?
No, you should not wash the brush bar with water. The brush bar contains bearings and often electrical connections (for motorized brush bars) that can be damaged by water. Instead, use scissors or a seam ripper to carefully cut away tangled hair and then wipe it clean with a dry cloth.
What tools do I need to open a Dyson?
For most routine maintenance, you’ll primarily use your hands. A coin might be needed for certain brush bar release mechanisms, and a Phillips-head screwdriver is usually required for battery removal on cordless models. Avoid using excessive force or sharp objects.
Why does my Dyson smell bad after cleaning the bin?
A persistent bad smell after emptying the bin often indicates trapped odors within the cyclone assembly or dirty filters. Ensure you’ve thoroughly cleaned and dried all washable filters, and consider wiping down the inside of the bin and cyclone with a damp (not wet) cloth and mild, unscented disinfectant.
My Dyson has a removable battery. How do I open that section?
On most newer cordless Dysons, the battery pack is secured by two or three Phillips-head screws, usually located on the underside of the handle or main body. Once these screws are removed, the battery can typically slide or pull out, allowing you to replace it.
How often should I empty the dustbin on my Dyson?
Dyson recommends emptying the dustbin as soon as the dirt reaches the MAX line. For optimal suction and performance, it’s best to empty it after every use, especially if you’re cleaning a large area or have pets.