How Do I Clean My Dyson Vacuum Cleaner
Maintaining your Dyson vacuum cleaner is crucial for optimal performance and longevity. Regular cleaning of its key components, including the dustbin, cyclone, filters, and brush bar, prevents clogs and maintains powerful suction. Follow our simple, step-by-step guide to effortlessly clean your Dyson and keep it running like new.
Ah, the Dyson. It’s more than just a vacuum cleaner; for many, it’s an investment in a cleaner, healthier home. Known for its powerful suction and innovative design, a Dyson vacuum cleaner makes light work of dirt, dust, and pet hair. But even the best workhorse needs a little pampering to stay at the top of its game. Over time, dust, debris, hair, and fine particles can build up inside your machine, quietly diminishing its performance and efficiency. You might notice less powerful suction, a strange smell, or that it just doesn’t pick up dirt like it used to.
That’s where a good, thorough cleaning comes in! Many Dyson owners wonder, “how do I clean my Dyson vacuum cleaner?” and often assume it’s a complicated task. The good news? It’s not! With a few simple tools and a little guidance, you can restore your Dyson to its former glory. Think of it as a spa day for your vacuum – a chance to refresh and rejuvenate its vital components, ensuring it continues to provide that signature Dyson cleaning power for years to come. This guide will walk you through every step, making the process easy and understandable, even if you’re not particularly handy.
Ready to bring back that “like new” feeling to your trusted cleaning companion? Let’s dive into exactly how do I clean my Dyson vacuum cleaner, covering everything from the dustbin to the brush bar and beyond. By the end, you’ll be a pro at Dyson maintenance, enjoying a vacuum that performs beautifully and a home that’s sparkling clean.
Key Takeaways
- Regular Cleaning is Essential: To maintain peak suction power and extend your Dyson’s lifespan, consistent cleaning of its various parts is vital.
- Safety First: Always unplug your Dyson vacuum cleaner before attempting any cleaning or disassembly to prevent accidents.
- Filters Need Regular Washing and Drying: Most Dyson filters are washable; rinse them under cold water until the water runs clear, then allow them to air dry completely for at least 24-48 hours. Never use heat.
- Untangle the Brush Bar: Hair and debris can significantly reduce cleaning effectiveness. Regularly remove the brush bar to untangle and cut away any trapped strands.
- Don’t Forget the Dustbin and Cyclone: Empty the dustbin frequently, and periodically wipe down the cyclone shroud to remove fine dust buildup that can impede airflow.
- Address Hoses and Attachments: Check hoses for blockages and clean all attachments. A small blockage can drastically reduce overall suction.
- Thorough Drying is Paramount: Before reassembling any washed parts, especially filters, ensure they are completely dry to prevent mold growth and damage to your machine.
Quick Answers to Common Questions
Can I put my Dyson filter in the dishwasher?
No, you should never put your Dyson filter in the dishwasher. Dishwasher detergents and high heat can damage the filter material and render it ineffective.
How often should I clean my Dyson filter?
Dyson recommends washing your filter every month, but this can vary depending on usage. If you have pets or use your vacuum frequently, you might need to clean it more often.
What if my Dyson still has low suction after cleaning?
If suction is still low, double-check for hidden blockages in the hose, wand, or cleaner head. Ensure your filter is completely dry and correctly reinstalled. If problems persist, contact Dyson support.
Can I use soap to clean my Dyson parts?
For most parts like the clear bin and filters, only cold water should be used. Mild dish soap can sometimes be used on non-electronic attachments, but ensure thorough rinsing and drying.
How long does it take for a Dyson filter to dry?
A Dyson filter typically needs to air dry for at least 24 hours, and sometimes up to 48 hours, depending on humidity and airflow. It must be bone dry before reinstallation.
📑 Table of Contents
- Why a Clean Dyson is a Happy Dyson: The Benefits of Regular Maintenance
- Getting Ready: What You’ll Need and Initial Steps
- The Heart of the Matter: Cleaning the Dustbin and Cyclone
- Breathe Easy: Washing Your Dyson’s Filter
- Smooth Operator: Maintaining the Brush Bar and Head
- The Finer Points: Cleaning Hoses, Wands, and Attachments
- Conclusion
Why a Clean Dyson is a Happy Dyson: The Benefits of Regular Maintenance
Just like any high-performance machine, your Dyson vacuum cleaner needs regular care to operate at its best. Neglecting to clean it can lead to several common issues that affect both its performance and longevity. Understanding these benefits makes the small effort of cleaning your Dyson truly worthwhile.
Enhanced Suction Power
This is probably the most immediate and noticeable benefit. When filters get clogged, brush bars get tangled, or the cyclone assembly is coated in fine dust, airflow is restricted. This restriction directly translates to a significant drop in suction power. Imagine trying to breathe through a stuffy nose – it’s just not as effective. Cleaning your Dyson removes these blockages, allowing air to flow freely and restoring that powerful suction you bought it for in the first place. You’ll pick up more dirt, dust, and debris with less effort, making your cleaning sessions far more efficient.
Extended Lifespan
A vacuum cleaner that’s struggling due to blockages or dirty components has to work harder. The motor strains, components heat up, and wear and tear accelerate. Regular cleaning reduces this stress on the motor and other moving parts. It helps prevent premature failure, keeps components from getting damaged, and ultimately extends the overall life of your investment. Think of it as preventive maintenance for your car – a little care now saves you a lot of trouble (and money) later.
Healthier Home Environment
Your Dyson is designed to capture microscopic dust, allergens, and pet dander. But what happens if those captured particles build up inside the machine? A dirty filter, for example, can’t effectively trap these irritants, potentially releasing them back into the air you breathe. Furthermore, a damp, dirty vacuum can become a breeding ground for mold and bacteria, leading to unpleasant odors. By regularly cleaning your Dyson, especially its filters and dustbin, you ensure it continues to effectively remove allergens and pollutants, contributing to a truly healthier and fresher living space.
Getting Ready: What You’ll Need and Initial Steps
Before you begin the process of learning how do I clean my Dyson vacuum cleaner, it’s wise to gather your tools and take a few safety precautions. This preparation ensures a smooth and effective cleaning experience.
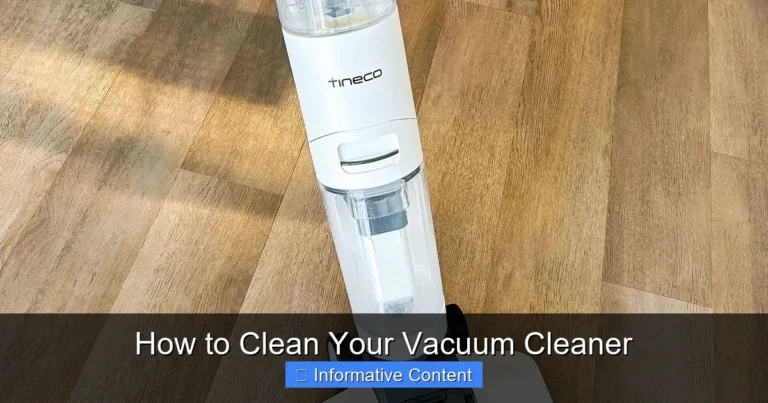
Visual guide about How Do I Clean My Dyson Vacuum Cleaner
Image source: media.binglee.com.au
Essential Tools
You won’t need a professional workshop to clean your Dyson. Most of what you need you probably already have at home:
- Soft brush or old toothbrush: Great for dislodging stubborn dust.
- Microfiber cloths: For wiping down surfaces.
- Scissors or a seam ripper: Absolutely essential for cutting tangled hair from the brush bar.
- Warm water: For washing certain components.
- Mild dish soap (optional): A small amount for stubborn grime on non-electronic parts.
- A coin or flat-head screwdriver: Some Dyson models require this to unlock the brush bar.
- Lint roller or tape: Handy for picking up fine debris from hard-to-reach areas.
Safety First!
This step is non-negotiable. Always, always, always unplug your Dyson vacuum cleaner from the power outlet before you start any cleaning, disassembly, or maintenance. This eliminates the risk of accidental power-on and potential injury. Safety should always be your top priority when dealing with electronics.
Disconnecting and Disassembling
Depending on the model, your Dyson might have various detachable parts. For a thorough cleaning, you’ll want to remove as many of these as possible. This typically includes:
- The dustbin (also known as the clear bin or cyclone assembly).
- The main brush bar (often located in the cleaner head).
- Any filters.
- The wand and hose.
- Attachments.
Refer to your Dyson’s user manual if you’re unsure how to detach specific components. Most Dyson parts are designed for easy removal and reattachment, often with clear release buttons or simple twists.
The Heart of the Matter: Cleaning the Dustbin and Cyclone
The dustbin and cyclone assembly are where all the magic happens – and where most of the grime collects. Regularly cleaning these parts is critical for maintaining optimal suction and hygiene.
Emptying the Bin
This might seem obvious, but it’s the first step! Empty your Dyson’s dustbin frequently, ideally after every use, or when the “Max” line is reached. To empty, simply press the bin release button (usually red), hold the bin over a trash can, and press the second release button (often also red) to open the base. Give it a good shake to ensure all debris falls out. If you notice dust sticking to the sides, you might need to wipe it down.
A Deep Clean for the Bin
While emptying is good, a deeper clean for the clear bin is necessary periodically. Once removed from the main body of the vacuum, the clear plastic bin can often be washed. Check your specific model’s manual, but generally, you can rinse the clear bin under cold tap water. Use a soft brush to dislodge any stuck-on dirt or fine dust film. Avoid using harsh detergents, as they can damage the plastic or leave residues. After washing, it’s absolutely crucial to let the bin air dry completely for at least 24 hours before reattaching it to the vacuum. Any residual moisture can lead to mold or damage the electrical components of the vacuum.
Tackling the Cyclone Assembly
The cyclone assembly is the intricate part inside the bin that separates dust from the airflow. Over time, a fine layer of dust can accumulate on the conical shrouds, reducing efficiency. Most Dyson cyclone assemblies are NOT washable with water. Instead, use a dry microfiber cloth or a soft brush to gently wipe away any dust from the metal mesh and plastic cones. For stubborn, caked-on dust, you can use a slightly damp (not wet!) cloth, but ensure it’s completely dry before reassembly. Sometimes, using compressed air (from a can, not a powerful compressor) can help dislodge dust from hard-to-reach crevices, but always do this outdoors to avoid spreading dust indoors.
Breathe Easy: Washing Your Dyson’s Filter
The filter is your Dyson’s lung, trapping microscopic particles and allergens. A clogged filter is one of the most common reasons for reduced suction. Learning how do I clean my Dyson vacuum cleaner filter is perhaps the most impactful step you can take for its performance.
Locating Your Filter
Dyson vacuums typically have one or two filters, depending on the model.
- Pre-motor filter: This is usually located near the dustbin or on top of the main body. It’s often conical or cylindrical.
- Post-motor filter (HEPA filter): Found at the back or side of the vacuum, often behind a small grill or cover.
Most Dyson filters are designed to be washable. However, always check your specific model’s manual to confirm if your filters are washable and for specific instructions. Some filters are NOT washable and must be replaced.
The Washing Process
For washable filters, the process is straightforward:
- Remove the filter: Twist or pull it out according to your model’s design.
- Rinse under cold water: Hold the filter under a running cold tap. Cup your hand around the open end and gently squeeze or tap the filter. Keep rinsing until the water running through it is completely clear. It might take a few minutes for really dirty filters. Do not use detergent, hot water, or put it in a dishwasher or washing machine.
- Shake off excess water: Gently shake the filter to remove as much water as possible.
Crucial Drying Time
This is arguably the most critical step. Your filter must be COMPLETELY, 100% dry before you put it back into your Dyson. This means air drying it for at least 24 hours, and often up to 48 hours, in a warm, dry place with good airflow. Placing it near a radiator or in direct sunlight can speed things up, but do NOT use a tumble dryer, microwave, or any other artificial heat source, as this can damage the filter material. Reinstalling a damp filter can lead to mold growth inside your vacuum, produce unpleasant odors, and even damage the motor. To avoid downtime, you might consider having a spare filter on hand.
Smooth Operator: Maintaining the Brush Bar and Head
The cleaner head and its brush bar are on the front lines, battling hair, carpet fibers, and larger debris. Keeping them clear is essential for effective cleaning, especially on carpets.
Removing the Brush Bar
The method for removing the brush bar varies by Dyson model. Many upright and stick models have a small latch or screw (sometimes requiring a coin or flat-head screwdriver) on the side of the cleaner head that allows the end cap or cover to come off, releasing the brush bar. On some older models, you might need to flip the cleaner head over and release a few clips. Again, consult your manual if you’re unsure.
Untangling Hairs and Debris
Once the brush bar is out, you’ll likely find it tangled with hair, threads, and pet fur. This is where your scissors or seam ripper come in handy. Carefully cut along the length of the brush bar, perpendicular to the bristles, to slice through the tangled mess. Then, simply pull the cut hair away. Be gentle to avoid damaging the bristles. Also, check the small wheels or bearings at the ends of the brush bar for trapped debris and clean them if necessary. Use a damp cloth to wipe down the brush bar itself, ensuring no moisture gets into any electronic connections.
Cleaning the Head Itself
With the brush bar removed, take the opportunity to clean the inside of the cleaner head. Use a soft brush or your hand to clear away any accumulated dust, fluff, or larger debris. Check the air channels and suction pathways for blockages. You can wipe down the exterior of the cleaner head with a damp microfiber cloth, but be careful not to get water into any electronic parts or motor housing. Ensure everything is dry before you reinsert the brush bar and reassemble the cleaner head.
The Finer Points: Cleaning Hoses, Wands, and Attachments
While the main components often get the most attention, don’t overlook the hoses, wands, and smaller attachments. These can harbor hidden blockages and grime that impact overall performance.
Clearing Blockages in Hoses
Dyson hoses are often flexible and ribbed, making them prone to blockages from larger items like socks, paper, or clumps of hair. If you notice a sudden drop in suction, a blockage in the hose is a common culprit. To check:
- Remove the hose: Detach it from both the main body of the vacuum and any wand or attachment.
- Visual inspection: Hold the hose up to a light source and look through it.
- Feel for obstructions: Gently flex the hose along its length to feel for hard lumps.
- Push through: If you find a blockage, use a broom handle or a long, blunt object (never anything sharp!) to gently push it through. Be careful not to puncture the hose.
Once cleared, you can rinse the inside of the hose with cold water if it’s particularly dirty, but ensure it’s hung to dry completely for at least 24 hours before reattaching. Again, moisture is the enemy of your Dyson’s electronics.
Wiping Down Wands and Tools
The wand and various attachments (crevice tool, upholstery tool, etc.) can also accumulate dust and grime. Simply wipe them down with a damp microfiber cloth. For tools with bristles, you can use an old toothbrush to clean between the bristles, and scissors to snip away any tangled hair. For stubborn sticky grime, a tiny bit of mild dish soap can be used, but rinse thoroughly and dry completely.
The Importance of Thorough Drying and Reassembly
We’ve mentioned it multiple times, but it bears repeating: every component you wash with water MUST be completely dry before reassembly. This is not just a recommendation; it’s a critical step to prevent damage, electrical faults, and mold. Give yourself ample time for drying, usually a minimum of 24-48 hours. Once all parts are sparkling clean and bone dry, you can reverse the disassembly process, clicking everything back into place. Your Dyson is now ready to unleash its full cleaning potential once again!
Conclusion
You’ve successfully learned how do I clean my Dyson vacuum cleaner, transforming it from a tired workhorse into a powerful cleaning machine once more. Regular maintenance isn’t just about making your Dyson look good; it’s about preserving its incredible suction power, extending its life, and ensuring it continues to contribute to a healthier, cleaner home environment. From the dustbin to the filters, and the brush bar to the attachments, each component plays a vital role in your Dyson’s overall performance.
Making Dyson cleaning a part of your routine—perhaps a quick wipe-down after each use, a filter wash once a month, and a full deep clean every 3-6 months—will make a significant difference. It’s a small investment of time that yields big returns in performance and longevity. So go ahead, plug in your freshly cleaned Dyson, and experience the satisfaction of a vacuum that performs just like it did the day you brought it home. Happy cleaning!
Frequently Asked Questions
How do I know if my Dyson filter needs cleaning?
You’ll often notice a reduction in suction power, or your vacuum might start emitting a strange smell. Many Dyson models also have an indicator light that illuminates when the filter needs attention.
Is it safe to get the brush bar wet when cleaning?
While you can use a damp cloth to wipe down the brush bar, avoid fully submerging it in water, especially if it contains electrical components. Focus on untangling hair and wiping bristles.
What should I do if my Dyson vacuum smells bad?
A bad smell usually indicates trapped organic matter or mold. A thorough cleaning of the dustbin, cyclone, and especially the filter (ensuring it’s fully dry) can eliminate odors. Also, check for blockages in the hose.
Can I use compressed air to clean my Dyson?
Compressed air can be useful for dislodging dust from the cyclone assembly or hard-to-reach crevices, but use it sparingly and outdoors to prevent spreading dust. Never use high-pressure industrial air compressors.
My Dyson is pulsating, what does that mean?
Pulsating is often a sign of a blockage or a severely clogged filter. The vacuum is struggling to maintain airflow. Follow all cleaning steps, focusing on clearing blockages and ensuring the filter is clean and dry.
How often should I deep clean my entire Dyson vacuum?
Beyond monthly filter washes and regular bin emptying, a comprehensive deep clean (including the brush bar, hoses, and attachments) is recommended every 3 to 6 months, depending on usage and household size.