Hoover Vacuum Cleaner How to Use
Mastering your Hoover vacuum cleaner how to use it effectively is key to a sparkling clean home. This comprehensive guide provides practical steps on preparation, operation, and essential maintenance, ensuring you get the most out of your powerful cleaning appliance. Discover how to tackle every mess with confidence and ease, keeping your home spotless and your Hoover performing optimally for years to come.
Welcome, fellow home cleaner! If you’ve just brought home a shiny new Hoover vacuum cleaner, or perhaps you’re looking to get more out of your trusty existing one, you’re in the right place. A Hoover isn’t just a vacuum cleaner; it’s a legacy of powerful cleaning performance, trusted by generations to keep homes spick and span. But like any good tool, knowing the ins and outs of your Hoover vacuum cleaner how to use it properly can make all the difference between a quick tidy-up and a truly deep, satisfying clean.
You might think, “It’s just a vacuum, how hard can it be?” And while the basic act of pushing and sucking up dirt is straightforward, unlocking your Hoover’s full potential involves a bit more finesse. From understanding its various settings to mastering its attachments and keeping up with essential maintenance, there’s a world of efficiency waiting to be discovered. This comprehensive guide will walk you through every step, ensuring you become a Hoover pro in no time, ready to tackle dust bunnies, pet hair, and crumbs with confidence and ease. So, let’s dive into mastering your Hoover vacuum cleaner how to use it for a sparkling home!
Key Takeaways
- Understand Your Model: Familiarize yourself with your specific Hoover vacuum cleaner’s type, components, and controls before you start cleaning.
- Prioritize Preparation: Clear the area, check the dirt container or bag, and inspect filters to ensure efficient and effective vacuuming.
- Master Operation Settings: Learn to adjust height settings for different floor types and understand when to engage or disengage the brush roll for optimal cleaning and floor protection.
- Utilize Attachments Wisely: Don’t overlook your Hoover’s specialized tools like the crevice, upholstery, and dusting brush for reaching tight spaces, cleaning furniture, and delicate surfaces.
- Perform Regular Maintenance: Consistently empty dirt bins, clean filters, and clear the brush roll to prevent clogs, maintain strong suction, and extend your vacuum cleaner’s lifespan.
- Troubleshoot Common Issues: Be prepared to address simple problems like loss of suction or strange noises by checking for blockages or filter issues to keep your Hoover running smoothly.
- Safety First: Always unplug your Hoover vacuum cleaner before performing any maintenance or clearing blockages to ensure your personal safety.
Quick Answers to Common Questions
How often should I empty my Hoover’s dirt canister?
You should aim to empty your Hoover’s dirt canister after every use, or at least when the dirt level reaches the “max fill” line. This ensures consistent strong suction and prevents strain on the motor.
Can I vacuum water or wet spills with my regular Hoover vacuum cleaner?
No, generally not. Standard Hoover vacuum cleaners are designed for dry debris only. Attempting to vacuum water or wet spills can severely damage the motor, pose an electrical hazard, and void your warranty. Only use a specialized wet/dry vacuum for liquids.
What does it mean if my Hoover vacuum cleaner is losing suction power?
Loss of suction is commonly caused by a full dirt bag or canister, clogged filters, or blockages in the hose, brush roll, or attachments. Always check these areas first when you notice reduced suction.
How do I know what height setting to use for my carpet?
Adjust your Hoover’s height setting so that the brush roll just barely makes contact with the carpet fibers. You should feel a slight resistance when pushing the vacuum, but not so much that it’s difficult to move. Too high won’t clean; too low can strain the motor.
Is it okay to vacuum over the power cord?
Absolutely not. Vacuuming over the power cord can damage the cord’s insulation, create an electrical hazard, and potentially damage your vacuum cleaner. Always be mindful of the cord’s position while operating your Hoover.
📑 Table of Contents
- Getting to Know Your Hoover Vacuum Cleaner
- Pre-Vacuuming Preparation: The Foundation of a Great Clean
- Mastering the Hoover Vacuum Cleaner: Operation and Technique
- Unleashing the Power of Attachments and Specialized Tools
- Maintaining Your Hoover Vacuum Cleaner for Longevity and Performance
- Troubleshooting Common Hoover Vacuum Cleaner Issues
Getting to Know Your Hoover Vacuum Cleaner
Before you even think about turning it on, it’s a great idea to get acquainted with your specific Hoover model. Hoover offers a wide range of vacuum cleaners, each designed for different cleaning needs. Understanding your model’s type and its key components is the first crucial step in learning your Hoover vacuum cleaner how to use it effectively.
Different Types of Hoover Vacuums
- Upright Vacuums: These are probably what most people picture when they think of a vacuum cleaner. Great for carpets, they often come with a powerful brush roll and can be very effective for general whole-house cleaning.
- Canister Vacuums: Featuring a separate canister unit on wheels and a hose with an attachment wand, these are highly maneuverable. They’re excellent for hard floors, stairs, upholstery, and reaching tricky spots.
- Stick Vacuums: Lightweight and sleek, stick vacuums are perfect for quick clean-ups and small spaces. Many are cordless and can often convert into handheld units for added versatility.
- Handheld Vacuums: Compact and portable, these are ideal for small messes, car interiors, and quick spot cleaning.
- Robotic Vacuums: The ultimate in convenience, these smart vacuums clean on their own, navigating your home to pick up debris while you do other things.
- Wet/Dry Vacuums: Designed to handle both dry debris and liquid spills, these are heavy-duty machines often used for garages, workshops, or tackling larger, tougher messes.
No matter which type you own, the core principles of your Hoover vacuum cleaner how to use it remain similar, though specific controls might vary.
Key Components and Controls
Take a moment to locate these common features on your Hoover:
- Power Button: Usually clearly marked, it turns the vacuum on and off.
- Brush Roll On/Off Switch: Crucial for different floor types. The brush roll agitates carpets to lift dirt but can scratch hard floors or scatter debris.
- Height Adjustment: A dial or lever that raises or lowers the vacuum’s base, allowing the brush roll to properly engage with different carpet pile heights or hard floors.
- Dirt Container/Bag: Where all the dust and debris collect. Know how to open it and, if applicable, replace the bag.
- Filters: Essential for trapping fine dust and allergens. Locate them as they require regular cleaning or replacement.
- Hose and Attachments: Often stored on the vacuum itself or in a separate bag, these tools extend your cleaning reach and capabilities.
- Power Cord: For corded models, ensure it’s long enough for your cleaning path and know how to wrap it safely.
Pre-Vacuuming Preparation: The Foundation of a Great Clean
You wouldn’t start painting a room without taping and priming, right? The same goes for vacuuming! A little preparation goes a long way in making your Hoover vacuum cleaner how to use it most efficiently and effectively. This stage is about setting yourself up for success and preventing potential issues.
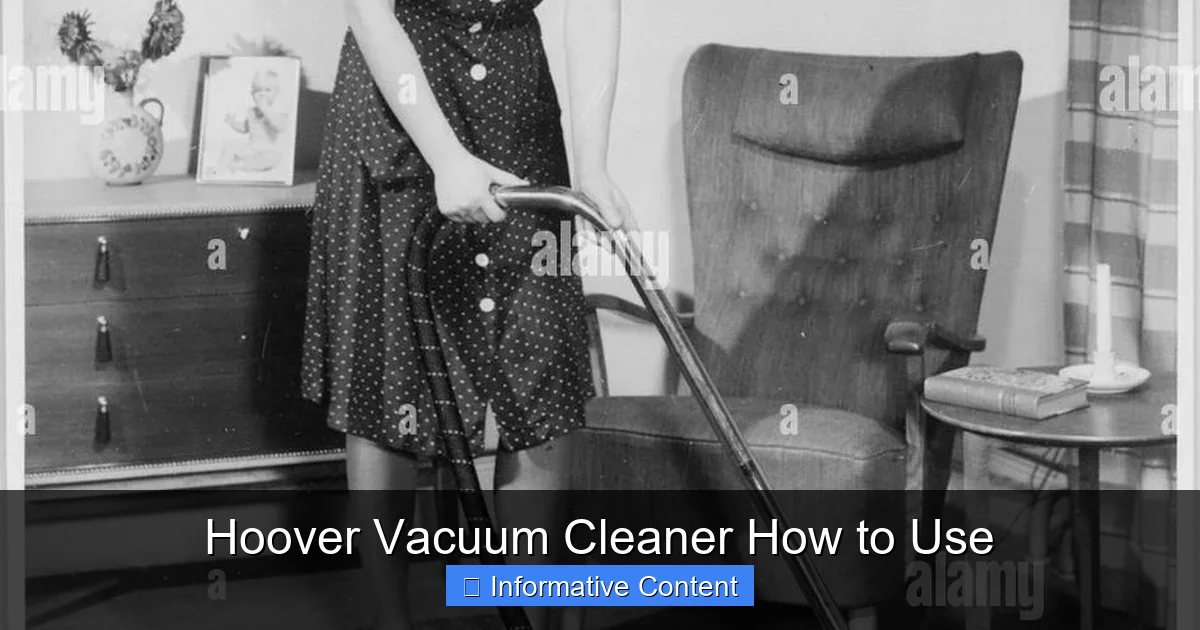
Visual guide about Hoover Vacuum Cleaner How to Use
Image source: freecadfloorplans.com
Clear the Area
Before you even plug in your Hoover, take a quick scan of the room. Pick up any small objects like toys, coins, paper clips, or jewelry. These items can get sucked into your vacuum, causing blockages, damaging the internal components, or even being lost forever. For larger items, like lightweight chairs or floor lamps, move them out of the way to ensure an unobstructed cleaning path. This allows you to vacuum thoroughly without stopping and starting.
Check the Dirt Collection System
One of the most common reasons for poor suction is a full dirt container or bag. Always check this before you begin. For bagless models, empty the canister into a trash can. For bagged models, ensure the bag isn’t too full and replace it if necessary. A nearly full bag or canister significantly reduces your Hoover vacuum cleaner’s suction power, making it work harder and clean less effectively.
Inspect and Clean Filters
Your vacuum’s filters are like its lungs, trapping dust and allergens. Clogged filters restrict airflow, leading to decreased suction and potentially pushing fine dust back into your air. Consult your Hoover’s manual for specific filter cleaning instructions. Many are washable and need to be completely dry before reinserting. Make it a habit to check them every few uses.
Cord Management (for Corded Models)
Unwind enough cord so you can move freely without tugging on the vacuum or stretching the cord too much. Be mindful not to vacuum over the cord, as this can damage it and pose a safety hazard. Always check for fraying or damage on the cord before use and never use a vacuum with a damaged cord.
Mastering the Hoover Vacuum Cleaner: Operation and Technique
Now that you’re prepped, it’s time to fire up your Hoover! The actual act of vacuuming involves more than just pushing the machine around. Strategic operation and proper technique will ensure you get the best clean every time, maximizing your Hoover vacuum cleaner how to use it for peak performance.
Plugging In and Powering On
Find a convenient outlet. Plug in your vacuum securely. Locate the power button (often a foot pedal on uprights or a button on the handle) and turn it on. You’ll hear the motor hum to life.
Adjusting Height Settings
This is a critical step, especially for uprights and some canister power nozzles. The height adjustment ensures the brush roll is at the optimal distance from the floor surface.
- For high-pile carpet: Set the vacuum to a higher setting to prevent it from “digging in” and making it hard to push.
- For low-pile carpet or rugs: Use a medium setting.
- For hard floors (wood, tile, laminate): Set it to the lowest hard floor setting, or often, the highest setting that lifts the brush roll slightly off the floor. Some models have a specific “hard floor” mode that disengages the brush roll entirely.
The goal is to allow the brush roll to just kiss the carpet fibers for effective agitation without excessive resistance.
Brush Roll Control: When to Use It, When to Avoid It
The brush roll (or beater bar) is fantastic for deep cleaning carpets. Its bristles agitate the carpet fibers, loosening embedded dirt, pet hair, and debris for the powerful suction to collect. However, it’s not always your friend:
- On carpets: Always engage the brush roll.
- On hard floors: Always disengage the brush roll if possible. If your Hoover doesn’t have a brush roll shut-off, ensure it’s on the highest height setting or use a hard floor specific attachment to avoid scratching delicate surfaces or scattering dirt.
- On delicate rugs or fringe: Disengage the brush roll or use an upholstery tool to avoid damage.
Vacuuming Technique for Optimal Clean
Forget frantic, quick passes. For a truly deep clean, adopt a deliberate technique:
- Slow and Steady: Move your Hoover slowly over the area. This gives the brush roll and suction time to do their job thoroughly.
- Overlap Passes: Overlap each pass by about half the width of the cleaning head. This ensures you don’t miss any strips of dirt.
- Back and Forth: Vacuum in a forward and backward motion over the same area several times, especially in high-traffic zones or areas with heavy soiling. This lifts more dirt.
- Pattern: Start at one end of the room and work your way to the other, moving systematically.
Tackling Different Surfaces
Your Hoover is versatile, but each surface needs a slightly different approach:
- Hardwood and Tile: Use a hard floor attachment or ensure the brush roll is off/elevated. Move slowly to pick up dust and debris without scattering.
- Carpets: Engage the brush roll and use the appropriate height setting. Take your time with slow, overlapping passes.
- Area Rugs: Check if the rug has fringes or is delicate. You might need to disengage the brush roll or use an attachment to avoid damage. Test a small, inconspicuous area first.
Unleashing the Power of Attachments and Specialized Tools
Your Hoover vacuum cleaner isn’t just for floors! The attachments are designed to extend your cleaning reach and tackle specific tasks that the main cleaning head can’t. Mastering these tools is key to your Hoover vacuum cleaner how to use it for a truly comprehensive clean.
The Essential Hoover Tools
- Crevice Tool: This long, narrow tool is your best friend for tight spots. Use it for cleaning along baseboards, in furniture cushions, between appliances, car interiors, and other hard-to-reach nooks and crannies.
- Upholstery Tool: Wider than the crevice tool, often with a fabric strip or small brush, this tool is designed for cleaning furniture, stairs, mattresses, and car seats. It’s gentle yet effective for lifting pet hair and dirt from fabric surfaces.
- Dusting Brush: With soft bristles, this attachment is perfect for delicate surfaces. Use it to dust bookshelves, lamp shades, window sills, blinds, and intricate moldings without scratching.
- Extension Wand: Many Hoover models come with an extension wand that connects to the hose. This allows you to reach high places (ceiling fans, cobwebs) or deep under furniture without bending or straining.
- Pet Hair Tool (on specific models): Some Hoover vacuums come with specialized pet tools, often mini-turbines or rubberized brushes, specifically designed to pick up stubborn pet hair from upholstery and stairs more effectively.
Tips for Using Attachments
- Connect Securely: Ensure attachments are firmly connected to the hose or extension wand to maintain maximum suction.
- Match the Tool to the Task: Don’t try to use a dusting brush for deep carpet cleaning or a crevice tool on upholstery. Using the right tool makes the job easier and prevents damage.
- Practice Makes Perfect: Get comfortable switching between tools and using them in different scenarios. You’ll be surprised at how much cleaner your home can get.
Maintaining Your Hoover Vacuum Cleaner for Longevity and Performance
A Hoover vacuum cleaner is an investment in a clean home, and like any investment, it needs regular care to perform its best. Proper maintenance isn’t just about extending its life; it’s crucial for keeping that powerful suction and preventing odors. Neglecting maintenance is the quickest way to diminish your Hoover vacuum cleaner how to use it effectively.
Emptying the Dirt Container or Replacing Bags
This is arguably the most important and most frequent maintenance task.
- Bagless Canisters: Empty after every use, or when the “full line” is reached. Tap out any stubborn debris and wipe the inside clean if necessary.
- Bags: Check the “full indicator” (if your model has one) or visually inspect. Replace the bag when it’s about two-thirds full, not completely packed. A full bag restricts airflow.
Cleaning and Replacing Filters
Your filters protect the motor and keep the air clean. They come in various types (HEPA, foam, pleated).
- Washable Filters: Rinse under cold water until the water runs clear. Allow them to air dry completely (usually 24-48 hours) before reinserting. Never put a damp filter back in!
- Non-Washable Filters: Tap them gently over a trash can to dislodge dust. Replace them according to your manual’s recommendations, usually every 3-6 months depending on usage.
Regular filter maintenance is critical for maintaining strong suction and air quality.
Clearing the Brush Roll
The brush roll can become tangled with hair, threads, and carpet fibers, reducing its effectiveness and potentially straining the motor.
- Unplug first! Always disconnect power before touching the brush roll.
- Remove the Cover: Many models have a removable plate over the brush roll.
- Cut Away Entanglements: Use scissors (carefully!) to cut through tangled hair and threads. Pull them out by hand.
- Check for Damage: Ensure the bristles aren’t overly worn or damaged.
Checking Hoses and Attachments for Blockages
Loss of suction often points to a clog.
- Visually Inspect: Look through the hose and attachment openings for any visible obstructions.
- Feel for Blockages: Run your hand along the outside of the hose; you might feel a lump indicating a clog.
- Use a Blunt Object: Carefully use a broom handle or similar blunt object to push through a blockage (again, only when unplugged!). Never use anything sharp.
Wiping Down the Exterior
A simple wipe-down with a damp cloth keeps your Hoover looking good and prevents dust buildup on the outside.
Troubleshooting Common Hoover Vacuum Cleaner Issues
Even with the best maintenance, sometimes your Hoover might throw you a curveball. Knowing how to quickly troubleshoot common issues can save you a trip to the repair shop or the hassle of a deep dive into the manual. These quick fixes are part of your Hoover vacuum cleaner how to use it effectively for years to come.
Loss of Suction
This is the most common complaint and usually has a simple fix:
- Full Dirt Container/Bag: Empty or replace it.
- Clogged Filters: Clean or replace them.
- Hose/Attachment Blockage: Inspect and clear any obstructions.
- Brush Roll Area Clog: Check if debris is jammed around the brush roll opening.
- Height Setting: Ensure it’s not set too high for the surface you’re cleaning.
Brush Roll Not Spinning
If your brush roll isn’t doing its job:
- Hair/Debris Entanglement: Unplug the vacuum and carefully cut away any tangled hair or fibers around the brush roll.
- Belt Issue: The belt that drives the brush roll can break or become dislodged. If you’re comfortable, check if it’s intact and properly seated. This might require professional repair or a replacement belt.
- Brush Roll On/Off Switch: Ensure the brush roll hasn’t been accidentally turned off.
Unusual Noises
- High-pitched Whine: Often indicates a partial blockage or a very full dirt container/filter restricting airflow.
- Grinding/Rattling: Could be something caught in the brush roll or a worn-out component. Unplug and inspect thoroughly.
- Motor Strain: If the motor sounds like it’s struggling, check for blockages or full dirt containers first.
Overheating
If your Hoover shuts off automatically or feels excessively hot, it’s usually a protective measure:
- Blockages/Full Filters: These make the motor work harder, causing it to overheat. Clear all blockages and clean filters.
- Allow to Cool: Unplug the vacuum and let it cool down for at least 30 minutes before trying again.
Odors
An unpleasant smell coming from your vacuum usually means:
- Pet Hair/Dander: Especially if it gets damp inside the canister. Empty and wash the dirt container thoroughly.
- Old Food Particles: Something might have been sucked up that’s now decaying. Again, clean the container and check for blockages.
- Dirty Filters: Wash or replace them.
- Mold/Mildew: If you’ve vacuumed anything damp, mold can grow. Deep clean or replace affected parts.
Remember, when in doubt, consult your specific Hoover vacuum cleaner’s user manual. It contains detailed diagrams and troubleshooting steps tailored to your model.
Mastering your Hoover vacuum cleaner how to use it isn’t just about flicking a switch; it’s about understanding its nuances, caring for it diligently, and knowing how to troubleshoot when things go awry. By following these comprehensive tips, you’re not just cleaning your home; you’re becoming a more efficient, confident, and empowered cleaner. Your Hoover is a powerful ally in the fight against dirt and dust, and with the right knowledge, it will serve you faithfully for many years to come, keeping your living space fresh and sparkling.
Frequently Asked Questions
How often should I clean or replace my Hoover vacuum cleaner’s filters?
Filter cleaning frequency depends on your usage and filter type. Washable filters should be cleaned every 1-3 months, and non-washable ones replaced every 3-6 months. Check your specific Hoover model’s manual for precise recommendations to maintain optimal performance.
My Hoover vacuum cleaner smells bad when I use it. What should I do?
A bad smell often indicates pet hair, old food particles, or mildew trapped within the vacuum. Empty and thoroughly clean the dirt canister or replace the bag, wash or replace all filters, and check for any blockages in the hose or brush roll. A clean vacuum should smell neutral.
Can I use my Hoover vacuum cleaner on delicate area rugs?
Yes, but with caution. For delicate area rugs, it’s best to disengage the brush roll (if your model allows) or use a gentle attachment like the upholstery tool. This prevents damage to the rug fibers or fringe. Always test an inconspicuous area first.
What should I do if the brush roll on my Hoover isn’t spinning?
First, unplug the vacuum. Check the brush roll for any tangled hair, threads, or debris that might be preventing it from spinning and carefully cut them away. If the problem persists, the drive belt might be broken or dislodged, which might require a replacement or professional service.
How can I prevent my Hoover vacuum cleaner from overheating?
Overheating is usually caused by restricted airflow, forcing the motor to work harder. To prevent it, ensure the dirt canister is empty or the bag isn’t full, all filters are clean, and there are no blockages in the hose or brush roll. If it overheats, unplug it and let it cool down completely before checking for obstructions.
What is the best way to store my Hoover vacuum cleaner when not in use?
Store your Hoover in a cool, dry place away from direct sunlight and extreme temperatures. Ensure the power cord is neatly wrapped (if applicable) and all attachments are stored properly to prevent loss or damage. Some models have on-board tool storage, making organization simple and convenient.