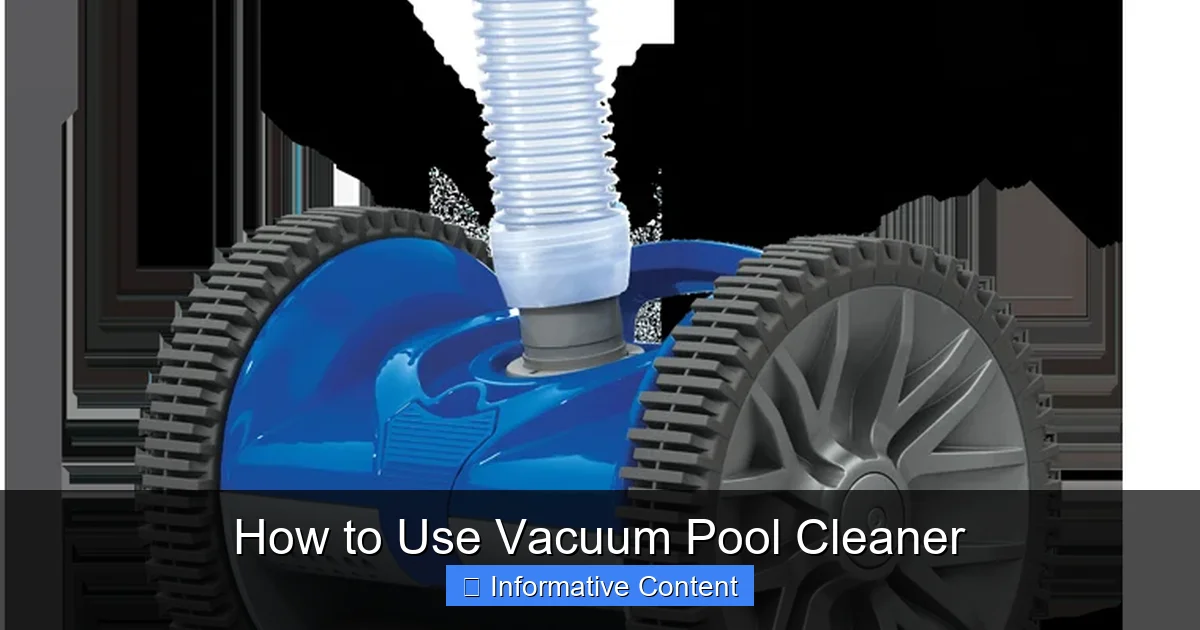
How to Use Vacuum Pool Cleaner
Mastering how to use a vacuum pool cleaner is simpler than you think and essential for a pristine swimming pool. This guide walks you through every step, from assembling your equipment and crucial priming to effective vacuuming techniques and post-cleaning maintenance. Achieve crystal-clear water with confidence and ease!
There’s nothing quite like the refreshing sight of a sparkling, crystal-clear swimming pool on a hot day. It invites you in, promising relaxation and fun. But behind that inviting shimmer is often a bit of hard work – specifically, keeping it clean. While modern robotic cleaners are great, sometimes the old-fashioned, hands-on approach with a manual vacuum pool cleaner is exactly what you need for a truly pristine finish, especially when dealing with stubborn dirt or specific problem areas.
Learning how to use a vacuum pool cleaner might seem a little daunting at first, with all the hoses and poles. But trust us, it’s a skill any pool owner can master, and once you get the hang of it, you’ll feel a real sense of accomplishment looking at your impeccably clean pool. Manual vacuuming gives you precise control, allowing you to target every speck of dirt, leaf, or sediment that has settled on the bottom.
This comprehensive guide will walk you through every step of how to use a vacuum pool cleaner. From gathering your tools and understanding your equipment to the crucial priming process, effective vacuuming techniques, and essential post-cleaning maintenance, we’ll cover it all. Get ready to transform your pool maintenance routine and enjoy a cleaner, clearer pool with confidence!
Key Takeaways
- Preparation is Key: Always skim the surface, brush walls, and check your filter and water chemistry *before* you even start assembling your vacuum pool cleaner. This prevents stirring up debris and ensures efficient cleaning.
- Proper Assembly: Ensure your vacuum head is securely attached to the pole and the hose is connected firmly to the head. Loose connections can lead to poor suction and frustration.
- Crucial Priming: Don’t skip priming the vacuum hose! This vital step removes all air from the hose, ensuring strong suction and preventing air from entering your pump, which could damage it.
- Slow and Steady Wins the Race: Vacuum your pool slowly and methodically, using overlapping strokes. Rushing can kick up debris, making your pool cloudy and requiring a re-clean.
- Monitor Your Filter: Vacuuming puts a strain on your pool filter. Be prepared to backwash or clean your filter mid-session or immediately afterward, especially if your pool was very dirty.
- Post-Vacuum Care Matters: Disassemble and clean your vacuum equipment after each use. Store it properly to extend its lifespan and be ready for your next cleaning session.
Quick Answers to Common Questions
How often should I vacuum my pool?
The frequency depends on factors like pool usage, weather, and surrounding foliage. As a general rule, vacuum your pool at least once a week. If you have heavy debris or an algae problem, you may need to vacuum more frequently.
Can I vacuum my pool with the pump off?
No, you cannot vacuum with the pump off. The pool pump creates the necessary suction to pull water and debris through the vacuum hose and into your filter system. The only time the pump should be off is during the initial connection and disconnection of the vacuum equipment for safety.
Why is my pool vacuum not picking up dirt?
Several reasons could cause poor suction: a dirty or clogged filter, an unprimed hose (air in the line), a loose connection in the vacuum setup, a torn vacuum head, or a clogged skimmer basket or pump impeller. Check each of these common issues.
Should I vacuum to “filter” or “waste”?
For routine cleaning and moderate debris, vacuum to “filter” so your filter catches the debris and clean water is returned. If you have a large amount of very fine dirt, excessive algae, or large debris that could clog your filter, vacuuming to “waste” is better, as it bypasses the filter entirely. Remember that vacuuming to waste will lower your pool’s water level.
What should I do if my pool gets cloudy after vacuuming?
Cloudiness after vacuuming often means you moved too fast, stirring up fine sediment, or your filter is dirty and recirculating fine particles. Backwash/clean your filter, check your water chemistry (especially pH and alkalinity), and consider using a clarifier or flocculant to help settle the fine particles, then re-vacuum slowly to waste if needed.
📑 Table of Contents
Understanding Your Pool Vacuum Setup
Before you dive in, it’s helpful to know the basic components of your manual vacuum pool cleaner system. Understanding what each part does will make assembly and operation much smoother.
The Basic Components of a Manual Pool Vacuum
- Telescopic Pole: This is the long, extendable pole that allows you to reach all areas of your pool floor without getting in. Most poles are universal and fit various vacuum heads and brushes.
- Vacuum Head: This is the part that makes direct contact with your pool floor. There are different types, which we’ll discuss shortly. It’s designed to suction debris from the bottom.
- Vacuum Hose: This specialized hose connects your vacuum head to your pool’s suction source (usually the skimmer). It’s typically buoyant and ribbed to prevent kinking.
- Skimmer Vacuum Plate (Optional but Recommended): This is a flat plate that sits inside your skimmer basket. It provides a secure connection for your vacuum hose and bypasses the skimmer weir, ensuring maximum suction directly from the pump. Some systems allow direct connection into the skimmer’s suction port.
- Pool Pump and Filter System: The heart of your pool’s cleaning operation. The pump creates the suction, pulling water and debris through the vacuum hose, and the filter traps the debris.
Types of Vacuum Heads
Choosing the right vacuum head can make a big difference in how effectively you clean your pool:
- Wheeled Vacuum Head: Ideal for concrete, gunite, or fiberglass pools. The wheels glide smoothly over hard surfaces, preventing scratches. Some have brushes attached to agitate debris.
- Bristled Vacuum Head: Perfect for vinyl liner pools. These heads have soft bristles that brush the surface as you vacuum, preventing damage to the liner while still collecting debris. They often don’t have wheels.
Always ensure your vacuum head is appropriate for your pool’s surface to avoid any damage.
Gathering Your Tools & Pre-Vacuum Checklist
A little preparation goes a long way. Before you even think about connecting your vacuum pool cleaner, take a few minutes to get everything ready. This will save you time and frustration in the long run.
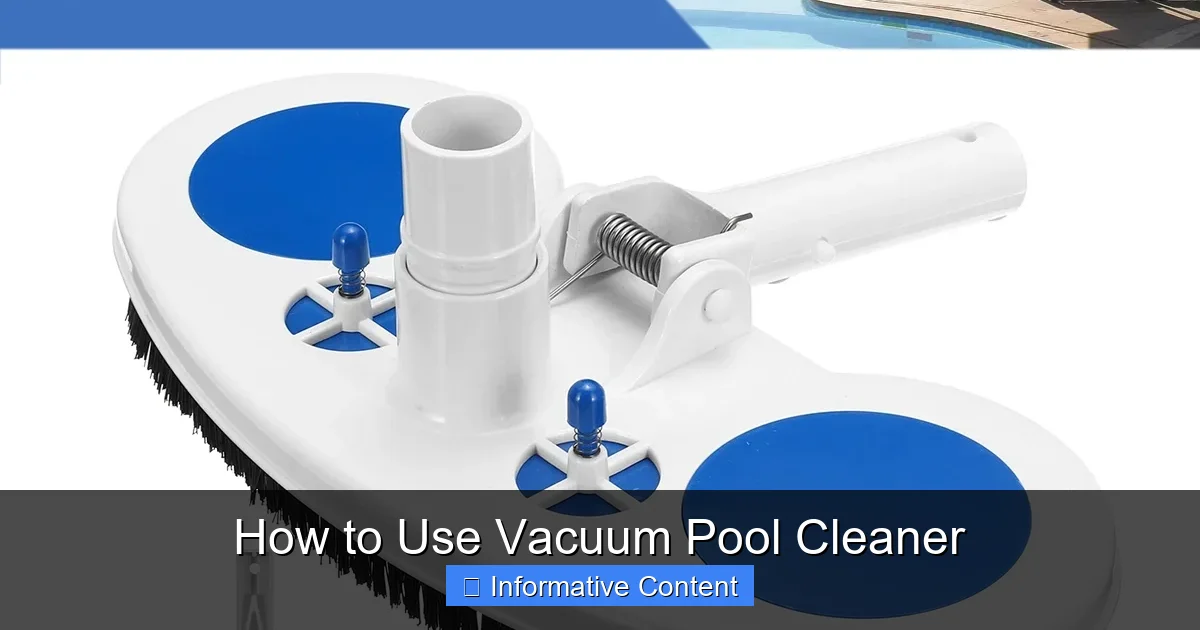
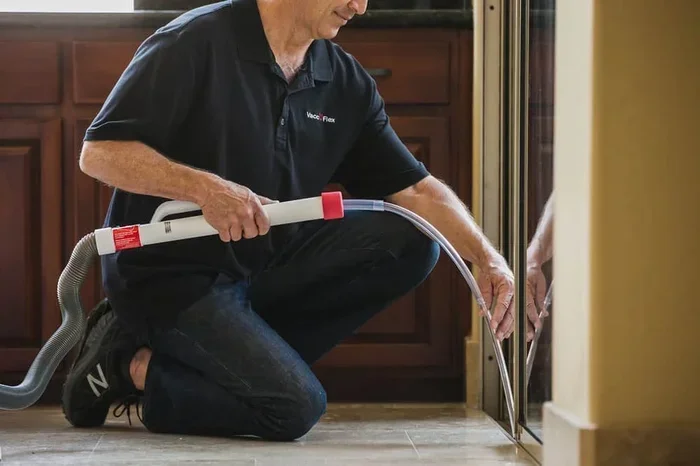
Visual guide about How to Use Vacuum Pool Cleaner
Image source: i5.walmartimages.com
Essential Tools for Vacuuming
- Your Manual Pool Vacuum Cleaner Kit: This includes your telescopic pole, vacuum head, and vacuum hose.
- Pool Skimmer Net: For removing large debris from the surface.
- Pool Brush: For scrubbing walls and dislodging stuck-on dirt.
- Water Testing Kit: To ensure your water chemistry is balanced.
- Backwash Hose (if applicable): For cleaning your filter.
Your Pre-Vacuum Routine
This checklist is crucial for making your vacuuming efficient and effective:
- Skim the Surface: Use your skimmer net to remove any floating leaves, bugs, or other debris. This prevents them from sinking and making your vacuuming job harder.
- Brush the Walls and Steps: Take your pool brush and give the walls, steps, and any “dead zones” a good scrub. This dislodges algae and dirt, allowing it to settle to the bottom where your vacuum pool cleaner can easily pick it up.
- Check Water Chemistry: Ensure your pH and alkalinity are within the recommended ranges. Imbalanced water can make dirt cling more, and also indicate potential issues affecting filter performance.
- Check and Backwash Your Filter (if needed): A clean filter is essential for strong suction. Check your filter pressure gauge; if it’s high (usually 8-10 PSI above its clean reading), it’s time to backwash or clean your filter cartridge. This step is critical because a dirty filter won’t be able to handle the additional debris from vacuuming effectively, leading to poor suction.
- Set Your Filter Valve to “Filter” or “Waste” (Important!): For normal dirt, set your filter to “Filter.” If you have a lot of very fine sediment, significant algae bloom, or large amounts of debris, consider setting your filter valve to “Waste.” This bypasses your filter entirely, sending the dirty water straight out of your pool via the backwash line. Be aware that this will lower your pool’s water level, so have a hose ready to refill. This is an advanced tip for severe cleaning. For typical cleaning, “Filter” is sufficient.
- Turn Off the Pool Pump: Always turn off your pool pump before connecting or disconnecting any equipment to the skimmer or pump. This is a safety measure and prevents air from entering the system unexpectedly.
Assembling Your Vacuum Pool Cleaner
Now that you’ve prepped your pool, it’s time to put your vacuum pool cleaner together. This process is straightforward, but correct assembly ensures optimal performance.
Connecting the Vacuum Head to the Pole
Take your telescopic pole and extend it to a comfortable length. Most vacuum heads have a universal butterfly clip or spring-loaded pin mechanism. Simply align the pole with the vacuum head’s attachment point and snap or slide it into place. Ensure it’s secure; you don’t want your vacuum head detaching mid-clean!
Attaching the Vacuum Hose to the Head
The ribbed end of your vacuum hose will connect to the port on your vacuum head. Push it firmly until it creates a tight seal. A loose connection here will lead to air leaks and reduced suction, making your vacuum pool cleaner ineffective.
Preparing the Skimmer Connection
This is where your vacuum hose connects to your pool’s suction. There are generally two ways:
- Using a Skimmer Vacuum Plate: This is the most common and recommended method. Place your skimmer basket inside the skimmer, then place the vacuum plate on top of the basket. The plate has a fitting where your vacuum hose will connect. This method provides maximum suction by sealing off the skimmer weir.
- Directly into the Skimmer Suction Port: Some skimmers allow you to push the end of the vacuum hose directly into the hole at the bottom of the skimmer basket area. This method can sometimes allow more air to be drawn in if not perfectly sealed.
Choose the method that works best for your pool setup. Remember, your pump should still be off at this point.
Priming the Vacuum Hose: The Crucial Step
This is arguably the most critical step in learning how to use a vacuum pool cleaner effectively. Priming the hose means filling it completely with water and expelling all the air. Skipping this step is the most common reason for poor suction or even damage to your pool pump.
Why Priming is Non-Negotiable
Your pool pump is designed to move water, not air. If air gets into your pump, it can cause the pump to lose its prime, stop working, or even overheat and burn out. By priming the vacuum hose, you ensure a continuous column of water flows from the vacuum head to the pump, providing strong, consistent suction and protecting your equipment.
The Priming Process (Two Methods)
With your vacuum head and hose assembled, and the pump still OFF:
- Method 1: Submerge and Fill (Recommended):
- Carefully lower the vacuum head into the pool, letting it sink to the bottom.
- Hold the free end of the vacuum hose (the one that connects to the skimmer) and place it over a return jet.
- Turn on your pool pump. The water from the return jet will push water through the hose, forcing all the air out. You’ll see bubbles coming from the vacuum head.
- Once you stop seeing bubbles coming from the vacuum head, the hose is fully primed. This usually takes 30-60 seconds, depending on hose length.
- Quickly move the hose end from the return jet and connect it to your skimmer vacuum plate (or direct suction port) before too much air can get back in. This step needs to be swift.
- Method 2: Manual Submersion (Slower, but works if no powerful return jet):
- Carefully lower the vacuum head into the pool.
- Slowly feed the vacuum hose, coil by coil, into the water, starting from the vacuum head end.
- As you submerge each section, water will fill the hose, pushing the air out the other end.
- Continue until the entire hose is submerged and no more bubbles emerge from the end that connects to the skimmer.
- Once fully primed, quickly connect the hose to your skimmer vacuum plate.
After connecting the primed hose to the skimmer, turn your pool pump ON. You should immediately feel strong suction at the vacuum head. If you don’t, turn off the pump, disconnect, and re-prime the hose.
The Art of Vacuuming Your Pool Like a Pro
Now for the fun part – cleaning your pool! Vacuuming isn’t just about moving the head around; a proper technique ensures a thorough clean without stirring up more dirt.
The Golden Rule: Slow and Steady
This is perhaps the most important tip on how to use a vacuum pool cleaner effectively. Move your vacuum head slowly across the pool floor. Rushing will stir up dirt and debris, turning your sparkling pool into a cloudy mess. Once dirt is suspended in the water, your vacuum can’t pick it up, and you’ll have to wait for it to resettle, adding hours to your cleaning time.
Overlapping Strokes for Maximum Coverage
Imagine you’re mowing a lawn. Use long, overlapping strokes, working your way across the pool. Start at one end and slowly move the vacuum head towards the other. When you reach the end, lift the head slightly (without breaking suction), reposition it for the next pass, and move back. Each stroke should slightly overlap the previous one to ensure no spots are missed.
Dealing with Different Debris Types
- Leaves and Large Debris: Your vacuum pool cleaner will easily pick these up. Just be mindful not to push them around too much.
- Fine Sediment/Silt: This is where slow movements are absolutely critical. If you move too fast, fine silt will just billow up into the water. If your filter struggles with fine silt, you might need to use the “Waste” setting on your filter valve (as discussed in the pre-vacuum checklist) to prevent it from recirculating back into the pool.
- Algae Spots: If you find stubborn algae spots after brushing, go over them slowly. For significant algae blooms, you’ll need to treat the pool with algaecide and potentially flocking agents before vacuuming to waste.
Navigating Tricky Spots and Corners
Corners, steps, and around ladders can be challenging. Angle your vacuum head to reach into these areas. For steps, you might need shorter, precise movements. Don’t forget to vacuum along the edges of the pool where debris often settles.
Monitoring Your Water Level
If you’re vacuuming to “Waste” (bypassing your filter), your pool’s water level will drop. Keep an eye on it. If the water level drops below the skimmer opening, your pump will start sucking air, which is bad for it. Have a garden hose ready to add water as you go if you anticipate a long “waste” vacuuming session.
Post-Vacuum Care & Maintenance
You’ve done the hard work, and your pool looks fantastic! But the job isn’t quite finished. Proper post-vacuum care extends the life of your equipment and keeps your pool healthy.
Disassembly and Cleaning Your Equipment
- Turn Off the Pump: Always turn off your pool pump before disconnecting anything from the skimmer.
- Disconnect the Hose: Remove the vacuum hose from the skimmer vacuum plate and then from the vacuum head.
- Rinse Everything: Thoroughly rinse your vacuum head, hose, and pole with fresh water. This removes any chemical residue or tiny bits of debris that could degrade the equipment over time.
- Store Properly: Coil your vacuum hose neatly (don’t fold or kink it) and hang it in a cool, dry place out of direct sunlight. Store your vacuum head and pole similarly. Proper storage prevents damage and extends the lifespan of your vacuum pool cleaner.
Backwashing or Cleaning Your Filter
Your filter has just worked hard trapping all the dirt and debris from your pool. It’s now likely quite dirty and needs attention:
- Sand and DE Filters: Check your pressure gauge. If it’s 8-10 PSI above its clean reading, it’s time to backwash. Follow your filter’s specific instructions for backwashing.
- Cartridge Filters: Remove the cartridge(s) and thoroughly rinse them with a garden hose. For tough grime, a filter cleaning solution might be needed.
A clean filter is essential for maintaining good water circulation and preventing future debris buildup.
Checking and Balancing Your Pool Chemistry
Even if you checked your chemistry before, it’s a good idea to re-test after vacuuming, especially if you had to vacuum to “Waste” (which removes water and potentially chemicals) or if you used any special treatments for algae. Adjust chemicals as needed to maintain a healthy and safe swimming environment.
Conclusion
Congratulations! You now have all the knowledge you need to confidently use a vacuum pool cleaner and keep your swimming haven sparkling clean. While it might require a bit of effort, the satisfaction of seeing your pool floor spotless, knowing you did it yourself, is incredibly rewarding. Regular, thorough cleaning with a manual pool vacuum cleaner is a cornerstone of good pool maintenance, ensuring your water remains inviting and your equipment functions optimally.
Remember, patience and consistency are your best friends in pool care. By following these steps on how to use a vacuum pool cleaner, you’re not just cleaning your pool; you’re investing in its longevity and your enjoyment. So grab your pole, prime that hose, and get ready to enjoy a pristine pool all season long!
Frequently Asked Questions
How do I know if my vacuum hose is fully primed?
You’ll know your vacuum hose is fully primed when you no longer see any bubbles coming from the vacuum head at the bottom of the pool. This indicates that all the air has been expelled from the hose and it’s completely filled with water, ready for strong, consistent suction.
Can I use my regular garden hose to vacuum my pool?
No, you cannot use a regular garden hose to vacuum your pool. A proper pool vacuum hose is specifically designed to withstand the suction of your pool pump, remain flexible, and float or be weighted appropriately. A garden hose would likely collapse under the suction and is not designed for this purpose.
What if my skimmer doesn’t have a vacuum plate?
If your skimmer doesn’t have a specific vacuum plate, you might be able to push the ribbed end of your vacuum hose directly into the suction port at the bottom of the skimmer basket area. Ensure it’s a tight fit to prevent air from entering the system. If it’s not a tight fit, you might need to purchase a universal vacuum plate.
How often should I clean my pool filter after vacuuming?
You should clean or backwash your pool filter immediately after vacuuming, especially if your pool was particularly dirty. Even for routine cleaning, it’s good practice to check your filter pressure gauge and backwash/clean if it shows a significant increase in pressure (typically 8-10 PSI above its clean operating pressure).
Is it okay to leave the vacuum head in the pool after I’m done?
It’s generally not recommended to leave the vacuum head in the pool long-term. Prolonged exposure to pool chemicals and sunlight can degrade the materials of the vacuum head and hose over time. Always rinse your equipment with fresh water and store it properly after each use to extend its lifespan.
My vacuum is making a loud sucking sound but isn’t picking anything up. What’s wrong?
A loud sucking sound without picking up debris often indicates that your pump is drawing air instead of water. This could be due to a poor connection in your vacuum hose (either at the head or the skimmer), a hole in the hose itself, or an improperly primed hose with air trapped inside. Turn off the pump, check all connections, and re-prime the hose carefully.