Easy 2025 Steps How to Replace Belt on Bissell Vacuum Cleaner
Is your Bissell vacuum not picking up dirt like it used to, or has its brush roll stopped spinning? It’s likely time to replace the drive belt. This comprehensive guide provides easy, step-by-step instructions for 2025, ensuring you can confidently perform this common repair yourself. You’ll learn everything from safety precautions and gathering the right tools to proper installation and testing, bringing your vacuum back to peak performance.
Easy 2025 Steps How to Replace Belt on Bissell Vacuum Cleaner
Hello there, savvy homeowner! Are you noticing your trusty Bissell vacuum cleaner isn’t quite living up to its cleaning reputation lately? Perhaps the brush roll has stopped spinning, or you’re just not picking up dirt and debris as effectively as you once did. Don’t worry, you’re not alone! These are classic signs that it might be time to replace the belt on your Bissell vacuum cleaner.
The drive belt is a crucial component in your vacuum cleaner. It connects the motor to the brush roll, making that brush spin to agitate dirt from your carpets. Over time, these belts can stretch, fray, or even snap due, to wear and tear, or if something gets tangled in the brush roll. The good news is that replacing a belt on a Bissell vacuum cleaner is a straightforward DIY task that can save you a trip to the repair shop and keep your floors spotless without buying a whole new machine.
In this comprehensive 2025 guide, we’ll walk you through every step of how to replace the belt on your Bissell vacuum cleaner. We’ll cover everything from essential safety precautions and gathering your tools to the actual replacement process and a final test run. By the end of this tutorial, you’ll have the confidence and know-how to bring your Bissell vacuum back to its peak performance, making your cleaning routine much more efficient. Let’s get that vacuum cleaner working like new again!
Key Takeaways
- Safety First: Always unplug your Bissell vacuum cleaner before attempting any repairs to prevent electrical shocks or accidental starts.
- Get the Right Belt: Ensure you purchase the correct replacement belt specifically designed for your Bissell vacuum model; check your owner’s manual or the Bissell website for compatibility.
- Accessing the Brush Roll: You’ll typically need a Phillips head screwdriver to remove the brush roll cover and access the old belt.
- Proper Belt Placement: When installing the new belt, ensure it’s correctly looped around both the motor pulley and the brush roll groove for optimal function.
- Test Thoroughly: After replacing the belt, always perform a test run to confirm the brush roll spins freely and the vacuum is operating correctly before full use.
- Regular Maintenance: Inspecting your vacuum belt periodically (every 3-6 months) can help prevent unexpected breakages and prolong your vacuum’s lifespan.
Quick Answers to Common Questions
What’s the best way to clean my brush roll while replacing the belt?
While the brush roll is out, use a pair of scissors to carefully cut away any tangled hair, string, or carpet fibers. A small brush or even a vacuum attachment can then be used to clear away loose debris from the brush roll and its housing.
How often should I inspect my Bissell vacuum belt?
It’s a good practice to inspect your Bissell vacuum cleaner belt every 3 to 6 months, or whenever you notice a decline in performance. Look for signs of stretching, fraying, cracking, or any obvious damage.
Can I use any universal vacuum belt?
No, it’s highly recommended to use a replacement belt specifically designed for your Bissell vacuum cleaner model. Universal belts might not have the correct length, width, or tension, which can lead to poor performance or damage to your vacuum.
What if the screws are stuck or stripped?
If screws are stuck, try applying a penetrating oil (like WD-40) and letting it sit for a few minutes. For stripped screws, you might need a screw extractor kit or to carefully use a pair of needle-nose pliers if enough of the head protrudes.
My new belt seems too tight to stretch over the brush roll. Is this normal?
Yes, new belts are designed to be quite tight to ensure proper tension and grip. This tightness is normal and necessary for the brush roll to spin effectively. A little bit of firm stretching is usually required, but avoid excessive force that could snap the belt.
Step 1: Safety First – Unplug Your Bissell Vacuum Cleaner
Before you even think about touching any part of your vacuum cleaner, safety must be your absolute priority. Working with electrical appliances carries inherent risks, and we want to avoid any accidents.
Unplug the Power Cord
Locate the power cord of your Bissell vacuum cleaner and carefully unplug it from the wall outlet. Do not simply turn off the vacuum; always remove it from the power source entirely. This prevents any accidental start-ups of the machine or electrical shocks while you’re working on it. This step is non-negotiable for your safety.
Step 2: Gather Your Tools and the Right Replacement Belt
Having the correct tools and parts ready before you start will make the process of how to replace the belt on your Bissell vacuum cleaner much smoother and quicker.
Identify Your Bissell Model
First, you need to identify the exact model number of your Bissell vacuum cleaner. This is usually found on a sticker on the back or bottom of the vacuum. Knowing your model number is crucial for purchasing the correct replacement belt. Different Bissell models use different sized belts, and using the wrong one can lead to improper function or even further damage.
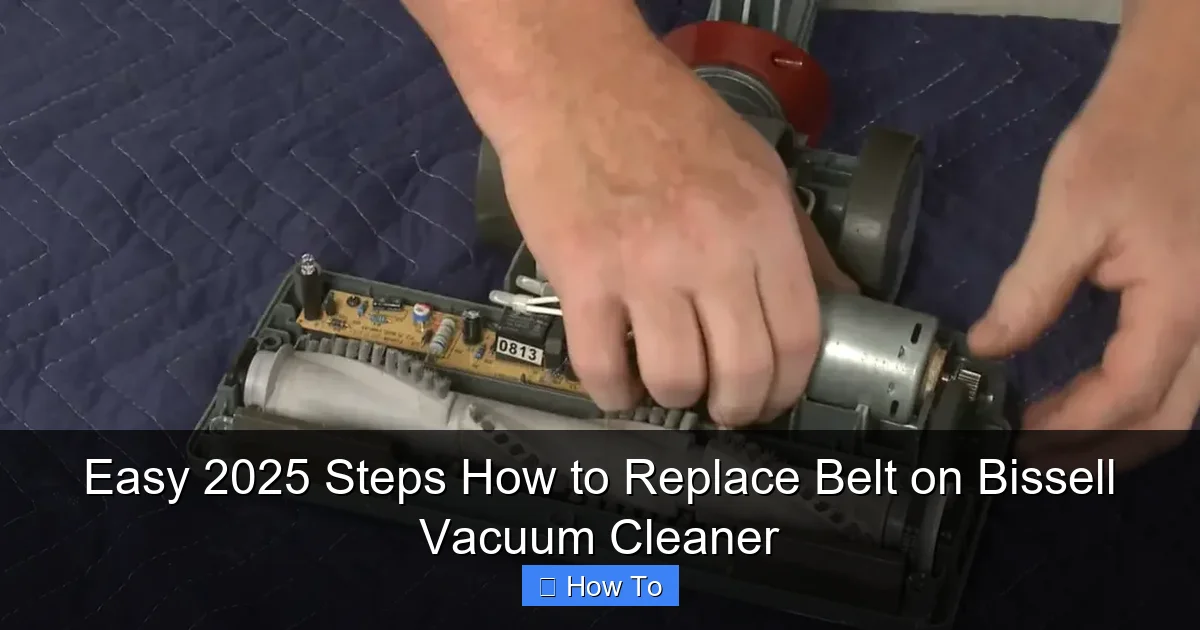
Visual guide about Easy 2025 Steps How to Replace Belt on Bissell Vacuum Cleaner
Image source: cleanerprofy.com
Purchase the Correct Replacement Belt
Once you have your model number, you can order the specific replacement belt. You can often find these directly on the Bissell website, through authorized dealers, or on major online marketplaces. Ensure the product description explicitly states compatibility with your Bissell vacuum cleaner model. It’s a good idea to buy a genuine Bissell part if possible, as aftermarket belts may not always match the quality or exact specifications.
Gather Necessary Tools
For most Bissell vacuum models, you’ll need a few common household tools:
- Phillips head screwdriver: Most vacuum cleaner covers are secured with Phillips head screws.
- Flathead screwdriver (optional): Sometimes useful for prying open stubborn covers, but use with caution to avoid damage.
- Work gloves: These can protect your hands from dirt, dust, and sharp edges.
- Flashlight: Handy for seeing into darker crevices, especially if your workspace isn’t brightly lit.
- Small brush or cloth: For cleaning out accumulated dirt and hair while you have the vacuum open.
Step 3: Prepare Your Bissell Vacuum Cleaner for Disassembly
Now that you’re safe and equipped, it’s time to get your vacuum ready for the operation.
Clear the Area
Find a clean, well-lit, and spacious area to work. A workbench or a cleared floor space covered with an old sheet or newspaper works perfectly. This will prevent small screws from getting lost and make cleanup easier.
Remove the Dirt Tank or Bag
Before flipping the vacuum, remove the dirt tank, canister, or bag, depending on your Bissell model. This makes the vacuum lighter, prevents spills, and often provides easier access to the brush roll area. Empty any collected debris to avoid a mess.
Lay the Vacuum Flat
Gently lay your Bissell vacuum cleaner on its side or front, exposing the underside where the brush roll and belt are located. Ensure it’s stable and won’t tip over while you’re working.
Step 4: Access the Brush Roll and Old Belt
This is where we start getting into the core of how to replace the belt on your Bissell vacuum cleaner. You’ll need to expose the area where the belt resides.
Locate the Brush Roll Cover
On the underside of your vacuum, you’ll see a plate or cover that protects the brush roll. This cover is typically secured by several screws.
Remove the Screws
Using your Phillips head screwdriver, carefully unscrew all the screws holding the brush roll cover in place. Keep the screws in a safe, visible spot (a small bowl or magnetic tray works wonders) so you don’t lose them. There might be anywhere from 3 to 7 screws, depending on your model.
Remove the Brush Roll Cover
Once all screws are removed, carefully lift off the brush roll cover. It might be a little snug, so you might need to gently pry it up with your fingers or a flathead screwdriver if there are small clips. Be gentle to avoid breaking any plastic tabs.
Remove the Brush Roll
With the cover off, you should now see the brush roll and the old belt. The old belt will likely be snapped, stretched, or just loose. Gently lift the brush roll out of its housing. The old belt might still be attached to it or wrapped around the motor pulley.
Step 5: Remove the Old Belt
Now that everything is exposed, removing the old, faulty belt is the next logical step.
Detaching the Old Belt
If the old belt is still intact, carefully unhook it from the motor pulley (a small wheel near the center) and then slide it off the brush roll. If it’s broken, simply remove any remaining pieces from both the motor pulley and the brush roll.
Inspect and Clean
While the brush roll is out and the area is open, take this opportunity to clean any hair, string, or debris that has wrapped around the brush roll ends or inside the brush roll housing. Use a small brush, scissors, or your fingers (wearing gloves) to clear everything out. A clean brush roll area ensures optimal performance and prevents future belt issues. Also, check the brush roll itself for damage – worn bristles or cracked plastic might mean it’s time for a new brush roll too.
Step 6: Install the New Belt
This is the moment of truth – putting in the new belt on your Bissell vacuum cleaner. Pay close attention to the correct positioning.
Loop the New Belt onto the Motor Pulley
Take your new replacement belt. First, loop one end of the belt around the small motor pulley. This pulley is usually metal and connected directly to the vacuum’s motor. Ensure the belt sits firmly and squarely in the pulley’s groove.
Position the Brush Roll
Now, carefully place the brush roll back into its housing. Make sure the ends of the brush roll sit correctly in their respective slots or bearings. Do not snap the belt onto the brush roll just yet; just get the brush roll into its proper position.
Stretch the Belt onto the Brush Roll
With the belt looped around the motor pulley, gently stretch the other end of the belt over the brush roll. The belt needs to sit in the designated groove along the length of the brush roll. This step can require a bit of force and precision as the new belt will be tight – which is exactly what you want for good tension.
Tip: Ensure the bristles of the brush roll are facing downwards (towards the floor) when you replace it. If it’s inserted incorrectly, it won’t clean effectively.
Verify Proper Tension and Movement
Once the belt is in place, try spinning the brush roll by hand. It should turn relatively freely, and the belt should move smoothly with it, without slipping or rubbing against any other components. The belt should feel taut, but not so tight that the brush roll is difficult to turn. If it feels too loose, double-check that it’s seated correctly in both the motor pulley and the brush roll groove.
Step 7: Reassemble Your Bissell Vacuum Cleaner
You’re almost there! It’s time to put everything back together.
Replace the Brush Roll Cover
Carefully align the brush roll cover over the brush roll area. Make sure all tabs and edges line up perfectly with the vacuum’s base. Do not force it; it should fit snugly.
Secure the Cover with Screws
Insert all the screws you removed earlier and tighten them using your Phillips head screwdriver. Tighten them firmly, but avoid overtightening, as this can strip the plastic threads or crack the cover. A gentle “snug” is enough.
Reinstall the Dirt Tank/Bag
Place the dirt tank, canister, or bag back onto your Bissell vacuum cleaner, ensuring it clicks securely into place.
Step 8: Test Your Bissell Vacuum Cleaner
The final and most exciting step – seeing your hard work pay off!
Plug It In and Power On
Plug your Bissell vacuum cleaner back into a wall outlet. Turn it on. Listen for any unusual noises and observe the brush roll. It should be spinning vigorously and smoothly. If your vacuum has a brush roll indicator light, it should now be green (or whatever indicates normal operation).
Perform a Quick Clean Test
Take your vacuum for a quick spin over a small area of carpet or a rug. Check if it’s picking up debris effectively and if the brush roll is agitating the carpet fibers as it should. Your vacuum cleaner should now feel like its old, powerful self!
Troubleshooting Common Issues After Replacing the Belt
Even with careful work, sometimes things don’t go perfectly. Here are a few common issues and how to address them:
Brush Roll Still Not Spinning
- Check Belt Placement: Ensure the new belt is properly seated in both the motor pulley and the brush roll groove. Sometimes it slips out during reassembly.
- Verify Brush Roll Orientation: Make sure the brush roll is inserted correctly into its slots; if it’s not seated right, it won’t spin.
- Motor Pulley Obstruction: Check if there’s any debris wrapped around the motor pulley itself, preventing it from turning.
- Motor Issue: In rare cases, if the belt replacement was correct and the brush roll is free, the motor itself might be faulty. This would require professional repair.
New Belt Breaks Quickly
- Wrong Belt Size: Did you use the exact belt specified for your Bissell model? A belt that is too small will be under too much tension and can snap quickly.
- Brush Roll Obstruction: If there’s persistent hair, carpet threads, or debris wrapping around the brush roll, it creates resistance that can cause the new belt to break. Regularly clean your brush roll.
- Worn Brush Roll: A worn or damaged brush roll can create excessive drag, leading to premature belt failure.
- Bearing Issues: The bearings at the ends of the brush roll can wear out, causing it to seize or spin sluggishly, putting immense strain on the belt.
Vacuum Smells Like Burning Rubber
- Belt Slipping: The belt might not be installed correctly, causing it to slip and rub, generating heat and a burning smell.
- Brush Roll Jammed: Something might be jammed in the brush roll, causing the belt to slip and burn against the motor pulley. Immediately turn off and unplug the vacuum, then clear any obstructions.
- Over-tightened Belt: While a belt needs to be snug, one that is excessively tight can cause friction and wear, leading to a burning smell.
Conclusion
Congratulations! You’ve successfully learned how to replace the belt on your Bissell vacuum cleaner. By following these easy 2025 steps, you’ve not only fixed your appliance but also gained valuable DIY skills and saved money on professional repairs or a new purchase. Regular maintenance, including checking and replacing your belt as needed, will significantly extend the life and efficiency of your Bissell vacuum. Keep those floors sparkling clean, and enjoy the satisfaction of a job well done!
🎥 Related Video: How to change the Belt on Proheat 2X Revolution | BISSELL
📺 BISSELL
This video gives you a step-by-step guide to change the belt on your Proheat 2X Revolution. Get your carpet clean with the …