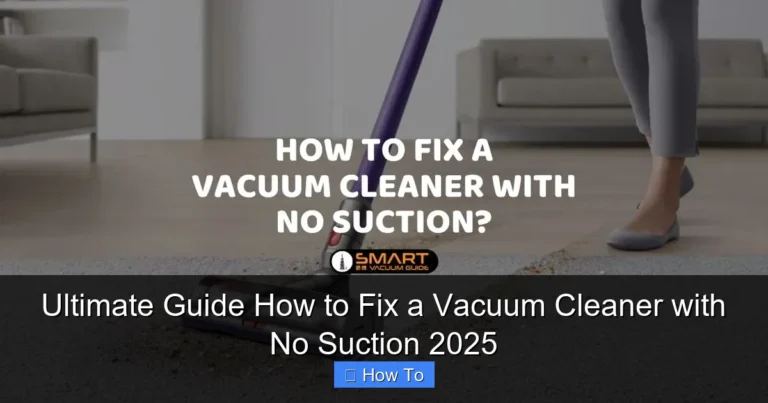
Expert Tips How to Fix a Vacuum Cleaner Quickly 2025
Don’t let a faulty vacuum cleaner disrupt your cleaning routine! This comprehensive guide provides expert, easy-to-follow steps to diagnose and fix a vacuum cleaner quickly in 2025. You’ll learn how to tackle common problems like loss of suction, non-spinning brush rolls, and power issues, empowering you to get your trusty cleaner back in action without needing a professional. Save money and time by mastering simple DIY vacuum repairs.
Expert Tips How to Fix a Vacuum Cleaner Quickly 2025
There’s nothing quite as frustrating as pulling out your vacuum cleaner, ready to tackle dirt and debris, only to find it’s not working as it should. Whether it’s lost its suction power, the brush roll refuses to spin, or it won’t even turn on, a broken vacuum can throw a wrench in your cleaning plans. But don’t despair! Before you rush to buy a new one or call a pricey repair service, know that many common vacuum cleaner problems have simple, DIY solutions.
In this comprehensive guide, designed for 2025 and beyond, we’ll walk you through the most frequent issues homeowners face with their vacuum cleaners. We’ll provide clear, step-by-step instructions on how to diagnose and fix a vacuum cleaner, empowering you to perform basic repairs yourself. You’ll learn practical tips, what tools you’ll need, and how to maintain your appliance to prevent future breakdowns. Let’s get that trusty cleaning companion back in top shape!
Key Takeaways
- Safety First: Always unplug your vacuum cleaner from the power source before attempting any inspection or repair to prevent electric shock.
- Start Simple: Many common vacuum issues, like loss of suction or a non-spinning brush roll, are often caused by easily fixable problems like clogs, full dirtbins, or tangled hair.
- Clogs are Key: A significant portion of “how to fix a vacuum cleaner” challenges relate to identifying and clearing blockages in hoses, wands, and air pathways.
- Filter Maintenance Matters: Dirty or clogged filters are a frequent culprit for reduced suction and unpleasant odors. Regular cleaning or replacement is crucial.
- Brush Roll Vigilance: Keep the brush roll free of hair and string to ensure it spins effectively, which is vital for picking up debris and preventing belt damage.
- Listen and Observe: Pay attention to unusual noises or smells from your vacuum, as these can be early indicators of underlying problems that need attention.
- Preventative Care Pays Off: Regular, simple maintenance can significantly extend the lifespan of your vacuum cleaner and prevent many issues from occurring in the first place.
Quick Answers to Common Questions
Q: What’s the very first thing I should do when my vacuum stops working?
A: Always unplug your vacuum cleaner immediately from the power outlet. This is crucial for your safety before you attempt any inspection or repair.
Q: My vacuum has lost suction. Where should I look first?
A: Start with the simplest checks: ensure the dirt bin is empty (or bag is new) and check if the filters are clean. These are the most common culprits for reduced suction.
Q: Why is my brush roll not spinning, even after I’ve cleared the hair?
A: If the brush roll is clear but still not spinning, the next thing to check is the drive belt. It might be broken, stretched, or dislodged. You’ll likely need to remove the bottom plate to inspect it.
Q: Can I wash all vacuum filters with water?
A: No, always check your vacuum cleaner’s owner’s manual. Some filters are washable and can be rinsed and air-dried, while others are disposable and must be replaced.
Q: How can I prevent my vacuum from smelling bad?
A: Regularly empty and clean the dirt bin/replace the bag, wash or replace filters, and clear any pet hair or food debris from the brush roll and hoses. Baking soda can also help absorb odors.
Safety First: Always Unplug Your Vacuum
This is the most critical step before you even think about looking at your vacuum cleaner. Always, and we mean always, unplug your vacuum from the wall outlet before you begin any inspection, cleaning, or repair. Failure to do so can result in serious electric shock or injury. Treat every repair attempt with the utmost caution. Once unplugged, you can safely proceed to diagnose and fix your vacuum cleaner.
Gather Your Tools
Having the right tools on hand will make the process much smoother. Most vacuum repairs require only basic household items:
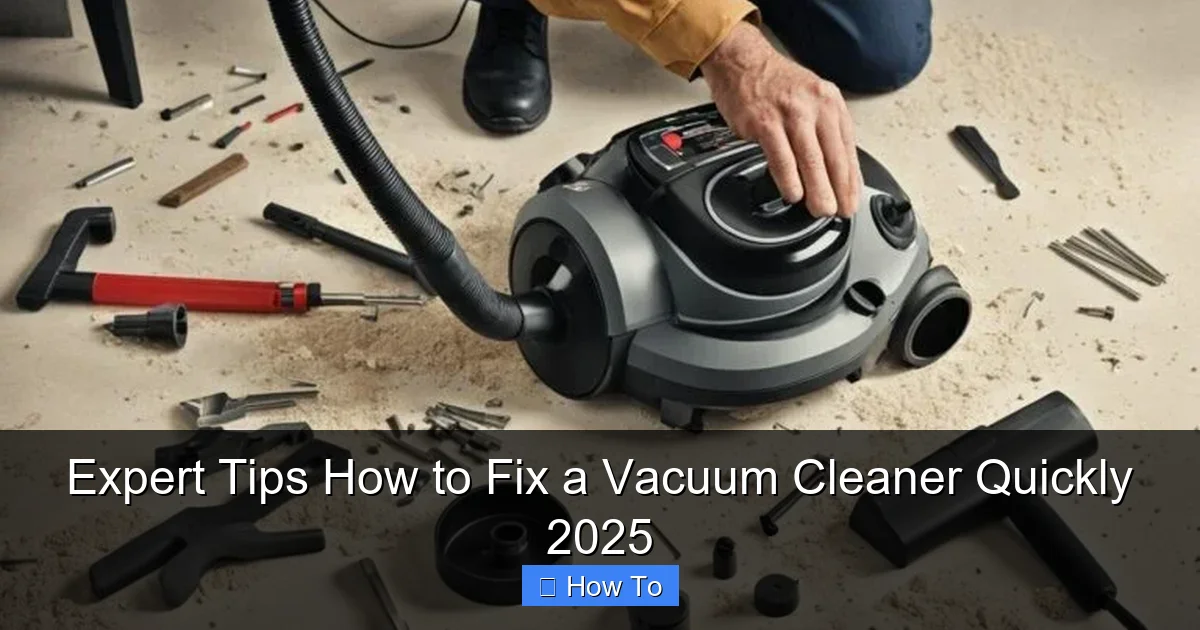
Visual guide about Expert Tips How to Fix a Vacuum Cleaner Quickly 2025
Image source: carpetandrugworld.com
- Phillips head and flathead screwdrivers (various sizes)
- Scissors or a utility knife
- Pliers (needle-nose can be very helpful)
- Flashlight (to see into dark crevices)
- Gloves (optional, but recommended for dirty jobs)
- Stiff brush or old toothbrush (for cleaning filters and crevices)
- Microfiber cloth
Common Vacuum Cleaner Problems and How to Fix Them
Let’s dive into the most frequent issues and how you can tackle them to fix your vacuum cleaner.
1. Your Vacuum Won’t Turn On (No Power)
This is arguably the most alarming problem. When your vacuum is completely unresponsive, it usually points to an electrical issue. Don’t panic; it might be simpler than you think to fix your vacuum cleaner.
Check the Power Outlet and Cord
- Test the Outlet: First, ensure the power outlet itself is working. Plug another appliance, like a lamp or phone charger, into the same outlet. If that appliance doesn’t work either, the problem is with your household’s electrical system (e.g., a tripped circuit breaker or GFCI outlet). Reset the breaker or GFCI and try again.
- Inspect the Power Cord: Carefully examine the entire length of the vacuum’s power cord for any visible damage. Look for cuts, fraying, kinks, or exposed wires. Pay close attention to where the cord enters the vacuum and where it meets the plug. If you find any damage, the cord likely needs to be replaced. For safety, this might be a job for a professional or a reason to replace the vacuum if the cord isn’t user-replaceable.
- Check the Plug: Ensure the plug is fully inserted into the outlet. Sometimes a loose connection is all it takes.
Inspect the Power Switch
On some vacuums, the power switch can wear out or become faulty. If the cord and outlet are fine, try wiggling the switch or pressing it firmly. If it feels loose or inconsistent, it might be the culprit. Replacing a power switch can be a more involved repair, often requiring access to the internal wiring, and might be best left to someone experienced with electrical components.
Examine Internal Wiring (Advanced)
If you’re comfortable with basic electrical work, you might check the internal wiring where the power cord connects inside the vacuum. This usually involves opening the vacuum’s casing (refer to your owner’s manual for instructions on how to do this safely). Look for any disconnected or burnt wires. If you find any, and you know how to safely reattach or repair them, you might be able to fix your vacuum cleaner. However, if you’re unsure, it’s safer to consult a professional.
2. Loss of Suction (Poor Cleaning Performance)
Reduced suction is one of the most common complaints and often the easiest to fix a vacuum cleaner. It usually means something is blocking the airflow.
Empty the Dirt Bin or Replace the Bag
This might seem obvious, but a full dirt bin or bag is a primary cause of suction loss. If the bin is overflowing or the bag is completely full, there’s no room for more air or dirt, dramatically reducing suction. Empty the bin, clean it thoroughly, or replace the bag with a new one. This simple step can often completely restore your vacuum’s suction.
Clean or Replace Filters
Vacuum cleaners have filters (pre-motor and/or post-motor) that trap dust and allergens. Over time, these filters become clogged, restricting airflow and causing a significant drop in suction. To fix your vacuum cleaner’s suction:
- Locate Filters: Consult your manual to find all the filters in your model.
- Clean Reusable Filters: If your filters are washable (check the manual!), remove them and tap them vigorously over a trash can to dislodge loose dirt. Then, rinse them under cool water until the water runs clear. Allow them to air dry completely (this can take 24-48 hours) before putting them back in. Never put wet filters back into your vacuum.
- Replace Disposable Filters: If your filters are disposable, replace them with new ones according to the manufacturer’s recommendations, typically every 3-6 months depending on usage.
Clear Blockages in Hoses and Wands
Hoses and wands are prime locations for clogs from large debris, pet hair, or socks. To fix your vacuum cleaner’s suction, you’ll need to clear these obstructions:
- Remove Attachments: Detach the hose, wand, and any other attachments from the main vacuum body.
- Visually Inspect: Shine a flashlight down the hose and wand. Look for any visible blockages.
- Use a Straight Object: If you see a clog, carefully use a broom handle, a straightened coat hanger, or a long, blunt object to dislodge it. Push from both ends if possible. Be gentle to avoid puncturing the hose.
- Check the Inlet: Also inspect the inlet where the hose connects to the vacuum body.
Inspect the Main Airway/Nozzle
The main airway where the brush roll operates can also become clogged. This is particularly common in upright vacuums. Turn the vacuum over and look into the opening where dirt is typically pulled up. Clear any visible obstructions with your fingers, scissors, or pliers.
3. The Brush Roll Isn’t Spinning
The brush roll (or beater bar) is essential for agitating carpet fibers and sweeping up debris. If it’s not spinning, your vacuum won’t clean effectively. Here’s how to fix your vacuum cleaner’s brush roll.
Clear Hair and Debris from the Brush Roll
This is by far the most common reason a brush roll stops spinning. Hair, string, threads, and even small pieces of fabric can get tightly wound around the brush roll, preventing it from rotating freely.
- Turn Over Vacuum: Lay your vacuum cleaner on its side or back to access the brush roll.
- Remove Bottom Plate: You may need to remove a bottom plate or cover (usually held by a few screws) to fully expose the brush roll.
- Cut Away Tangled Debris: Use scissors or a utility knife to carefully cut through and remove all tangled hair and debris. Be careful not to cut the brush bristles or the drive belt. Pull everything off until the brush roll can spin freely by hand.
- Clean End Caps: Also check the ends of the brush roll where it connects to the housing. Debris can build up there too.
Check the Drive Belt
The brush roll is typically powered by a drive belt connected to the vacuum’s motor. If this belt is broken, stretched, or dislodged, the brush roll won’t spin. To fix your vacuum cleaner’s belt:
- Locate the Belt: Once the bottom plate is removed, you should see the rubber drive belt.
- Inspect Condition: Look for a broken belt (it will be snapped), a stretched belt (it will be loose and saggy), or a dislodged belt (it will have come off its pulleys).
- Replace or Realign: If the belt is broken or overly stretched, it needs to be replaced. Refer to your vacuum’s manual for the correct replacement part number. If it’s just dislodged, carefully realign it onto the motor shaft and brush roll.
- Test: Reassemble the bottom plate and test the vacuum.
Inspect the Brush Roll Motor/Bearings
In some advanced vacuum models, the brush roll might have its own motor or bearings that can fail. If the belt is fine and the brush roll is clear of debris but still won’t spin, the internal motor or bearings might be seized or faulty. This is a more complex repair and often requires professional help or considering a new vacuum.
4. Your Vacuum Smells Bad
A foul odor coming from your vacuum cleaner can make an otherwise clean home feel dirty. Here’s how to fix your vacuum cleaner’s smelly problem.
Empty and Clean the Dirt Bin/Bag
Just like with suction issues, a full or dirty dirt bin/bag is a prime culprit. Old food particles, pet hair, or mold can create unpleasant odors. Empty the bin and wash it thoroughly with warm soapy water, then let it air dry completely before reattaching. If you use bags, replace with a fresh one.
Wash or Replace Filters
Filters can also harbor bacteria and mold, leading to smells. Follow the cleaning or replacement instructions from the “Loss of Suction” section. A clean filter isn’t just good for suction; it’s great for odor control.
Clean the Brush Roll and Hoses
Lingering pet hair, food bits, or other organic matter caught in the brush roll or hoses can decompose and stink. Thoroughly clean the brush roll as described previously, and check hoses for any stuck debris that could be causing the smell.
Deep Clean the Vacuum Body
Use a damp cloth with a mild cleaner to wipe down the exterior and interior (after removing filters and dirt bin) of your vacuum. Pay attention to any crevices where dirt might accumulate. You can also try sprinkling baking soda into the empty dirt bin or bag area and letting it sit for an hour before emptying to absorb odors.
5. Vacuum is Making Strange Noises
Unusual noises can be unsettling and often indicate an underlying problem. Listen carefully to diagnose and fix your vacuum cleaner.
Identify the Source of the Noise
- Whining/High-Pitched Noise: Often indicates a motor issue, possibly bearings wearing out. Sometimes it can be a partial clog restricting airflow, causing the motor to work harder.
- Grinding/Rattling: Could be debris caught in the brush roll, fan, or impeller. Small rocks, coins, or other hard objects can cause this.
- Thumping/Vibration: A bent or unbalanced brush roll, or something caught around the brush roll causing it to hit the casing.
Check for Obstructions in the Fan/Impeller
If you hear a rattling or grinding noise, especially with reduced suction, something might be stuck in the fan or impeller, which is usually located near the motor. Accessing this area can be tricky and varies by model. You might need to remove the dirt bin and look down into the main air intake. Use a flashlight and pliers to carefully remove any debris. Be extremely cautious not to damage the fan blades.
Inspect Bearings and Motors
If the noise persists and you’ve ruled out clogs and brush roll issues, it might be a motor or bearing problem. Worn motor bearings often produce a high-pitched whine or grinding noise. This is usually a professional repair job, as replacing bearings or motors can be complex and requires specific tools and expertise. At this point, you might consider if it’s more cost-effective to replace the vacuum.
Troubleshooting Guide: Quick Fixes for Persistent Issues
Sometimes, even after following the steps, your vacuum might still not be performing perfectly. Here’s a quick troubleshooting checklist to help fix your vacuum cleaner.
- Double-Check Everything: Go back through all the previous steps. Did you miss a hidden clog? Is the filter truly dry? Is the bag inserted correctly?
- Section by Section Isolation: If you have an upright vacuum, try running it with just the hose attachment. If suction is good there, the problem is likely in the brush roll housing. If suction is still bad, the problem is higher up (filters, motor).
- Power Cycling: Unplug the vacuum for 15-30 minutes, then plug it back in. Sometimes a thermal cutoff switch (designed to prevent overheating) might have tripped and needs time to reset.
- Consult Your Manual: Your vacuum’s specific user manual is an invaluable resource. It often has a dedicated troubleshooting section tailored to your model.
Preventative Maintenance to Keep Your Vacuum Running Smoothly
An ounce of prevention is worth a pound of cure, especially when it comes to keeping your vacuum cleaner in top condition. Regular maintenance can significantly extend its life and prevent many common issues.
- Regular Filter Cleaning/Replacement: Make this a habit. Clean washable filters monthly and replace disposable ones every 3-6 months.
- Brush Roll Maintenance: After every few uses (or as needed), turn your vacuum over and cut away tangled hair and threads from the brush roll. This takes minutes and prevents major problems.
- Cord Care: Avoid running over the power cord and store it neatly to prevent damage.
- Emptying the Dirt Bin/Bag: Don’t wait until it’s overflowing. Empty it after each significant use, especially if you have pets.
- Inspect Hoses Regularly: Give your hoses a quick check for blockages every few months, especially if suction feels weaker.
- Clean Attachments: Keep your crevice tools and brushes clean, as clogs can form there too.
When to Call a Professional (Or Consider a New Vacuum)
While many issues can be fixed at home, there are times when it’s best to call in the experts or consider investing in a new appliance. If the problem involves complex electrical wiring, internal motor issues, or if replacement parts are expensive and hard to find, a professional might be necessary. Factor in the age of your vacuum and the cost of repair versus a new unit. For very old vacuums, a new, more efficient model might be a better long-term investment.
Conclusion
Don’t let a misbehaving vacuum cleaner gather dust in the corner. Armed with these expert tips and a little patience, you can confidently diagnose and fix a vacuum cleaner, saving yourself time and money in 2025. From tackling power problems to restoring lost suction and clearing pesky brush roll tangles, you now have the knowledge to get your cleaning companion back on track. Remember, safety first, simple steps often yield big results, and regular maintenance is your best friend. Happy vacuuming!
🎥 Related Video: Philips Vacuum Cleaner ✅ Best Quality 👌🏻💥 Highly Recommended 👍 #philips #vacuumcleaner
📺 Unikk Nazz
Philips Vacuum Cleaner ✓ Best Quality Highly Recommended #philips #vacuumcleaner.